Reflections through tutorials
As my project progressed and my connections with the material and landscape deepened, my ideas and intentions changed. Whilst at the start, my focus was on the millstones themselves, I realised that I was conforming too literally to the interpretation of what a crafted object should be perceived as. I needed to alter my own perceptions to look with an abstract lens and to delve deeper.
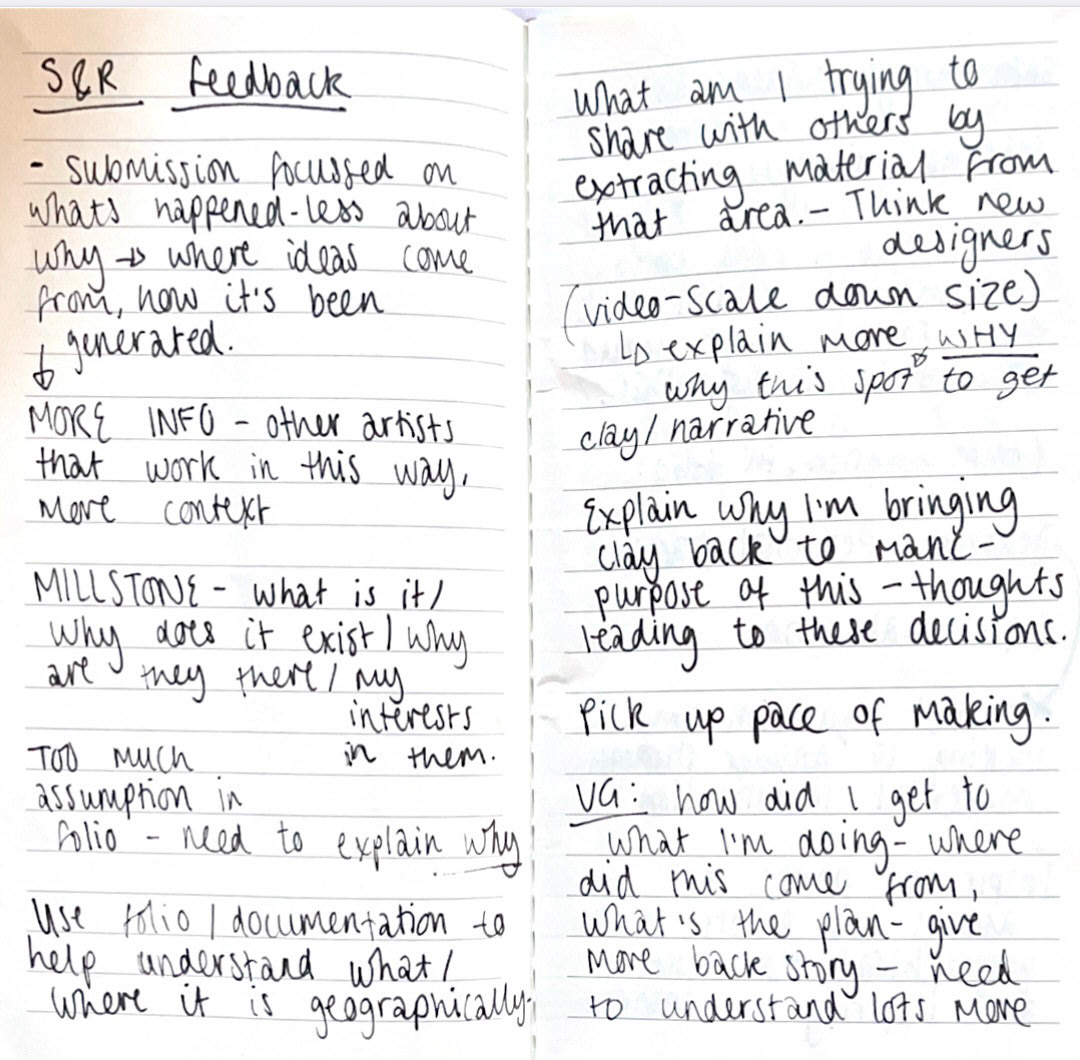
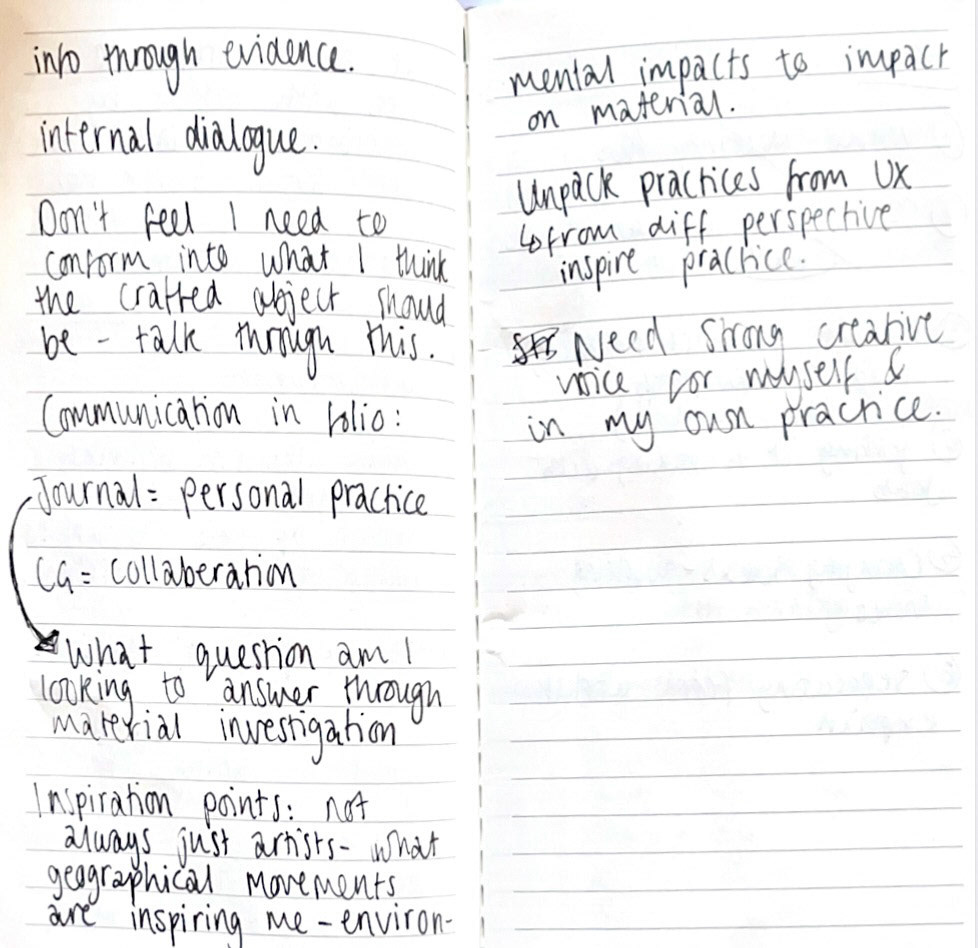
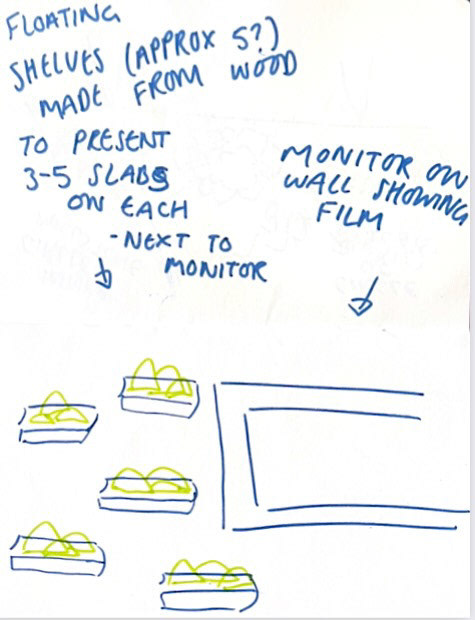
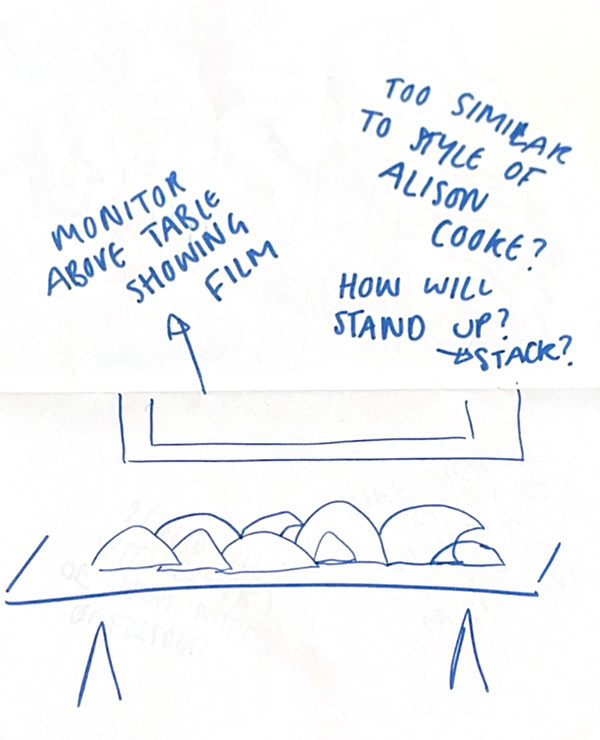
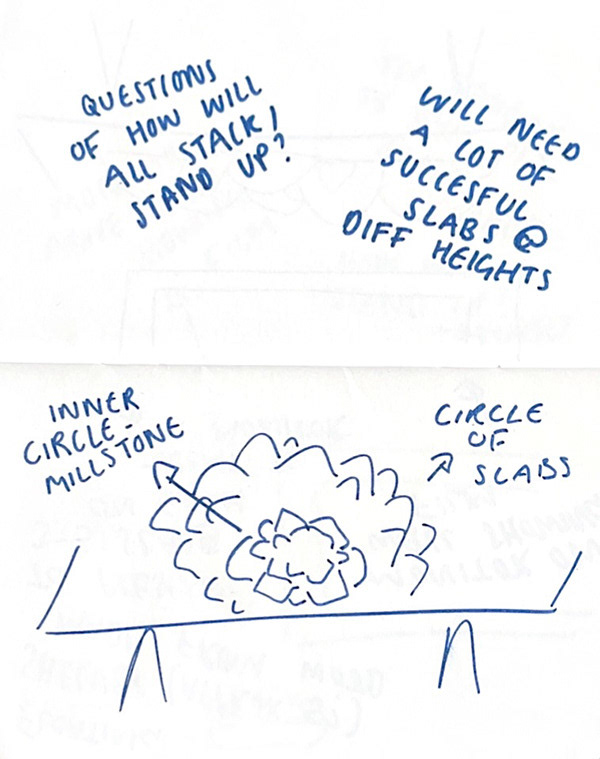
Tutorial notes from formative review.
Changing Direction: Negative spaces
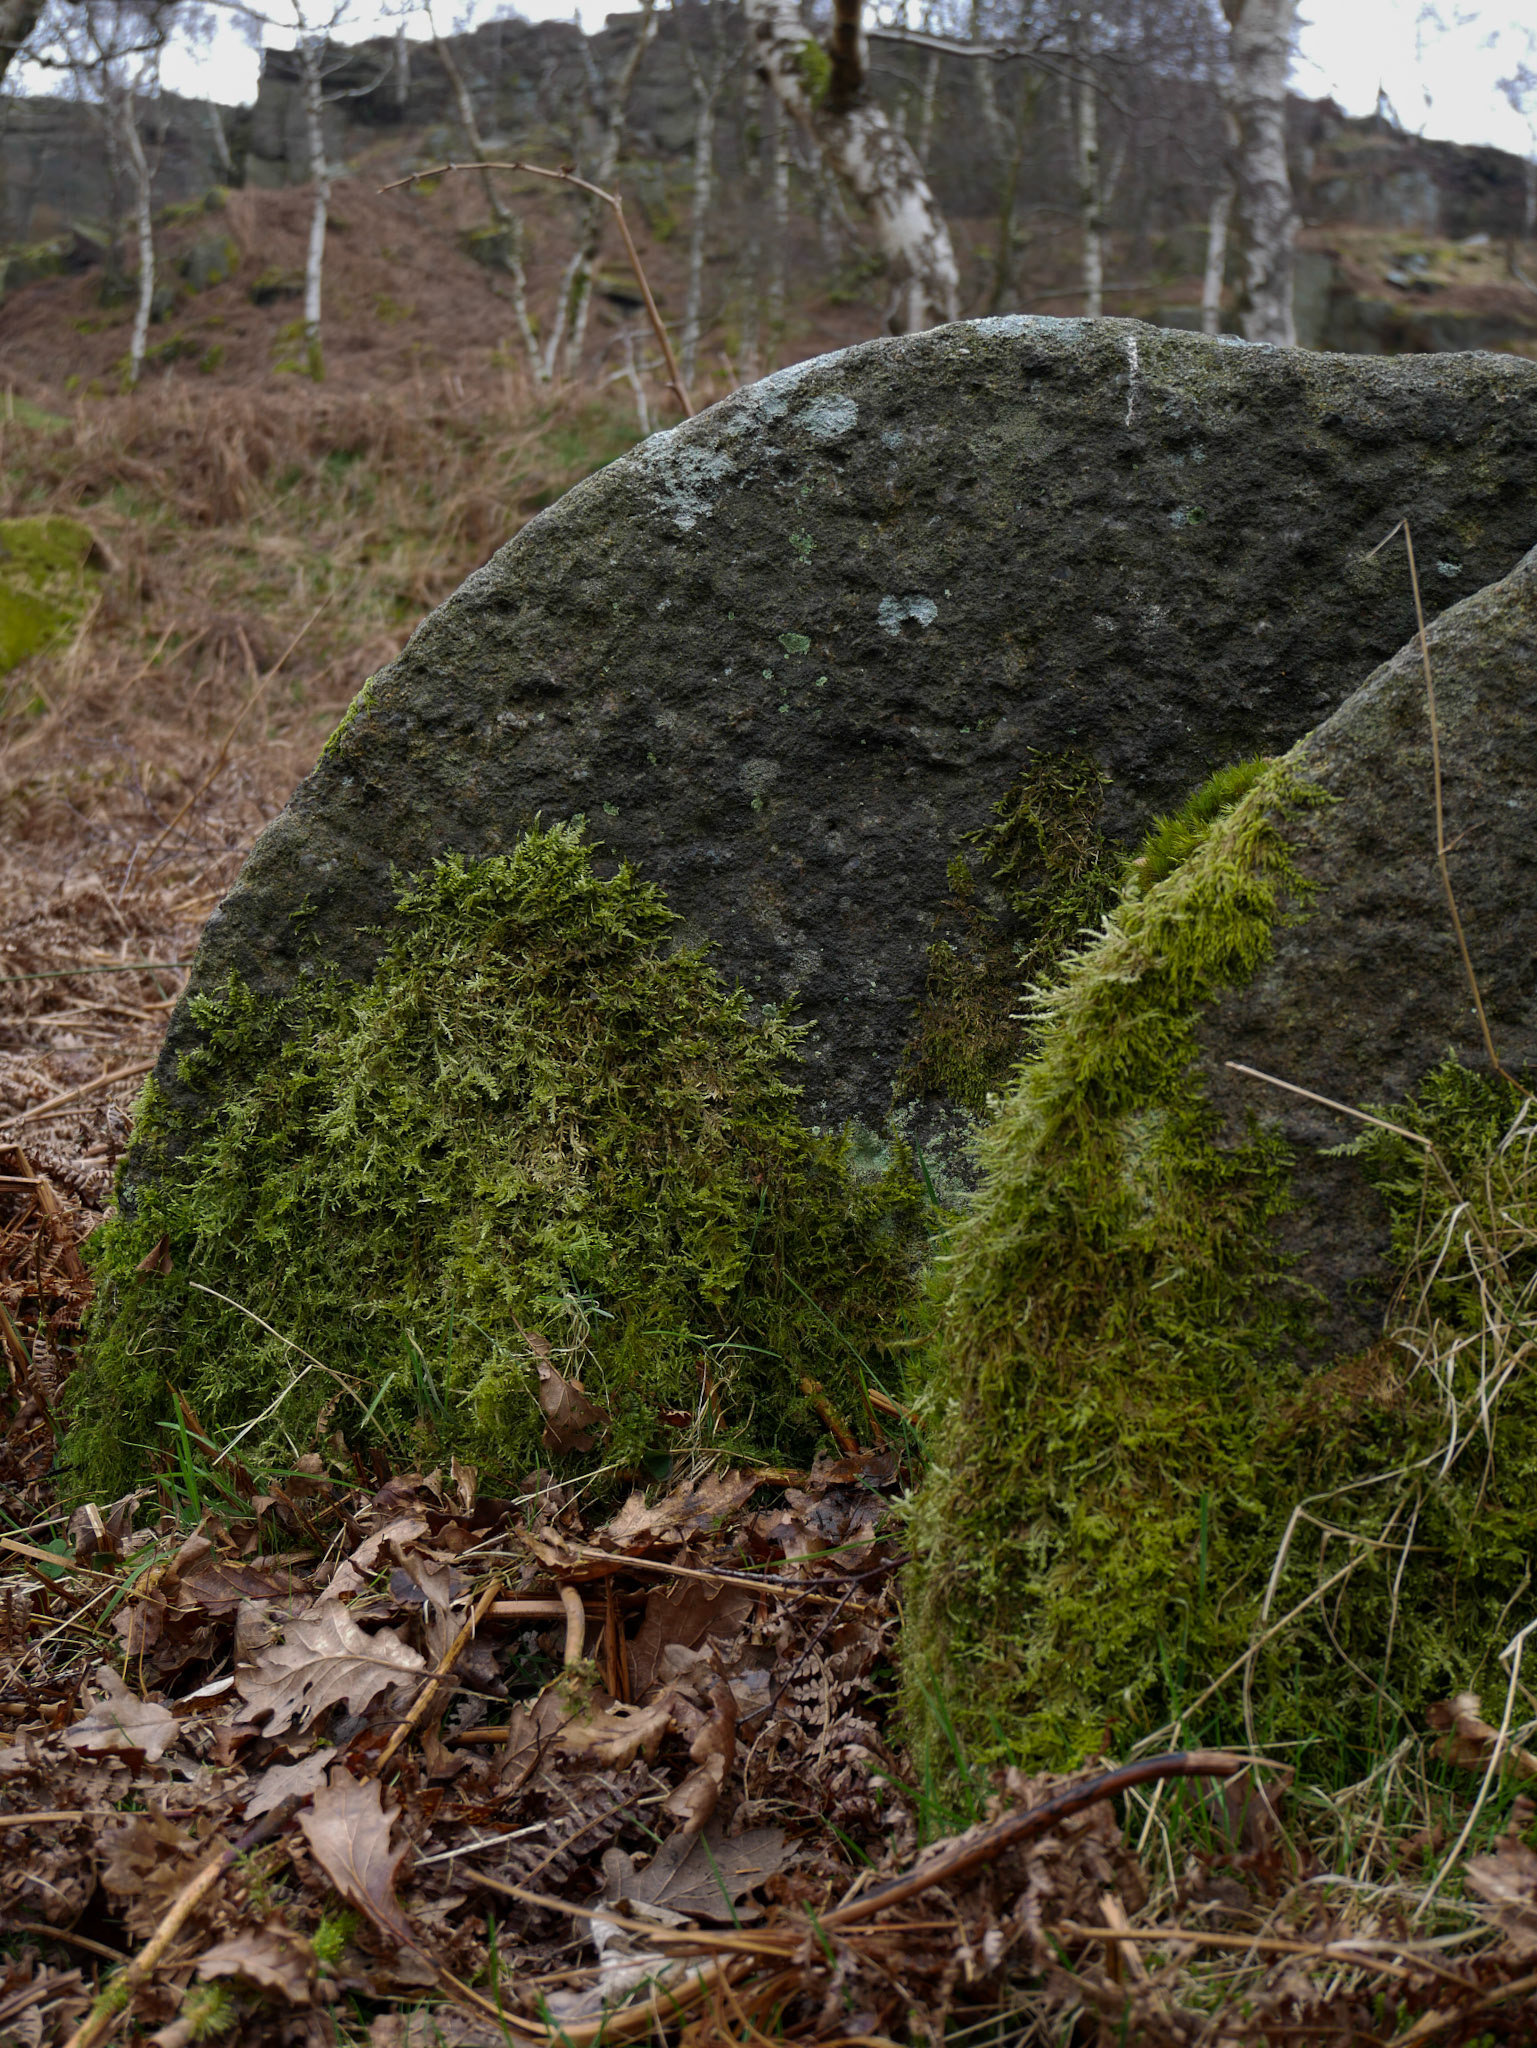
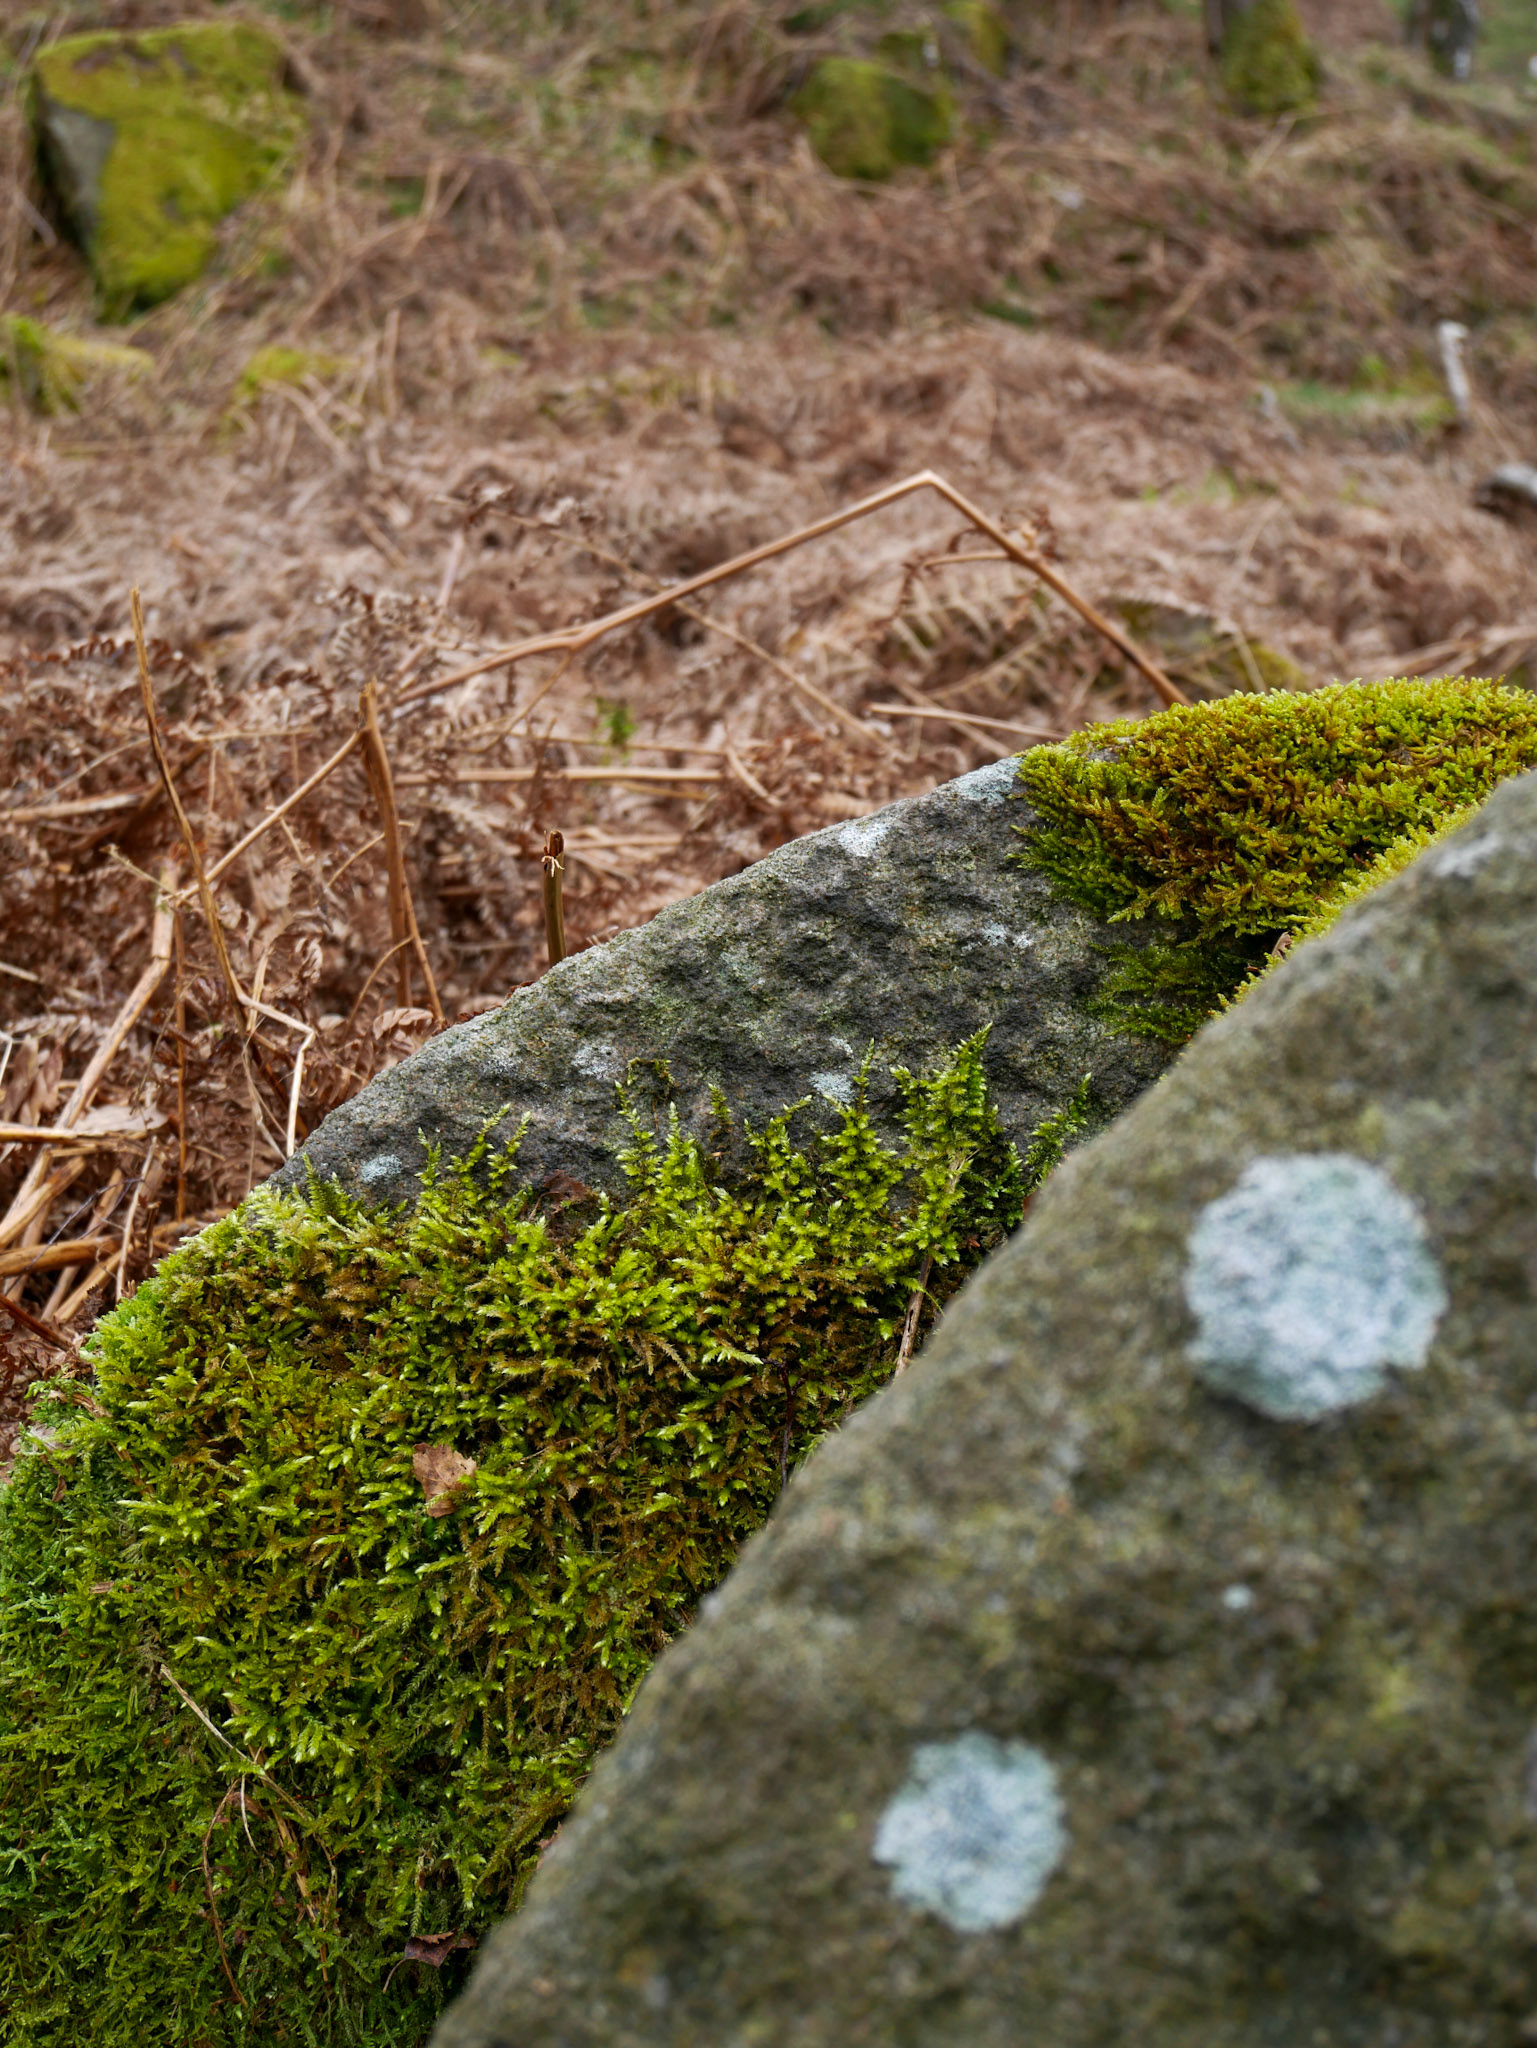
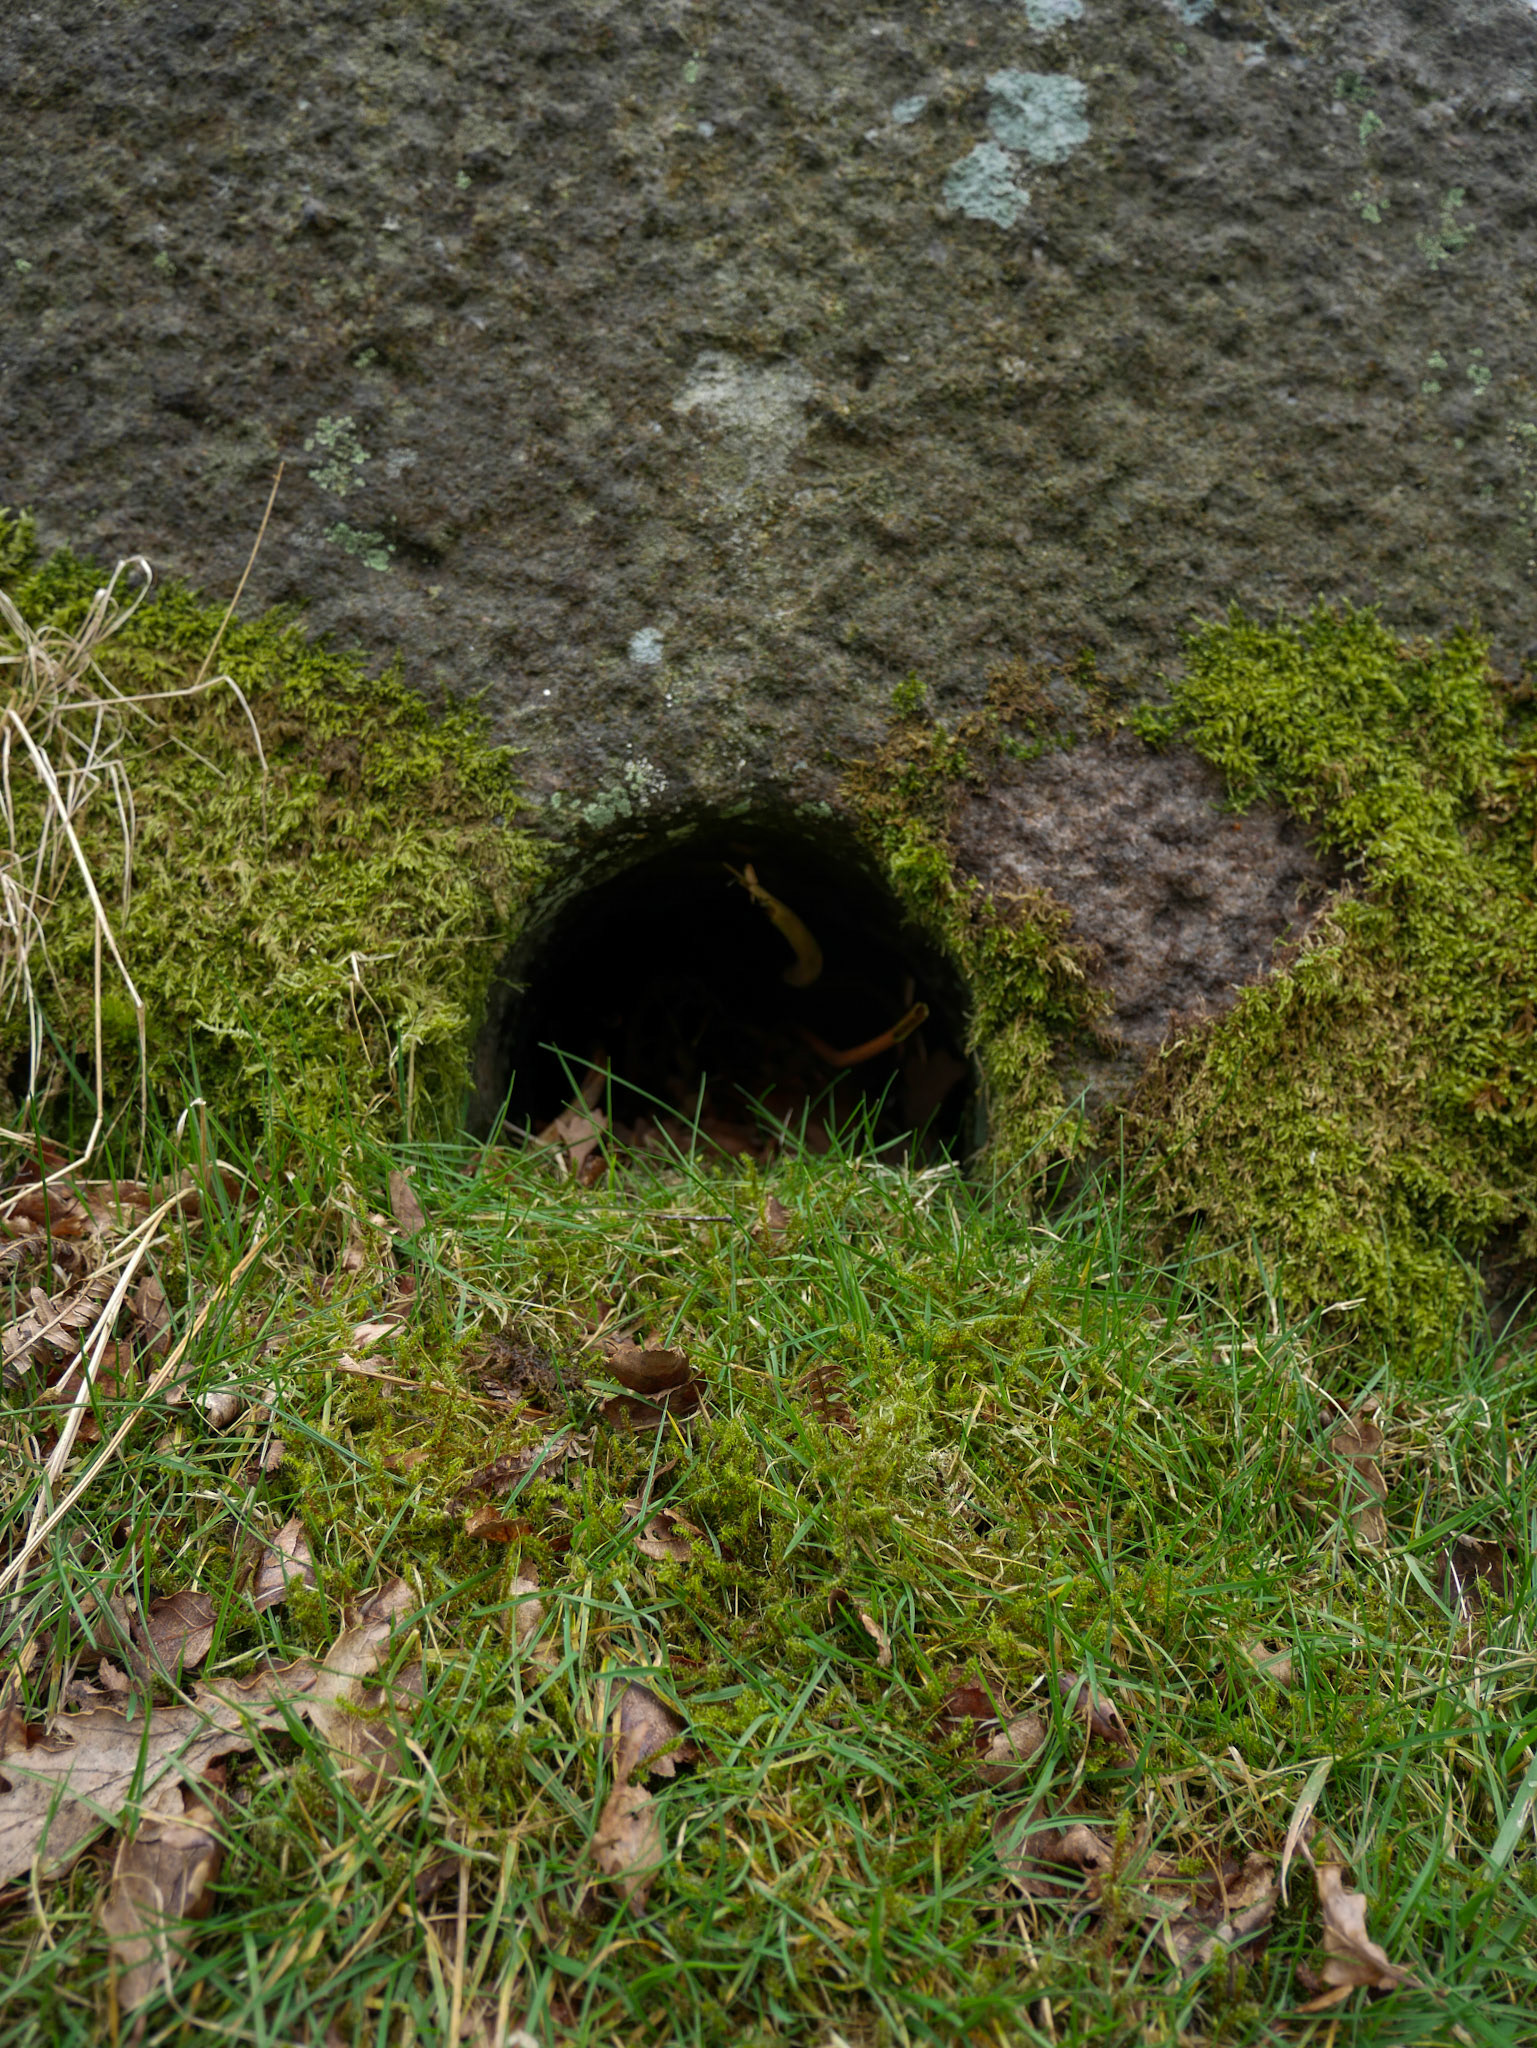
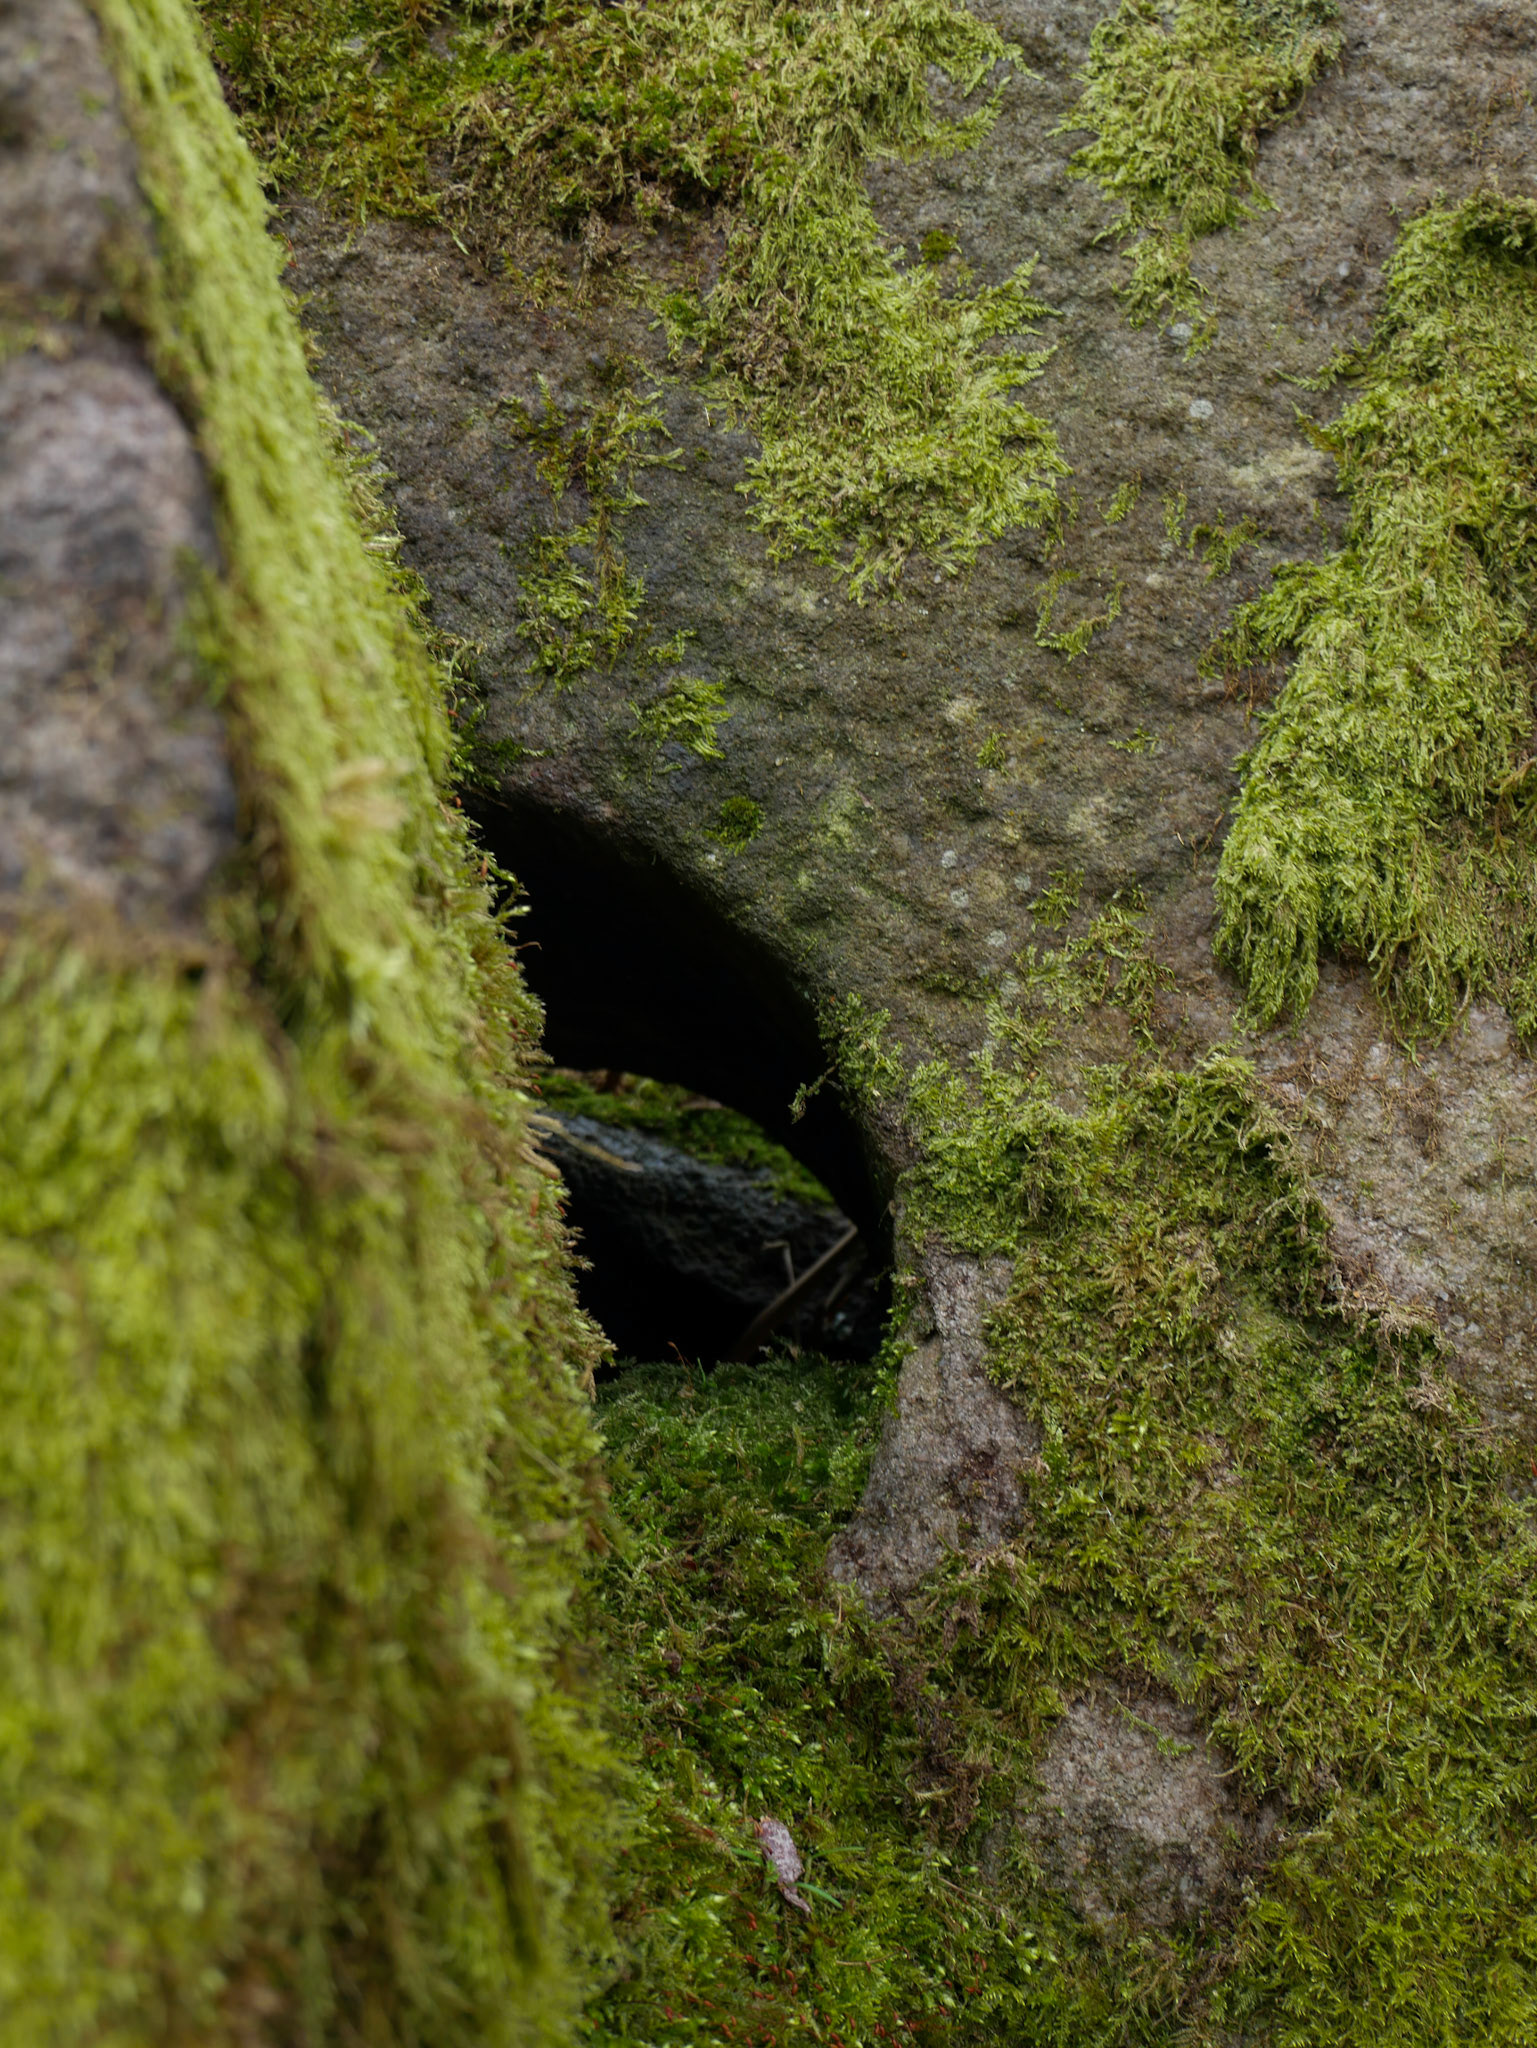
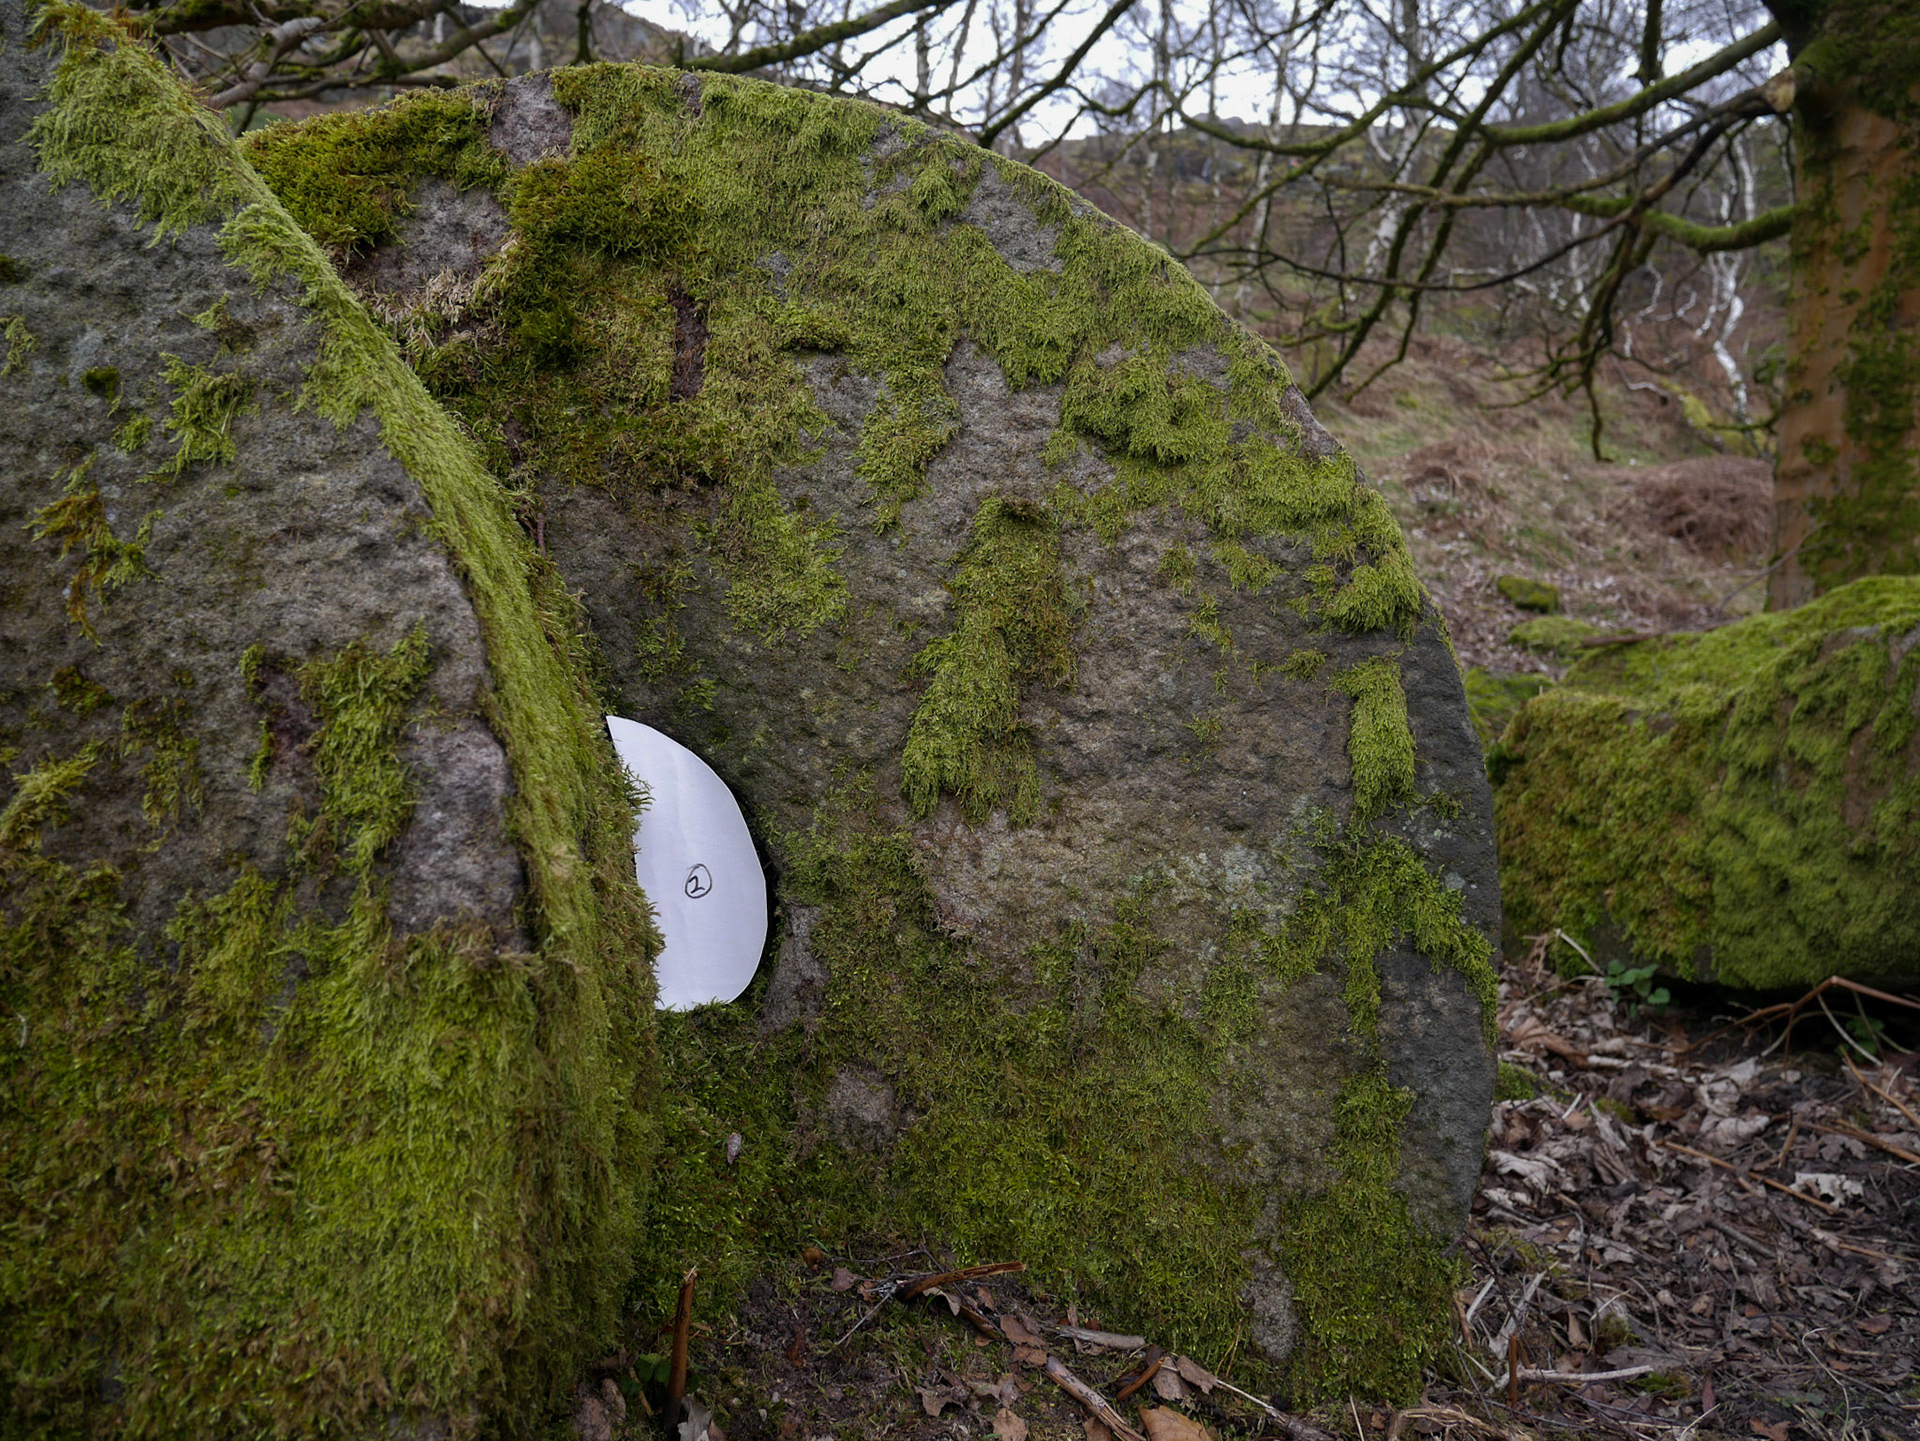
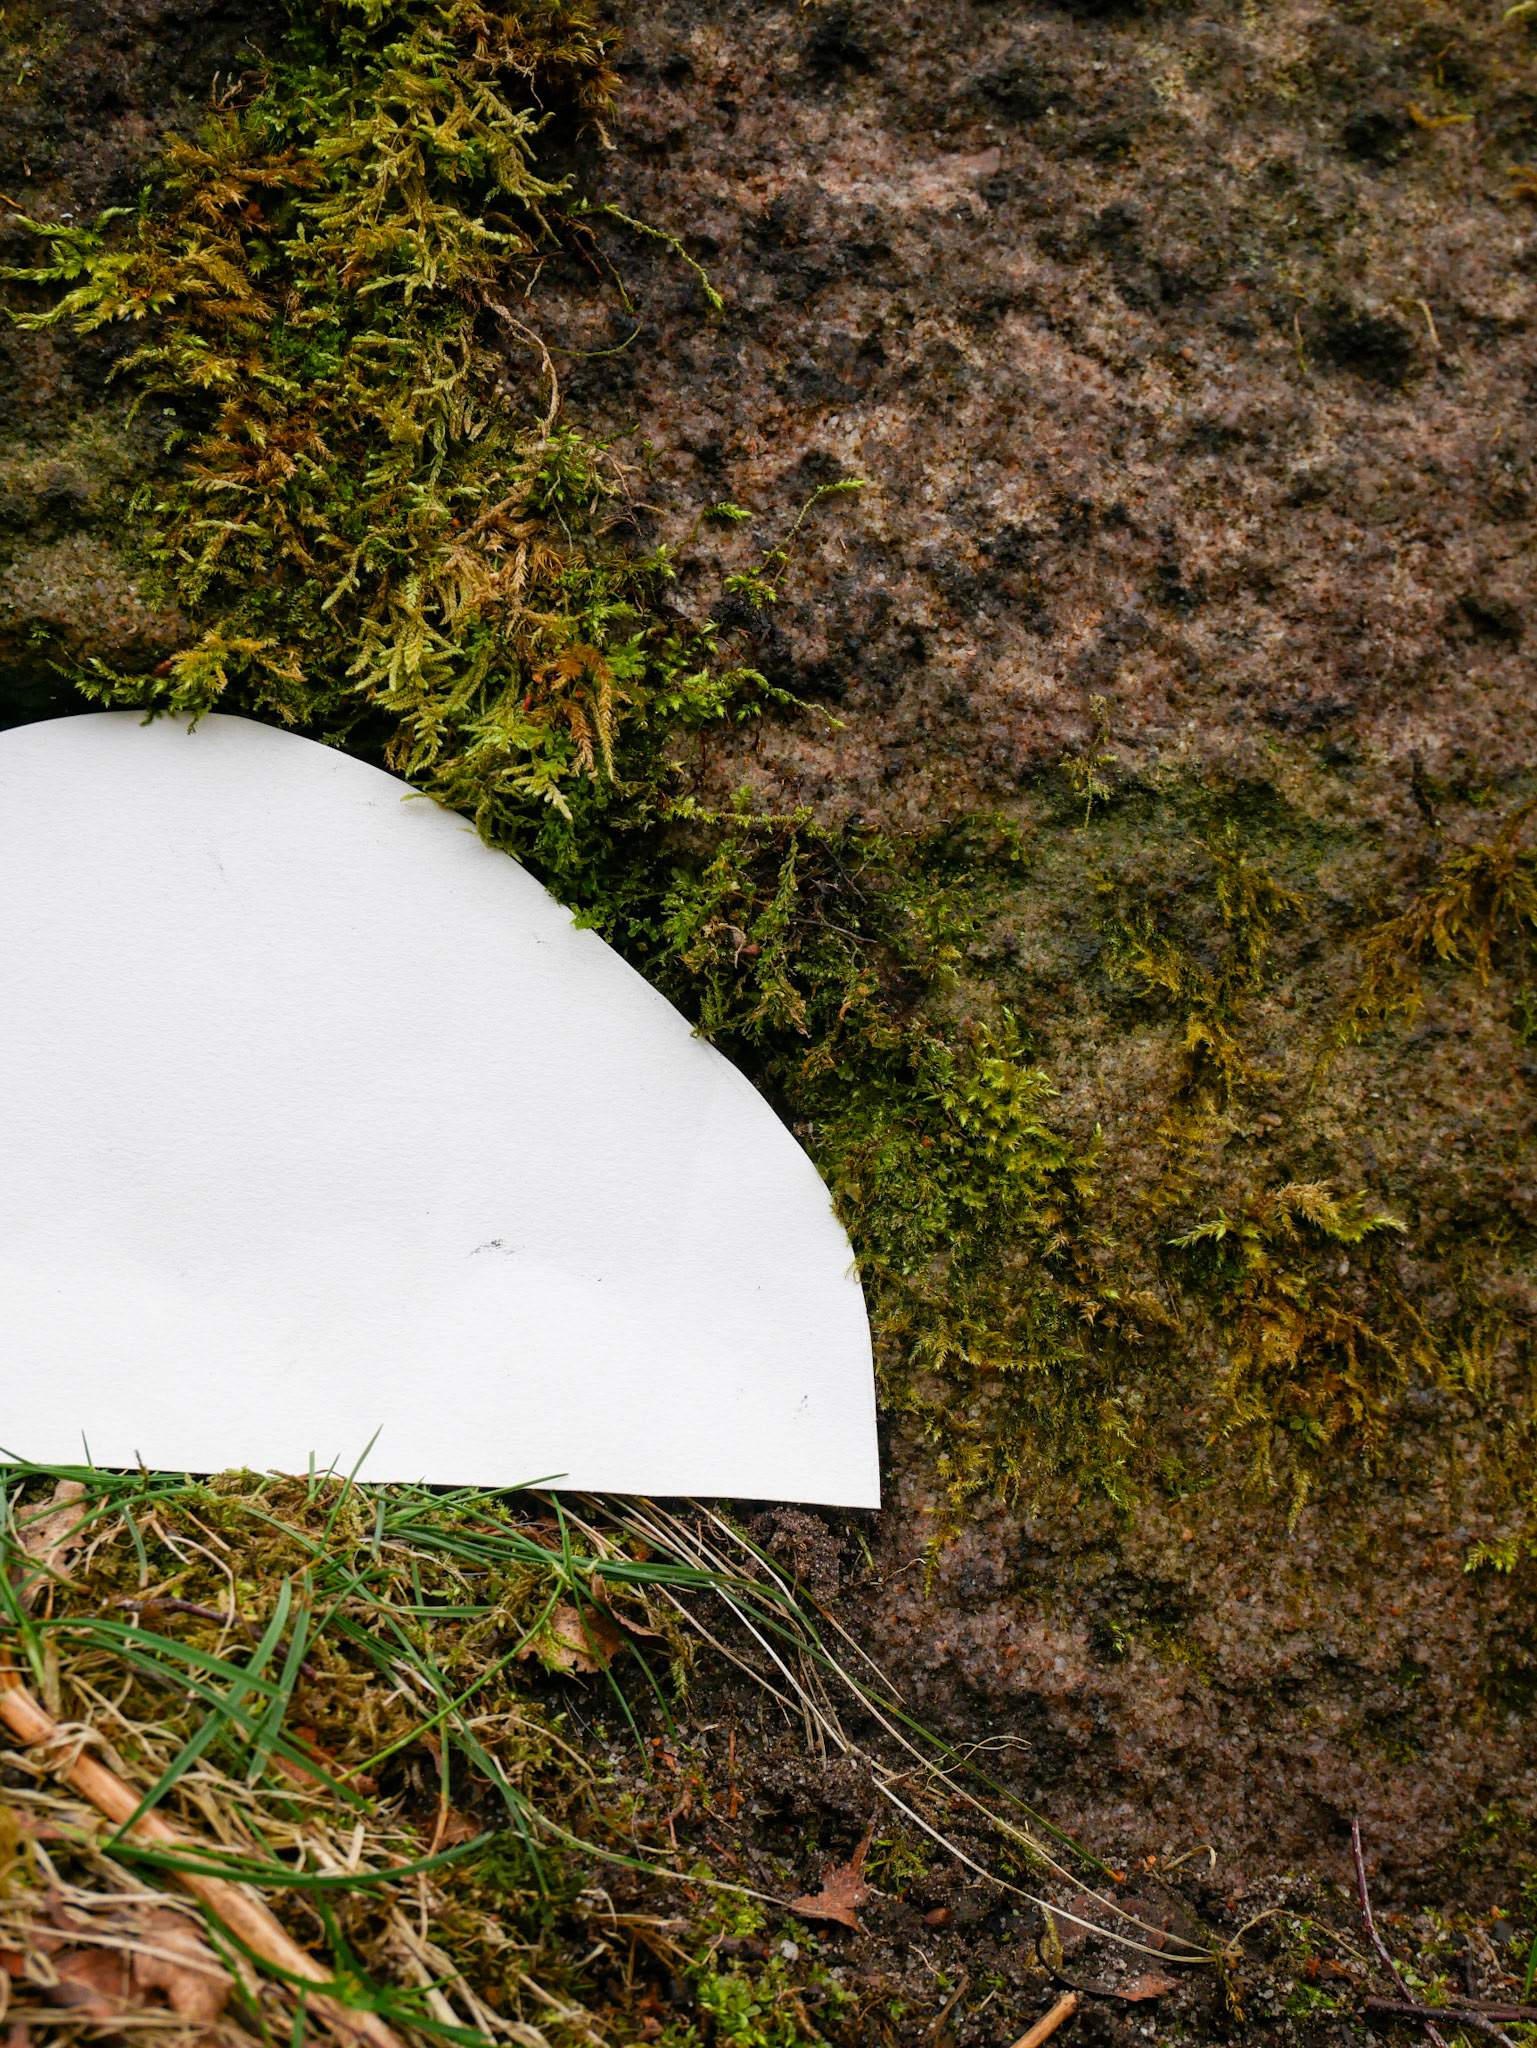
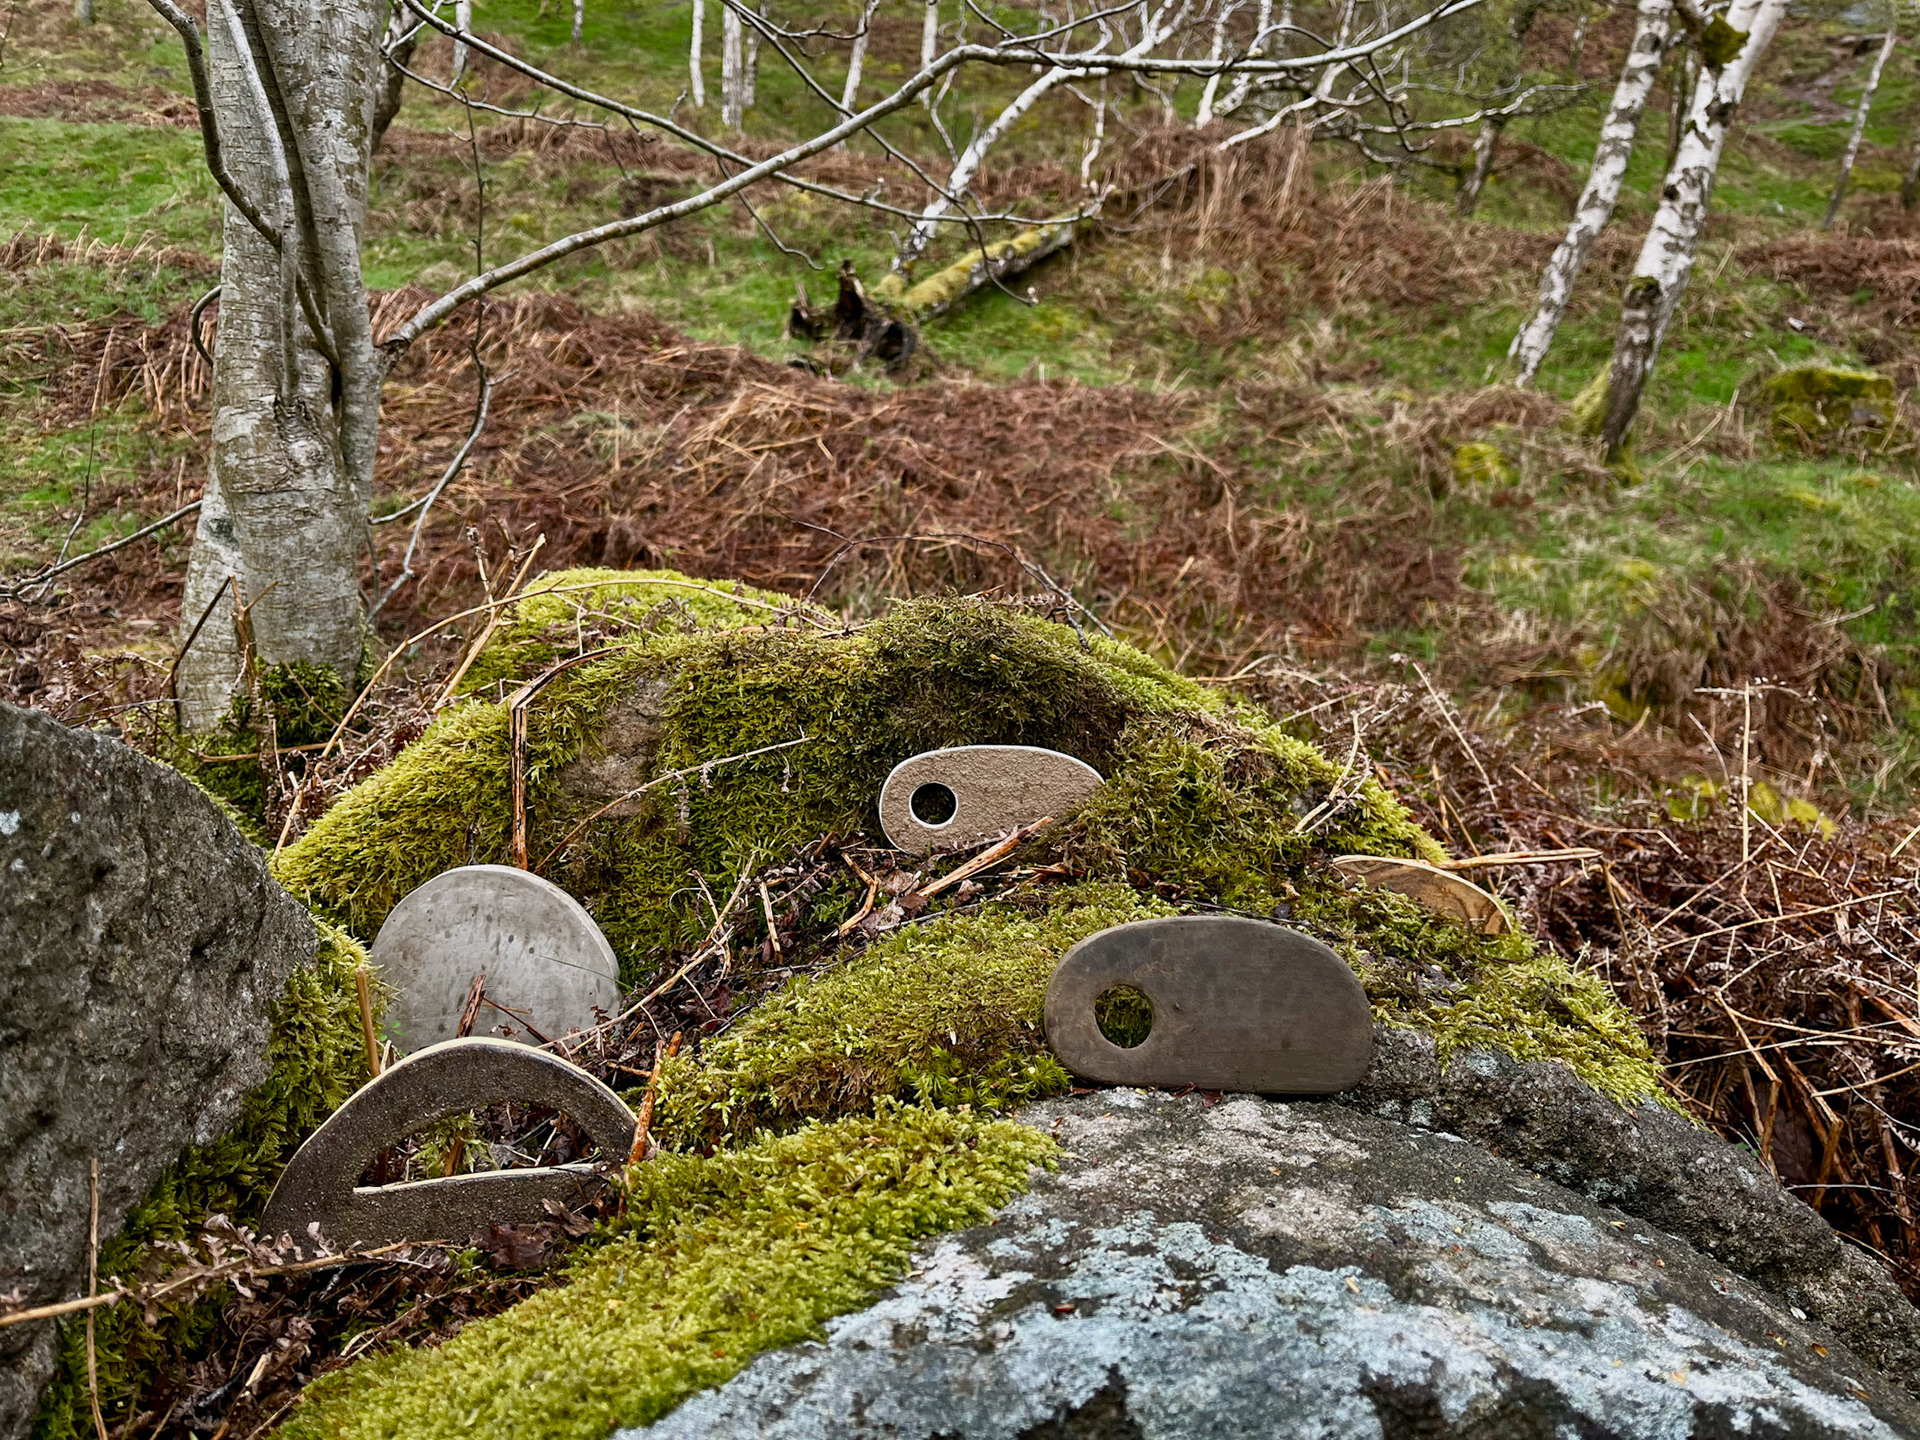
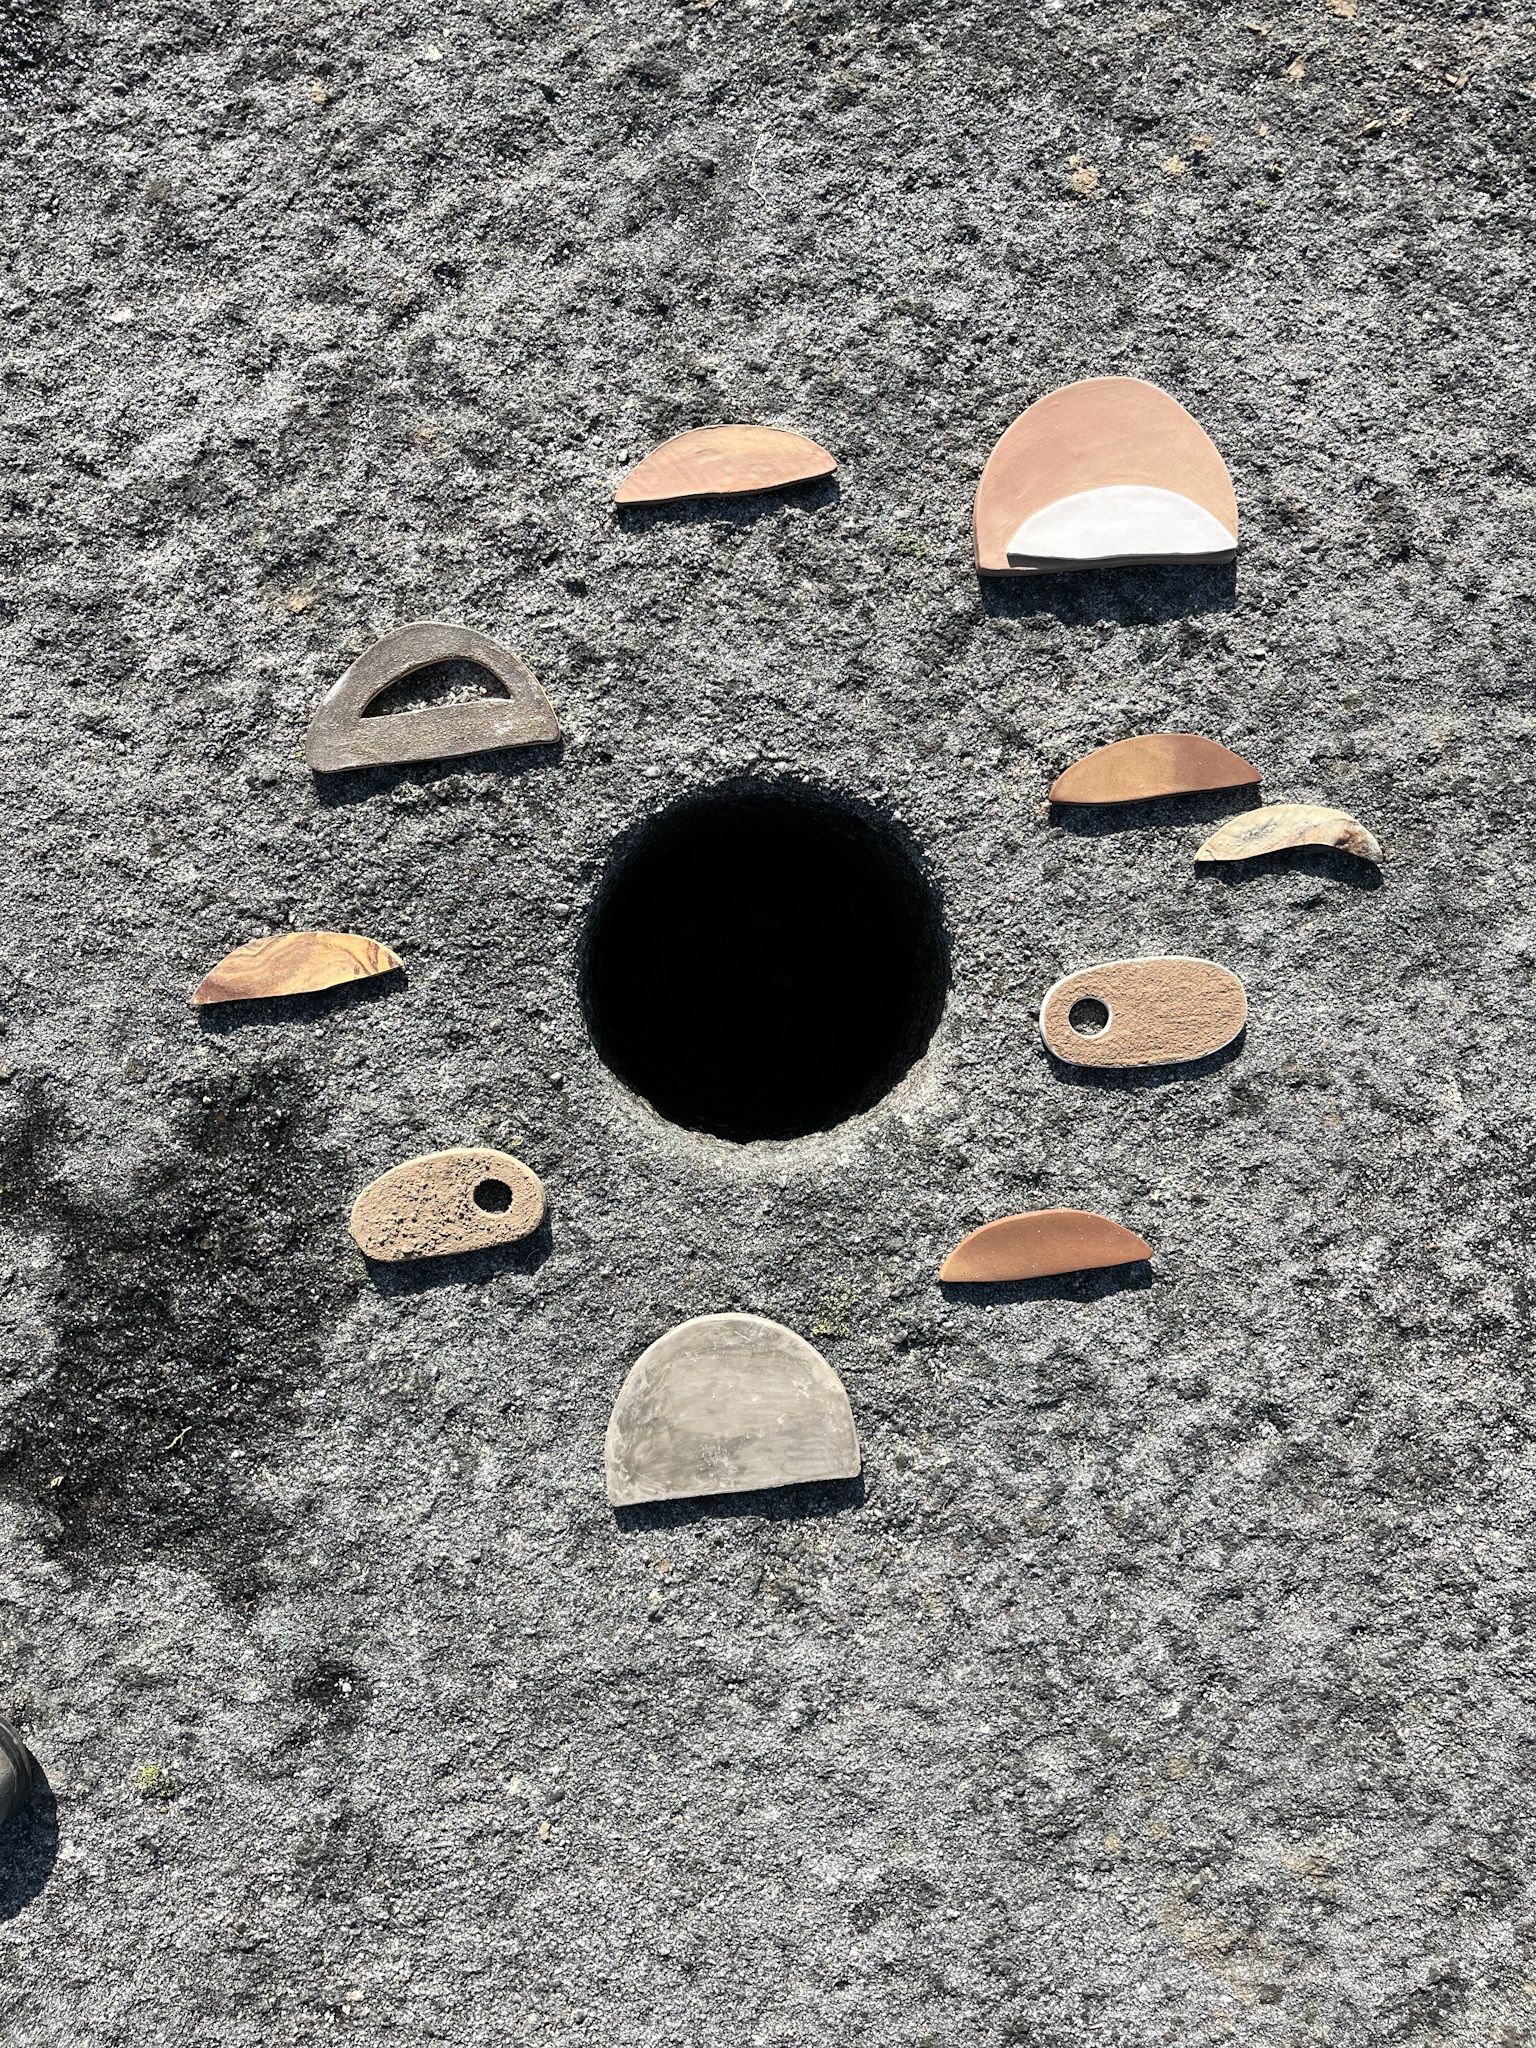
From these reflections, I have decided to change the direction of my making roots. Instead of looking at the millstone for what its literal connotations are, I will instead focus on the negative spaces of the millstones, the spaces in between. The ways that the natural land is seeping through the unnatural, the sense that nature is always finding ways to overpower the manmade landscape. The curves and flows of the crafted rock, how the stone is formed and built by hand. Through my making, I aim to research the detailed ways that human interference affects a material, creating forms from the negative, in-between spaces of the millstone, the gap between human intervention and natural growth.
Negative spaces are the unoccupied areas between objects. They help to define the 'positive' space that holds the main subject, and are often thought of as empty space. In my opinion, I believe that contextually, the whole concept of the millstone can be classed as a negative space. Millstones were made as a means to make a product, and as times changed became redundant. Further to this, when the millstones, especially in the location of Lawrencefield, were abandoned and forgotten, stacked together one by one, they began to create their own negative space within each other. The spaces in between the holes, the curves that were created through the ways that the stones were placed, probably without much thought or precision into the structure where they were to be left, unintentionally create a magical piece of artistic composition that adds a profound depth to the landscape.
Making forms
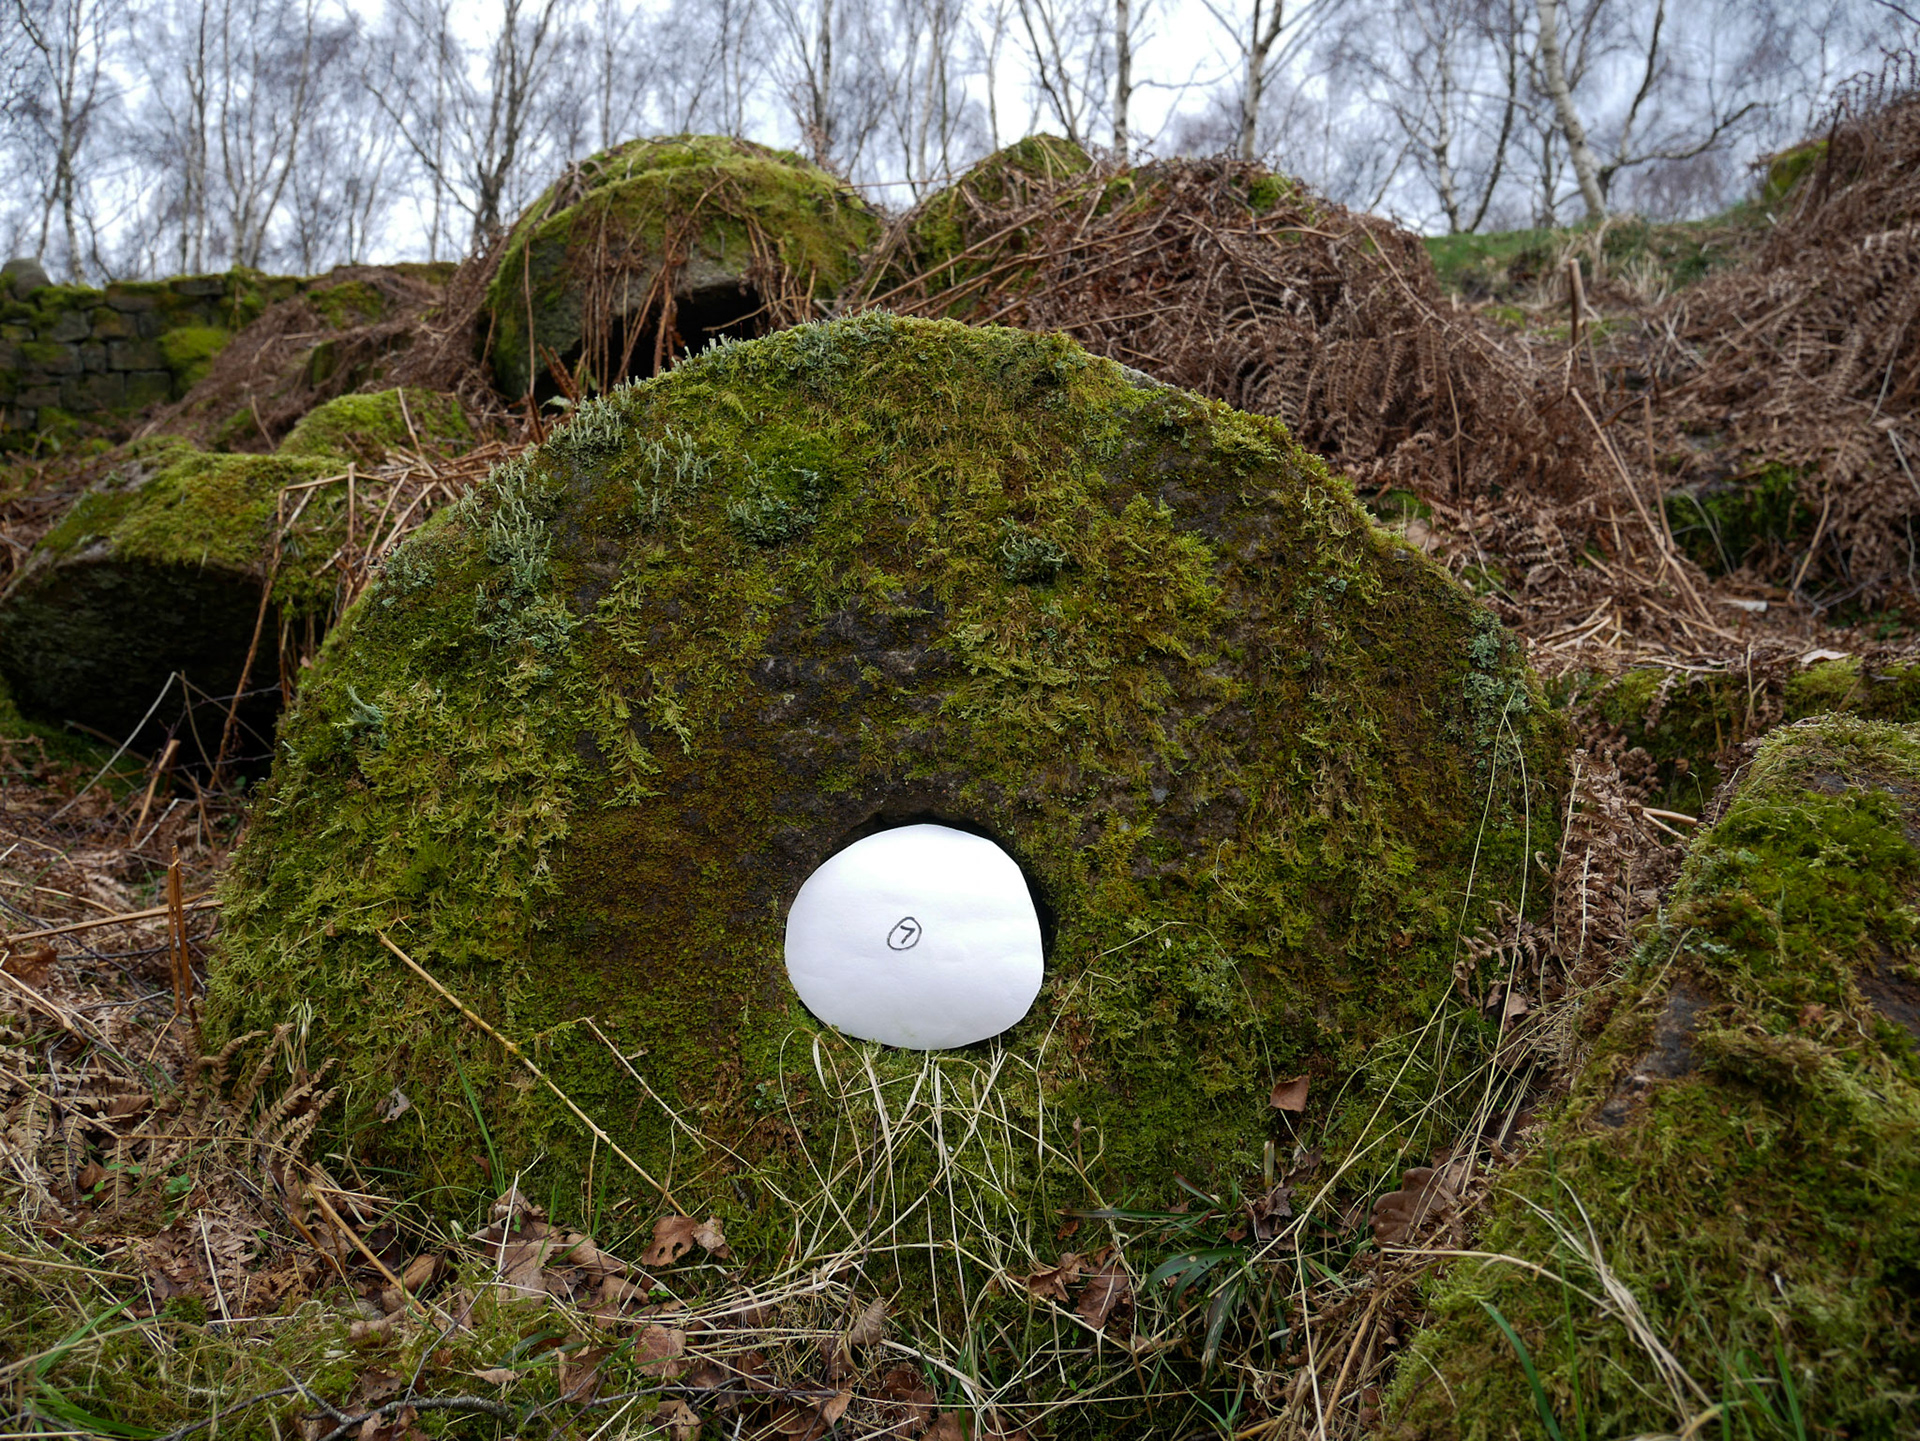
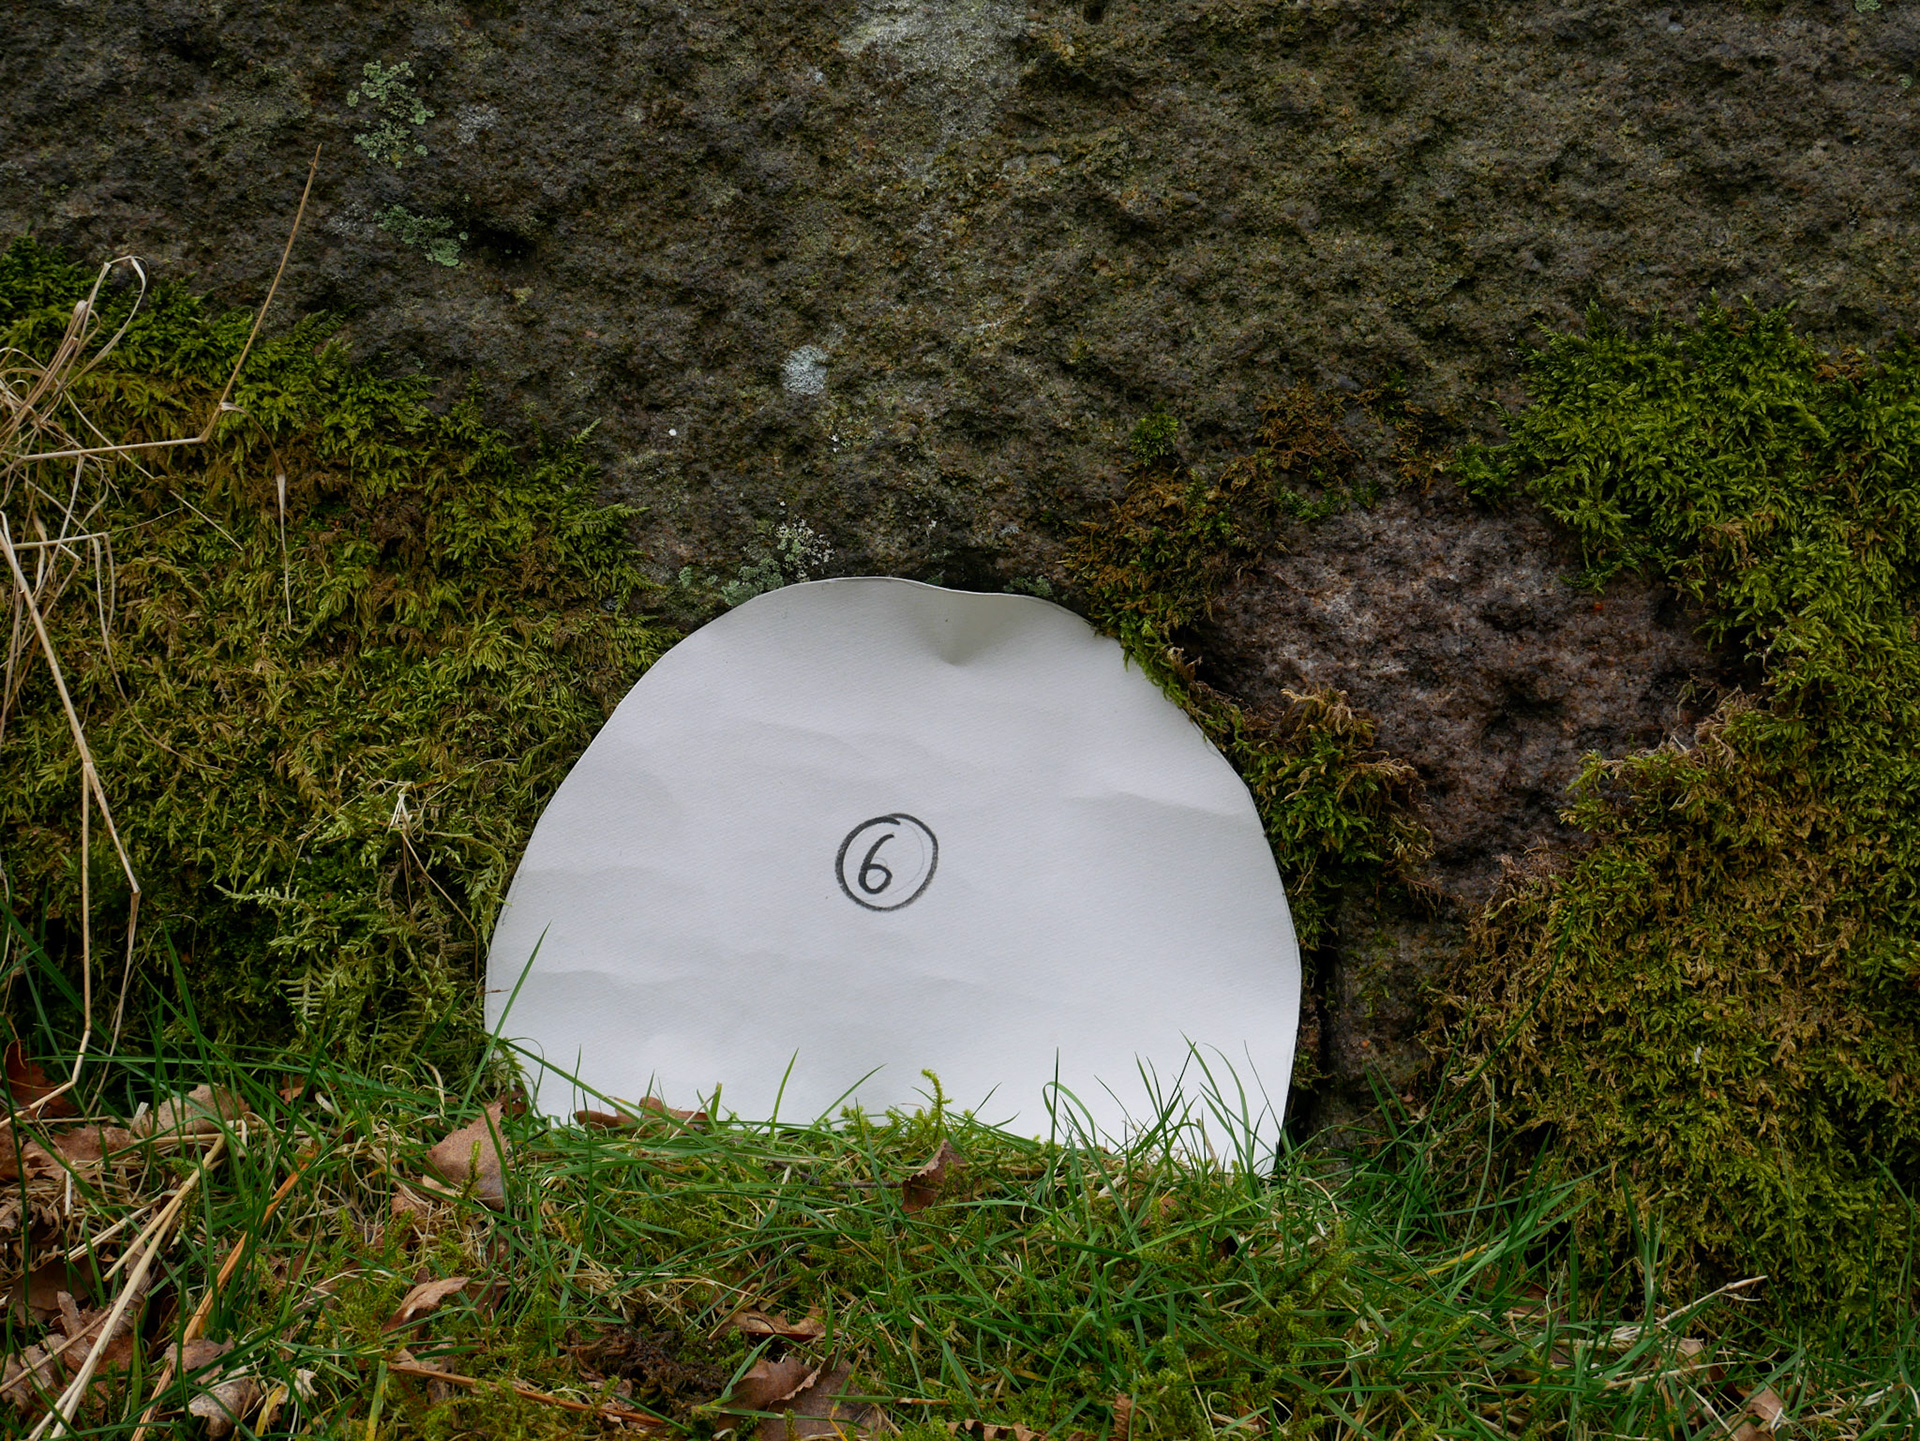
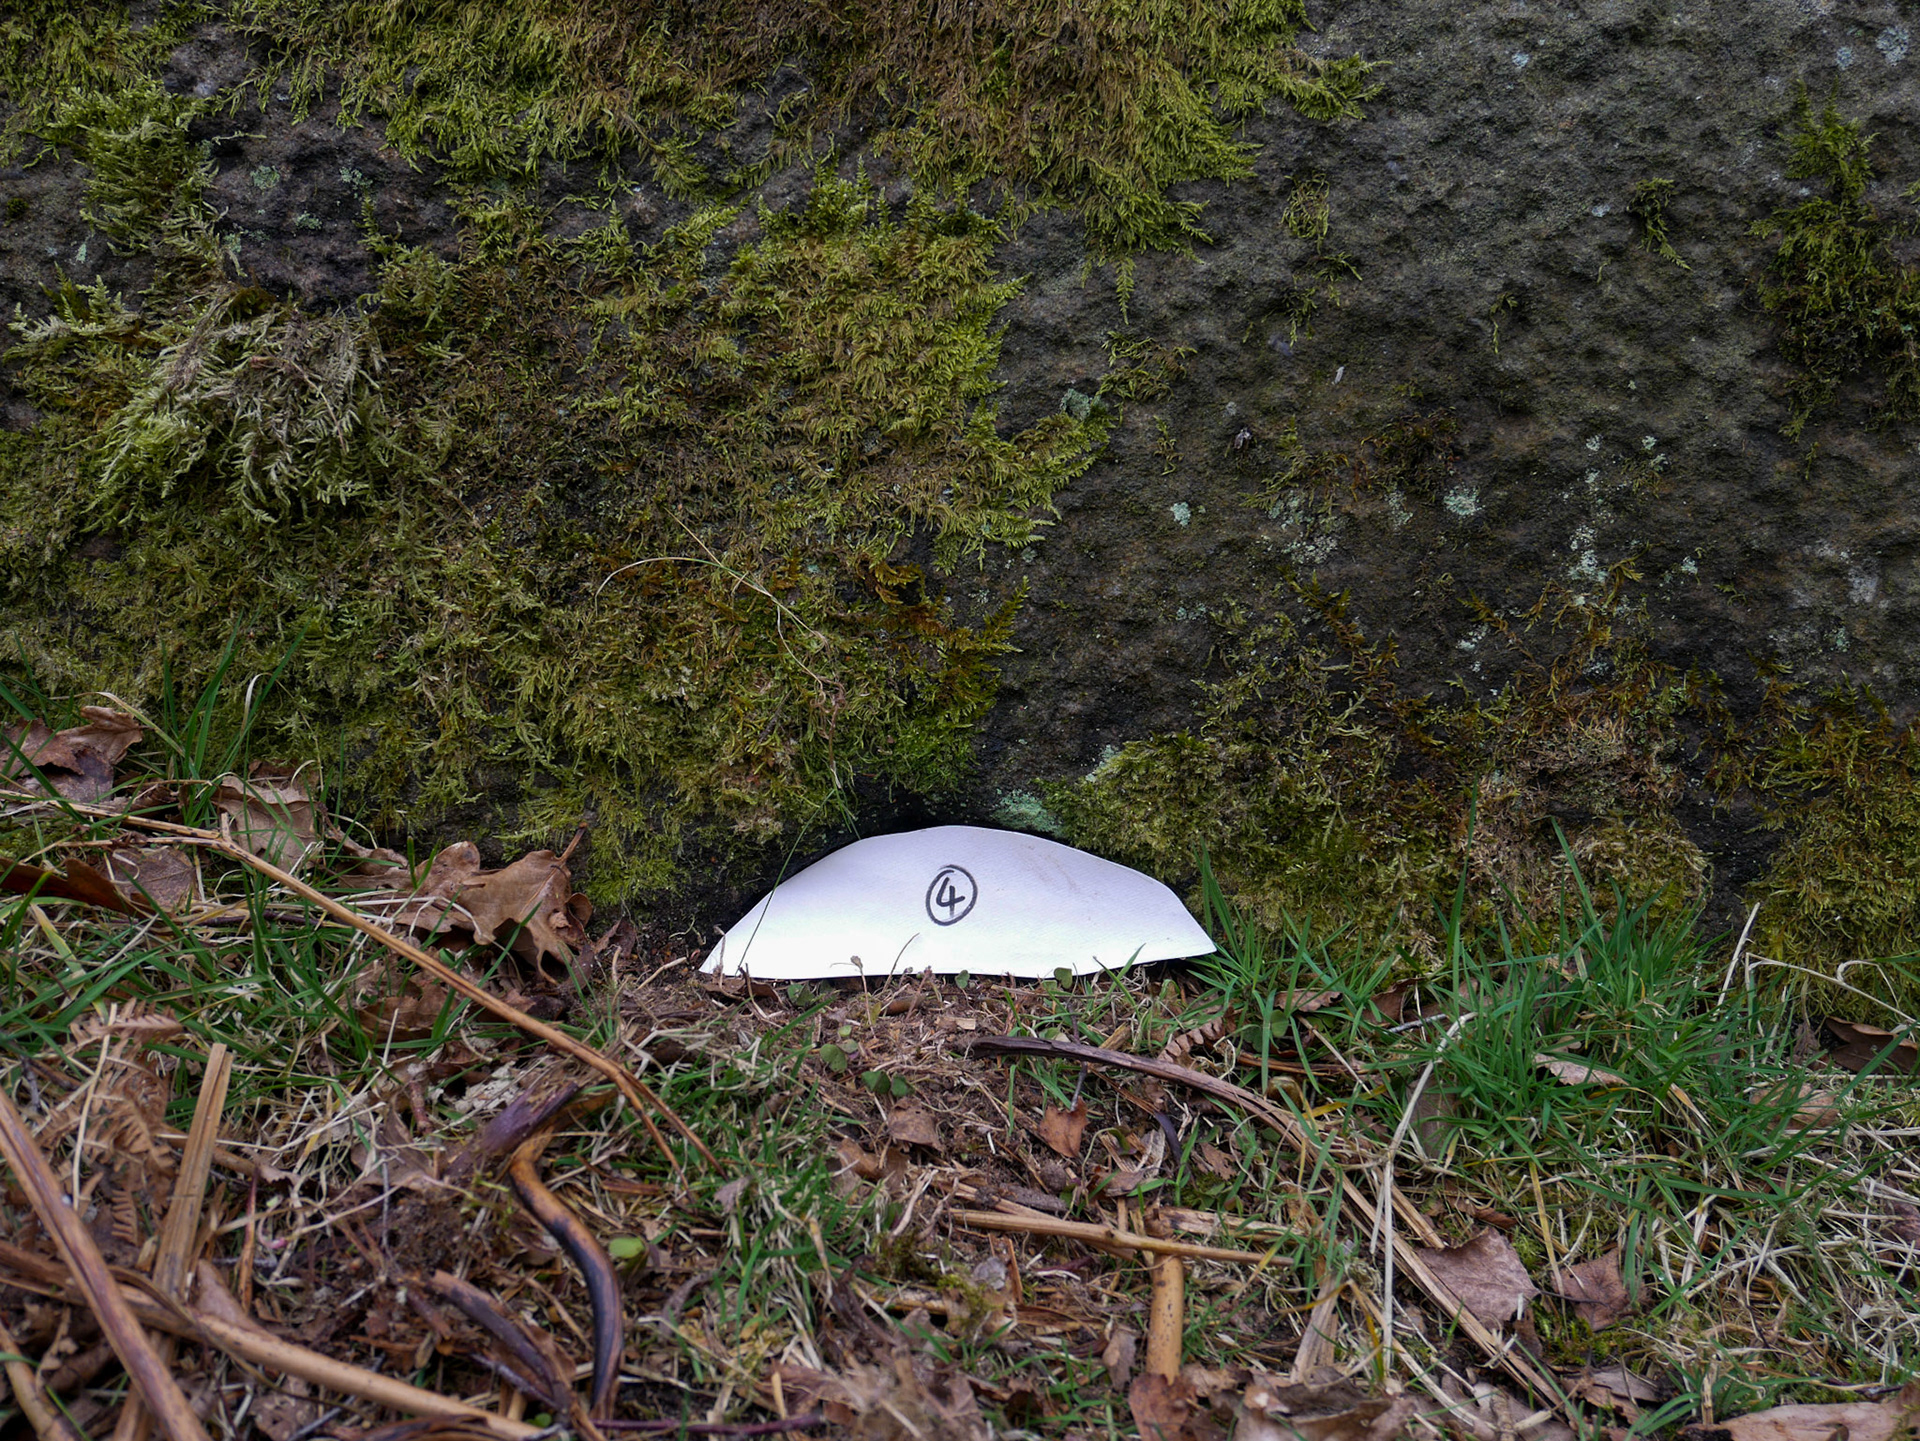
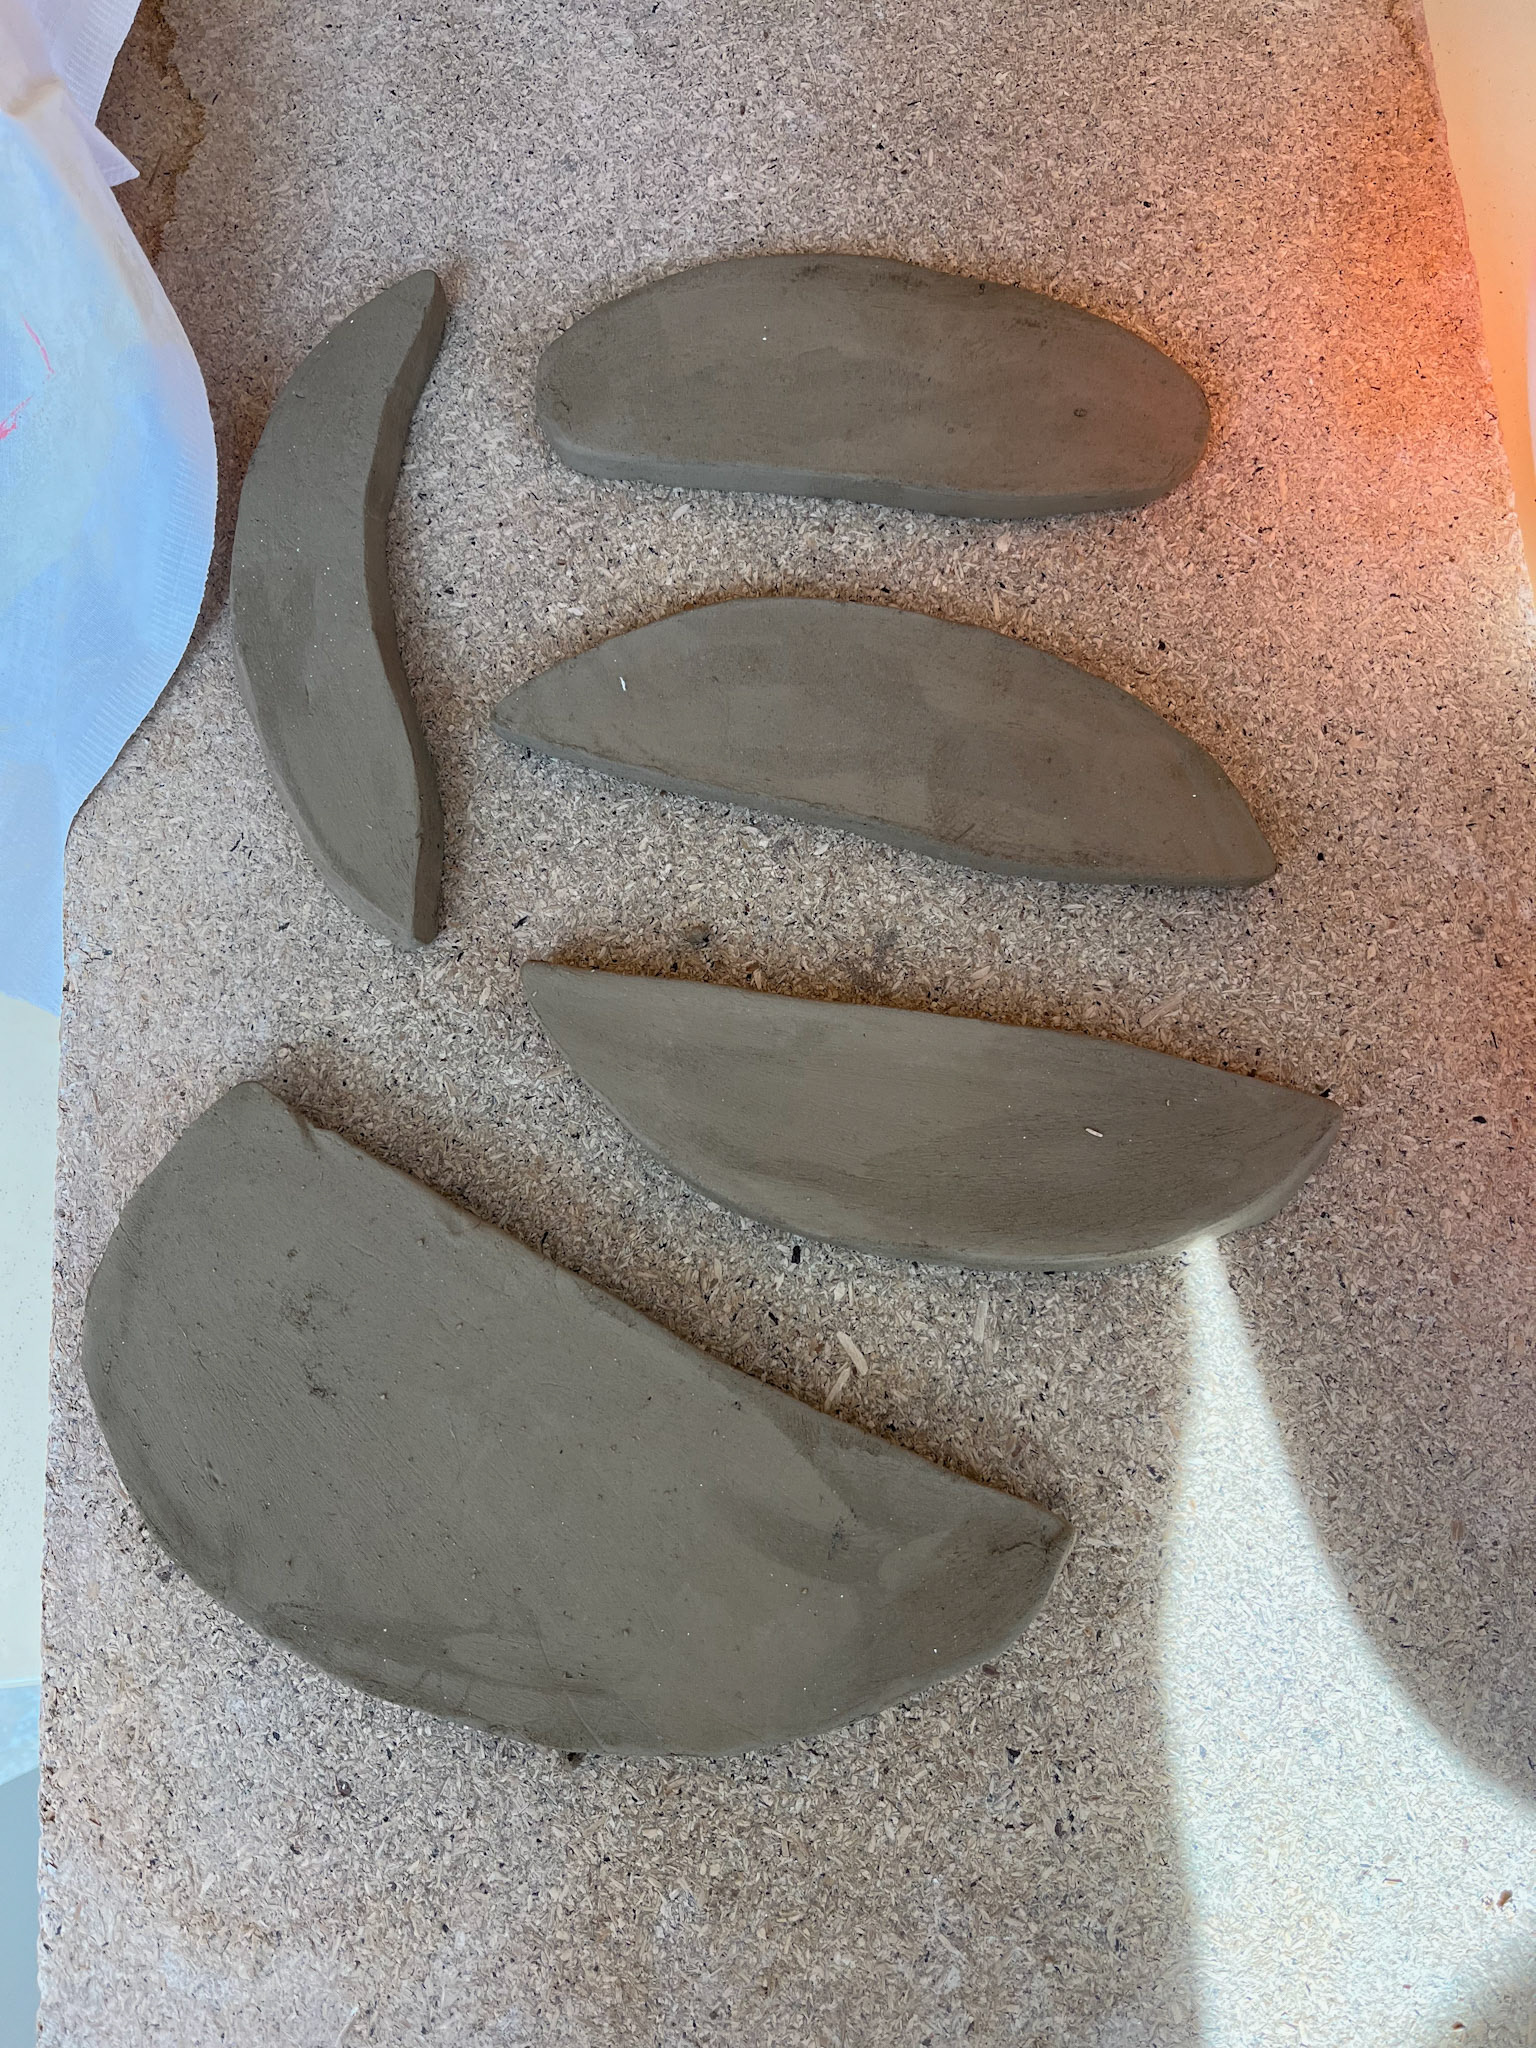
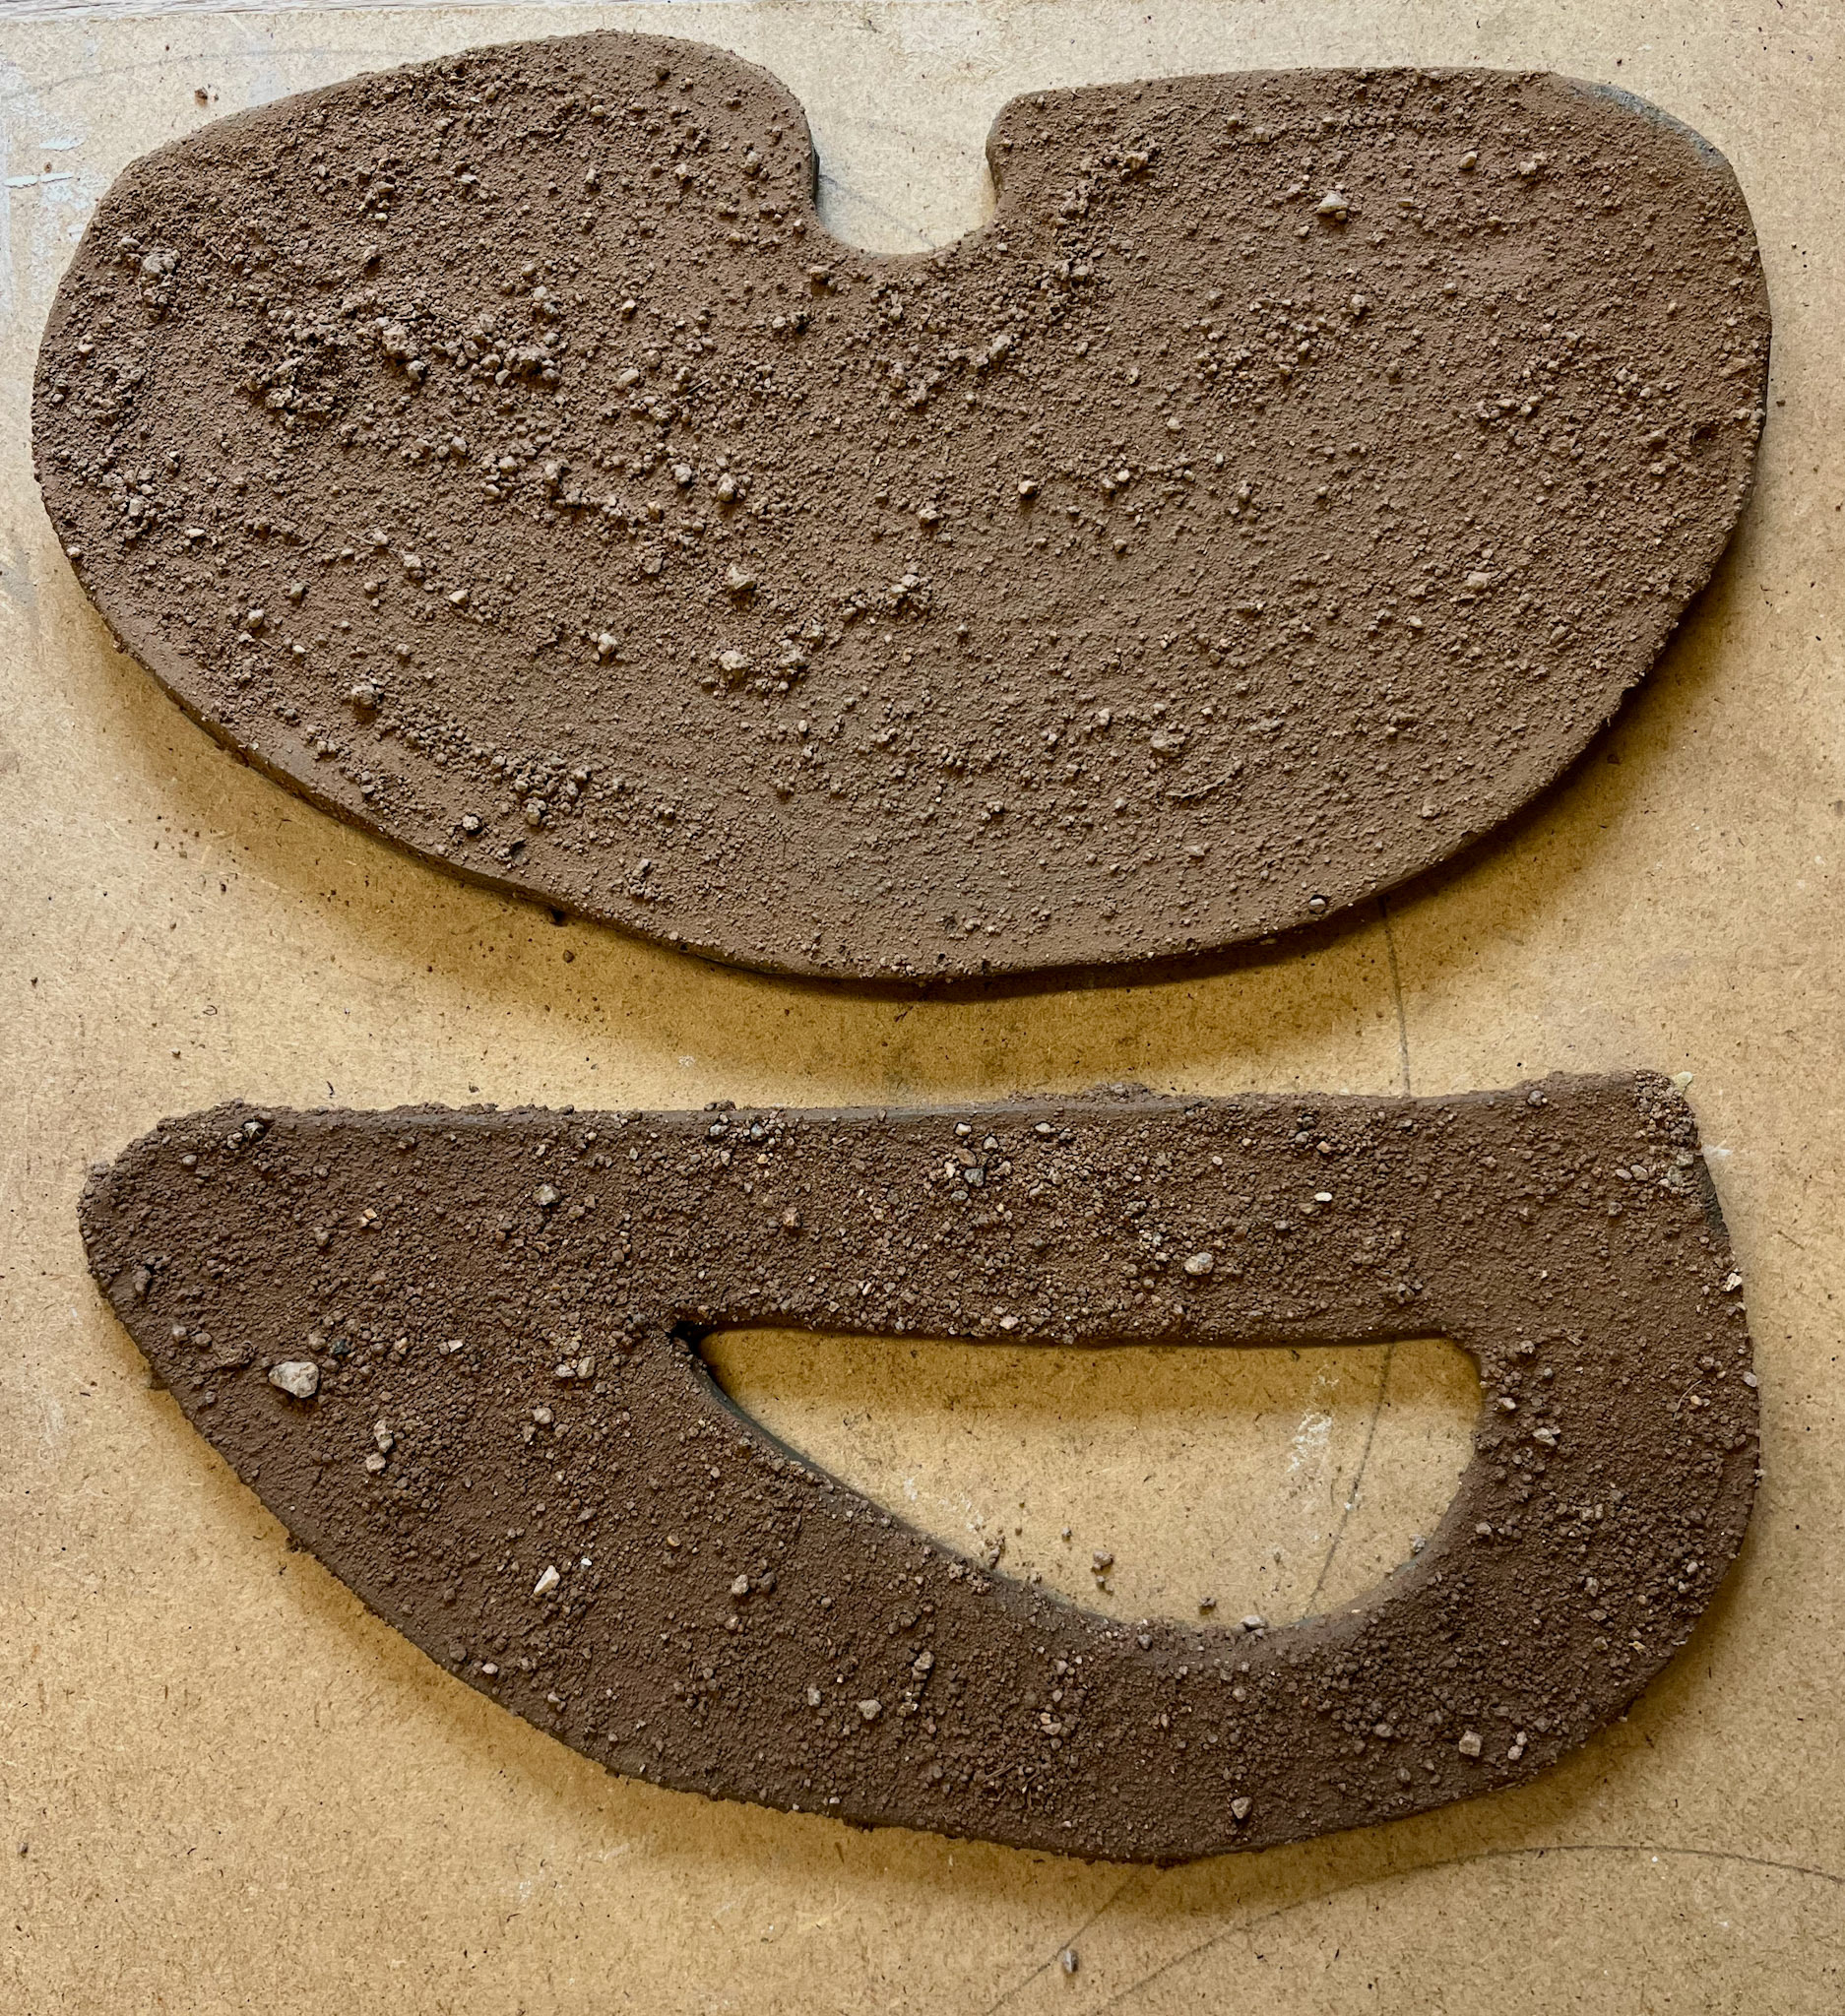
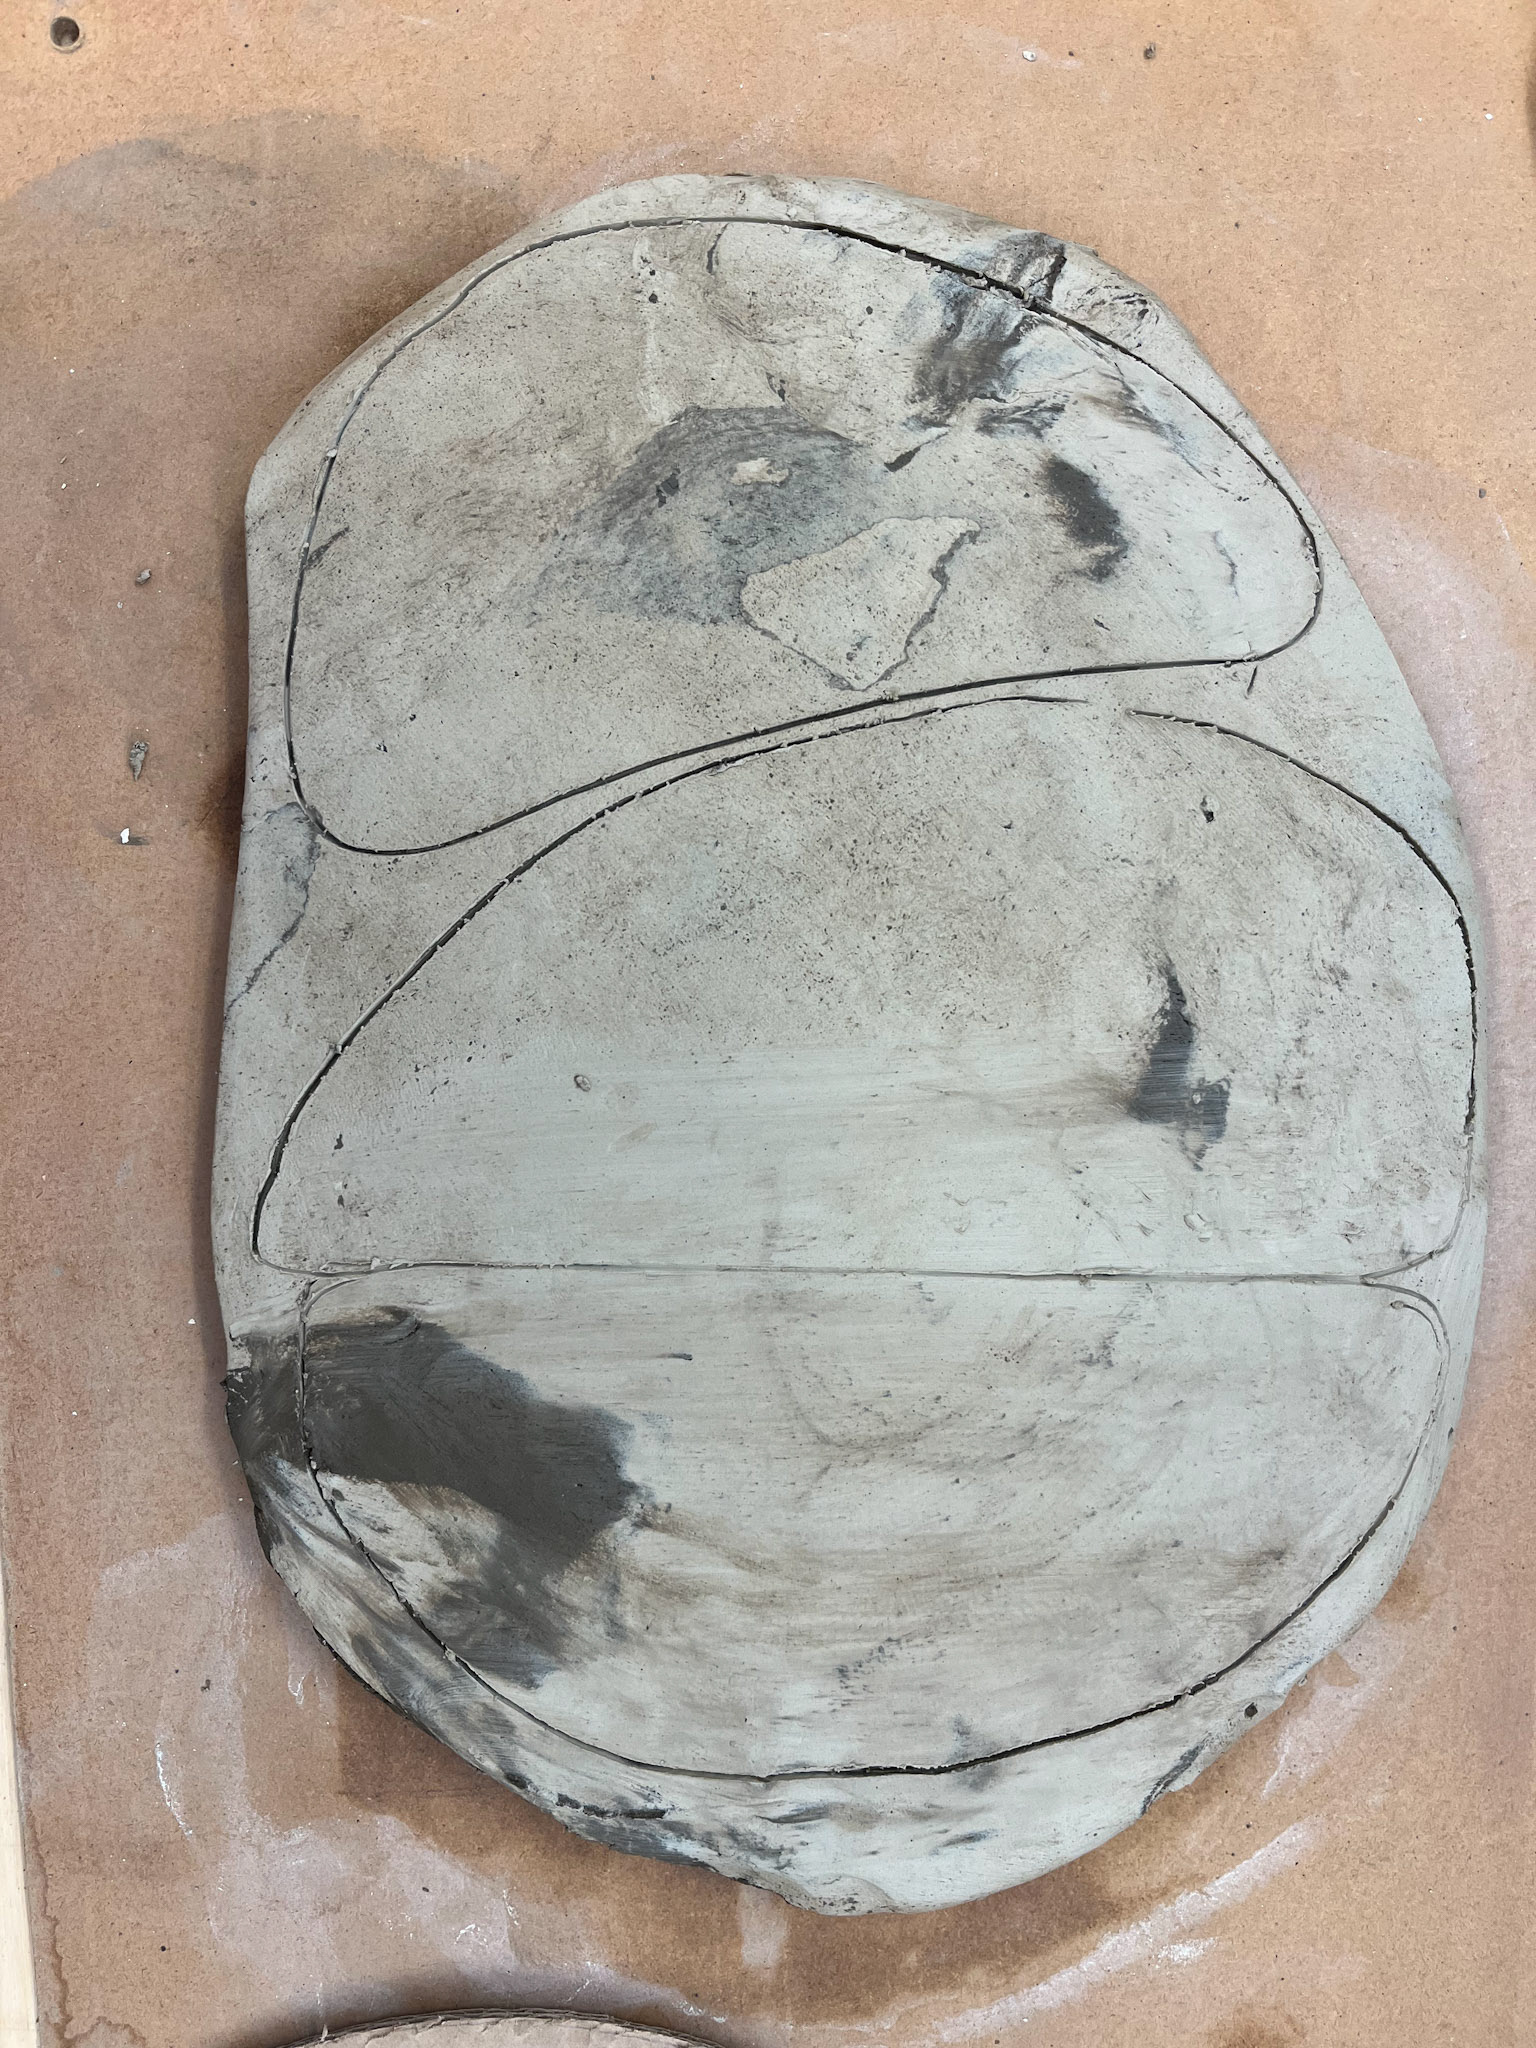
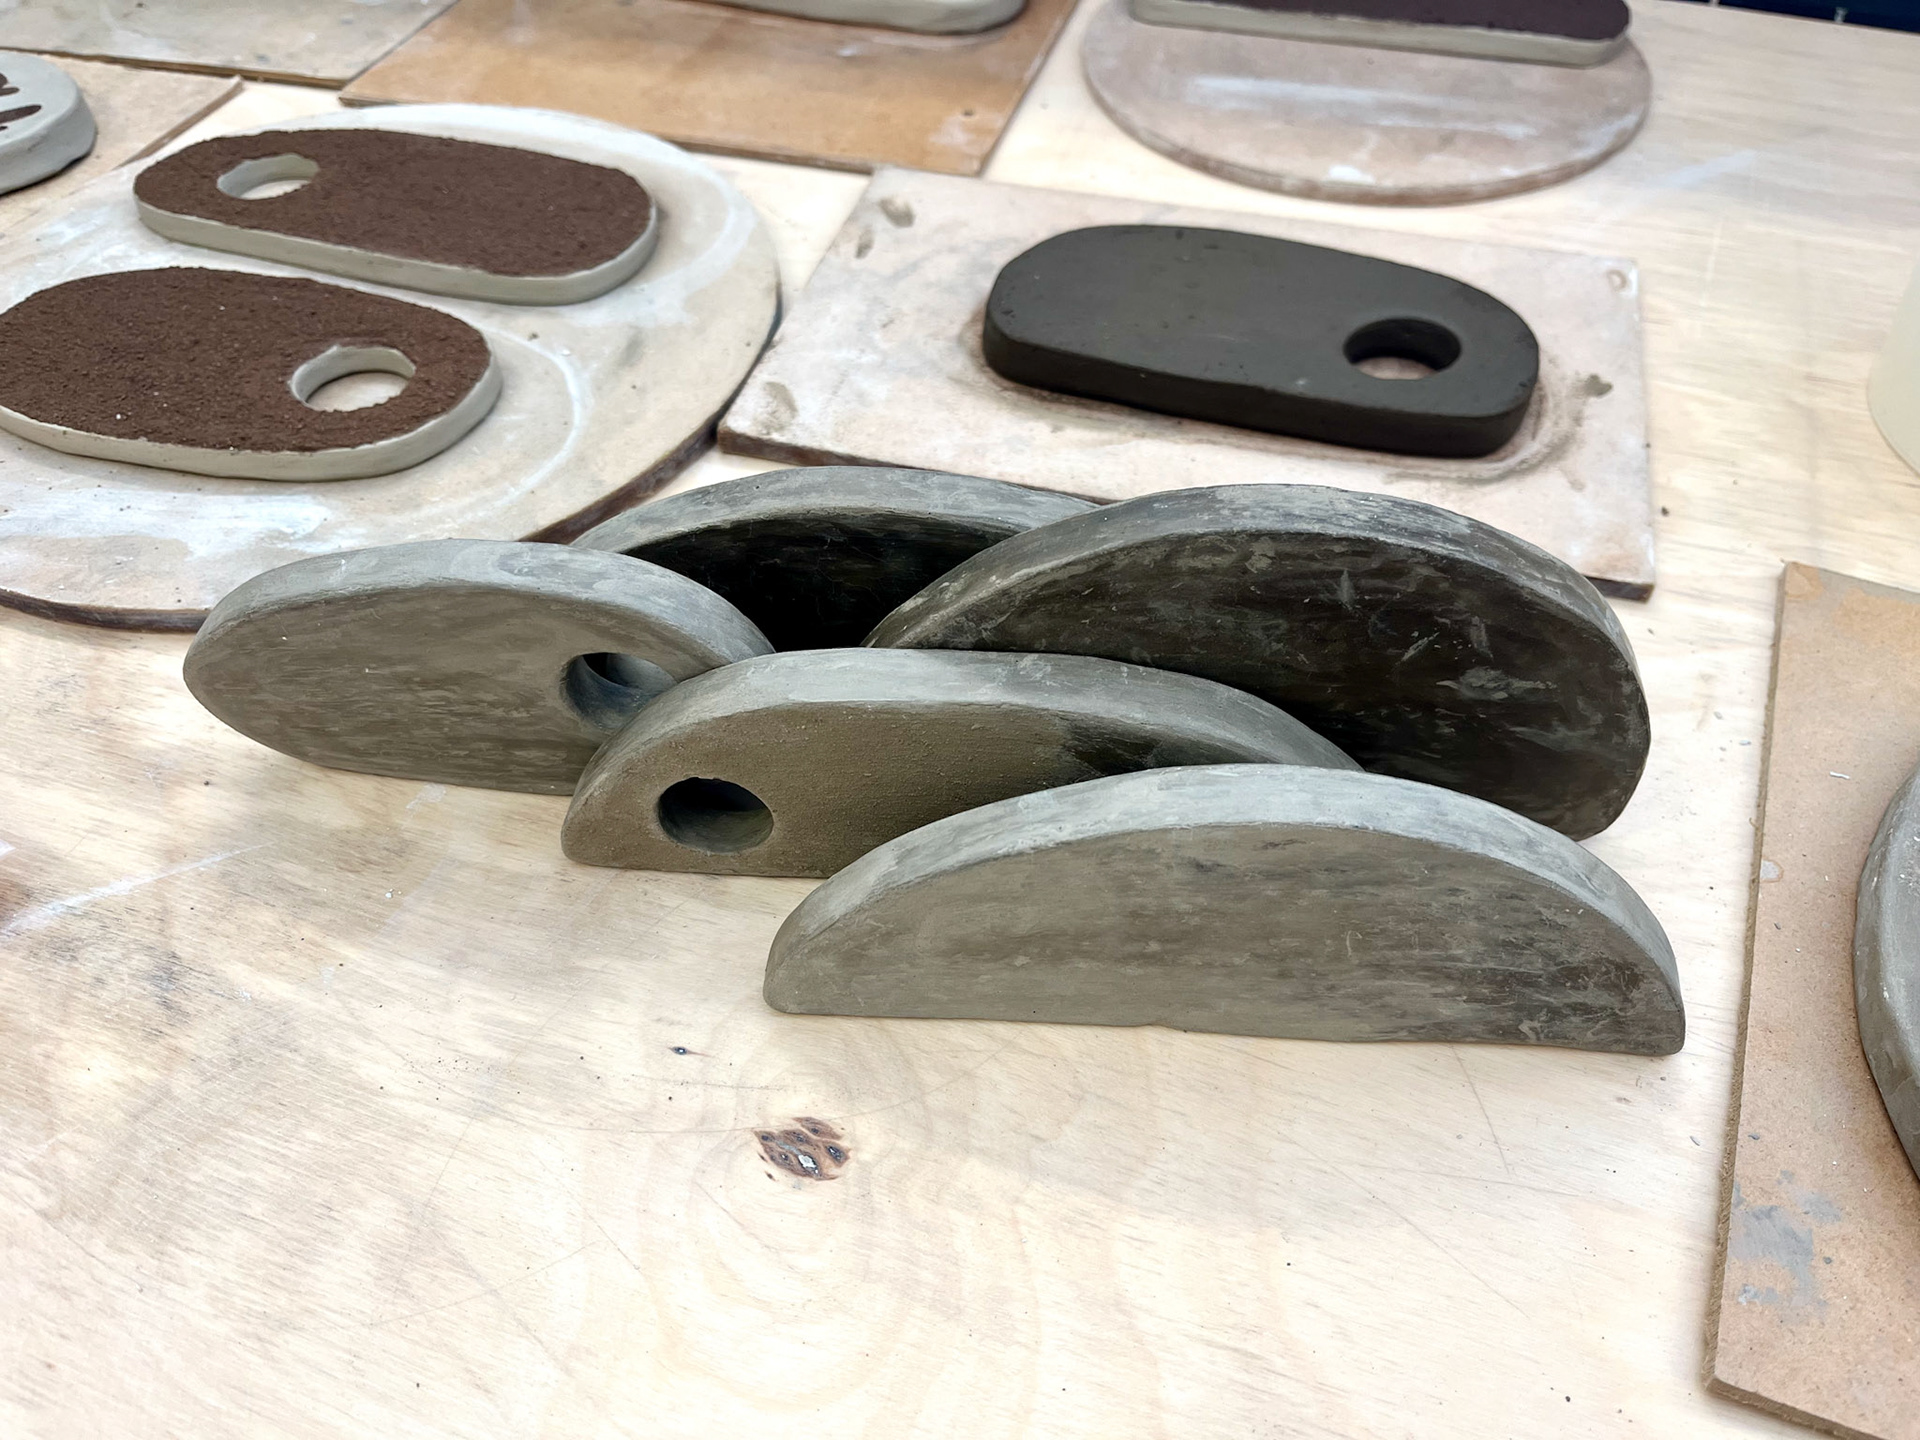
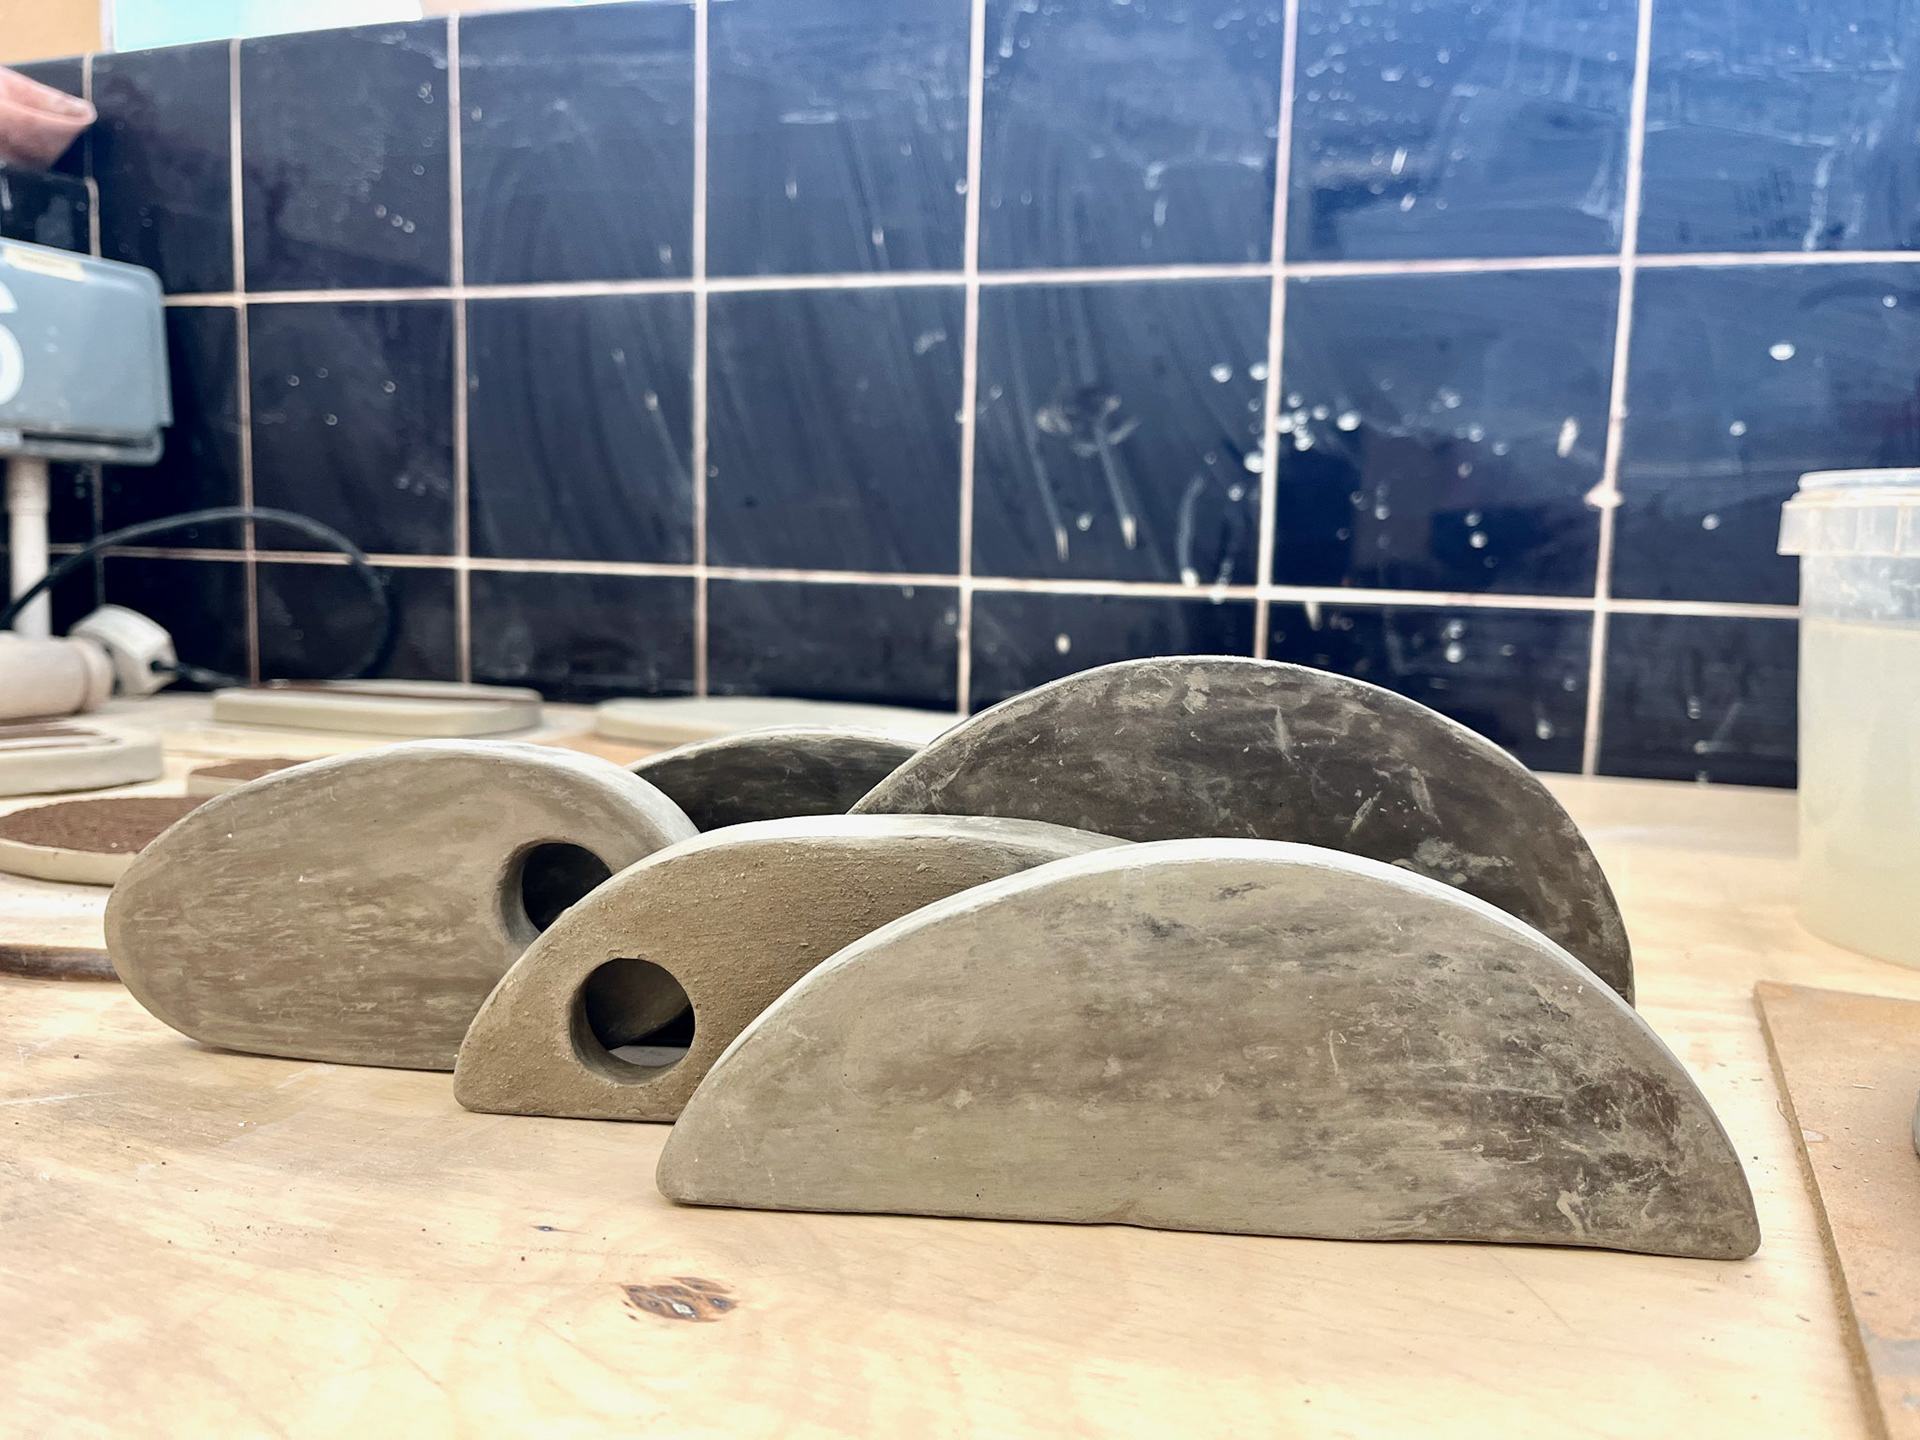
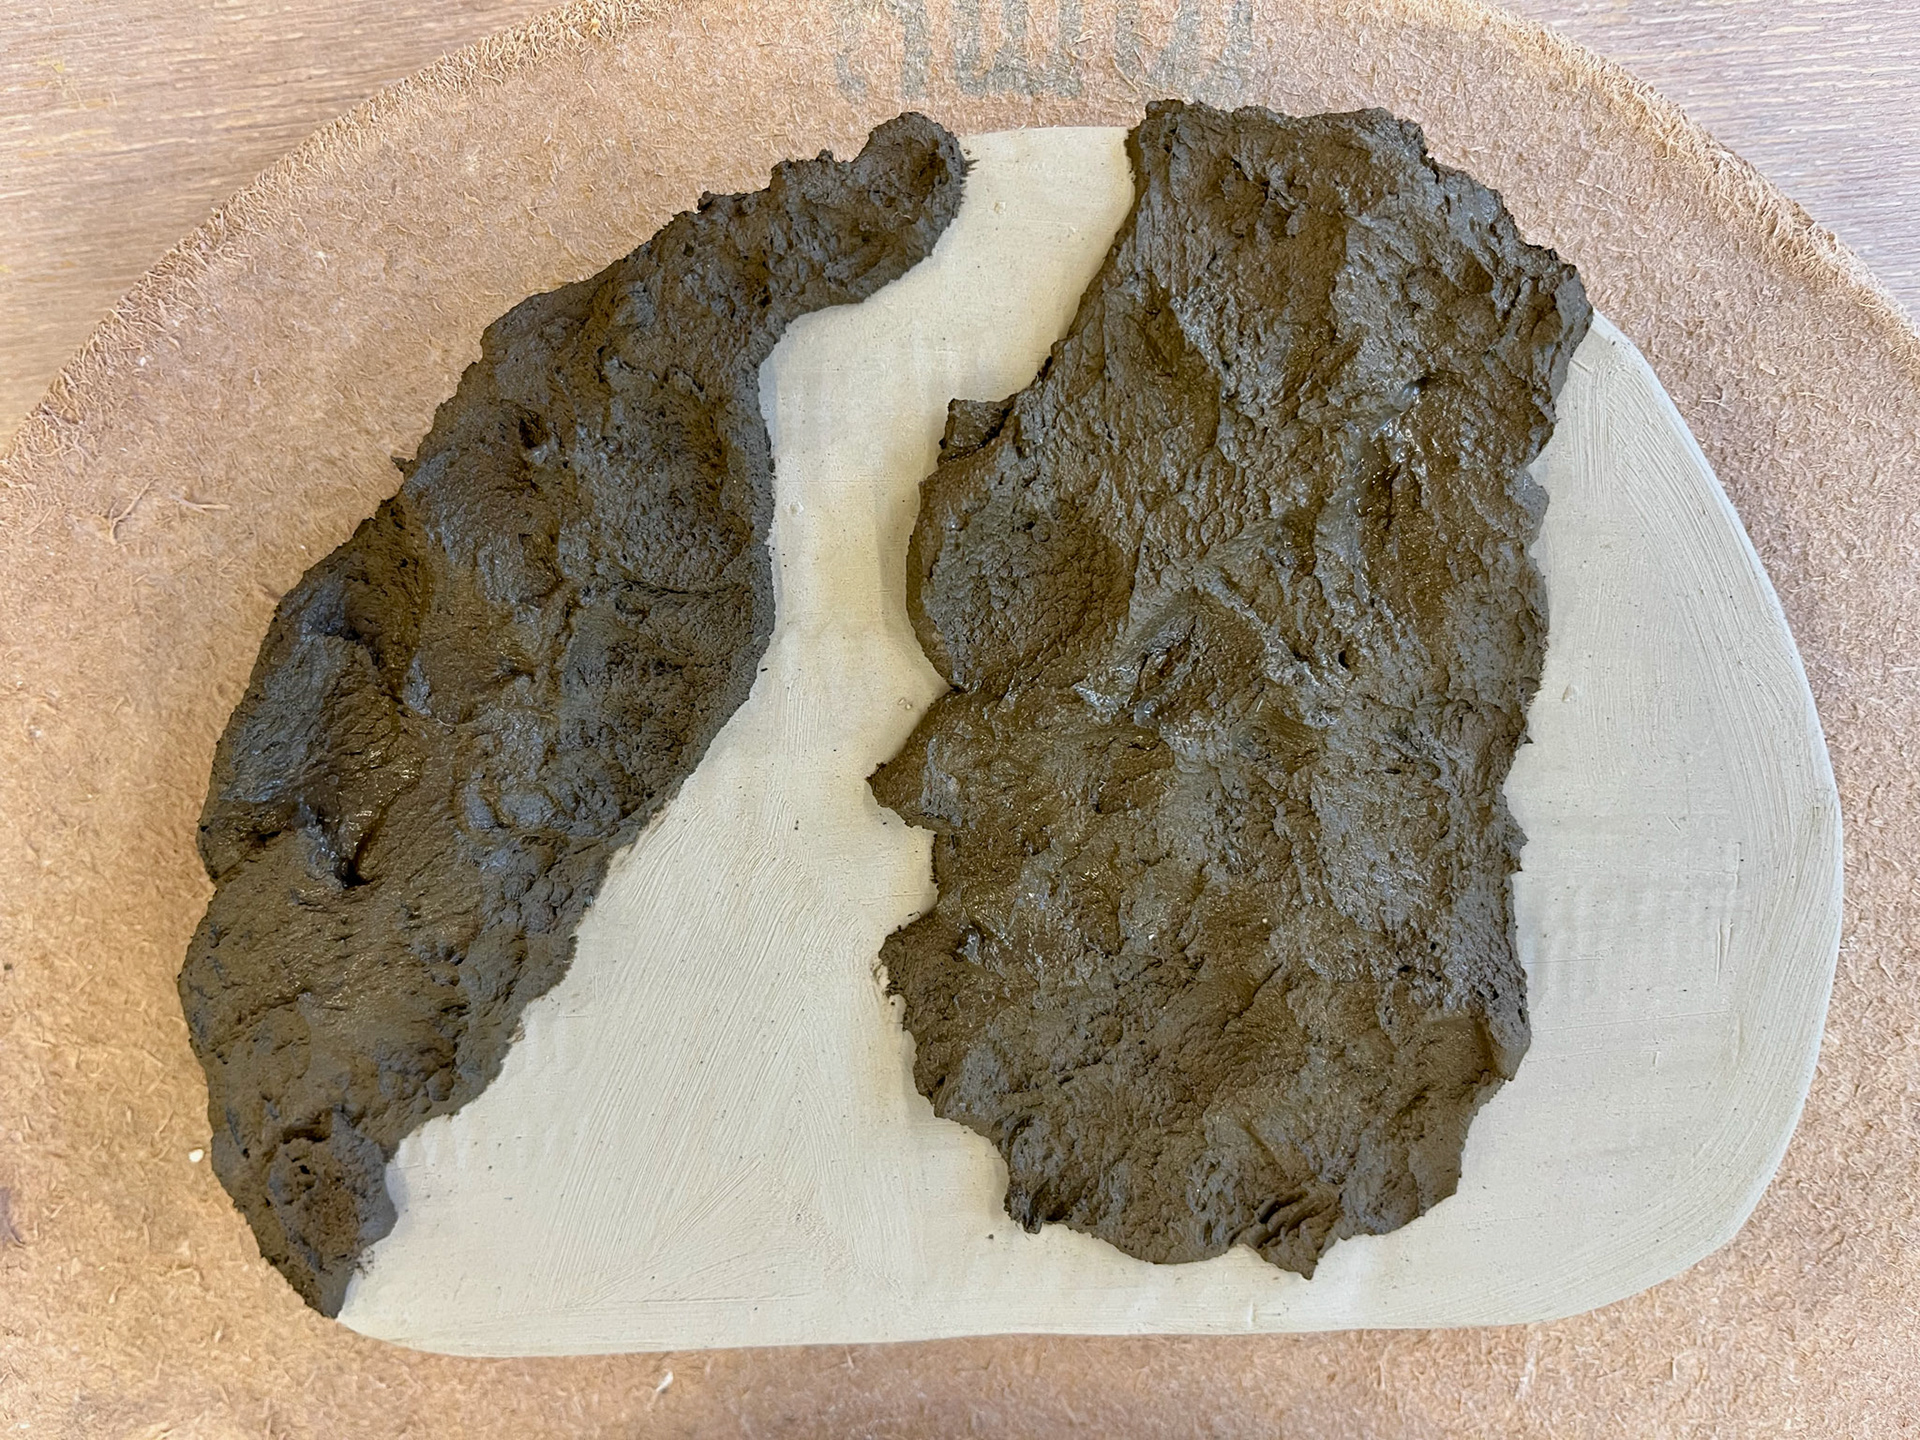
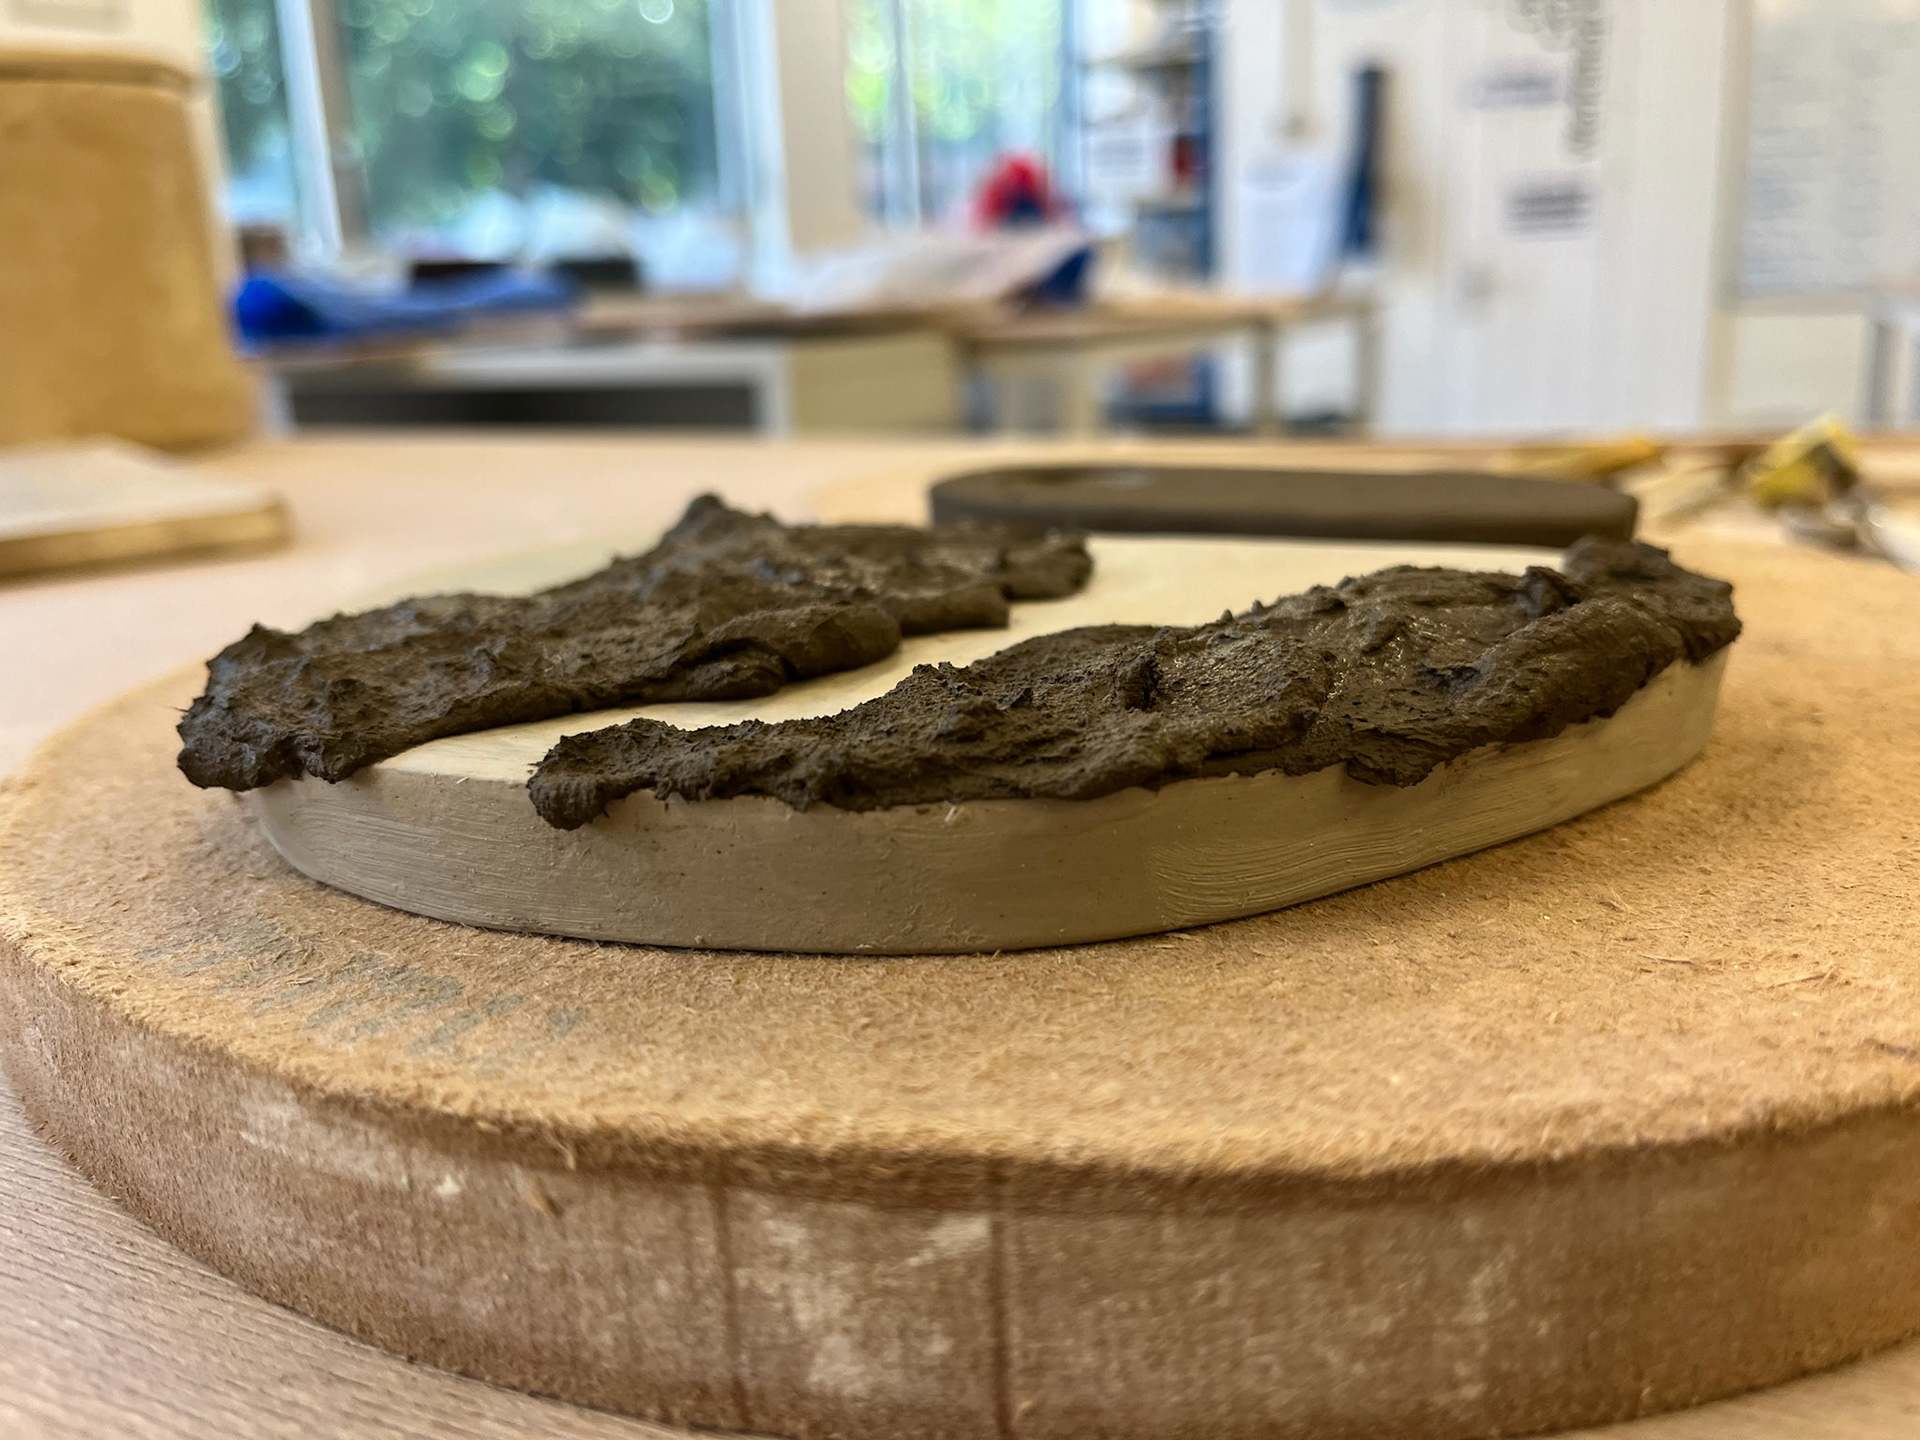
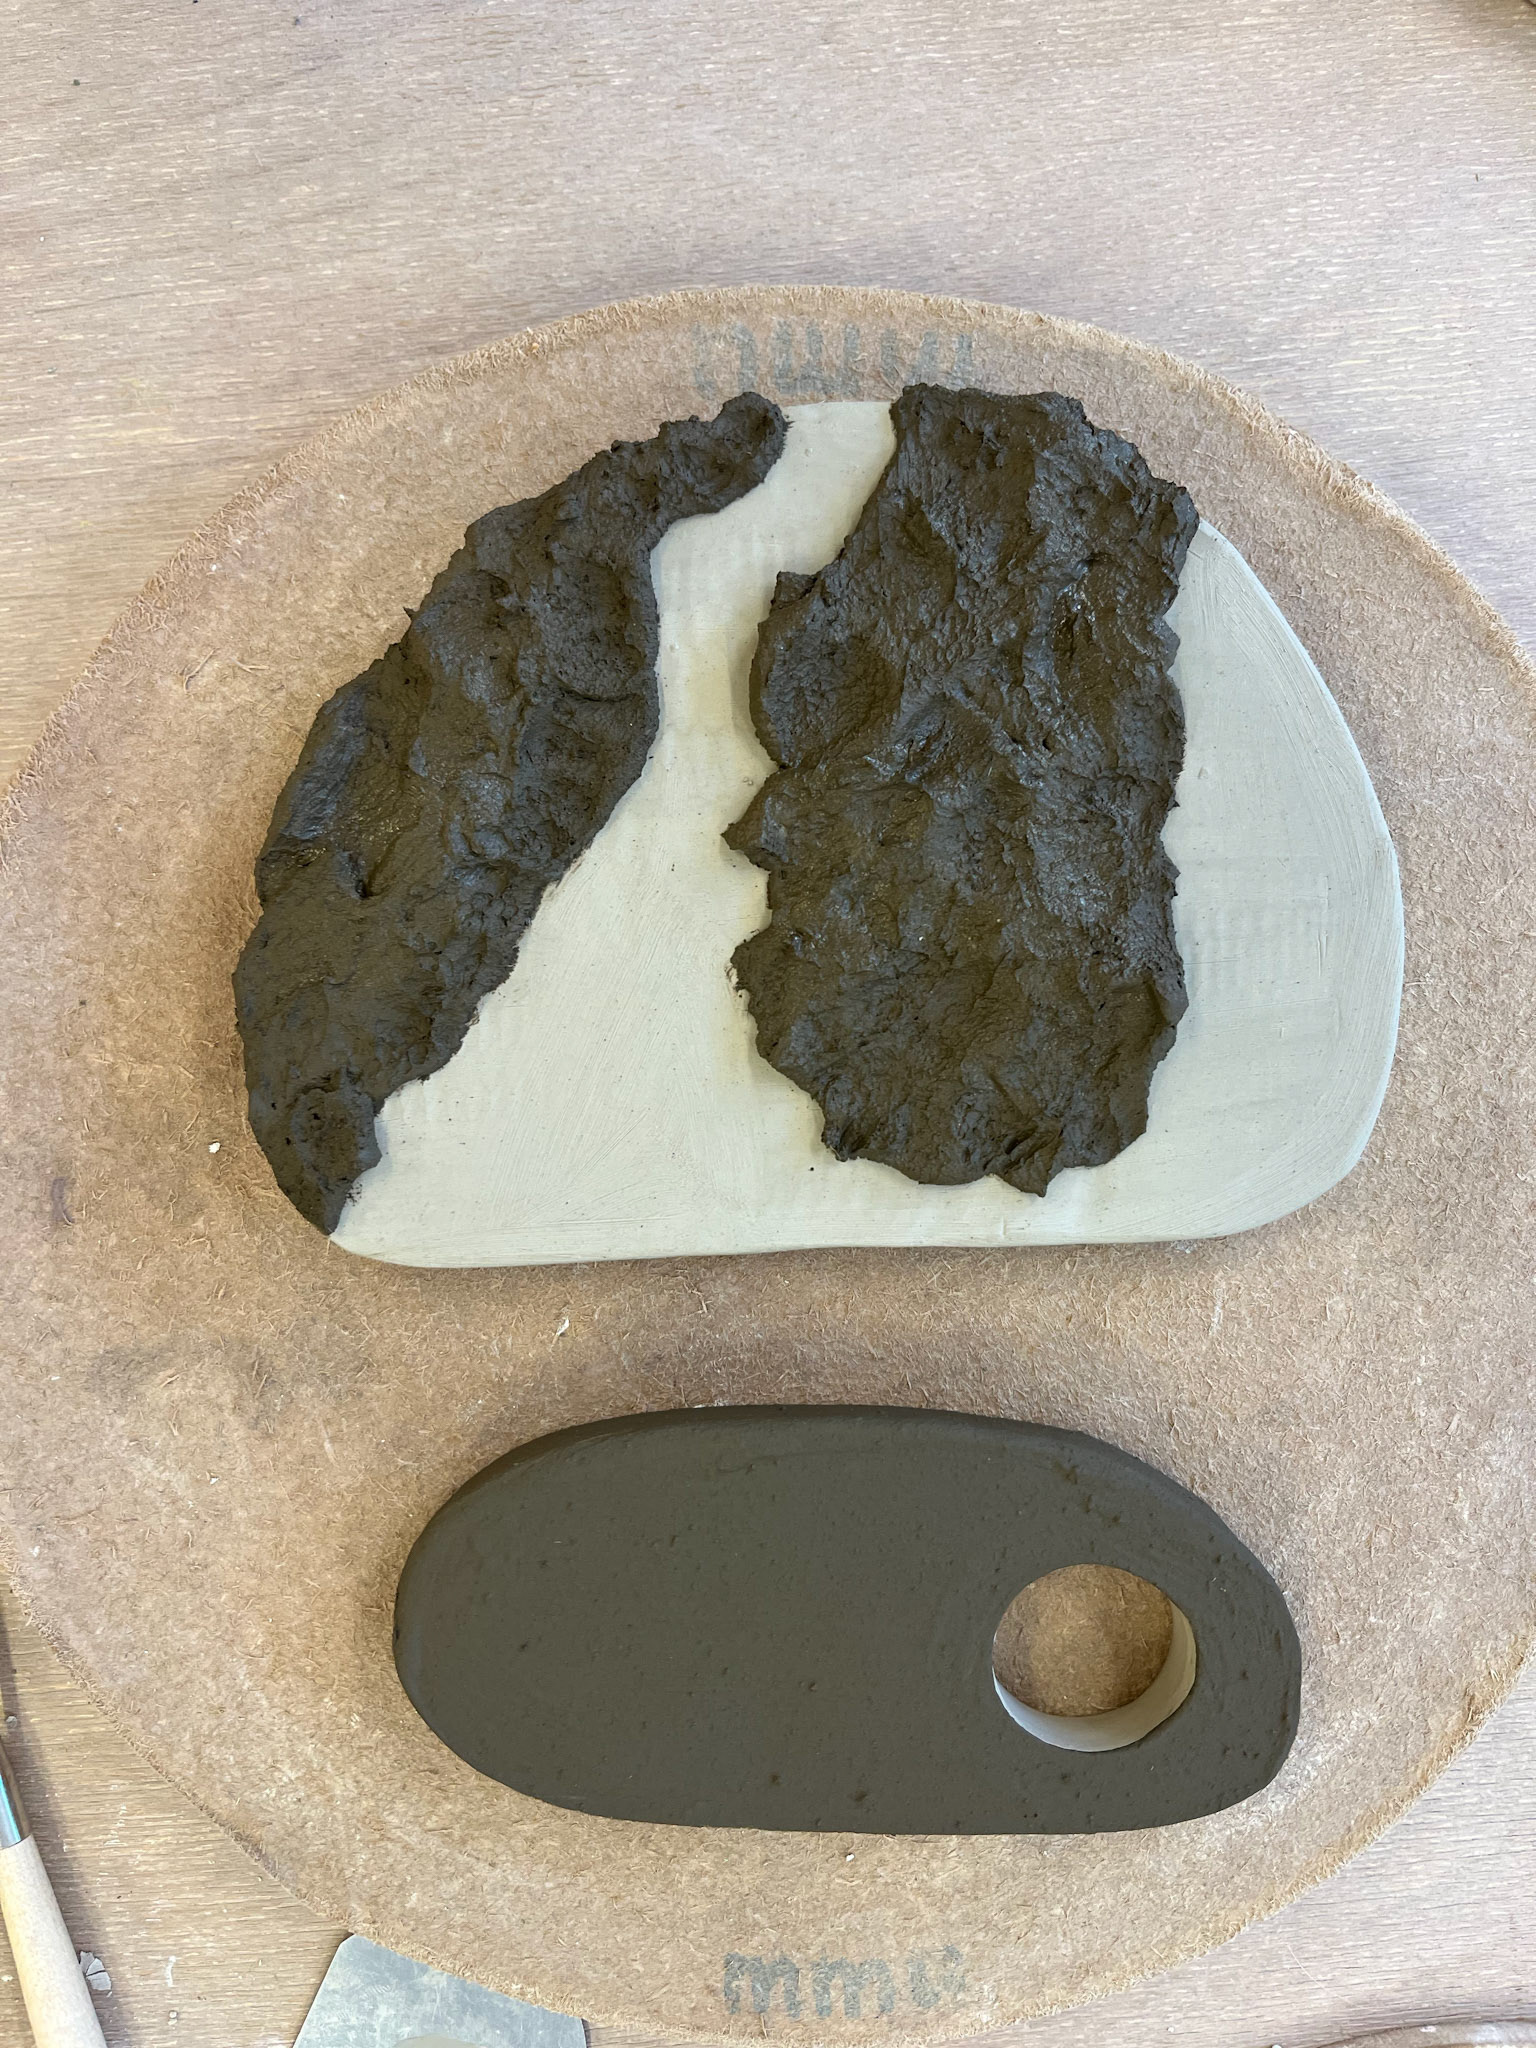
I have made a series of cardboard formers from the negative spaces in the millstones, which I aim to bring back to the studio to use as templates for making the clay. I am going to go back to the basics of making, by working with slab-built techniques of clay, studying the properties of the clay by allowing the clay to stay in its original form, with a little amount of building or handling into sculptural forms.
Making these forms will enable me to get a better representation of the curves and forms of the millstones, so that when I am making the abstracted shapes out of clay, I will have these to base my shapes on. The slabs will be made organically, as it will be my personal reflection on the negative spaces that I see through the stones, however, I will use the formers as templates for the clay to form into the curves of the rock.

Making on location
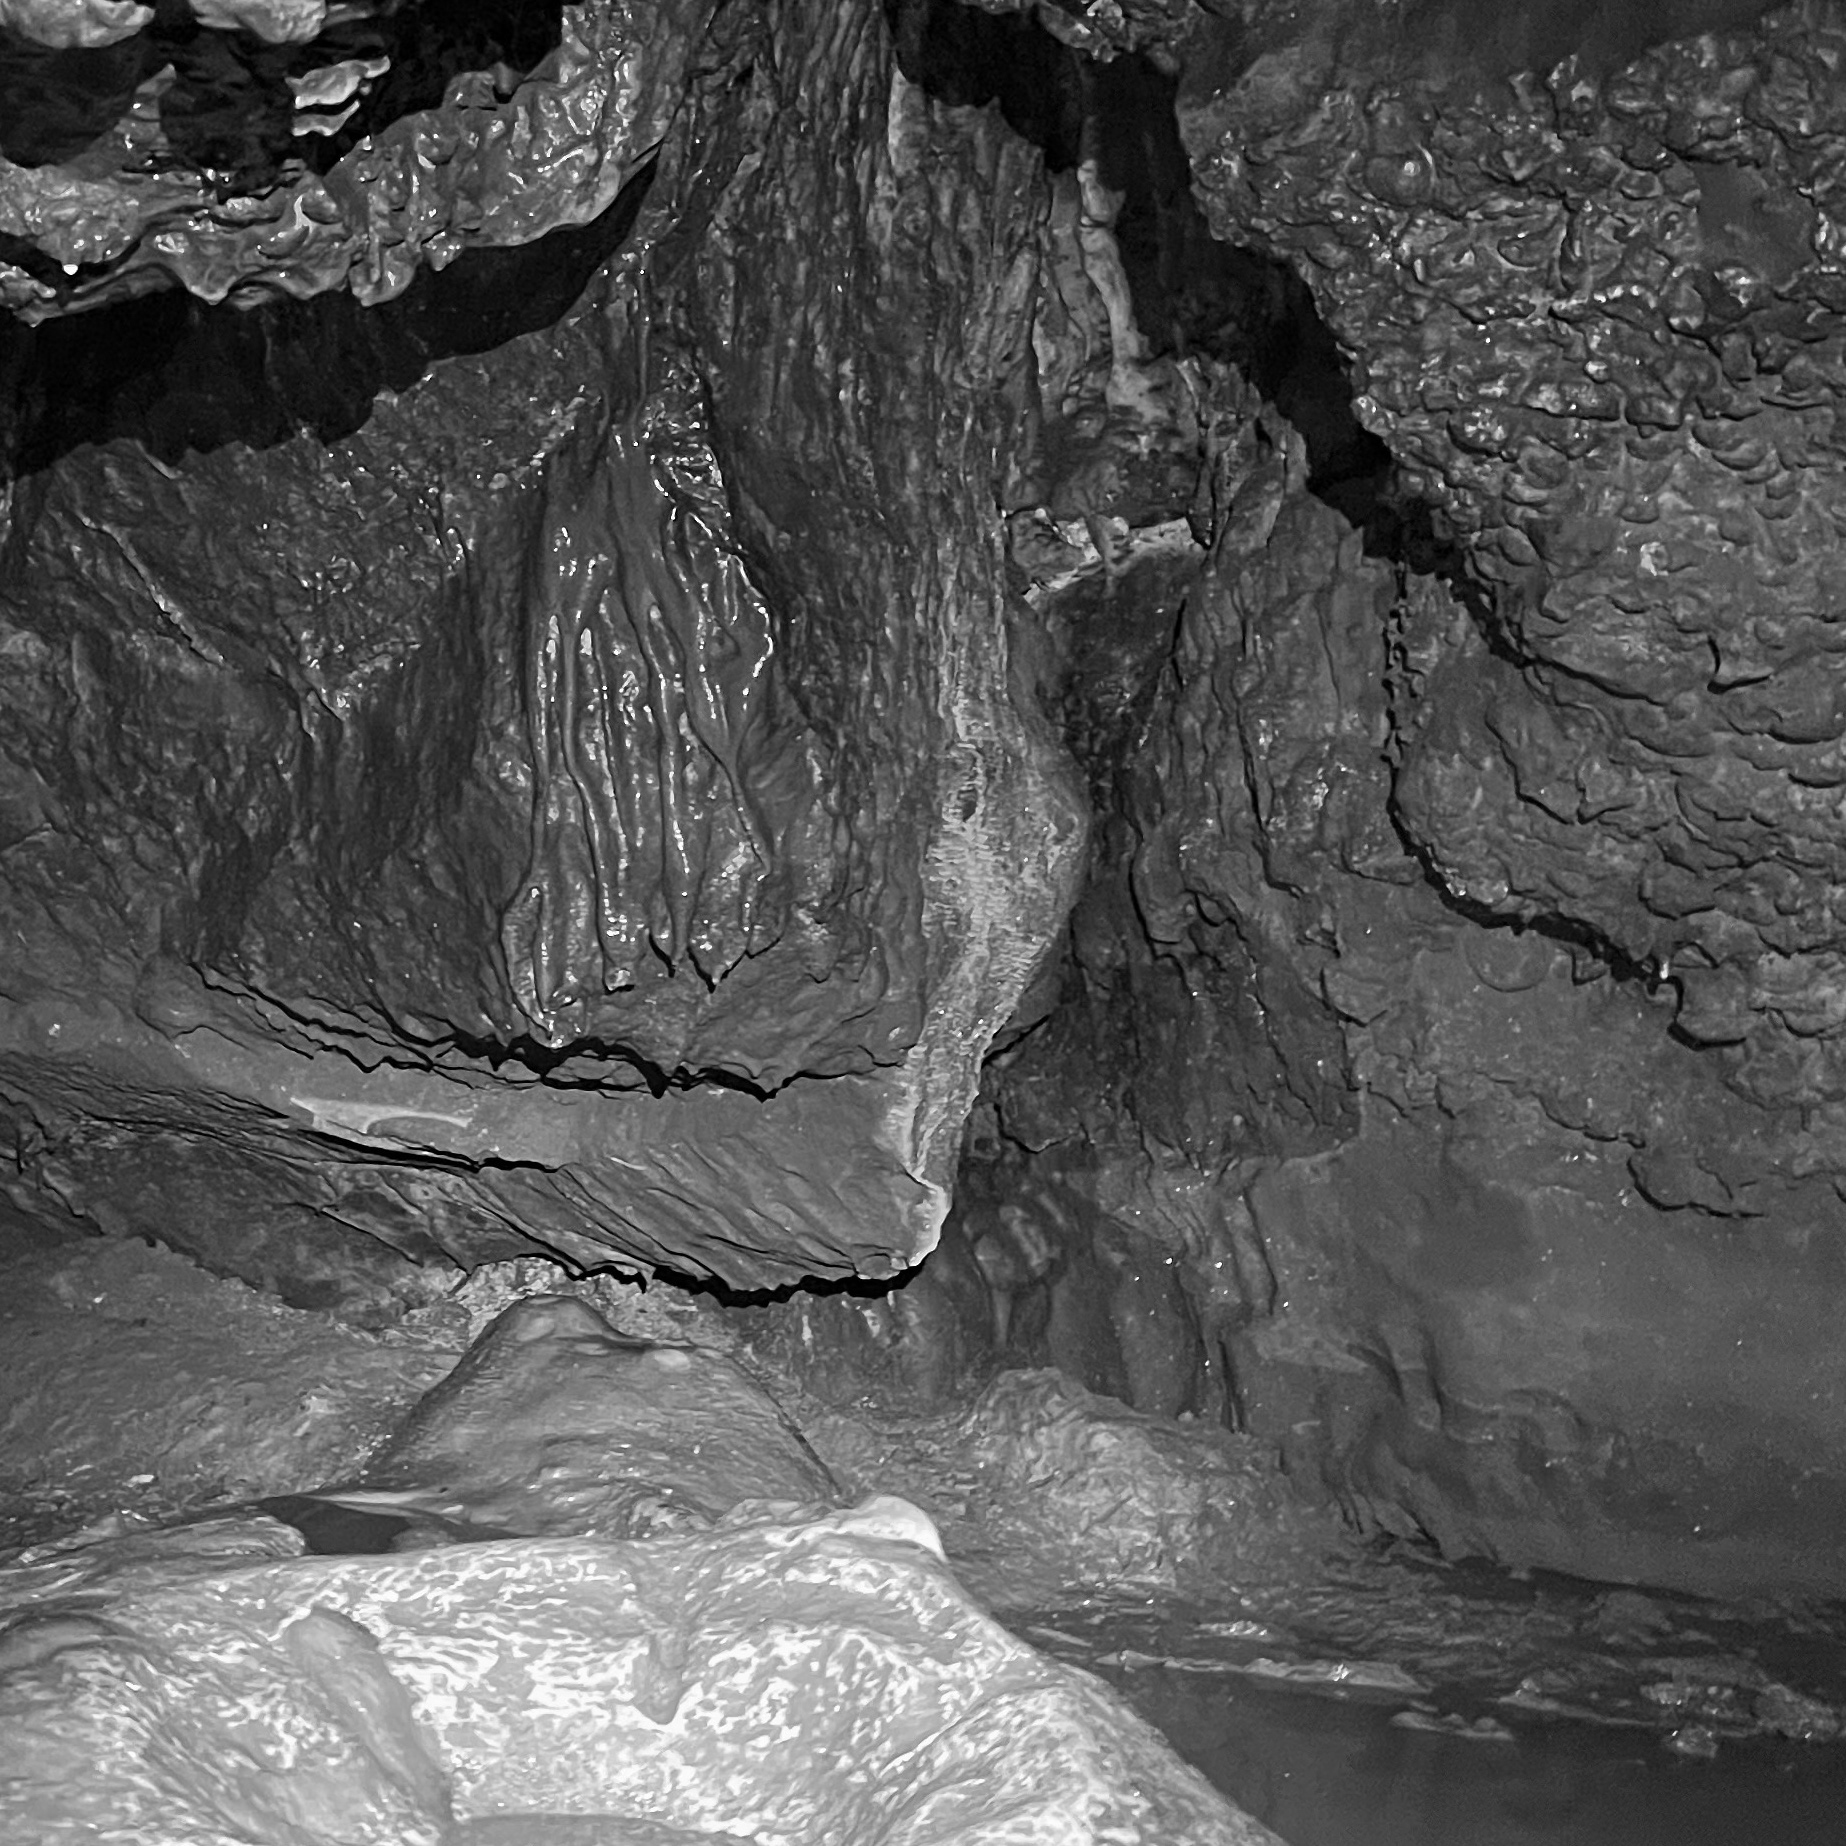
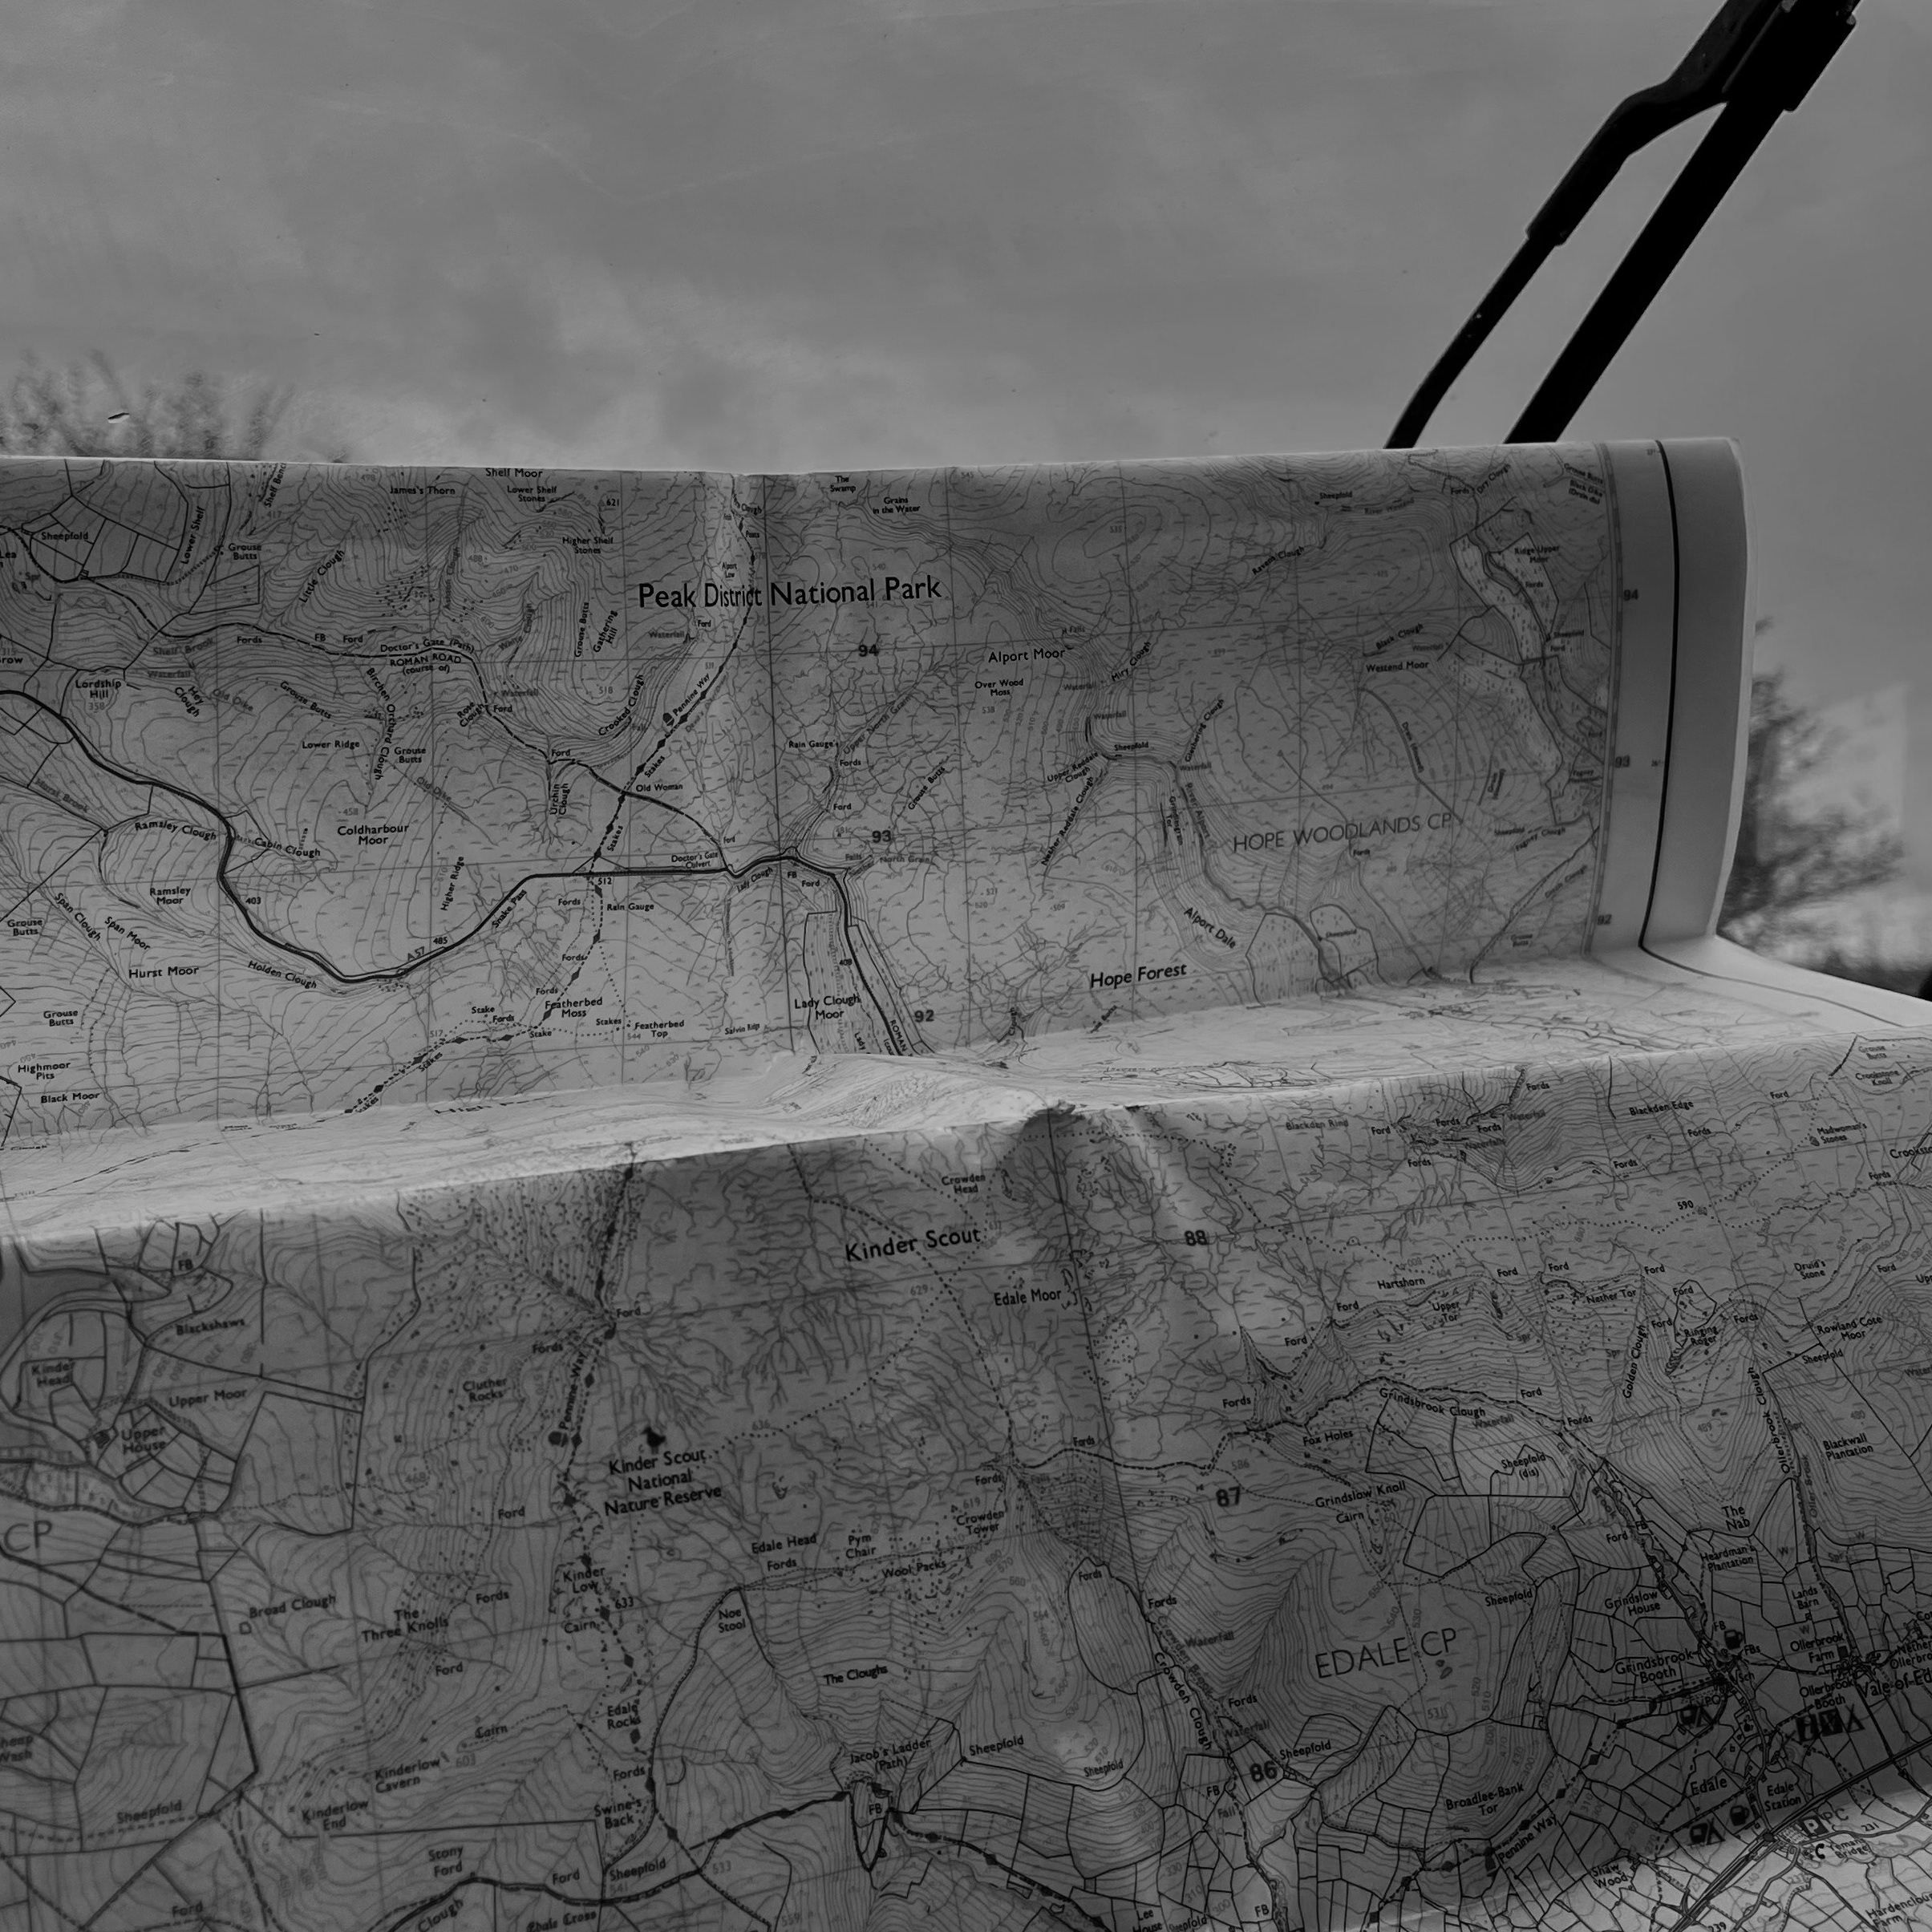
As my practice develops, I come to the realisation that for me, working on location is key. The Peak District landscape is where my inspiration originates from, and where I can work most creatively. Surrounded by trees, stones, rocks and mud, I have space to breathe, to think and to work with the clay. I use simple tools on moss-covered millstones, using clay harvested from a cave nearby. For me, the notion of sustainability, environment and landscape are the key drivers in my project.

In my proposal for this unit, I aimed to investigate alternative ways of firing in order to make my practice as sustainable and location-based as possible. However, due to not having access to and the opportunity to build my own alternative kilns, I made the decision to use the electric kilns provided by the university, in order to spend my time more productively.
storyboard
This is how I see my practice flowing for the next few weeks and how I see the development and structure of my project going. Having a mix of being out on location making whilst also working with my clay back in the workshop in Manchester will mean that I can have multiple firings and track the progression of my work.

Storyboard of filming
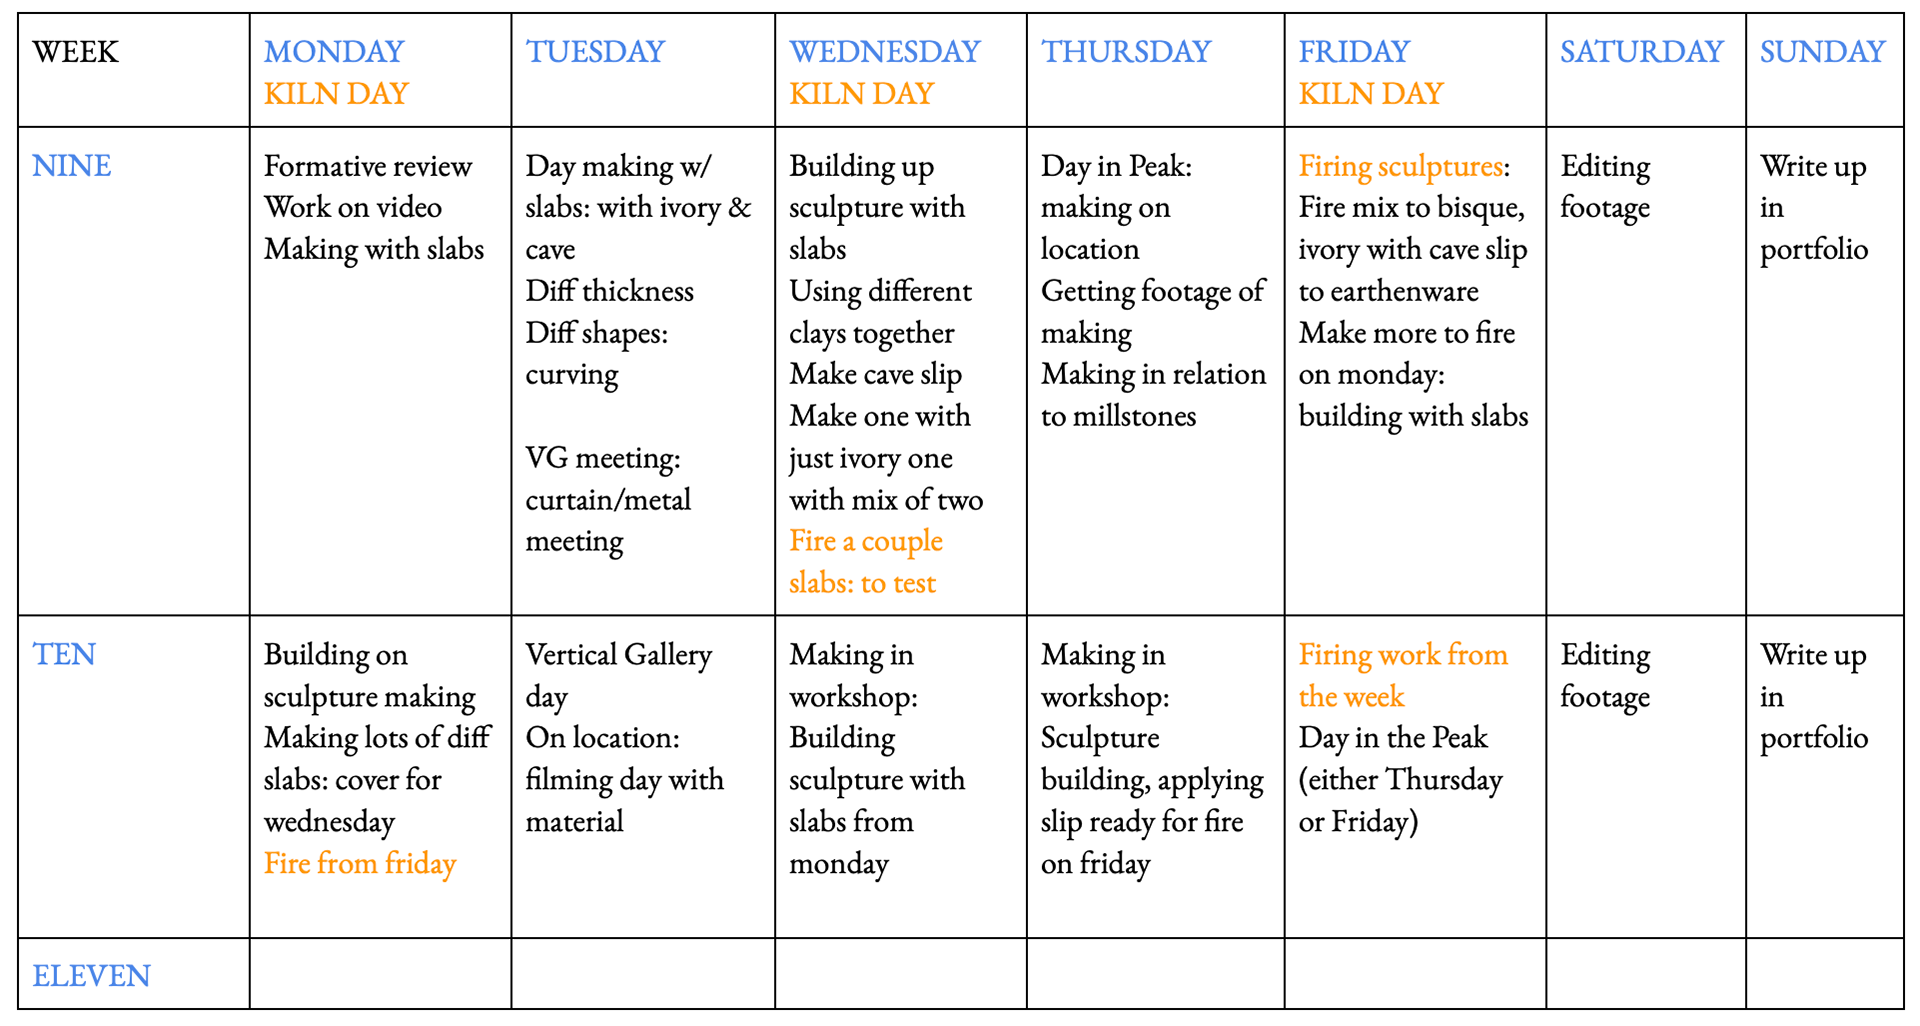
Timetable for next few weeks
film on location
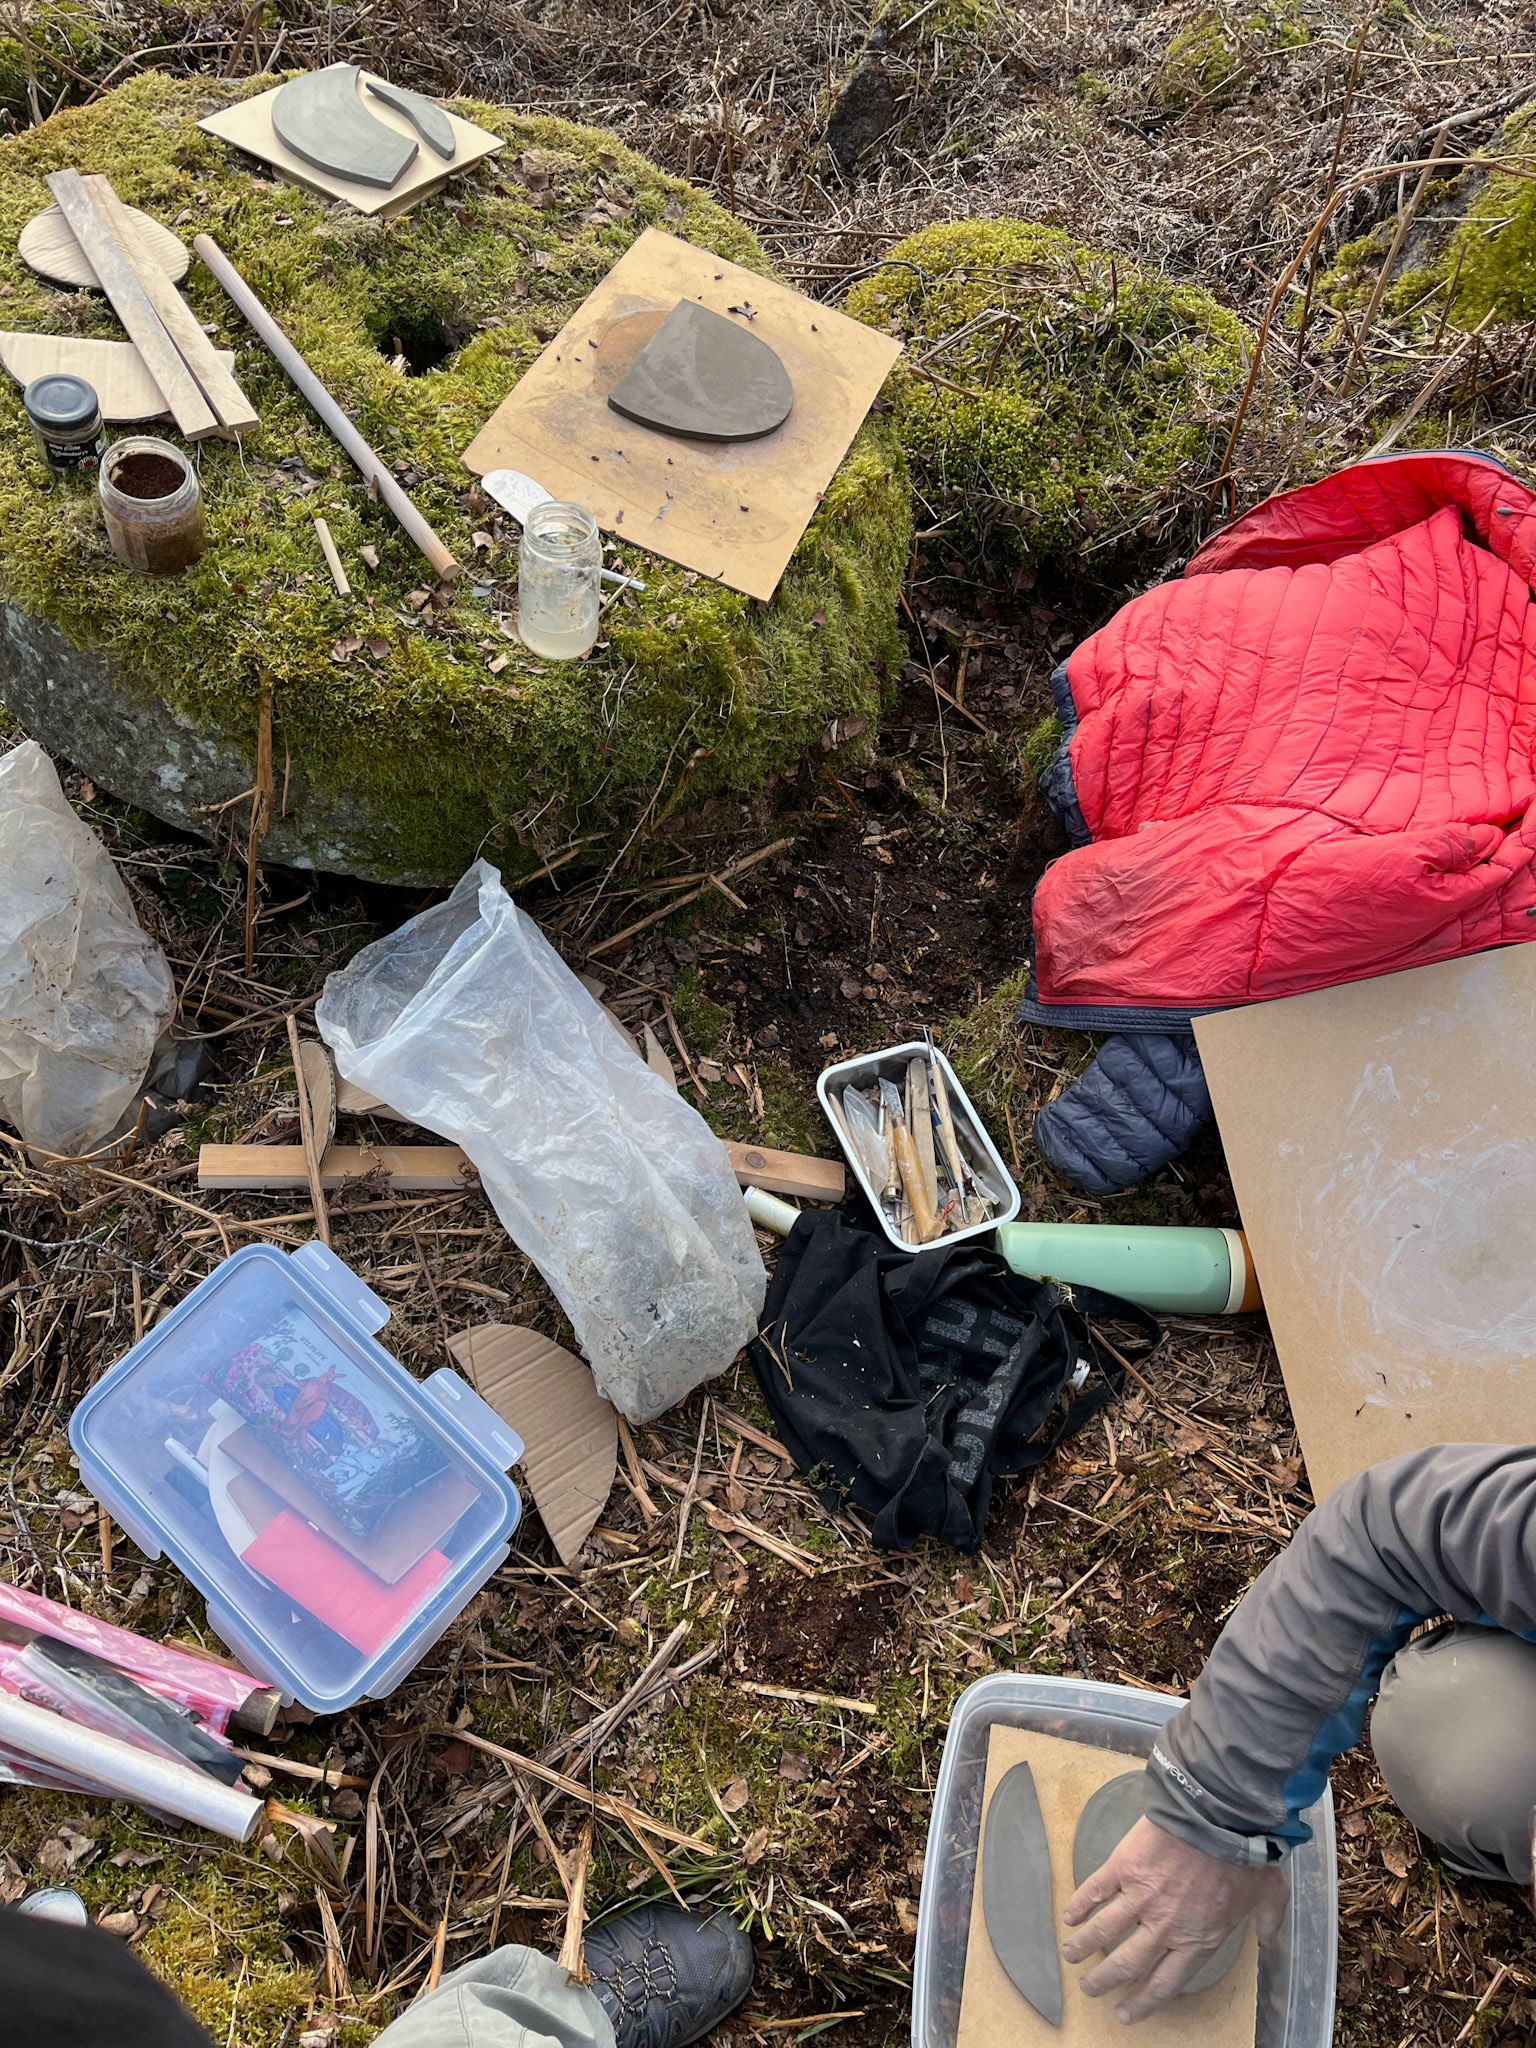
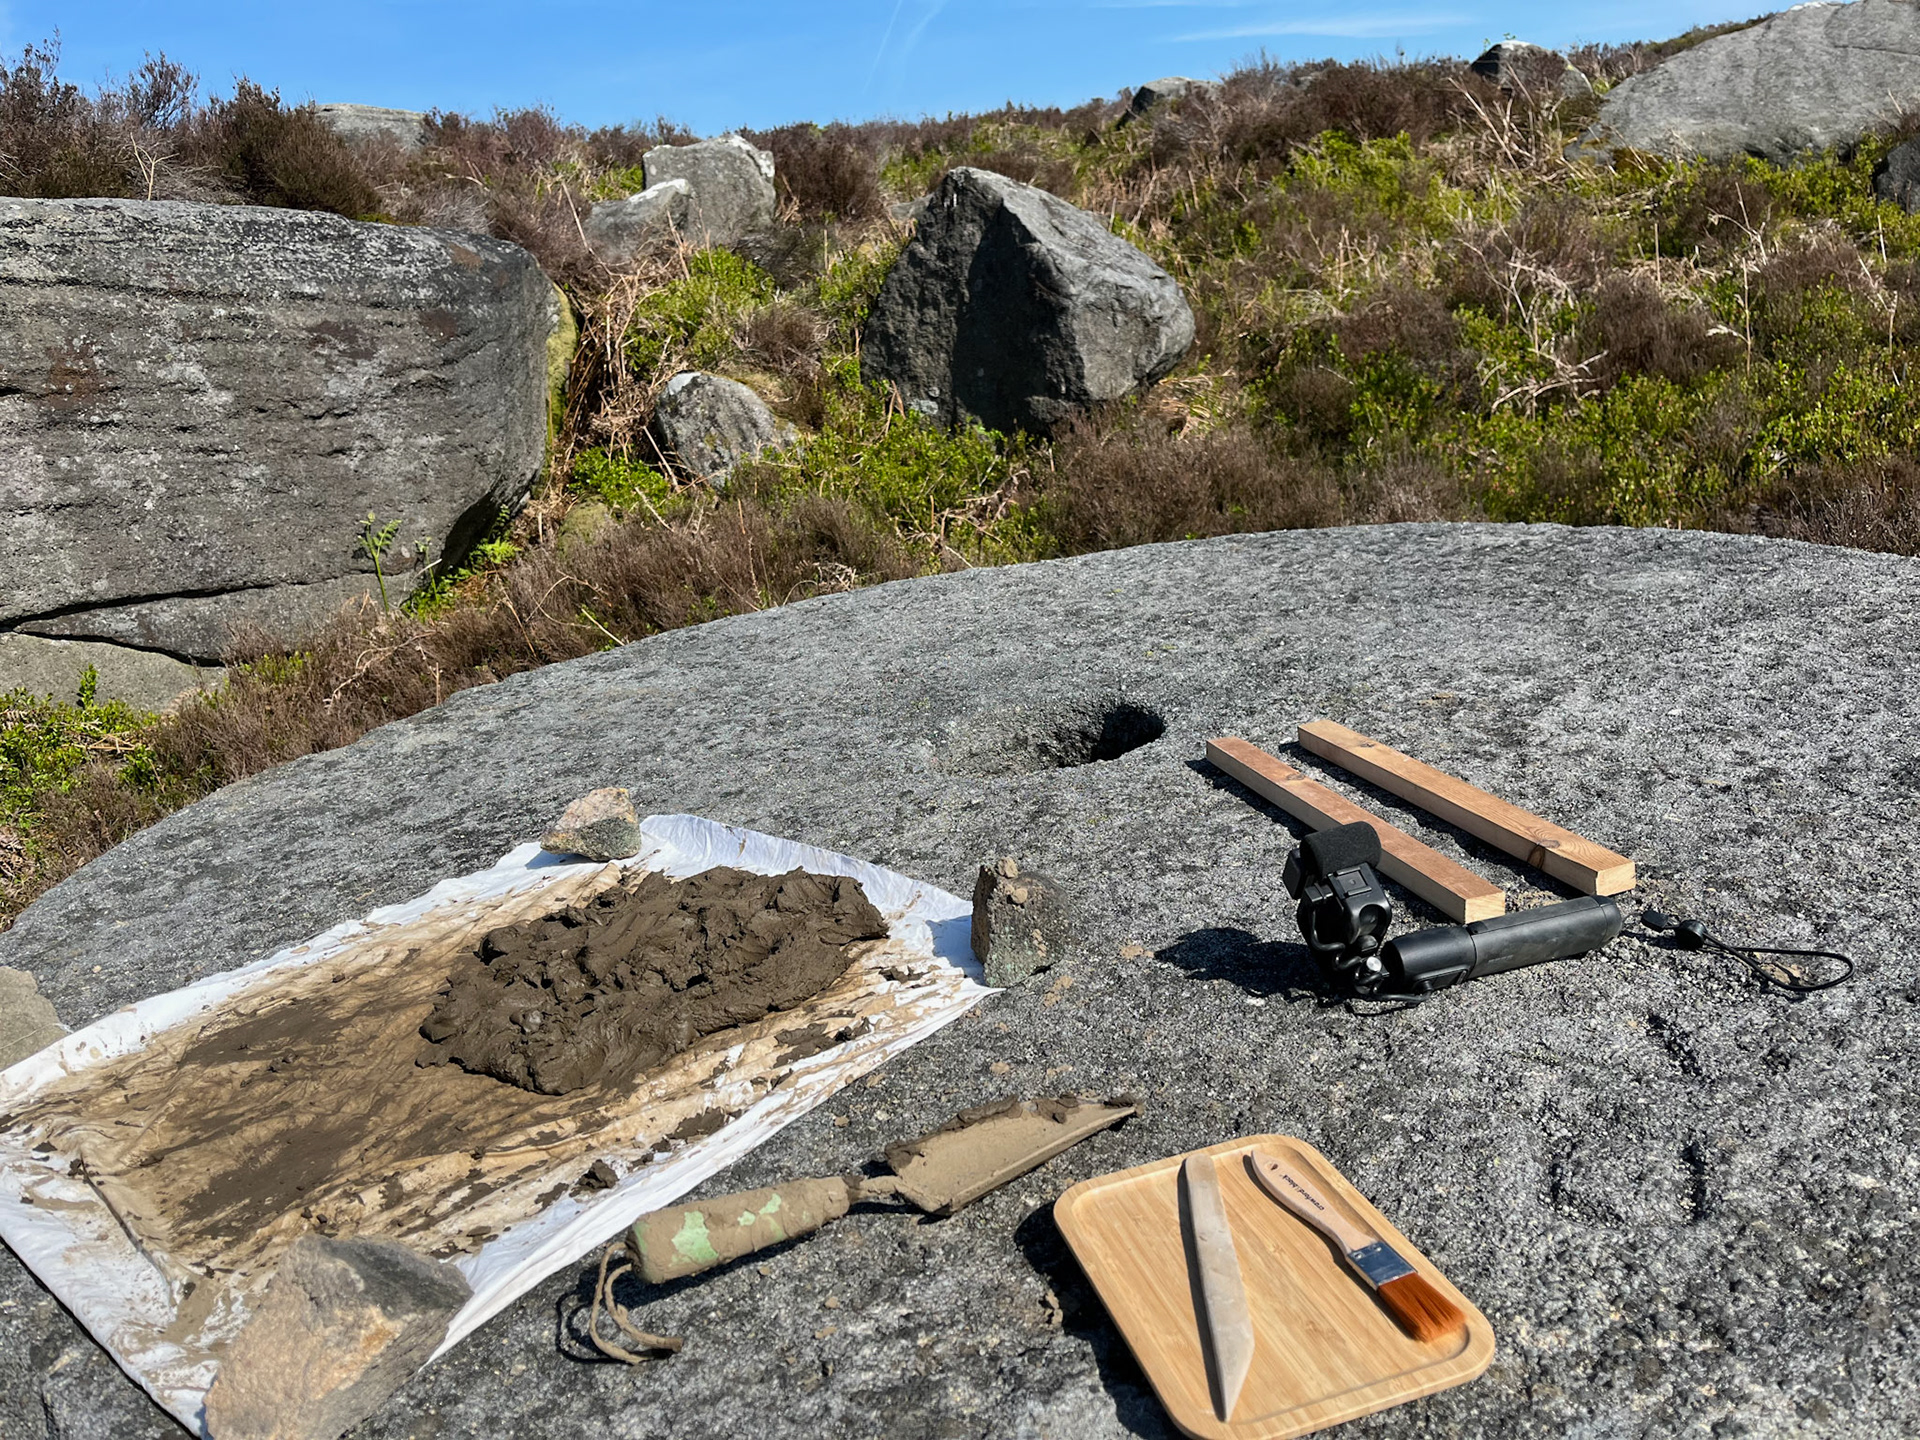
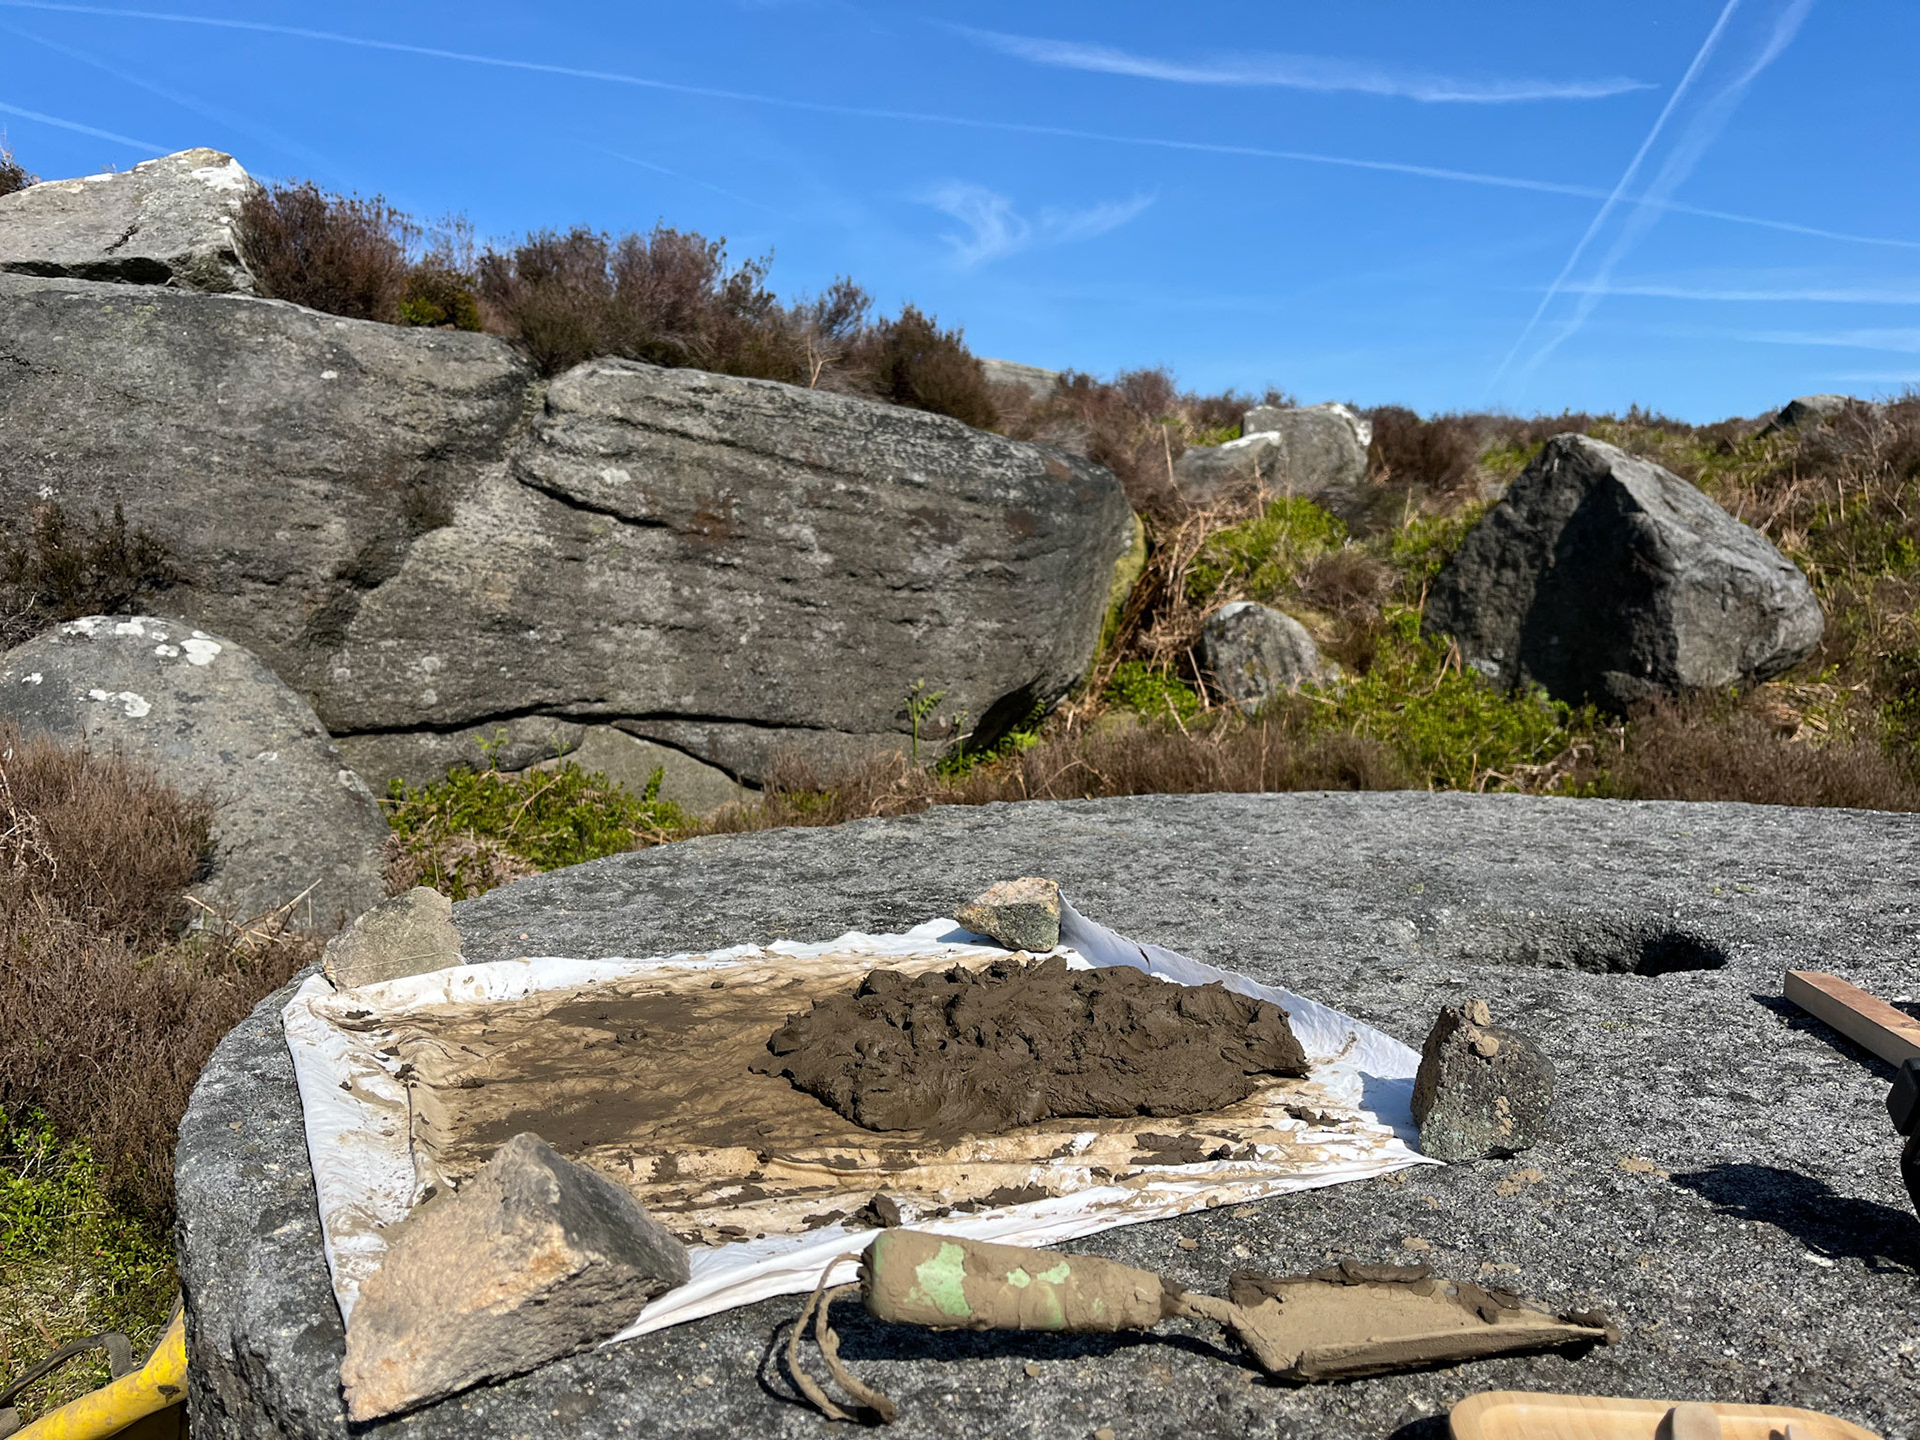
This short film shows how I am using the land of the millstones as the basis for my making. I brought some cave clay and clay tools into the landscape to start working with. Setting up my workstation in the landscape, using a millstone as my working table, creates a true connection to the land that my work takes inspiration from.
transportable workstation
I have continued to make on-location work in the area where I am getting my inspiration, making work on a millstone. I have made a transportable workstation to take wherever I go. It includes multiple wooden boards of different sizes to make and roll out my clay on and use to transport my clay, a wooden rolling pin for rolling out the slabs, different thickness levels to roll my clay at different thicknesses, and my clay toolbox, which includes a knife used for cutting out the clay from my handmade shape formers.
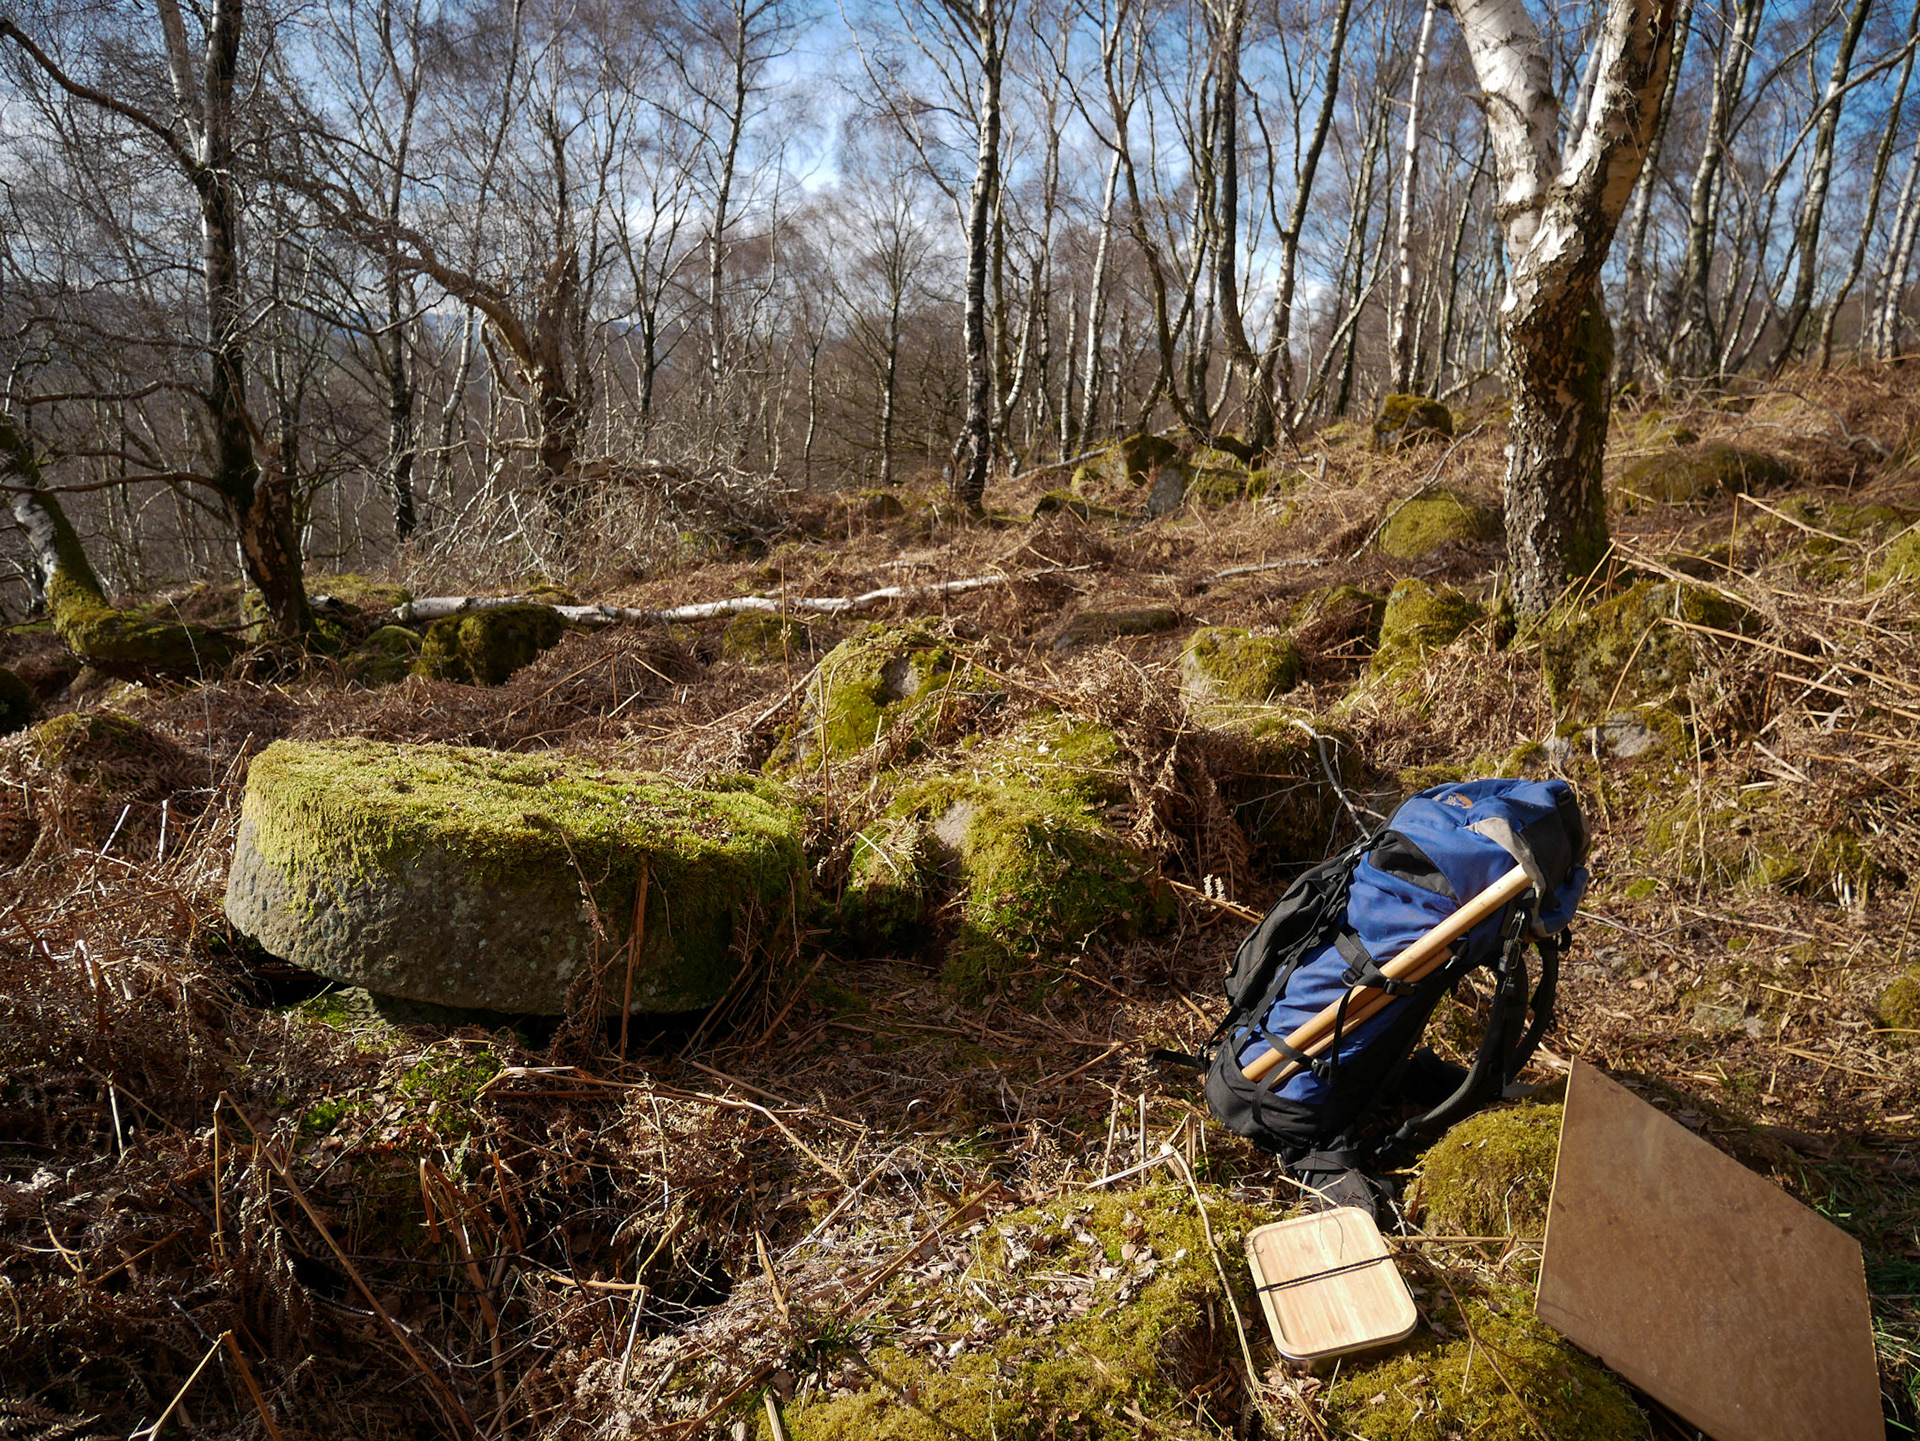
workstation set up
This time-lapse shows what setting up my portable workstation on location is like. Ensuring I can carry everything in a backpack means that I can work on building the clay slabs wherever I am gathering my inspiration. Setting up my station on the surface of a millstone with the view of the millstones on which I am basing my curves and shapes provides extensive circularity to the reasoning of my project's purpose.
This, in turn, lends well to thinking about bringing this into a workshop environment in the future. Combining this project with my collaboration, the idea of leading a land-based workshop for people to have the opportunity to explore the hyper-locality of areas of the Peak District through working with local materials and clay-building techniques. A transportable workstation allows this workshop style to be brought into any environment and landscape.
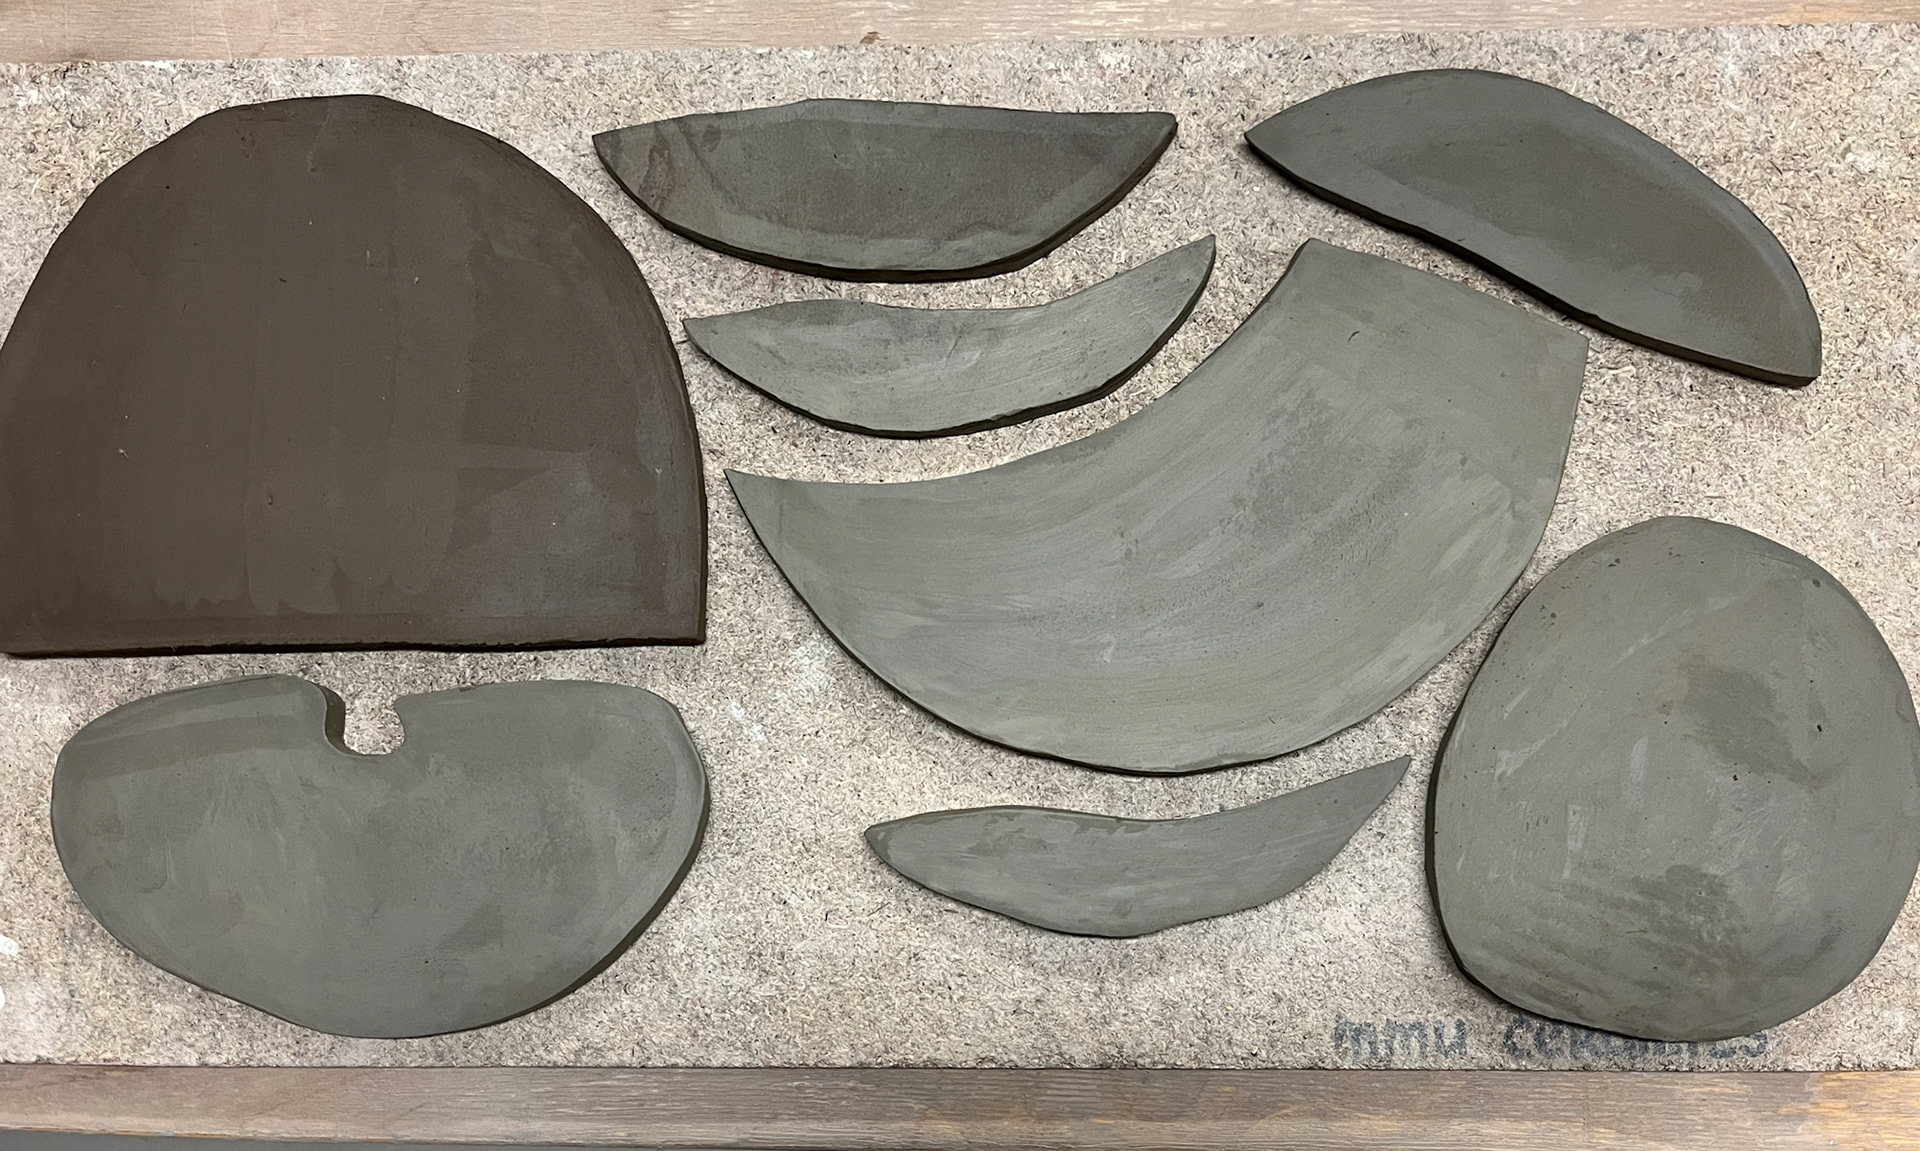
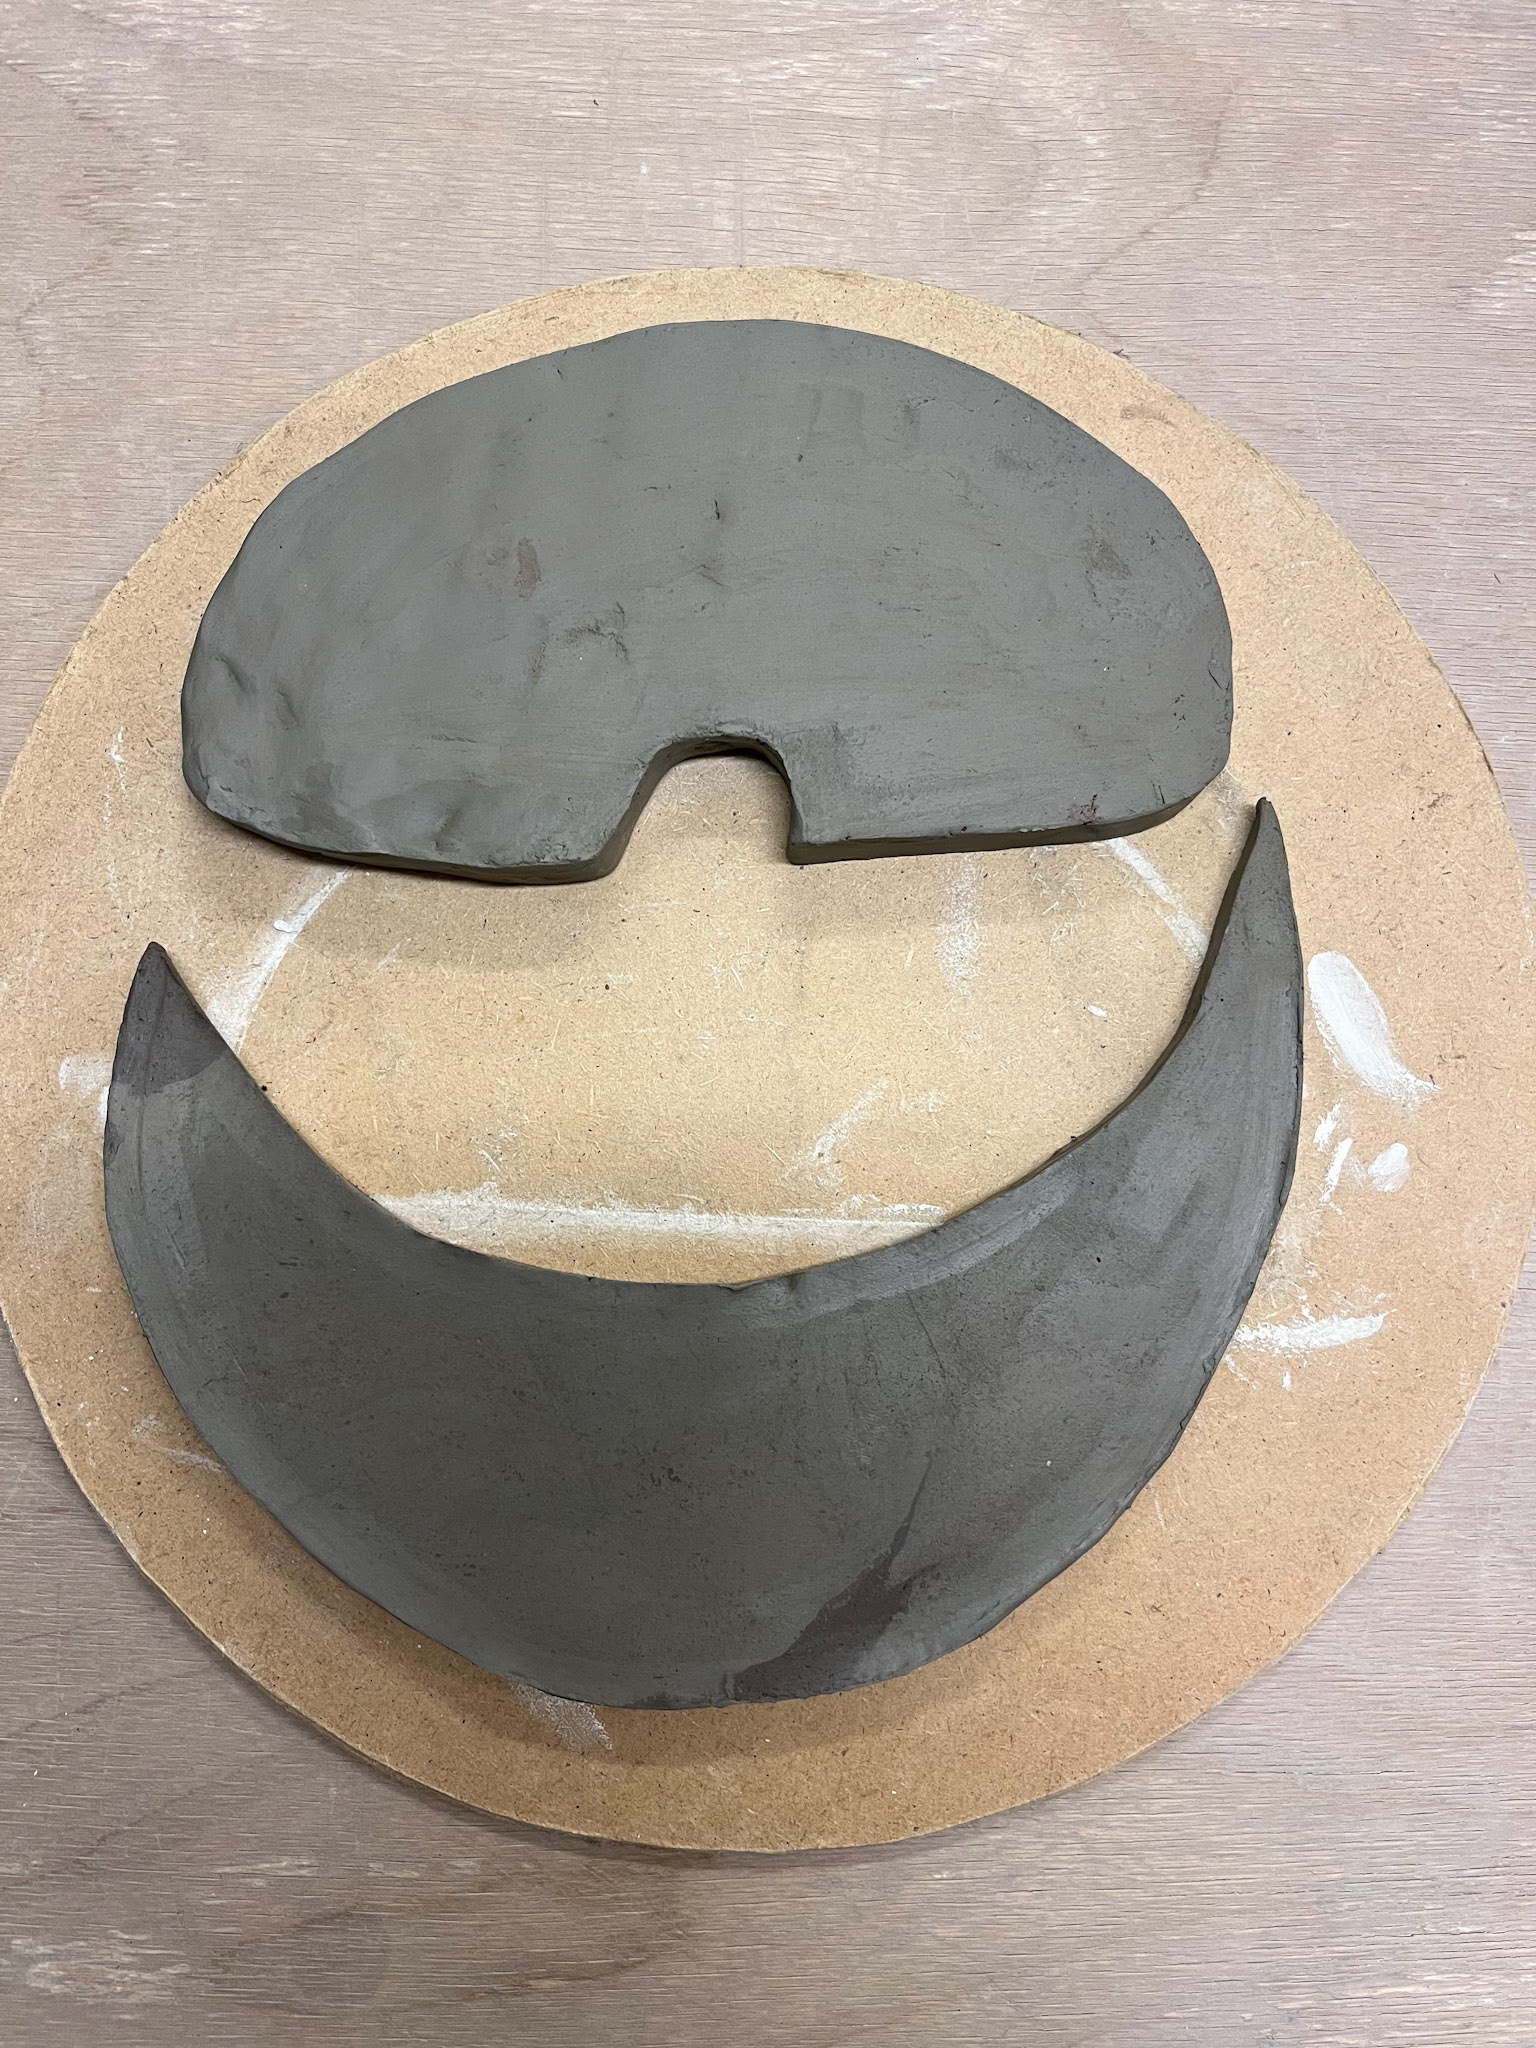
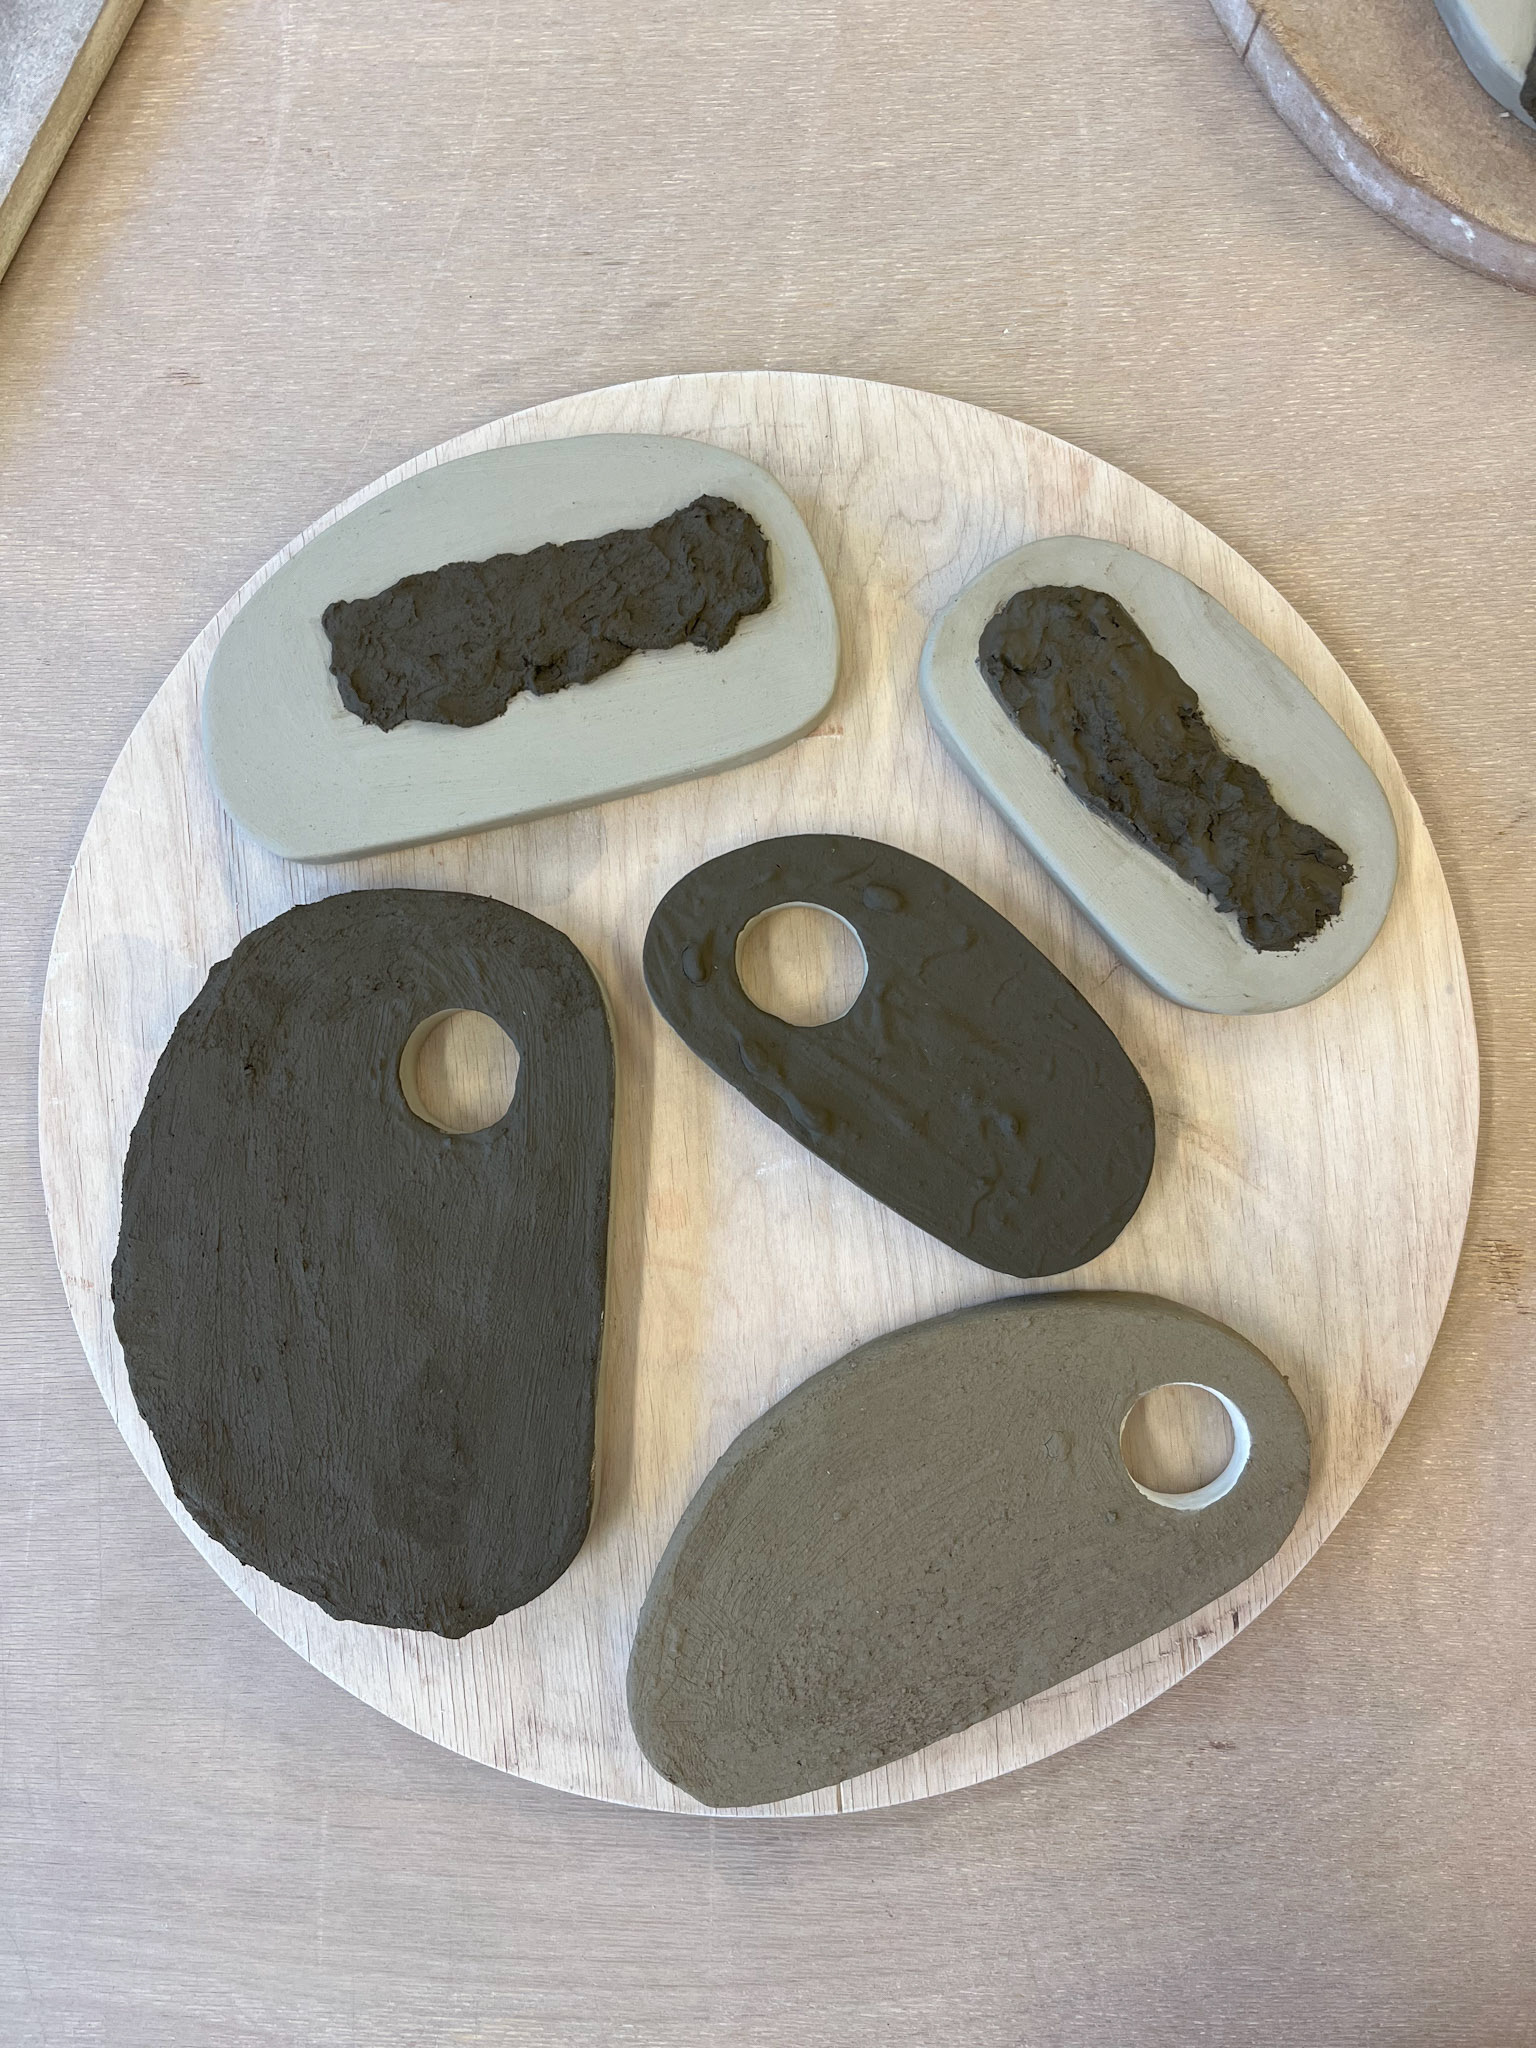
Building Slabs- pre-fire
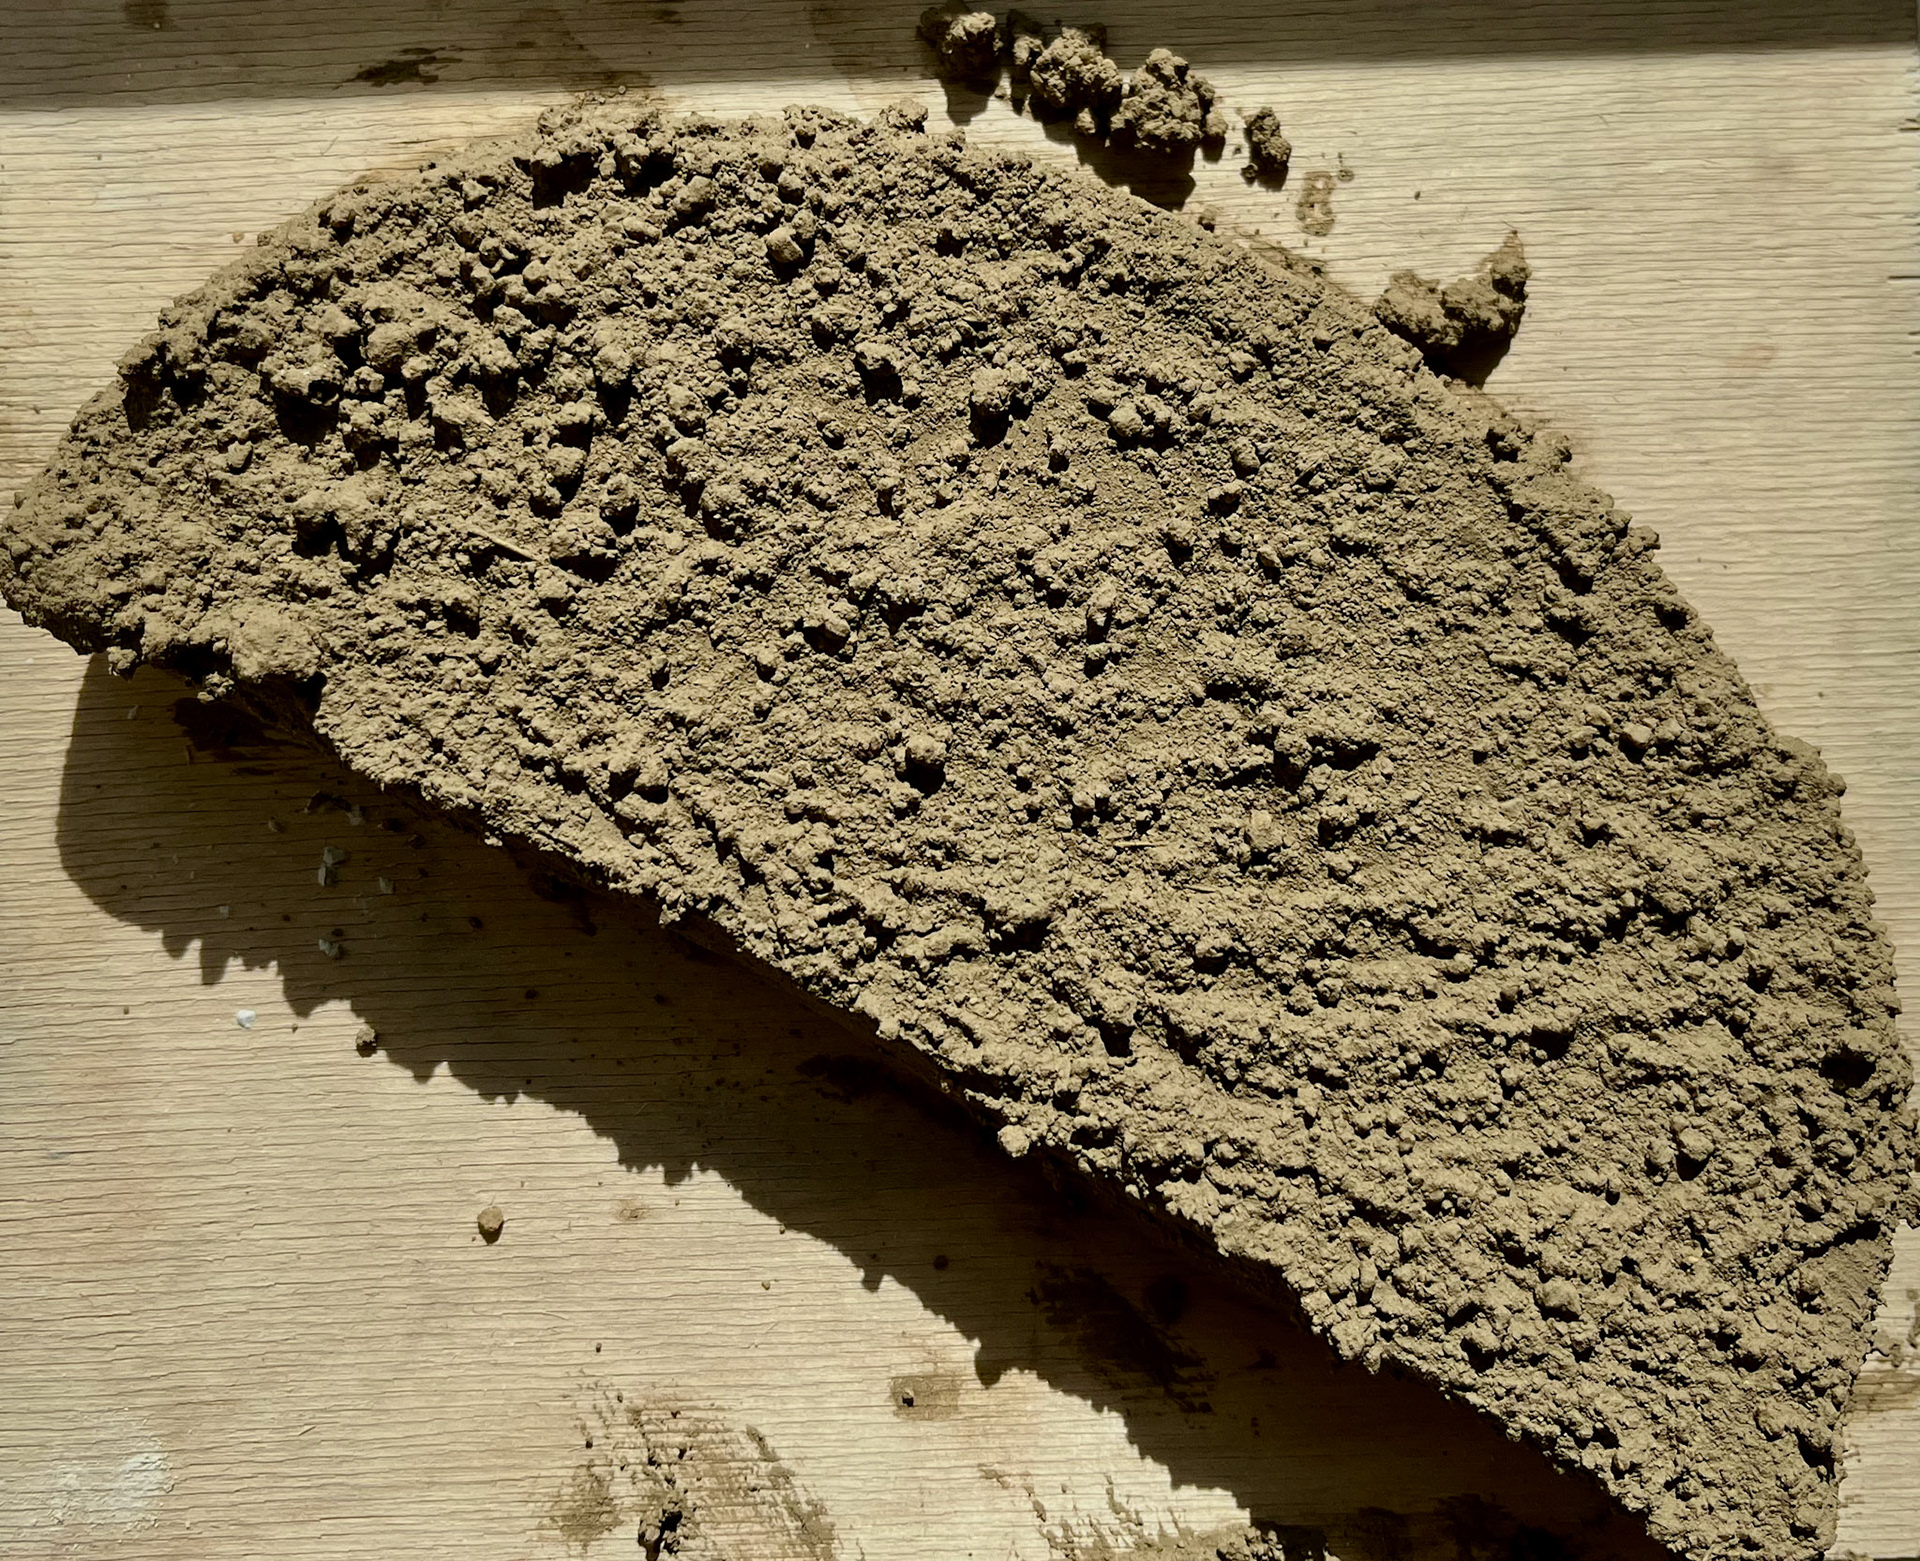
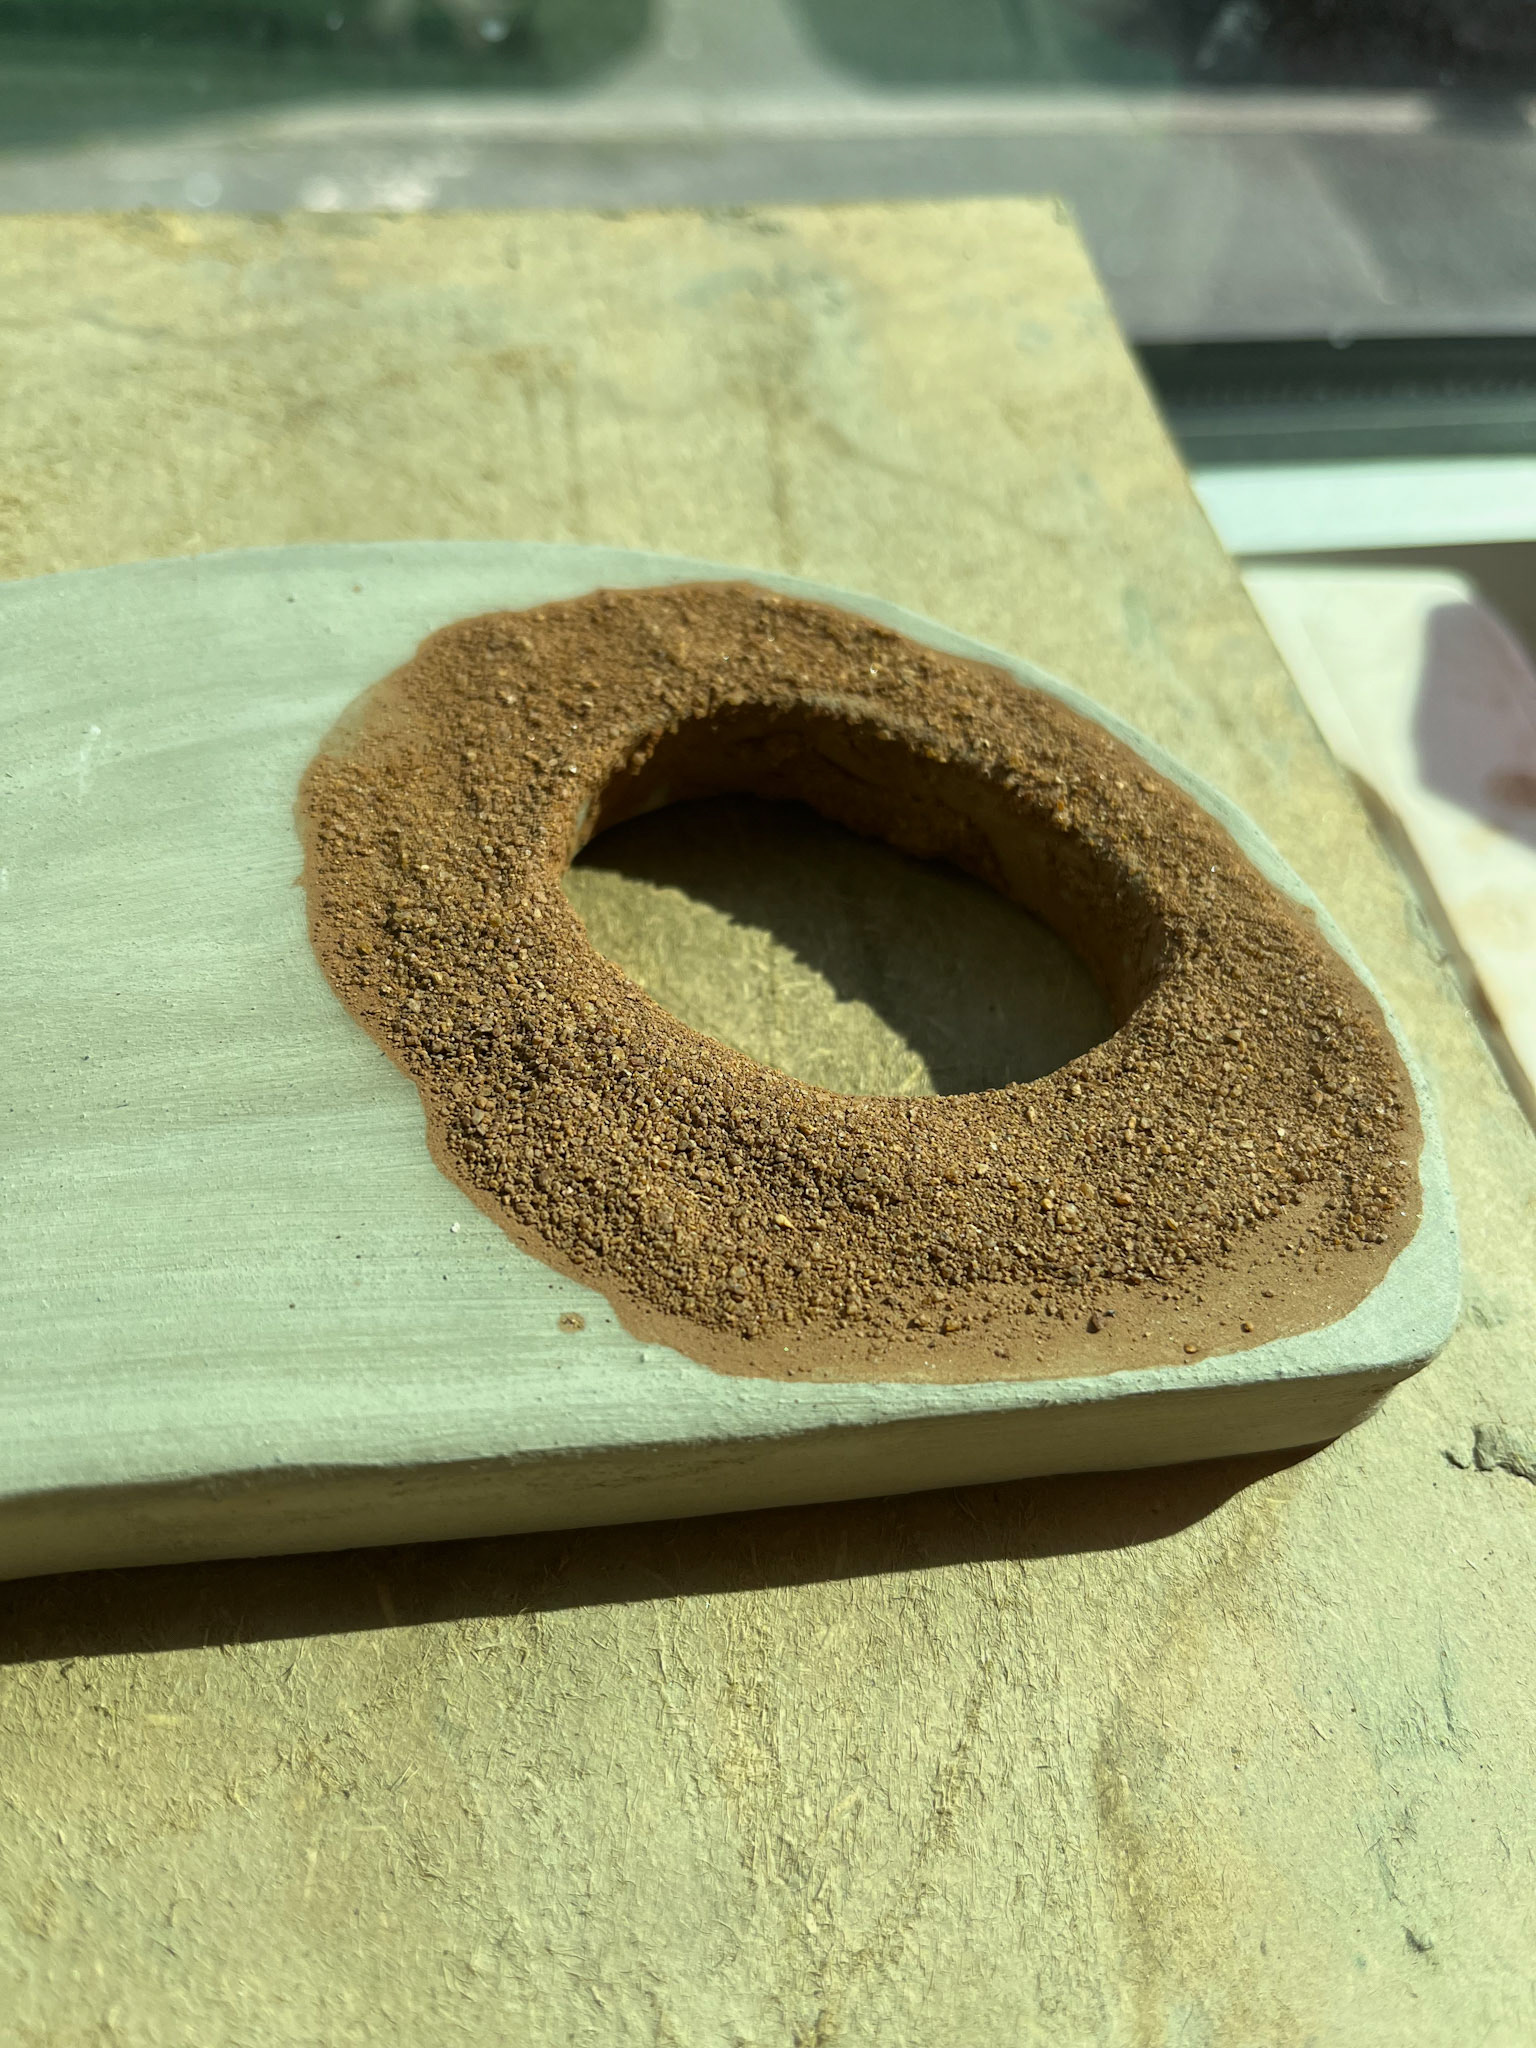
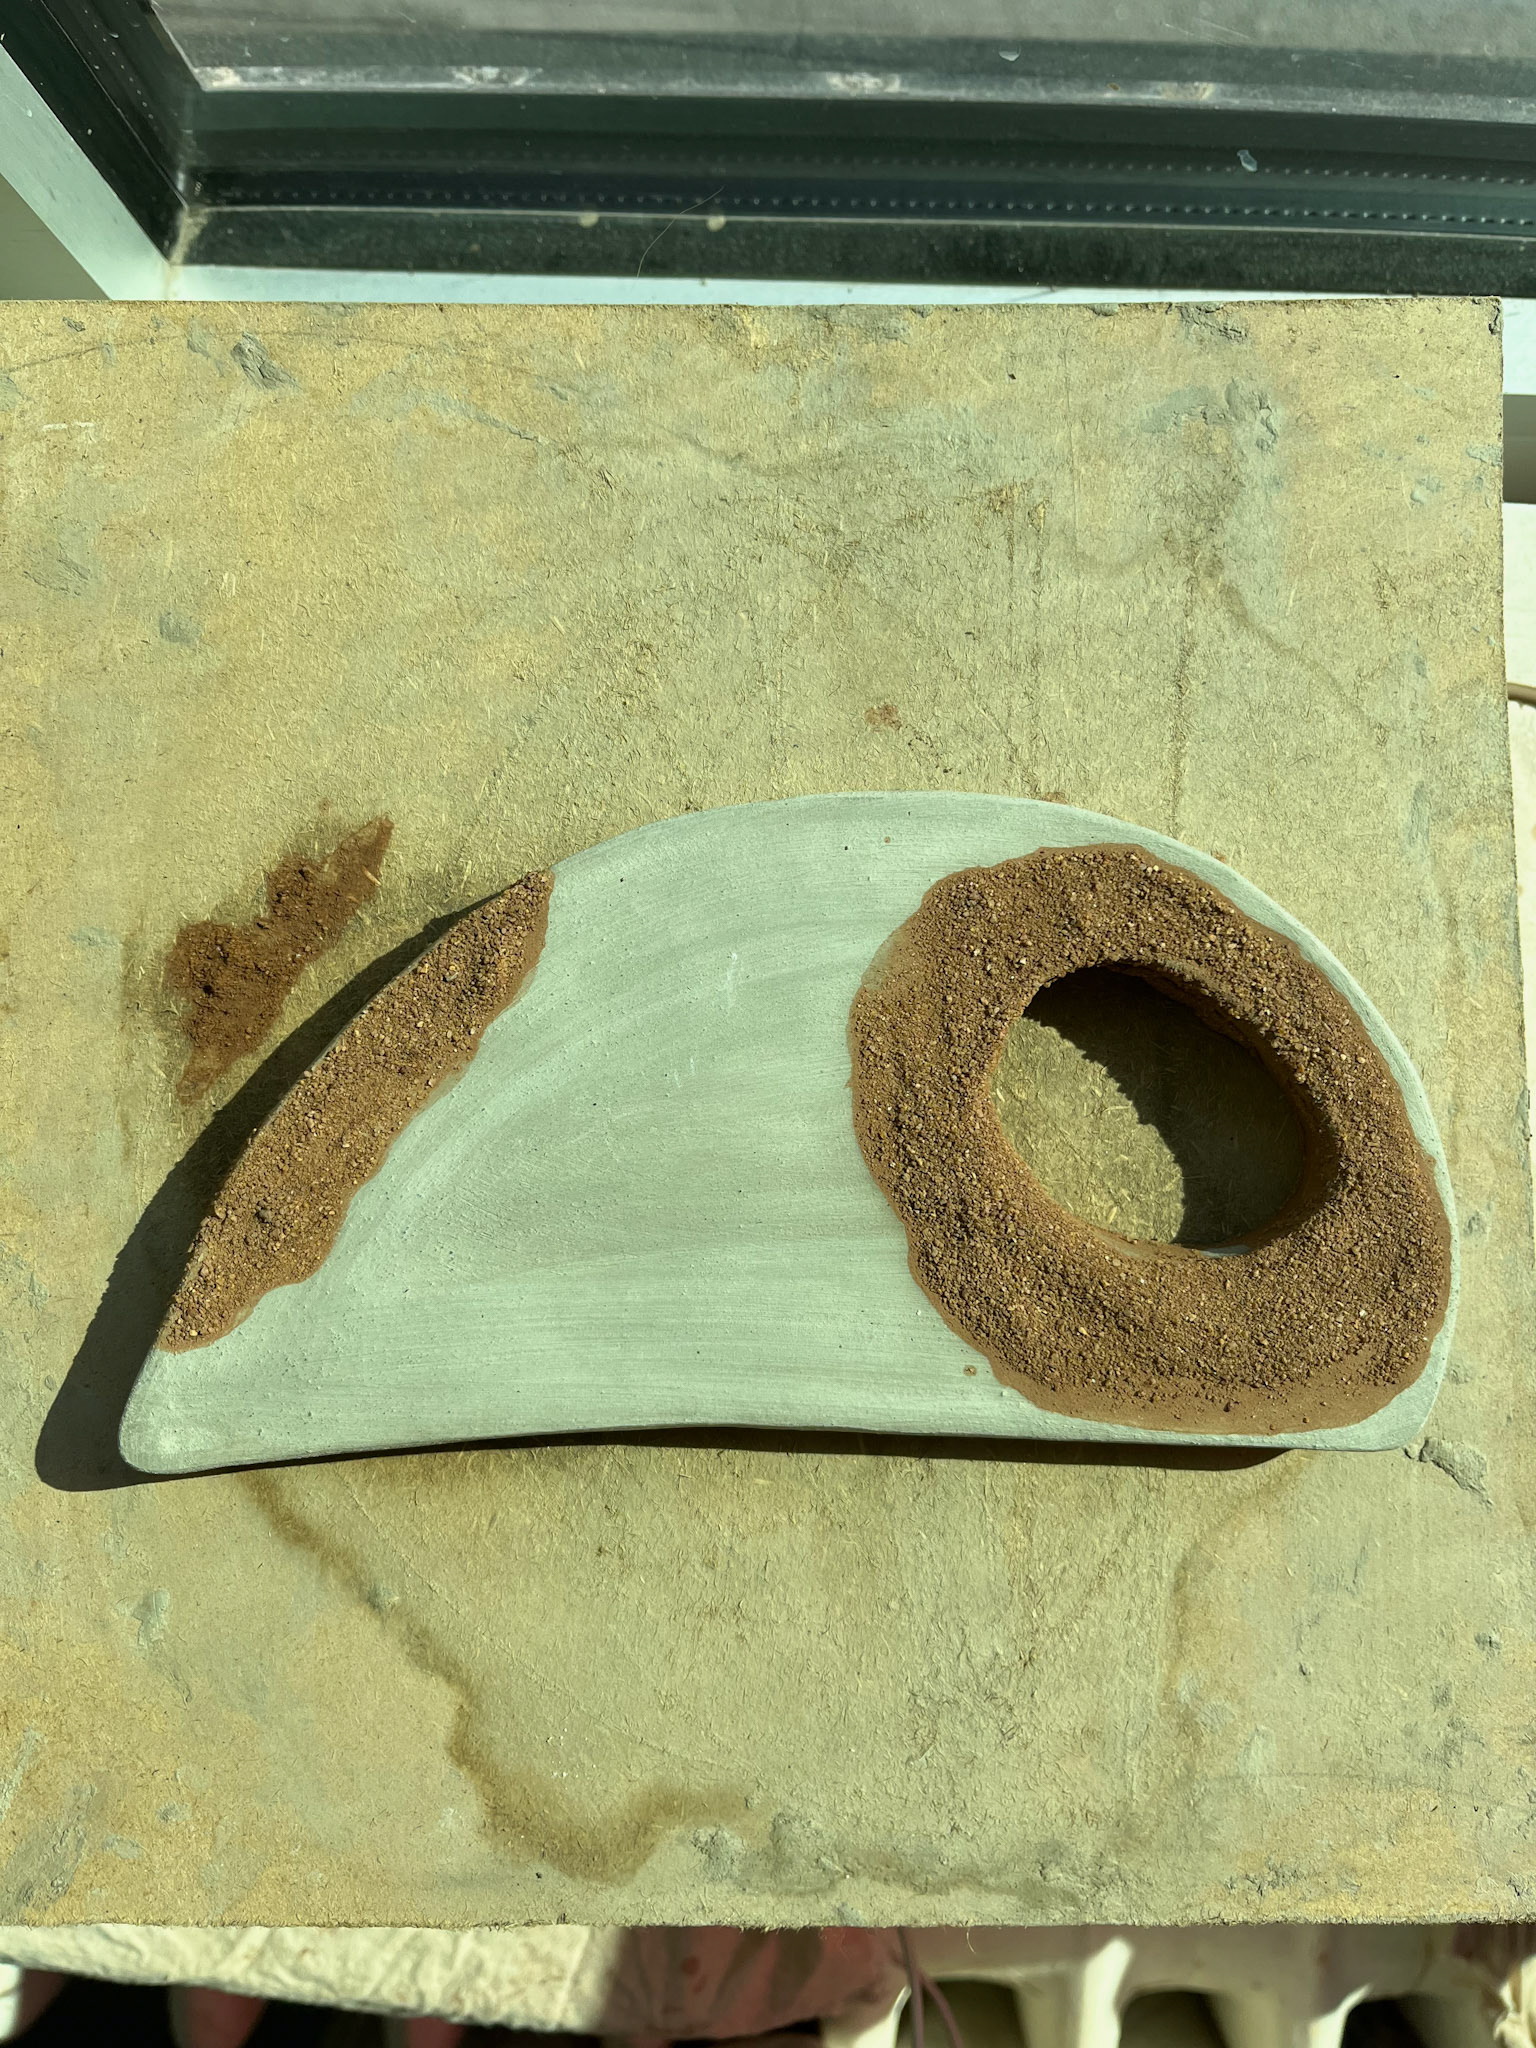
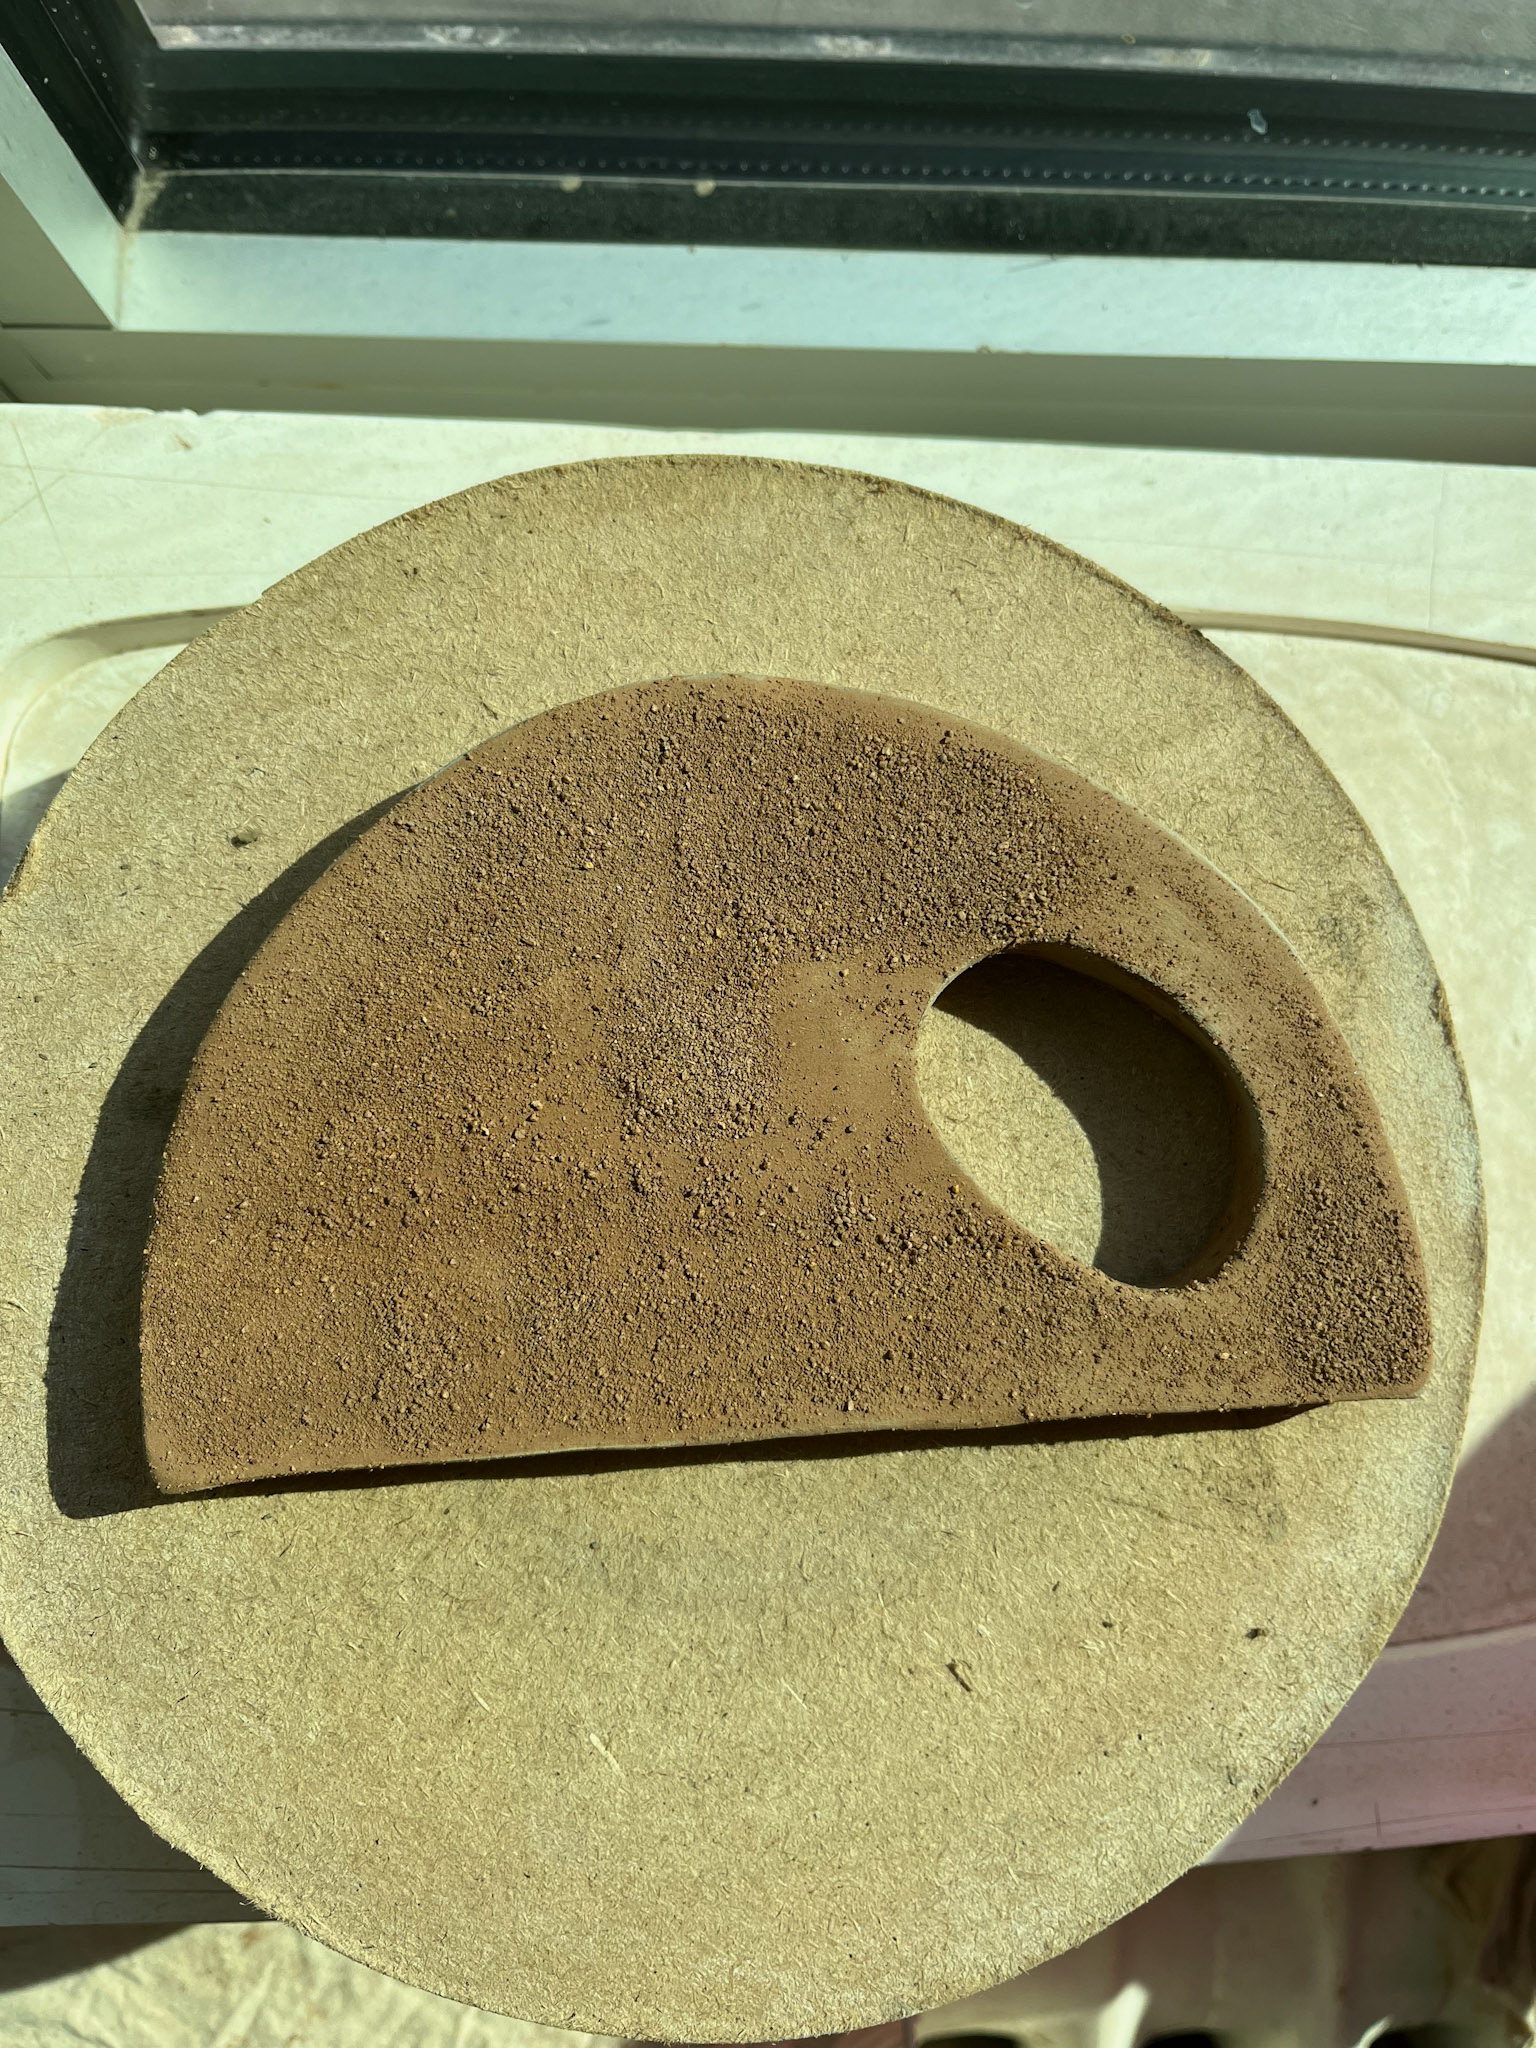
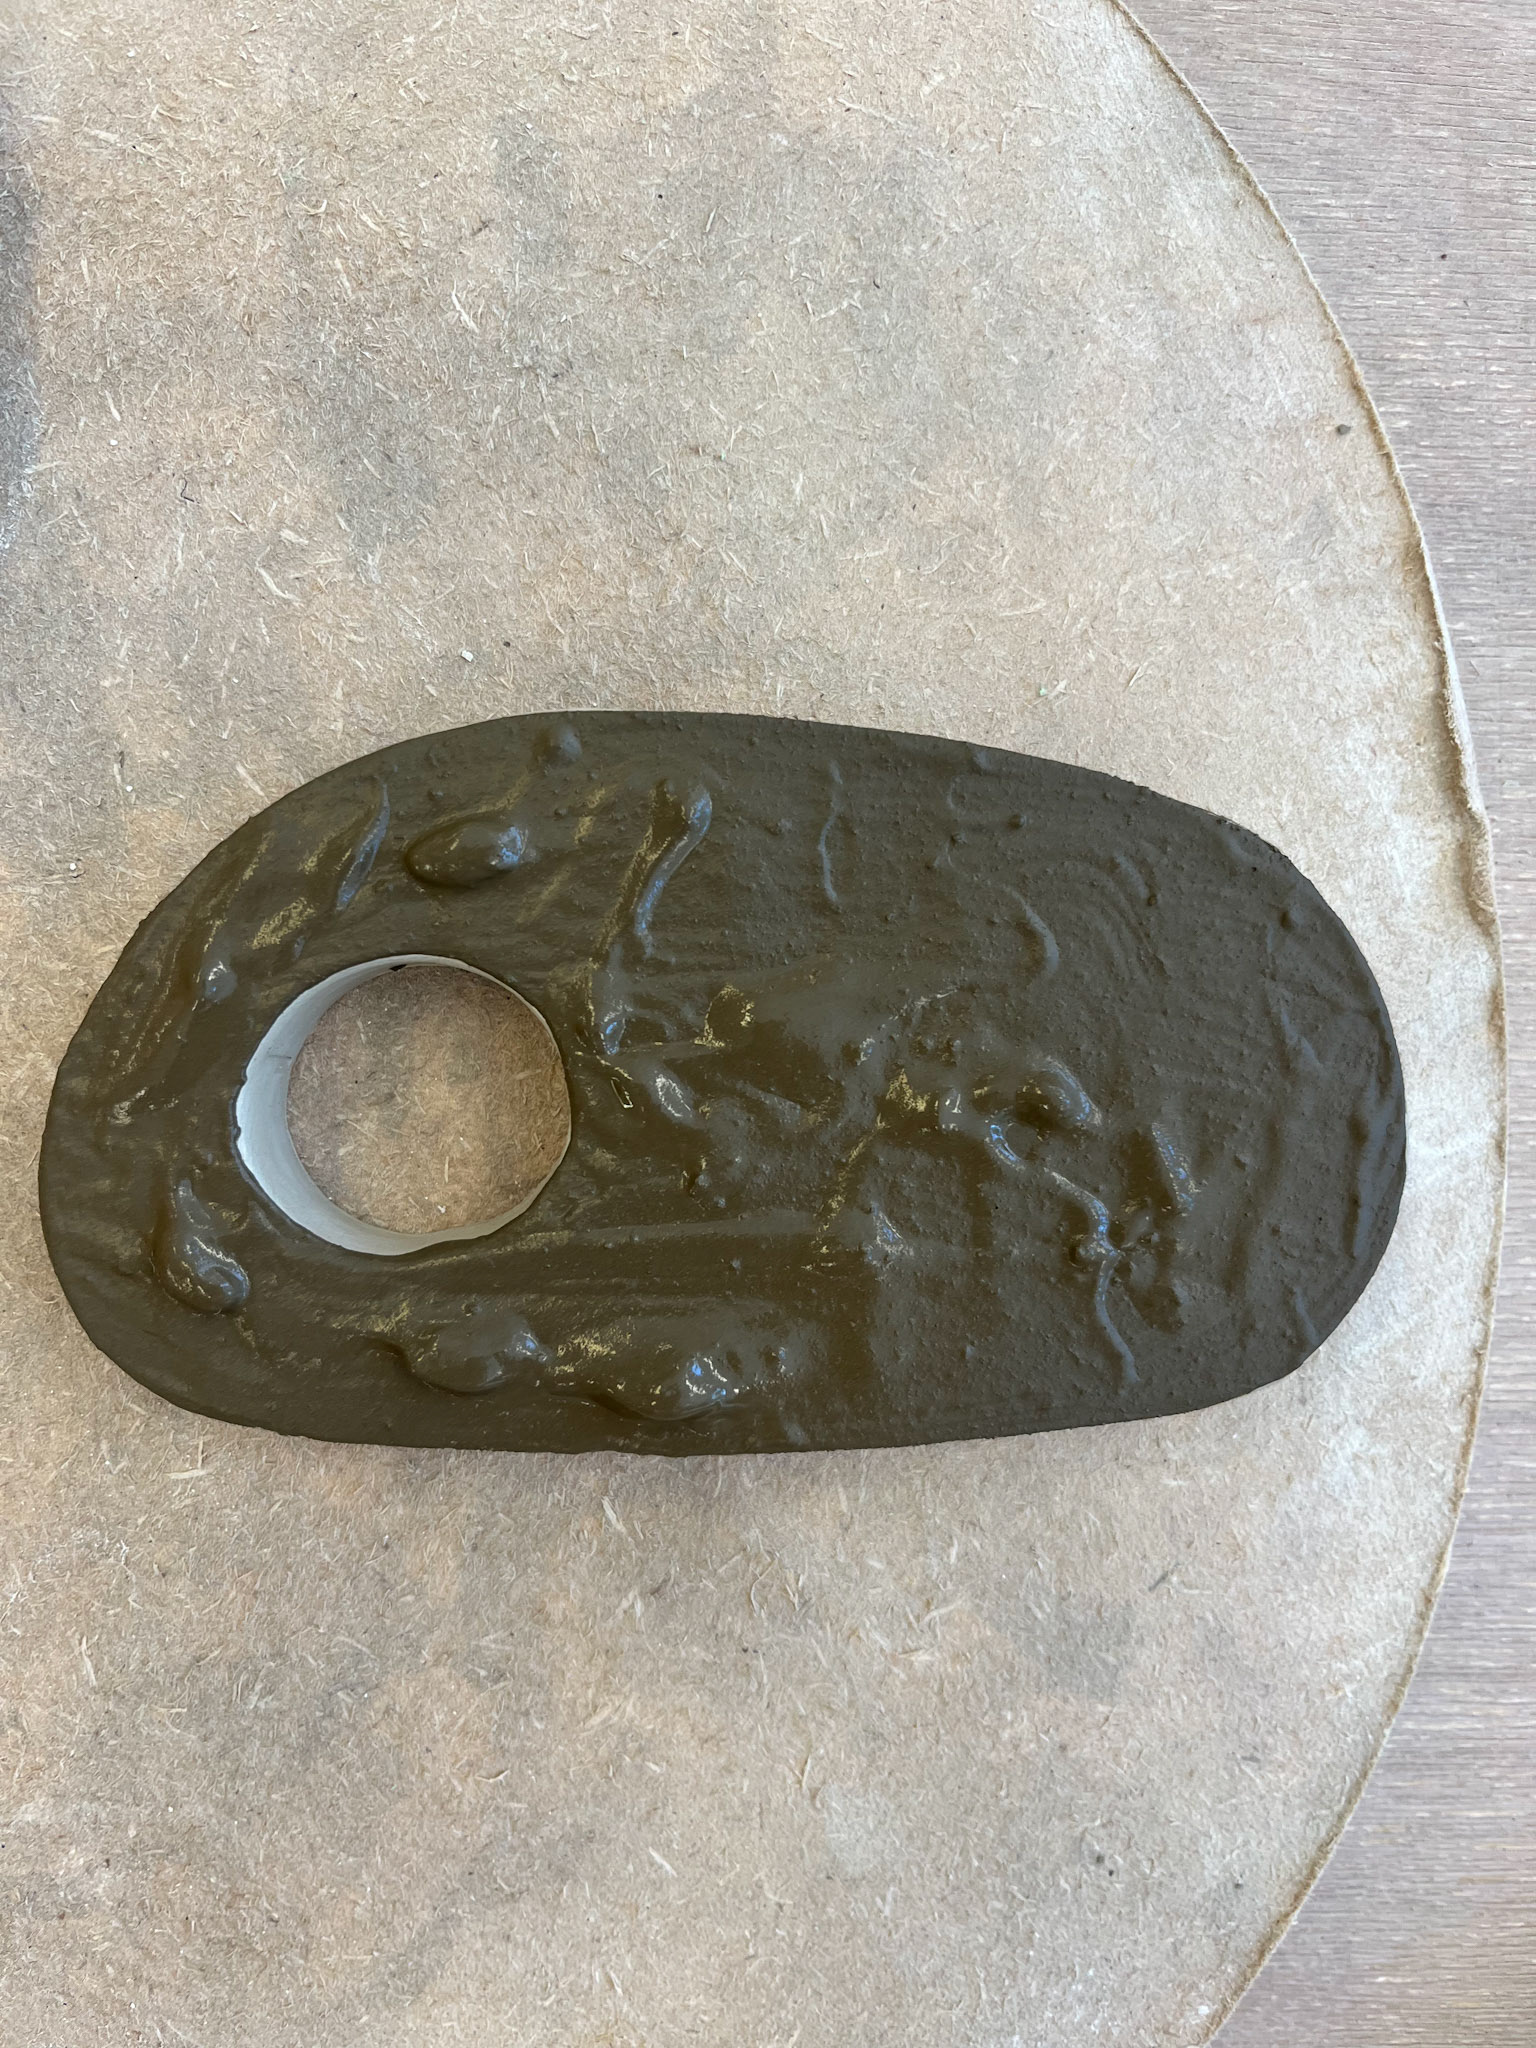
From the former I have created, I have started making slabs in different sizes and thicknesses. I wanted to investigate different types of clay to discover how they react to one another, primarily working with Ivory stoneware, Almignton, and Cave Clay that I have gathered from the caves of the Peak District. I am working with three different varieties of clay, using cave clay to see how it reacts as a glaze on the commercial clay and to work with it to fire to bisque. Using commercial clay alongside the wild clay allows for that distinction between each, and an investigation into the materialities of the glacial clay body that I am working with.
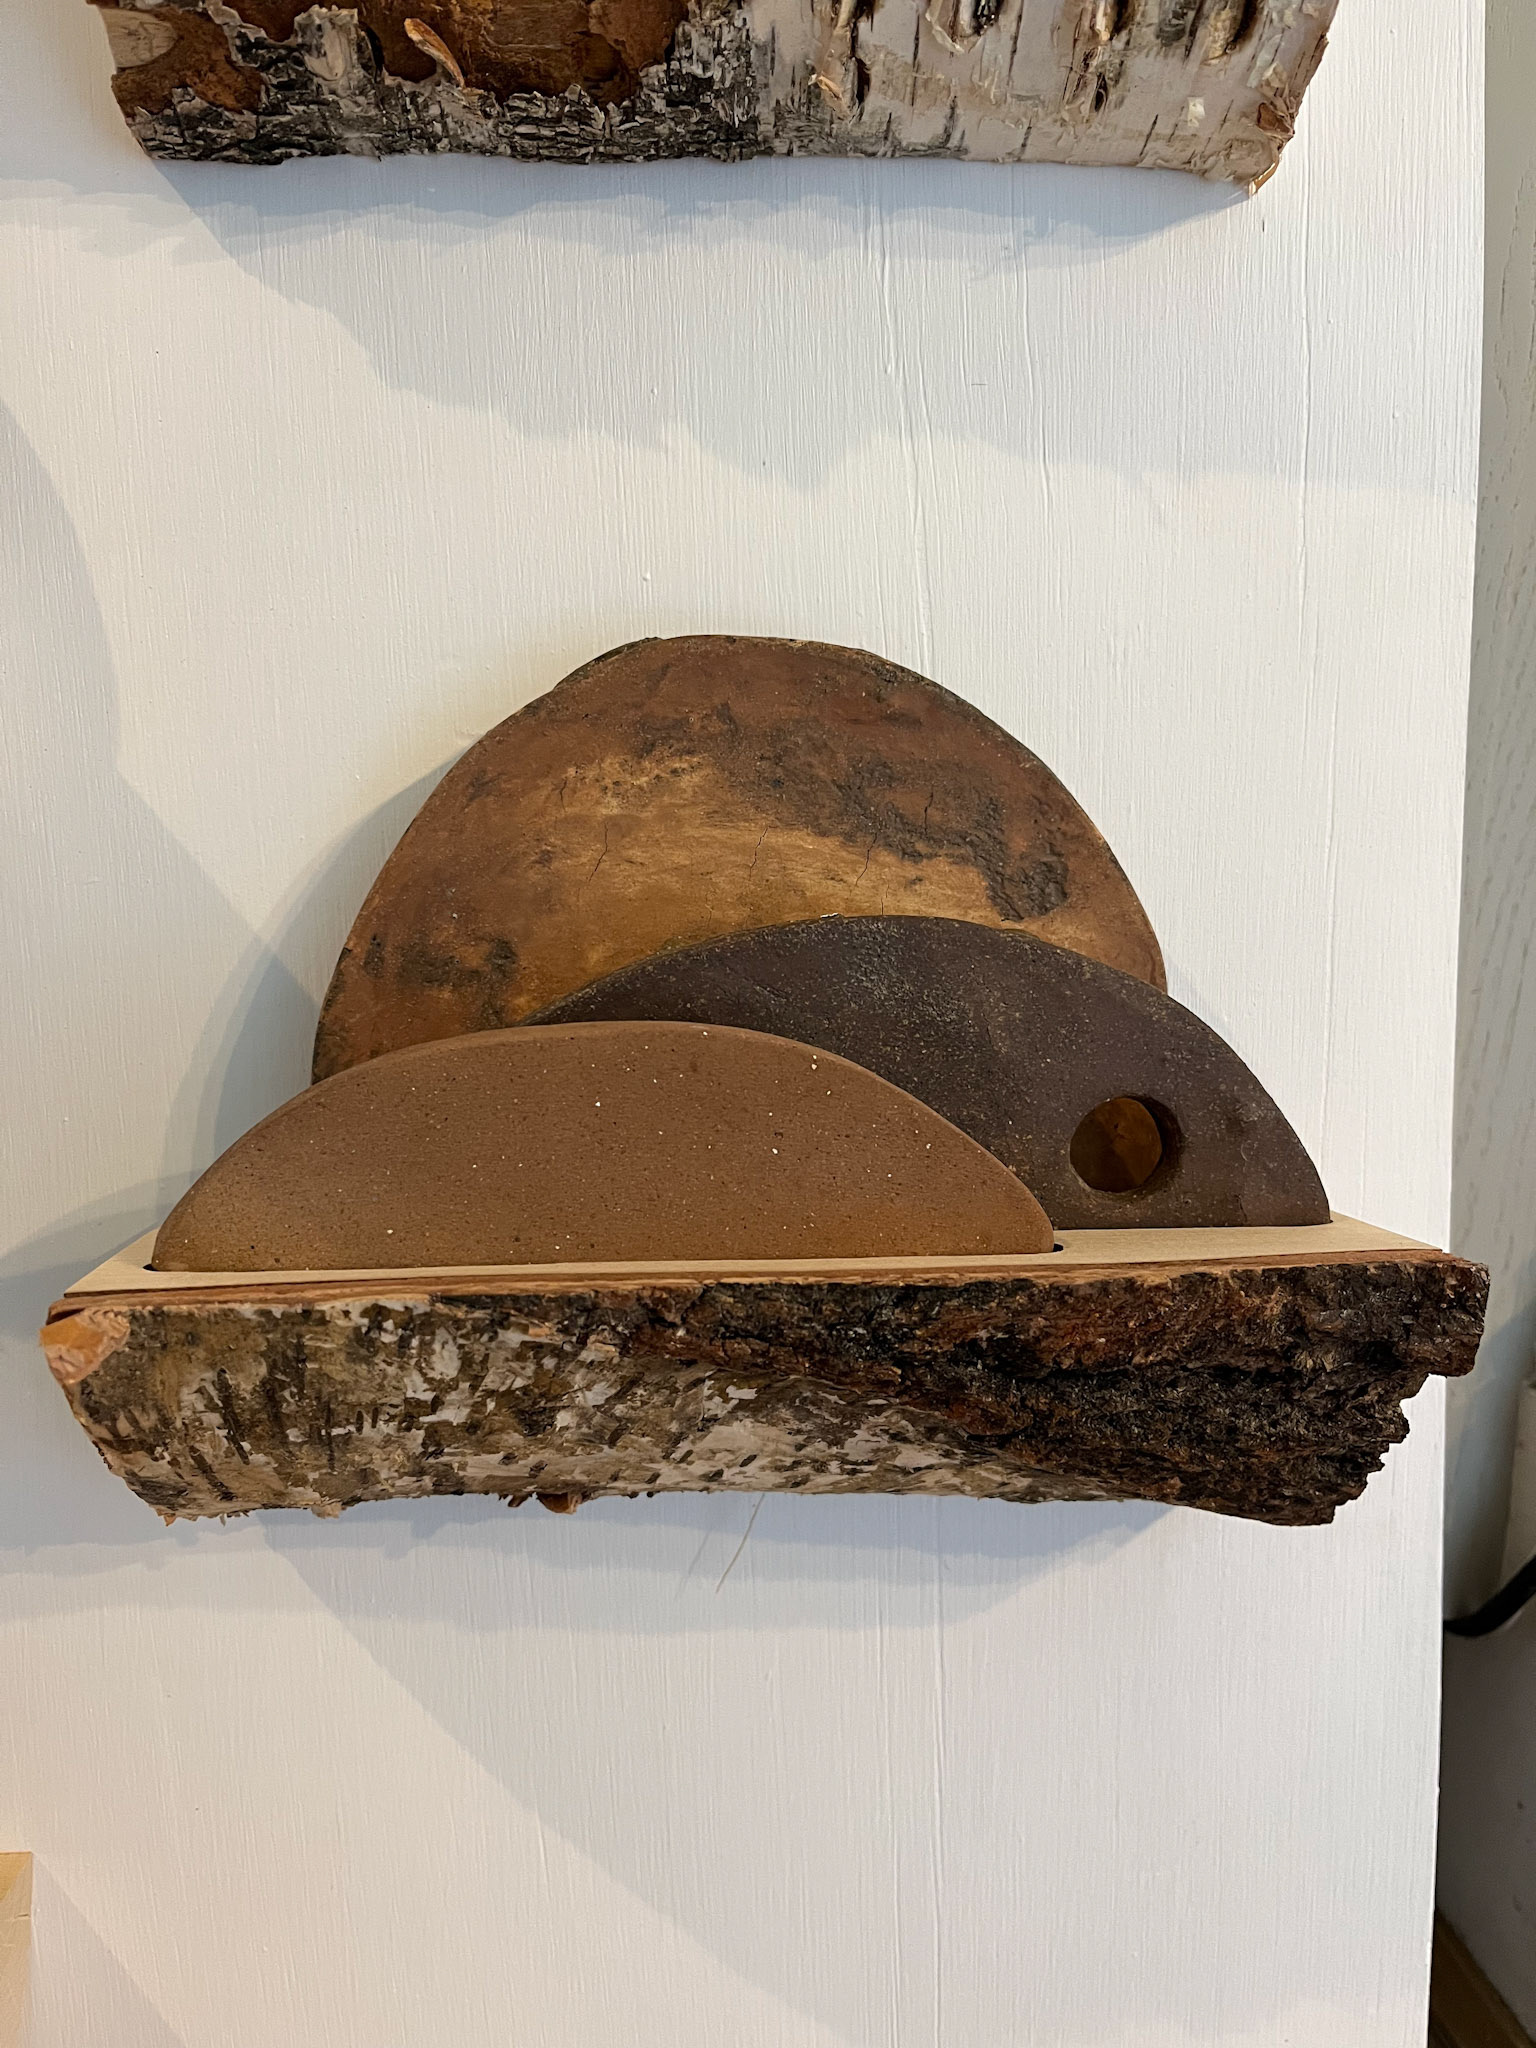
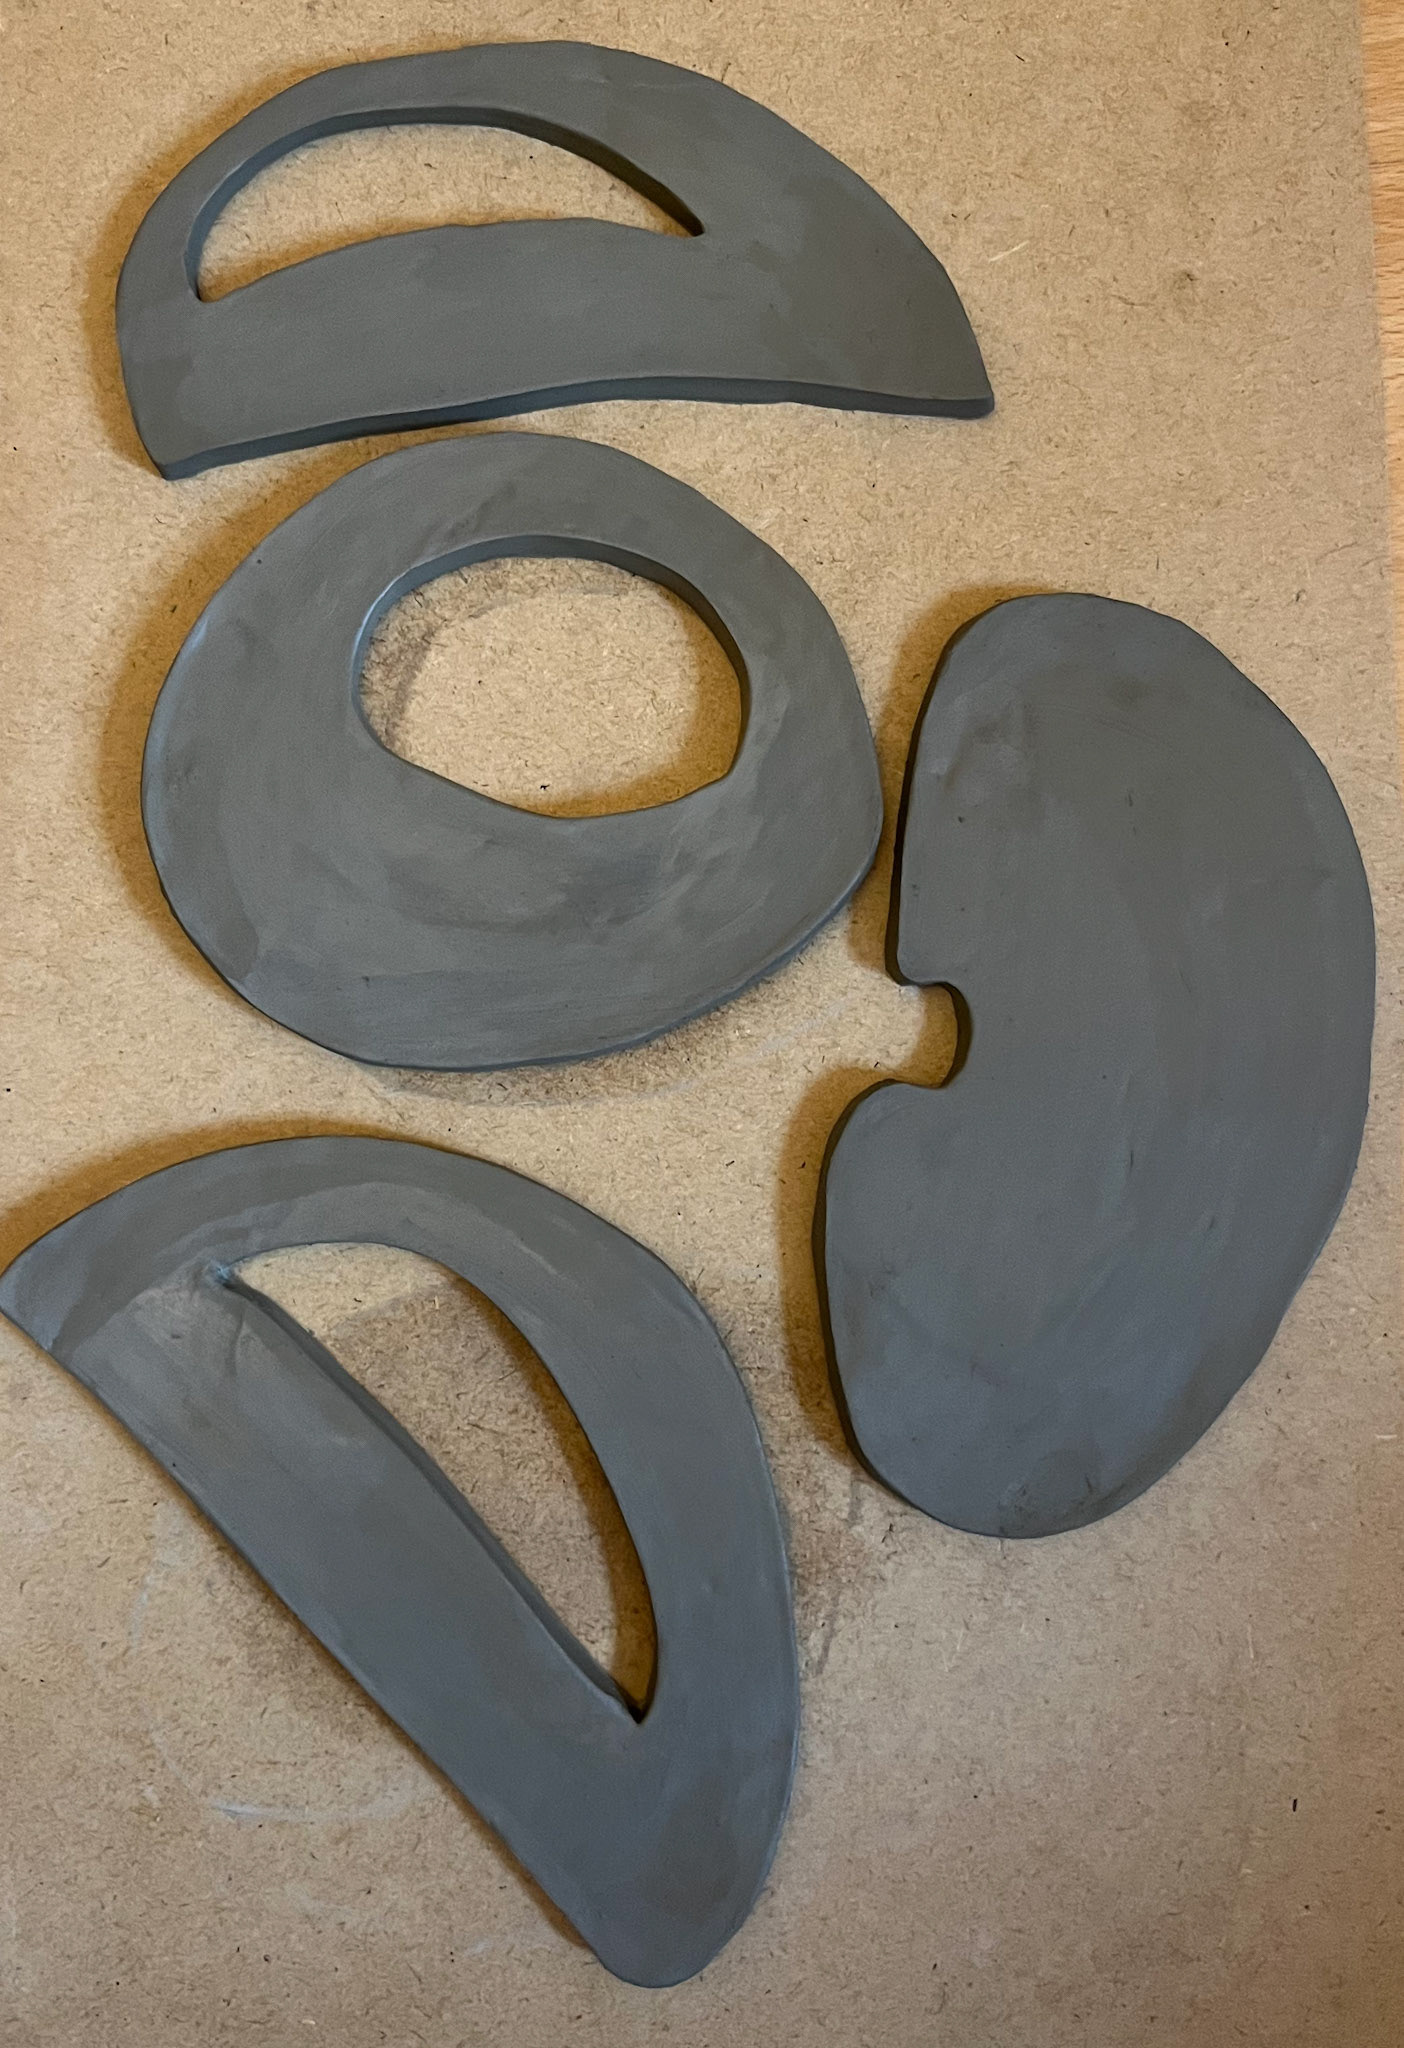
I am starting to combine the different clays and using the cave clay slip, which I have made as a painted glaze over the top of ivory stoneware clay, and firing to earthenware. From the tests that I did at the start of the project, I found that combining the two clays this way is successful, as I have done many tests of the cave clay firing at different temperatures and found that the compatibility works well. Once fired to earthenware, the clay melts and burns. However, using a glaze over commercial stoneware clay creates a textured, almost volcanic glaze. I have started to cut holes in some of the slabs. Still, with the intention of organic shapes, the holes represent the gaps and negative spaces that are so iconic of the millstones.
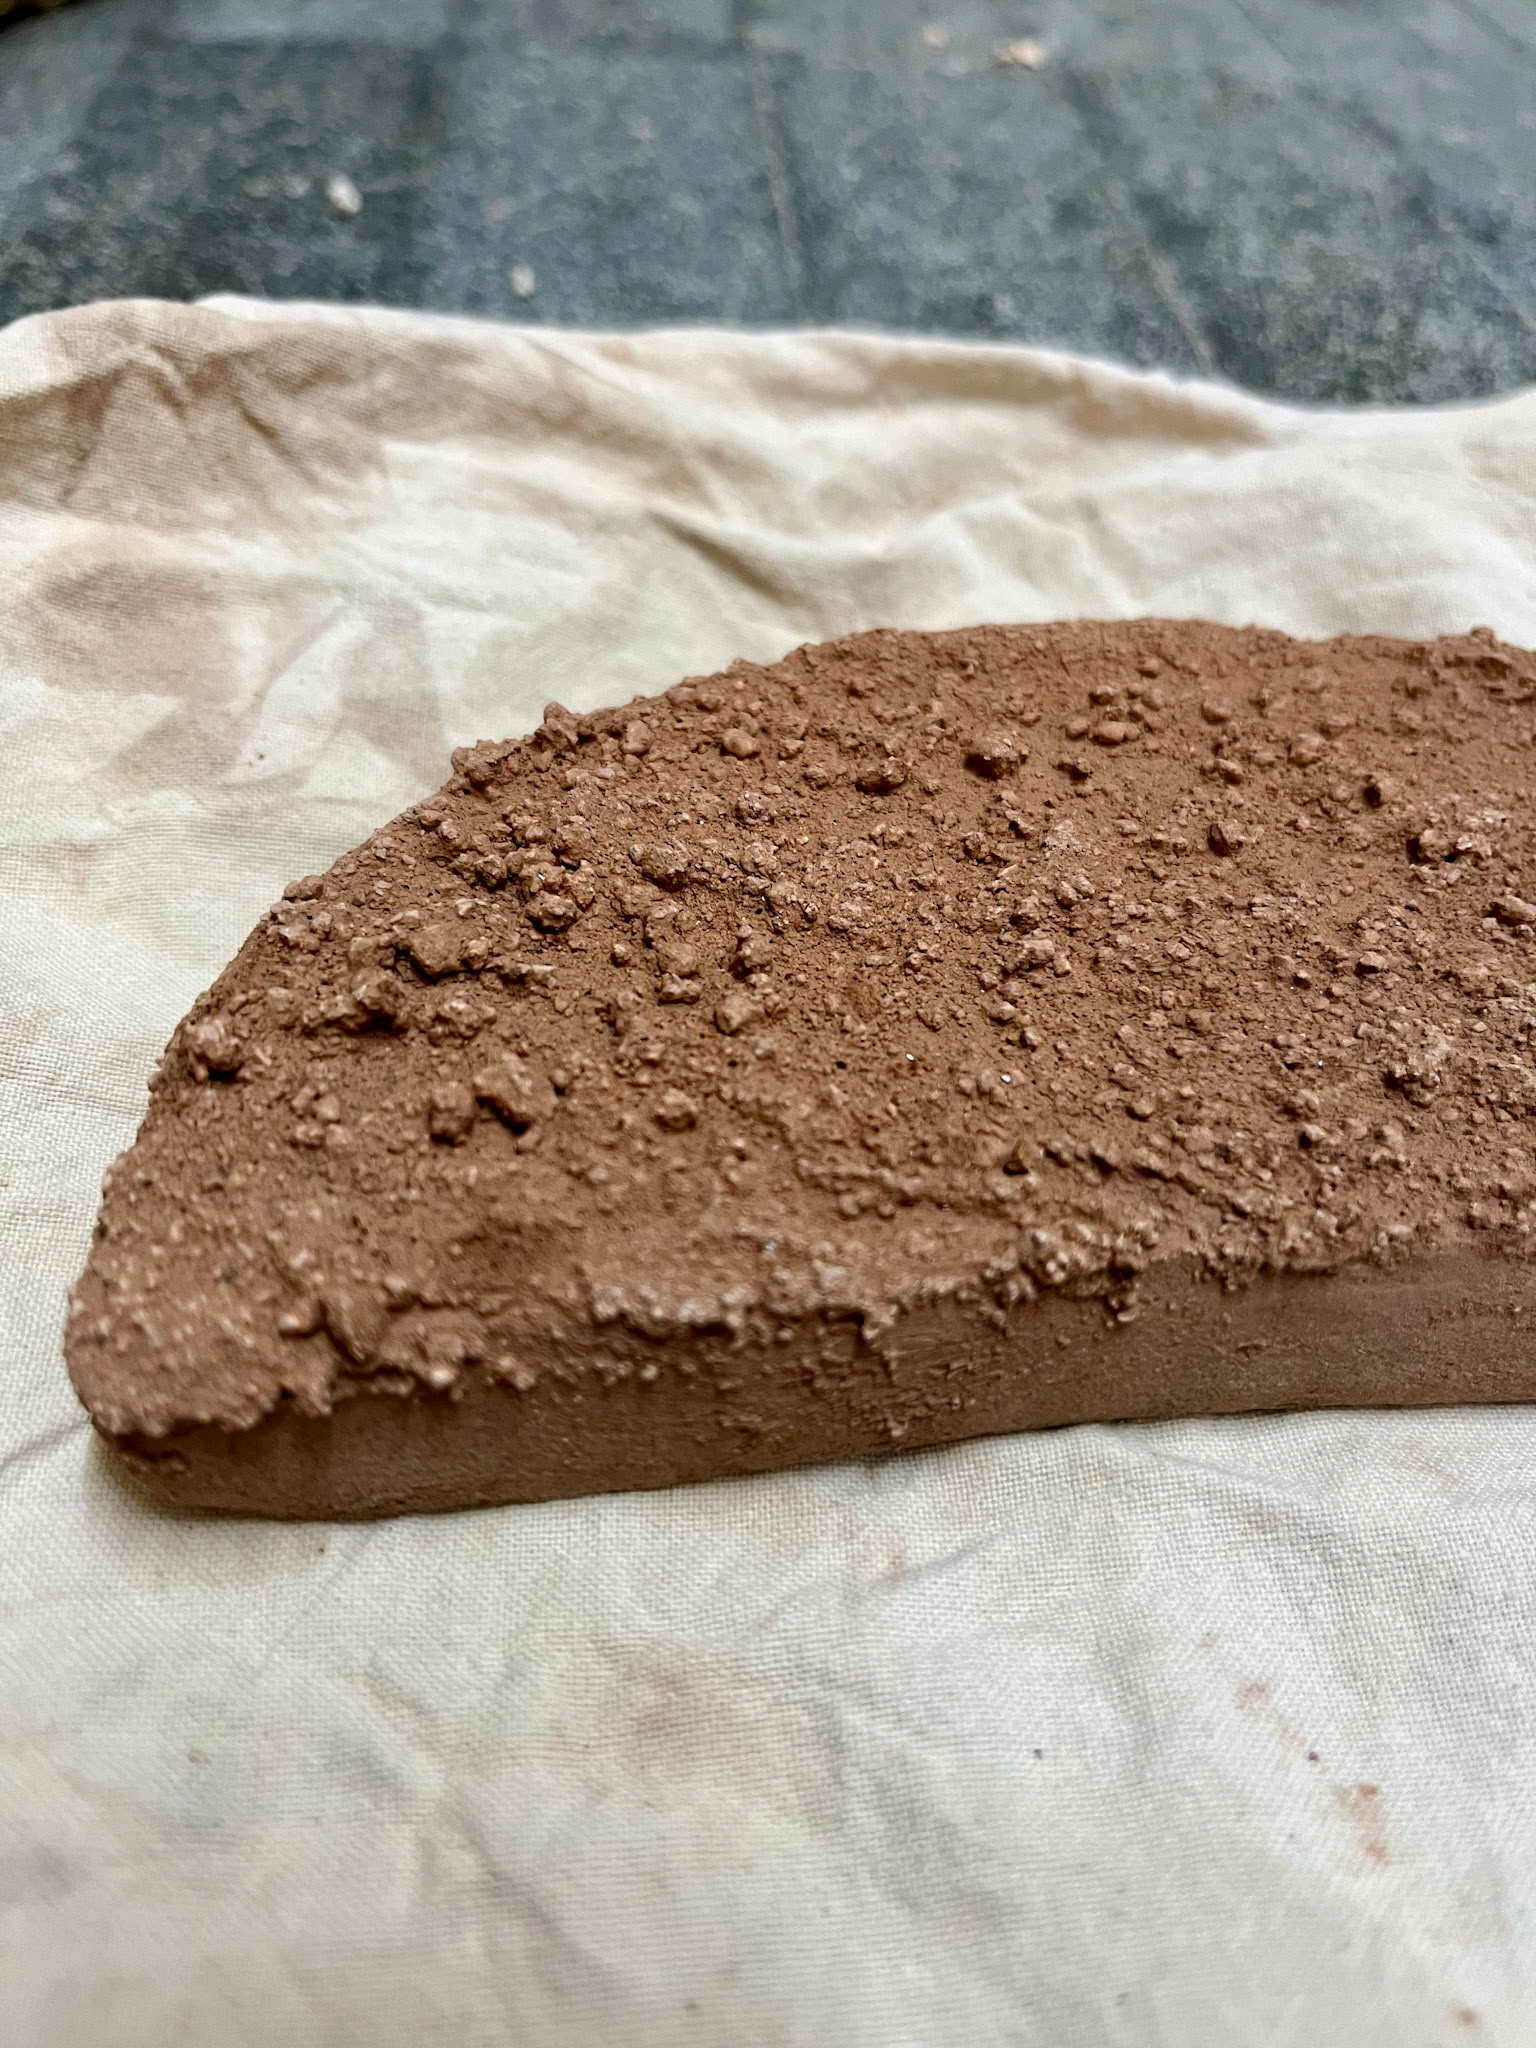
Adding texture through a gritstone glaze that I made with gritstone gathered from the locations near where I am taking inspiration. From my experiments at the start of the unit, I found that the gritstone often did not stay on the ceramic post-fire, and it would often crumble off. This time, I tried using the grit within a slip-to-slip the glaze onto the surface of the clay before firing. Hopefully, doing this will ensure that the texture stays on, but the colours of the slip still come through.
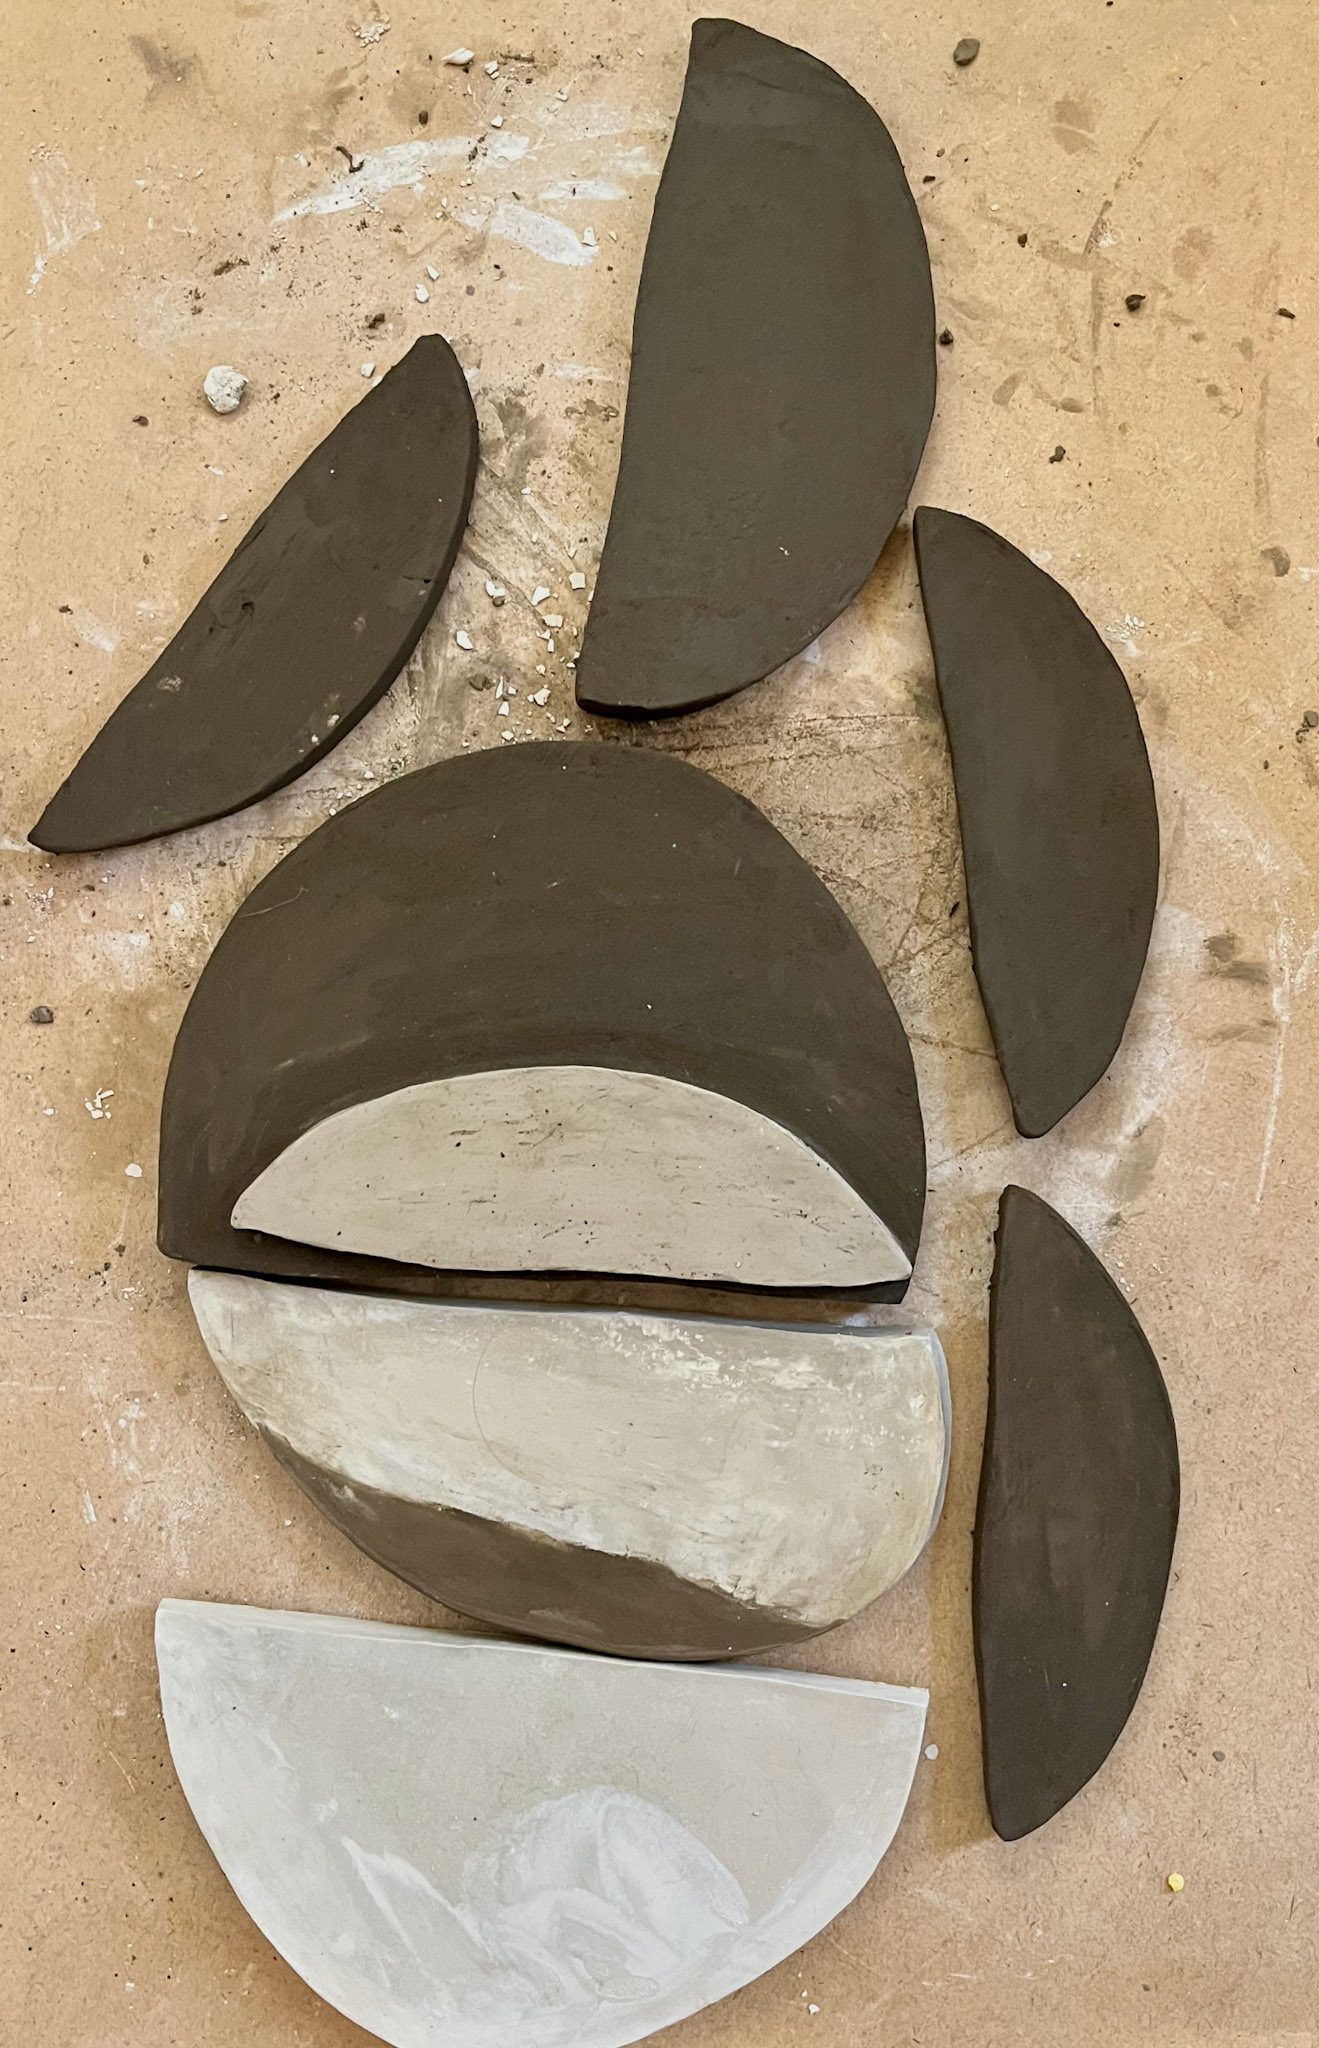
Fired results
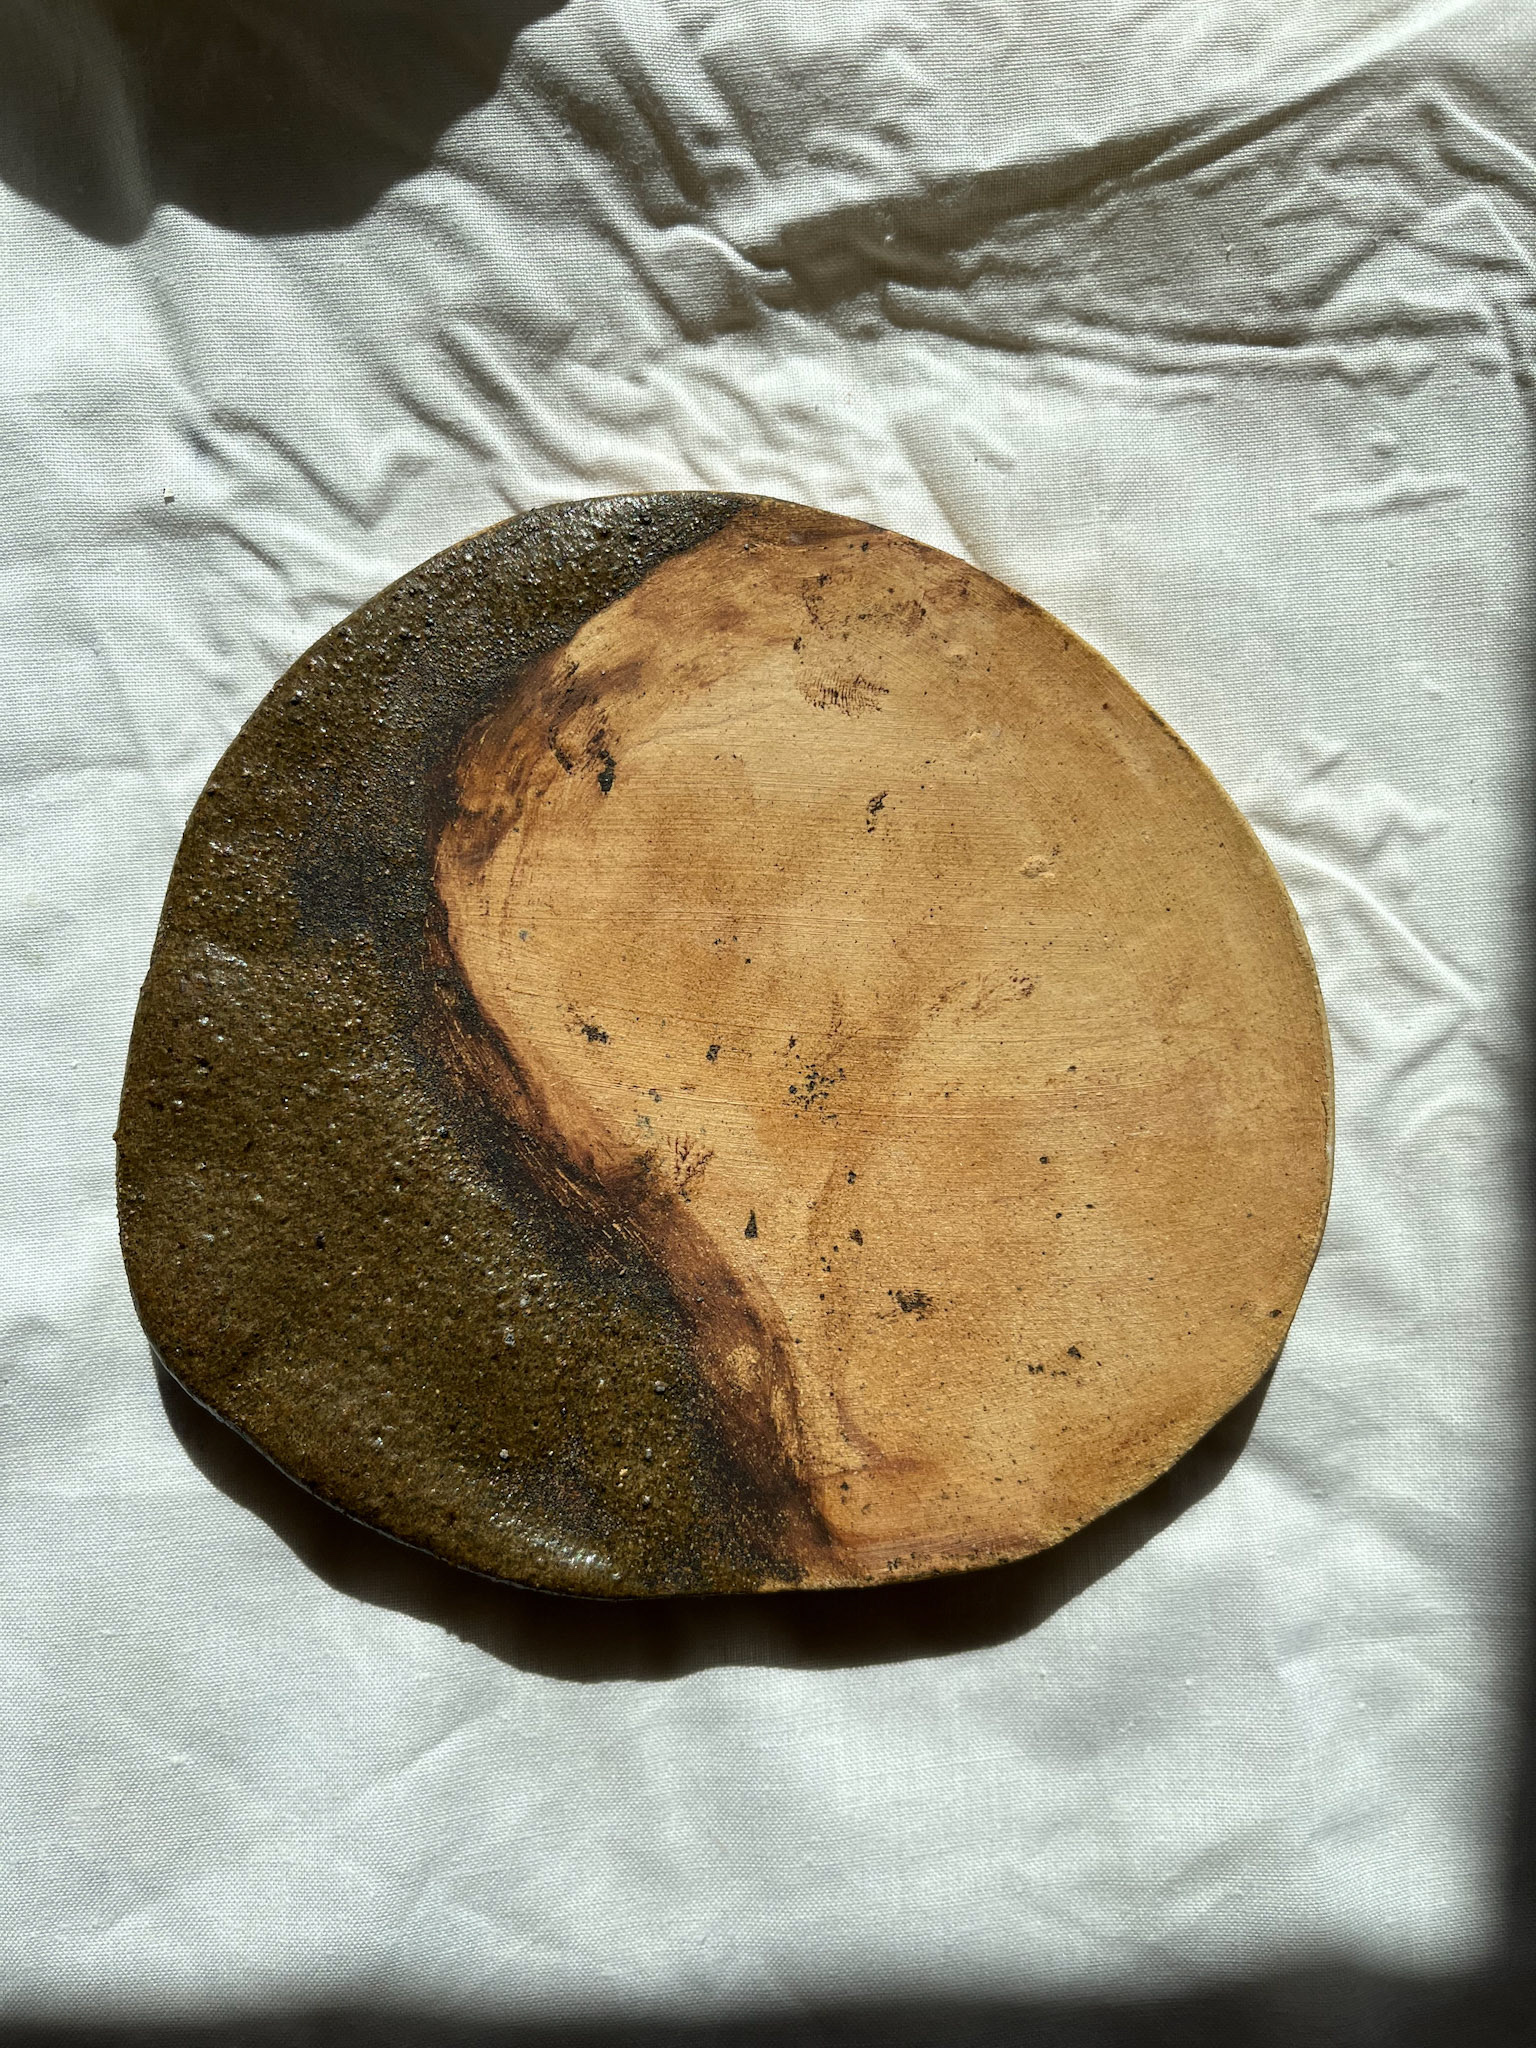
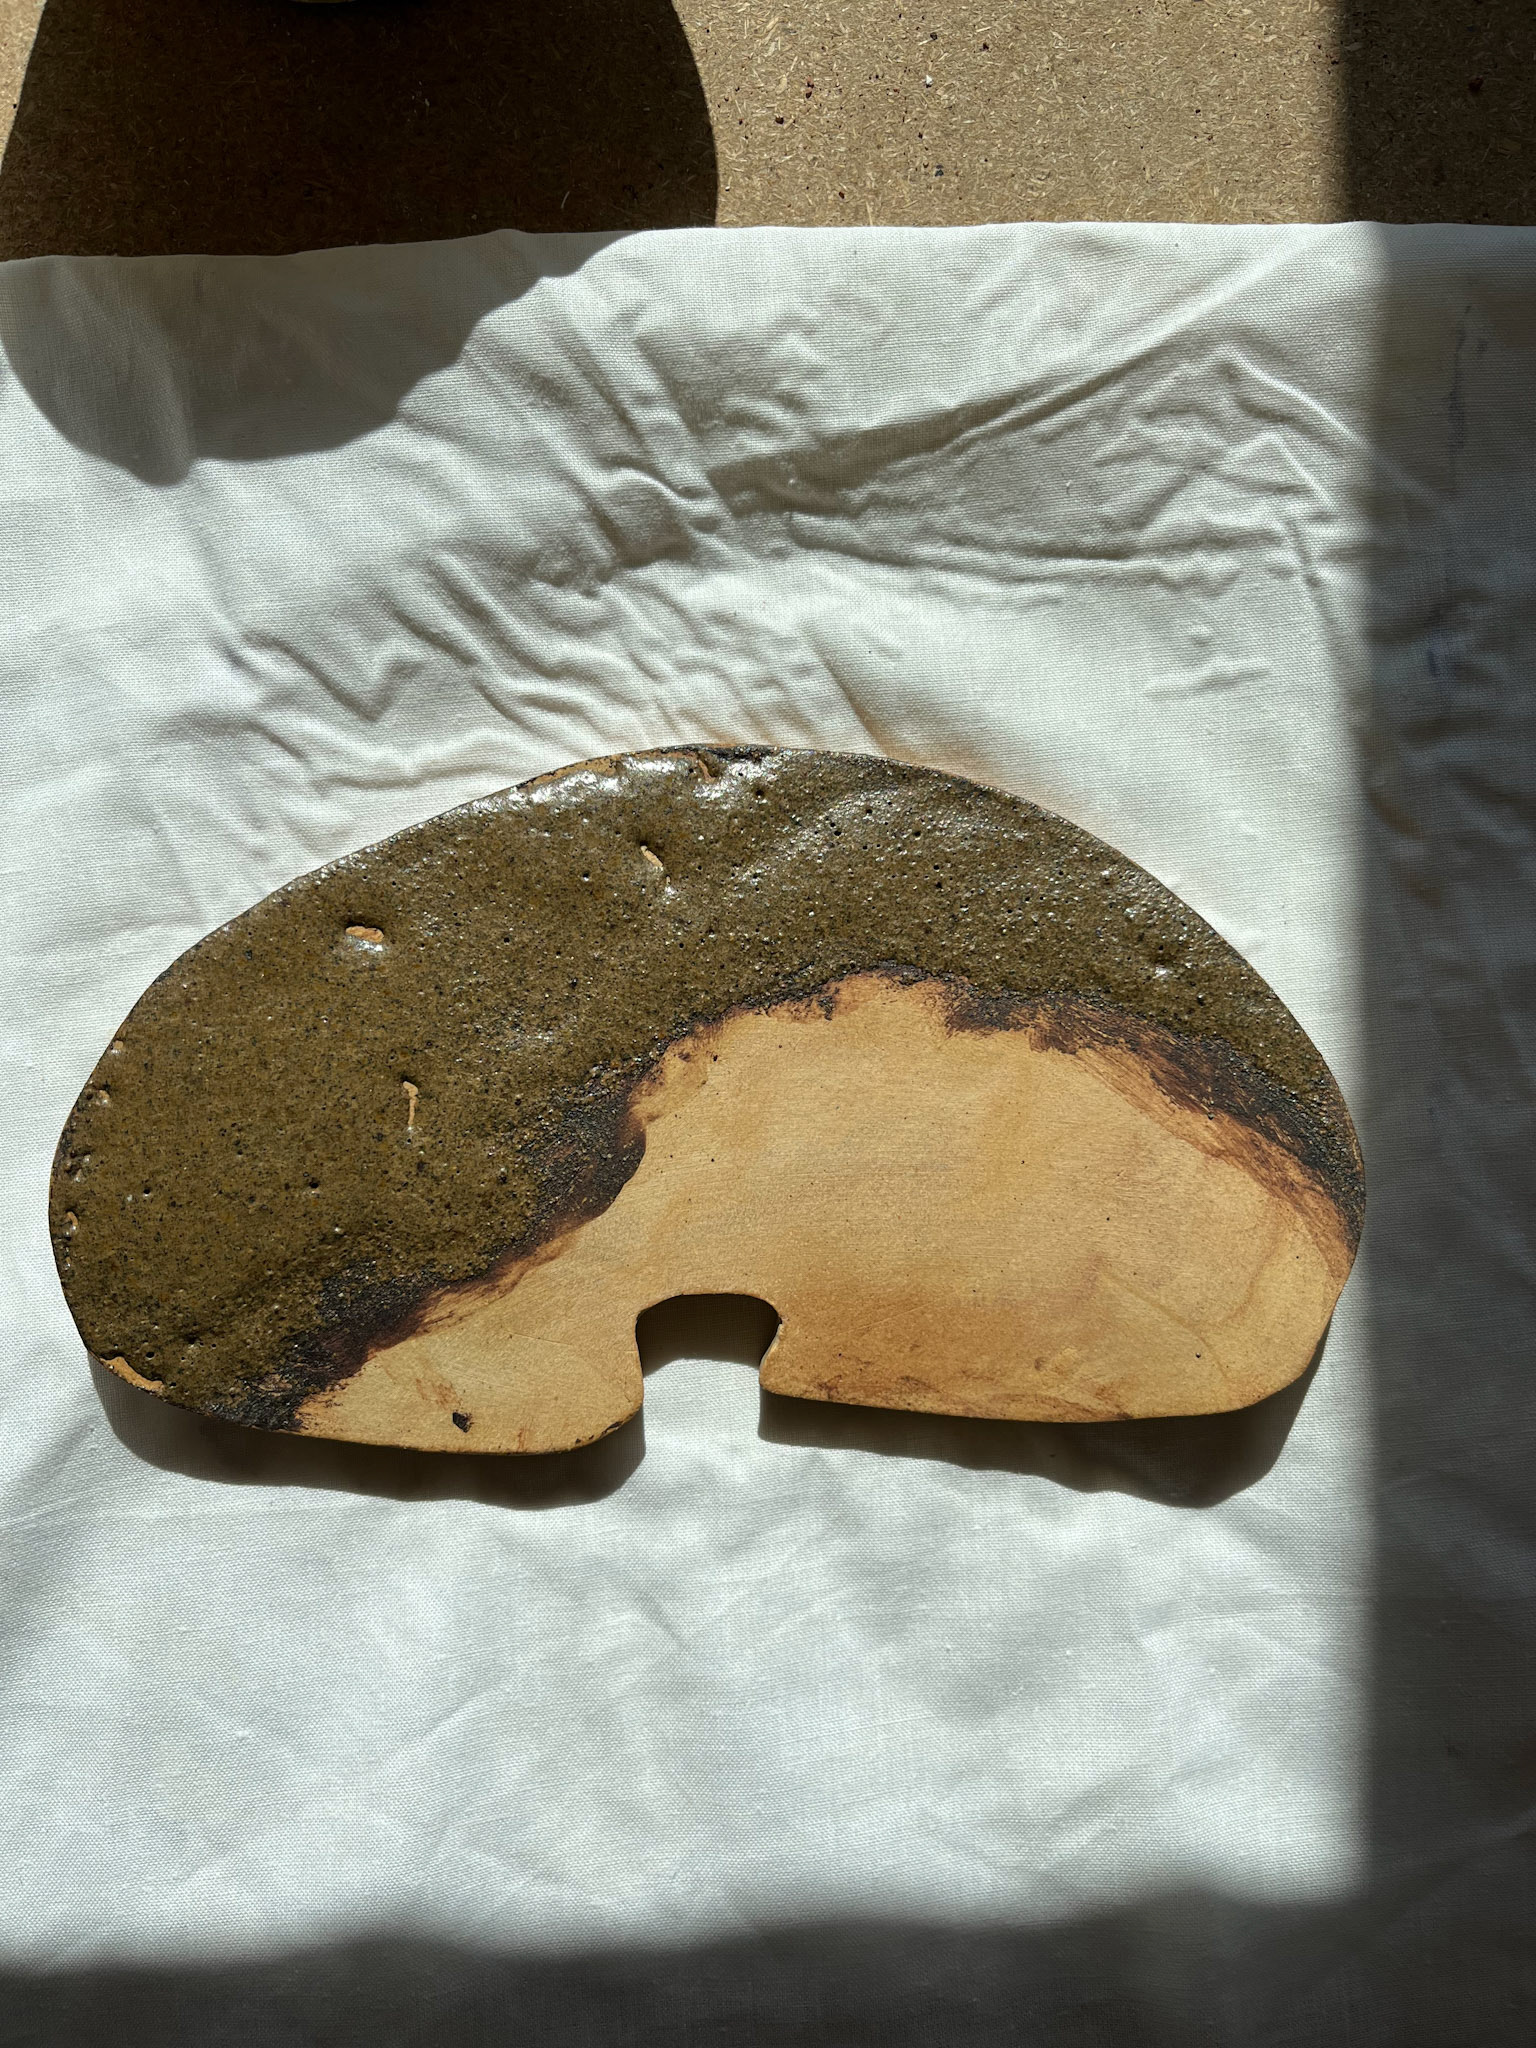
From the first firing of the slabs I made, I found that the cave clay glaze fired to earthenware works well as a glaze. However, the way I did it came out quite messy, and the different thicknesses of the glaze application made different colours on the almington clay. Going forward, I will create a more consistent slip glaze that will be applied more consistently on the commercial clay, perhaps covering the whole clay slab.
The gritstone glaze came out successfully, as it was applied as a slip combined with the clay. The colour of the gritstone didn't come out as strong due to the clay it was combined with. However, I still like the texture and feel of the ceramic with this glaze on, as it resembles the textures of a millstone.
Going forward, I will be refining the application of the cave slip to ensure continuity and more structure throughout.

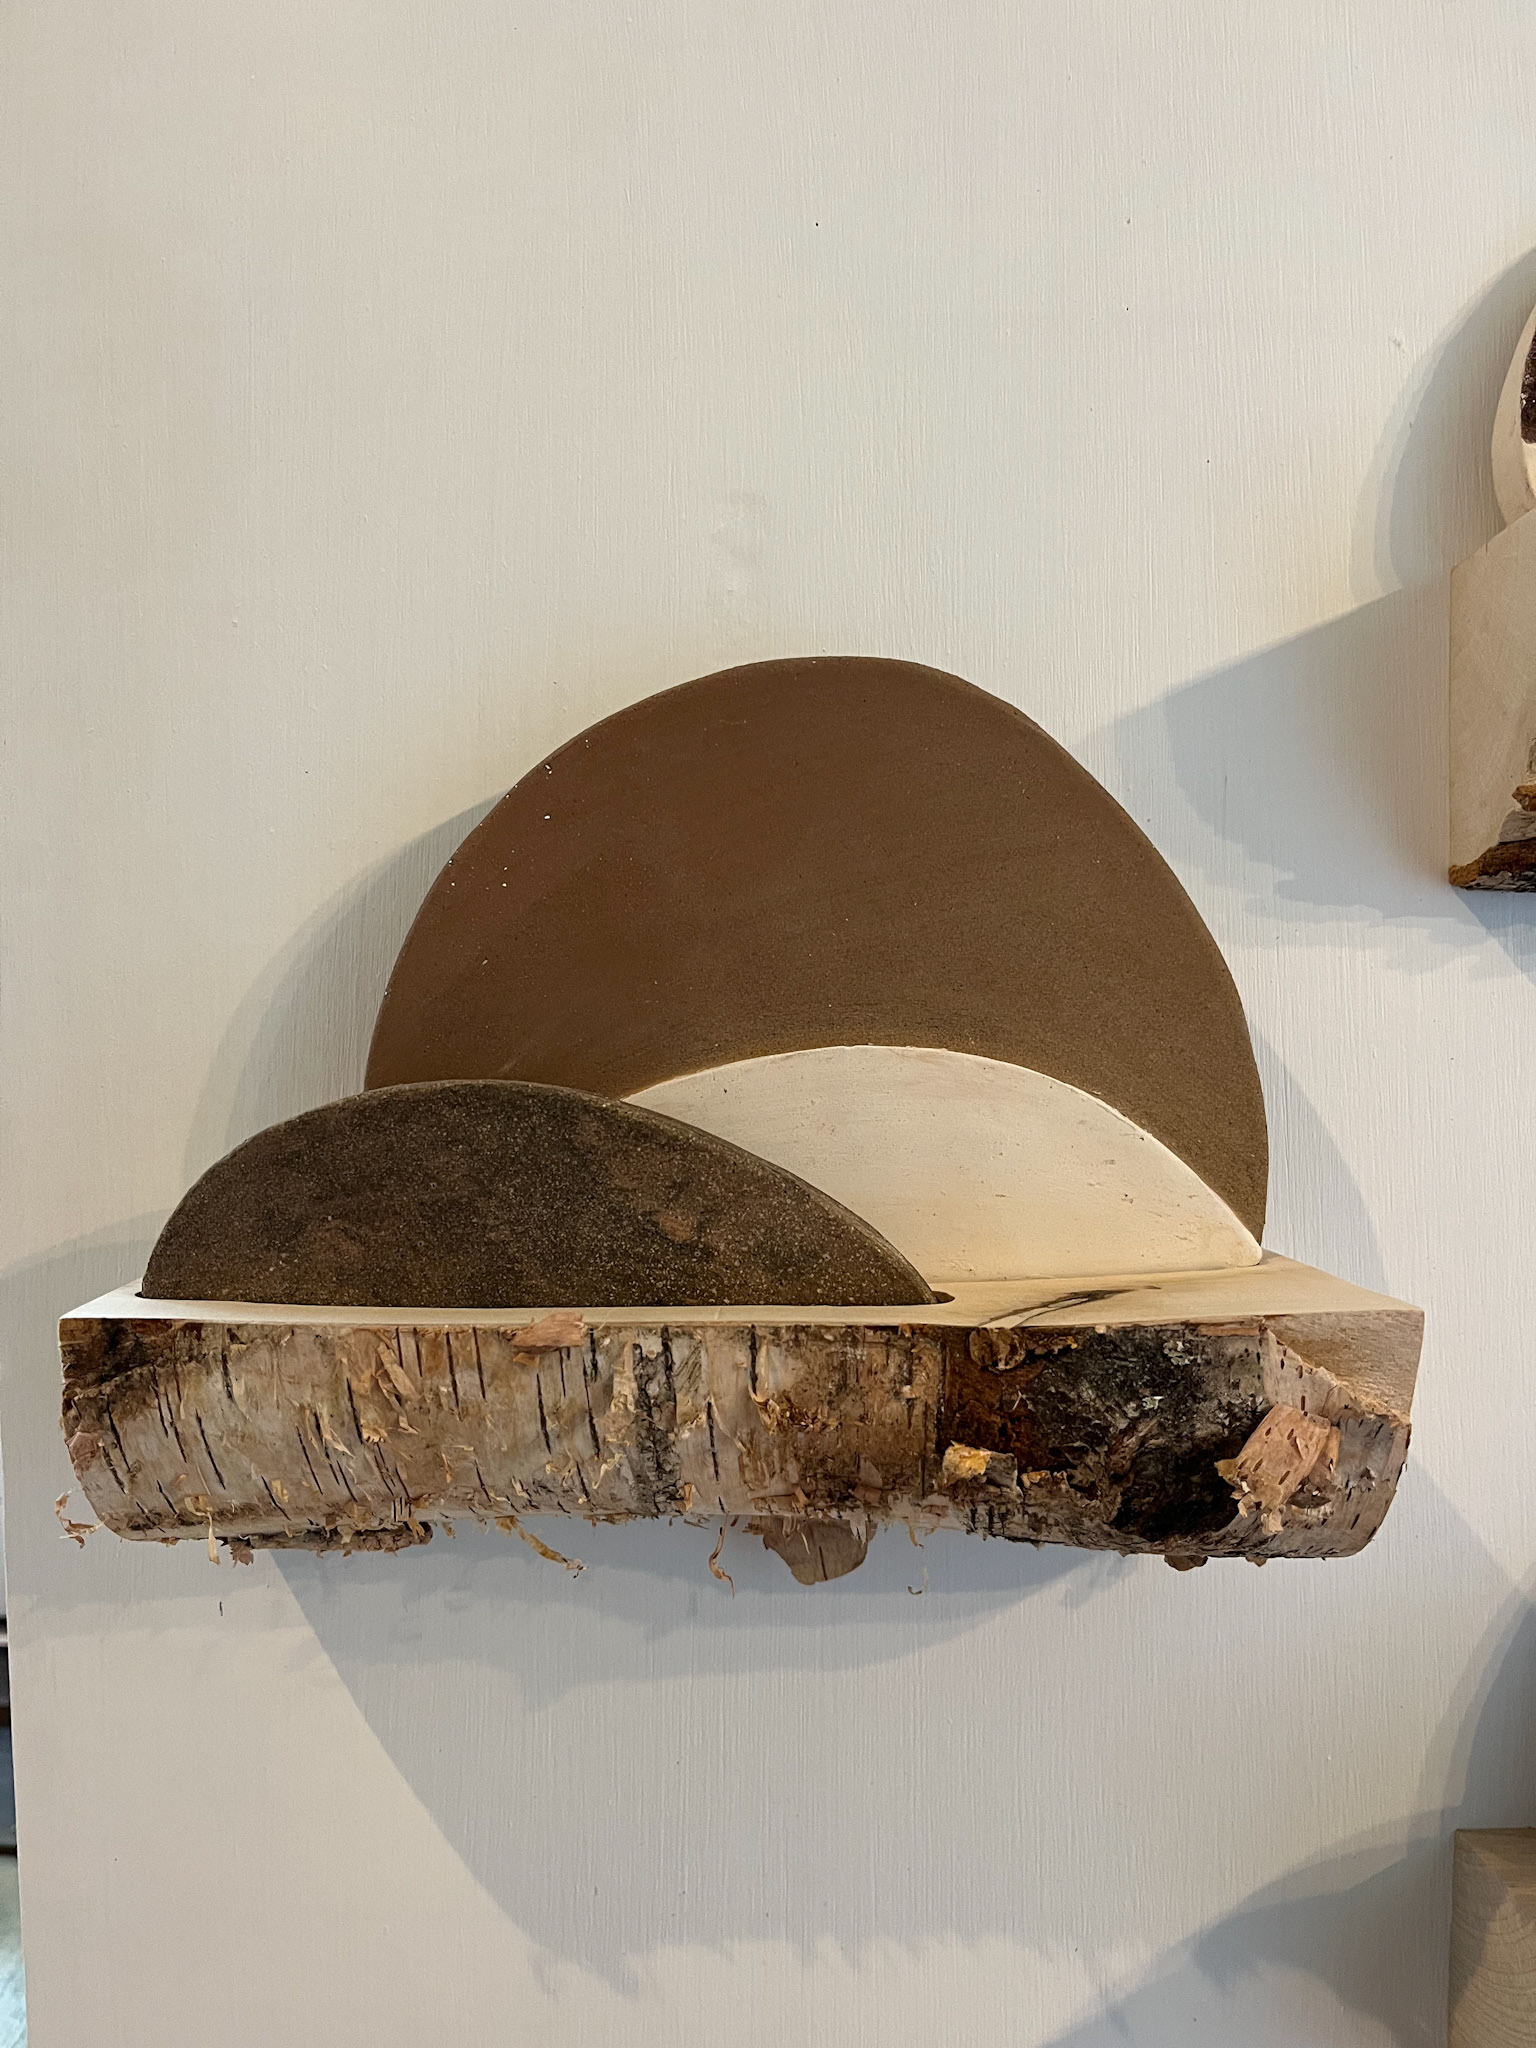
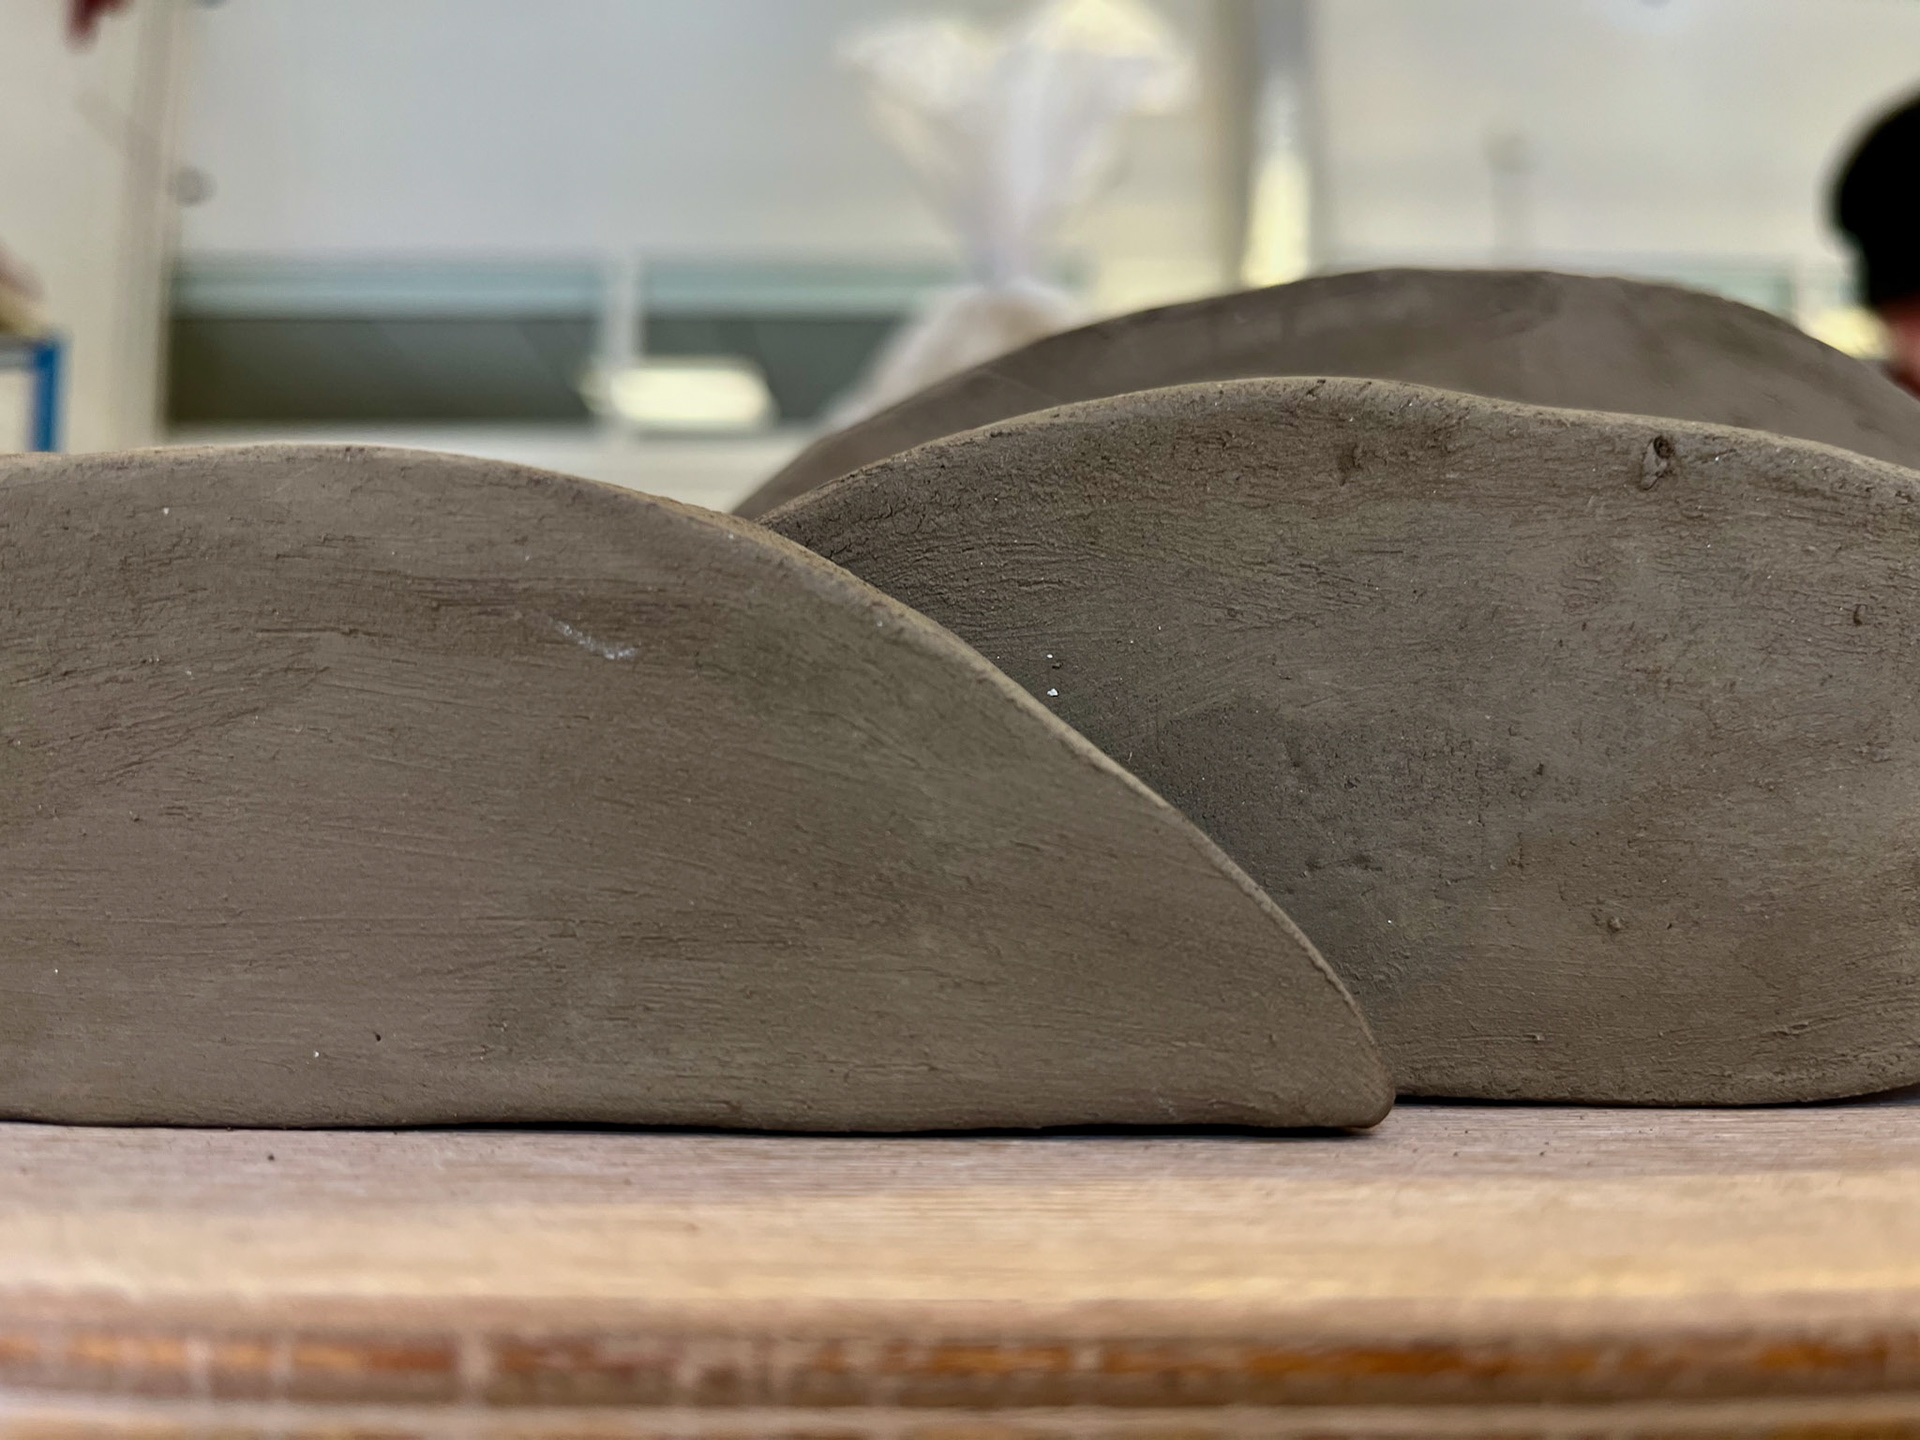
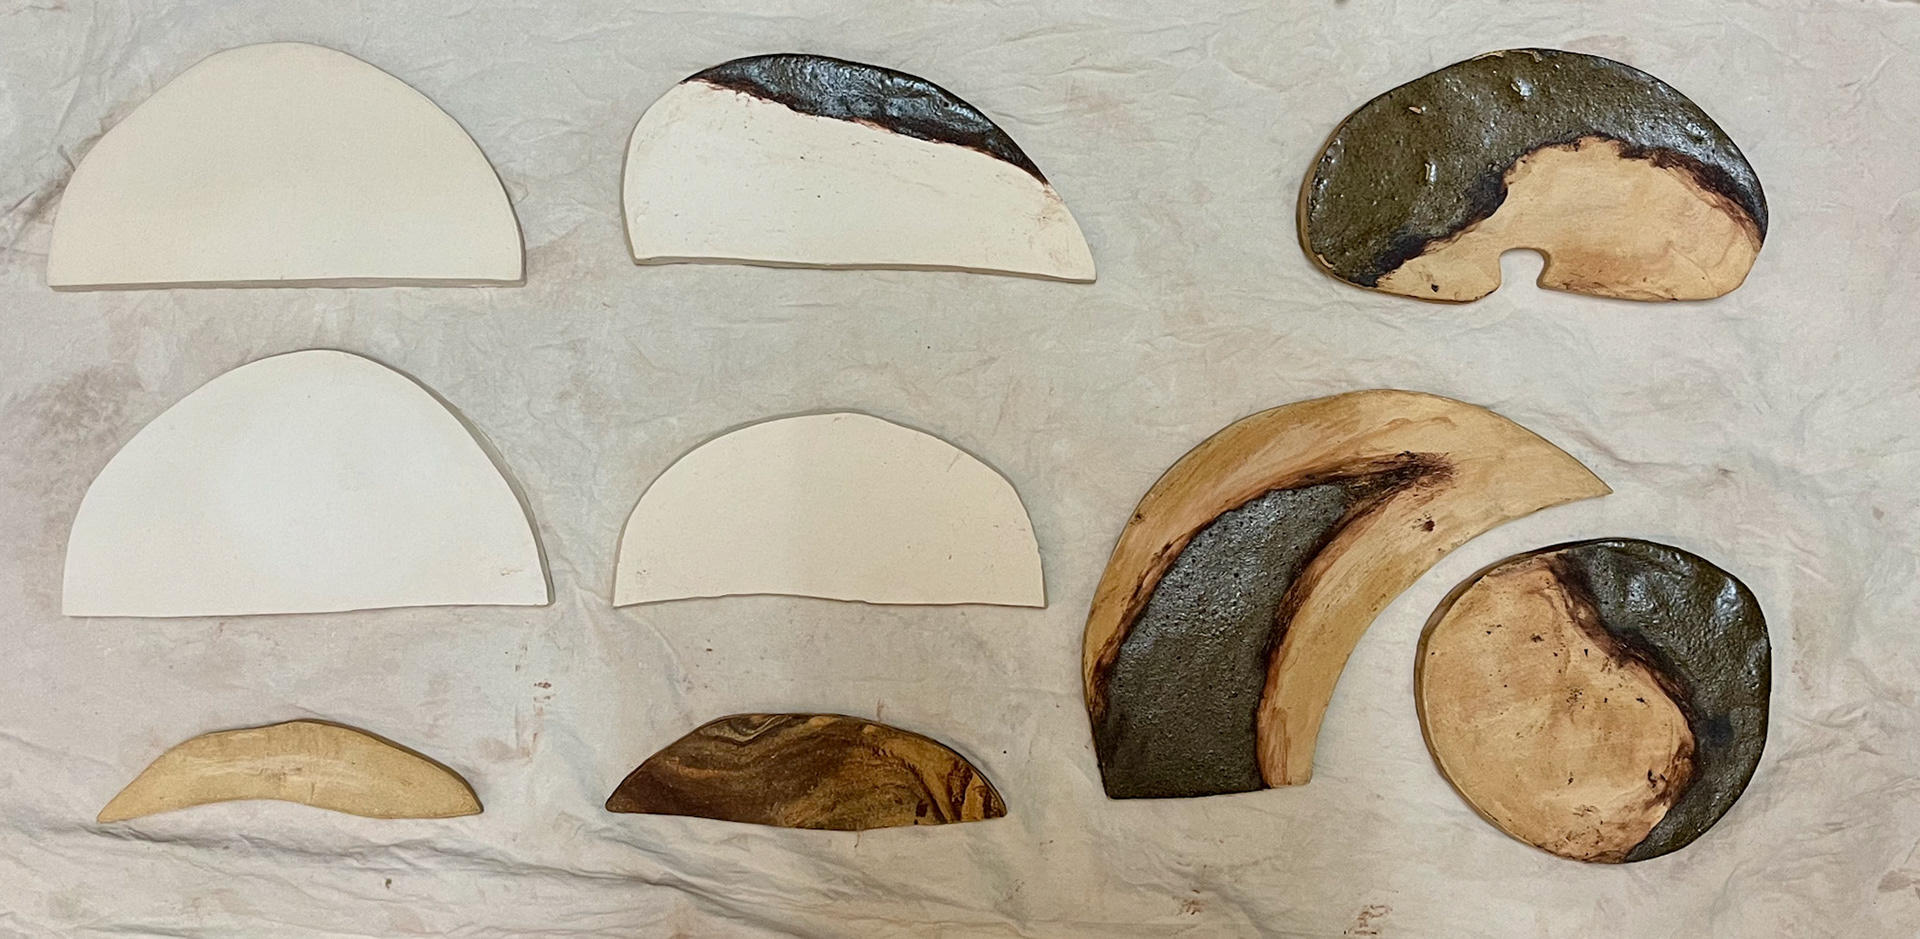
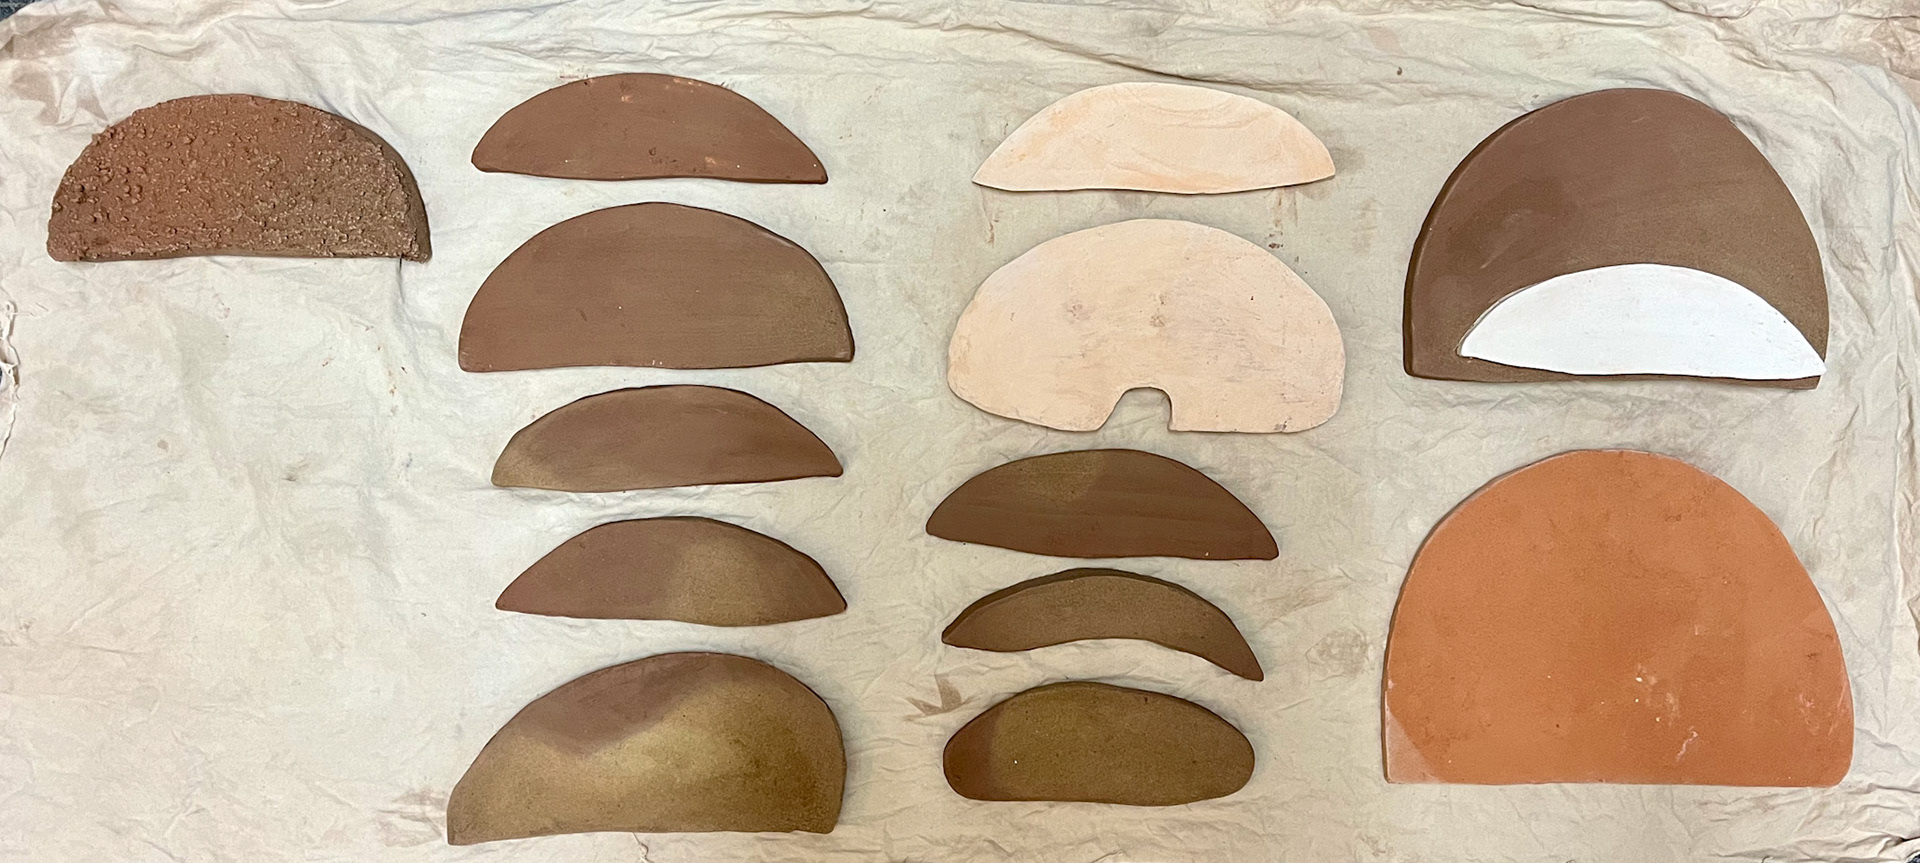
These ceramic slabs all use different clays and different techniques. I have found that the larger, thicker slabs work better than the smaller ones, as they stand out more and show off the clay well. In the next slabs I make, I will be refining the smoothness of the edges and ensuring that they will all be able to stand up. I am also looking into ways of sanding down the ceramic because I will not be using any other glazes post-fire, and it is the clays themselves that are being highlighted.
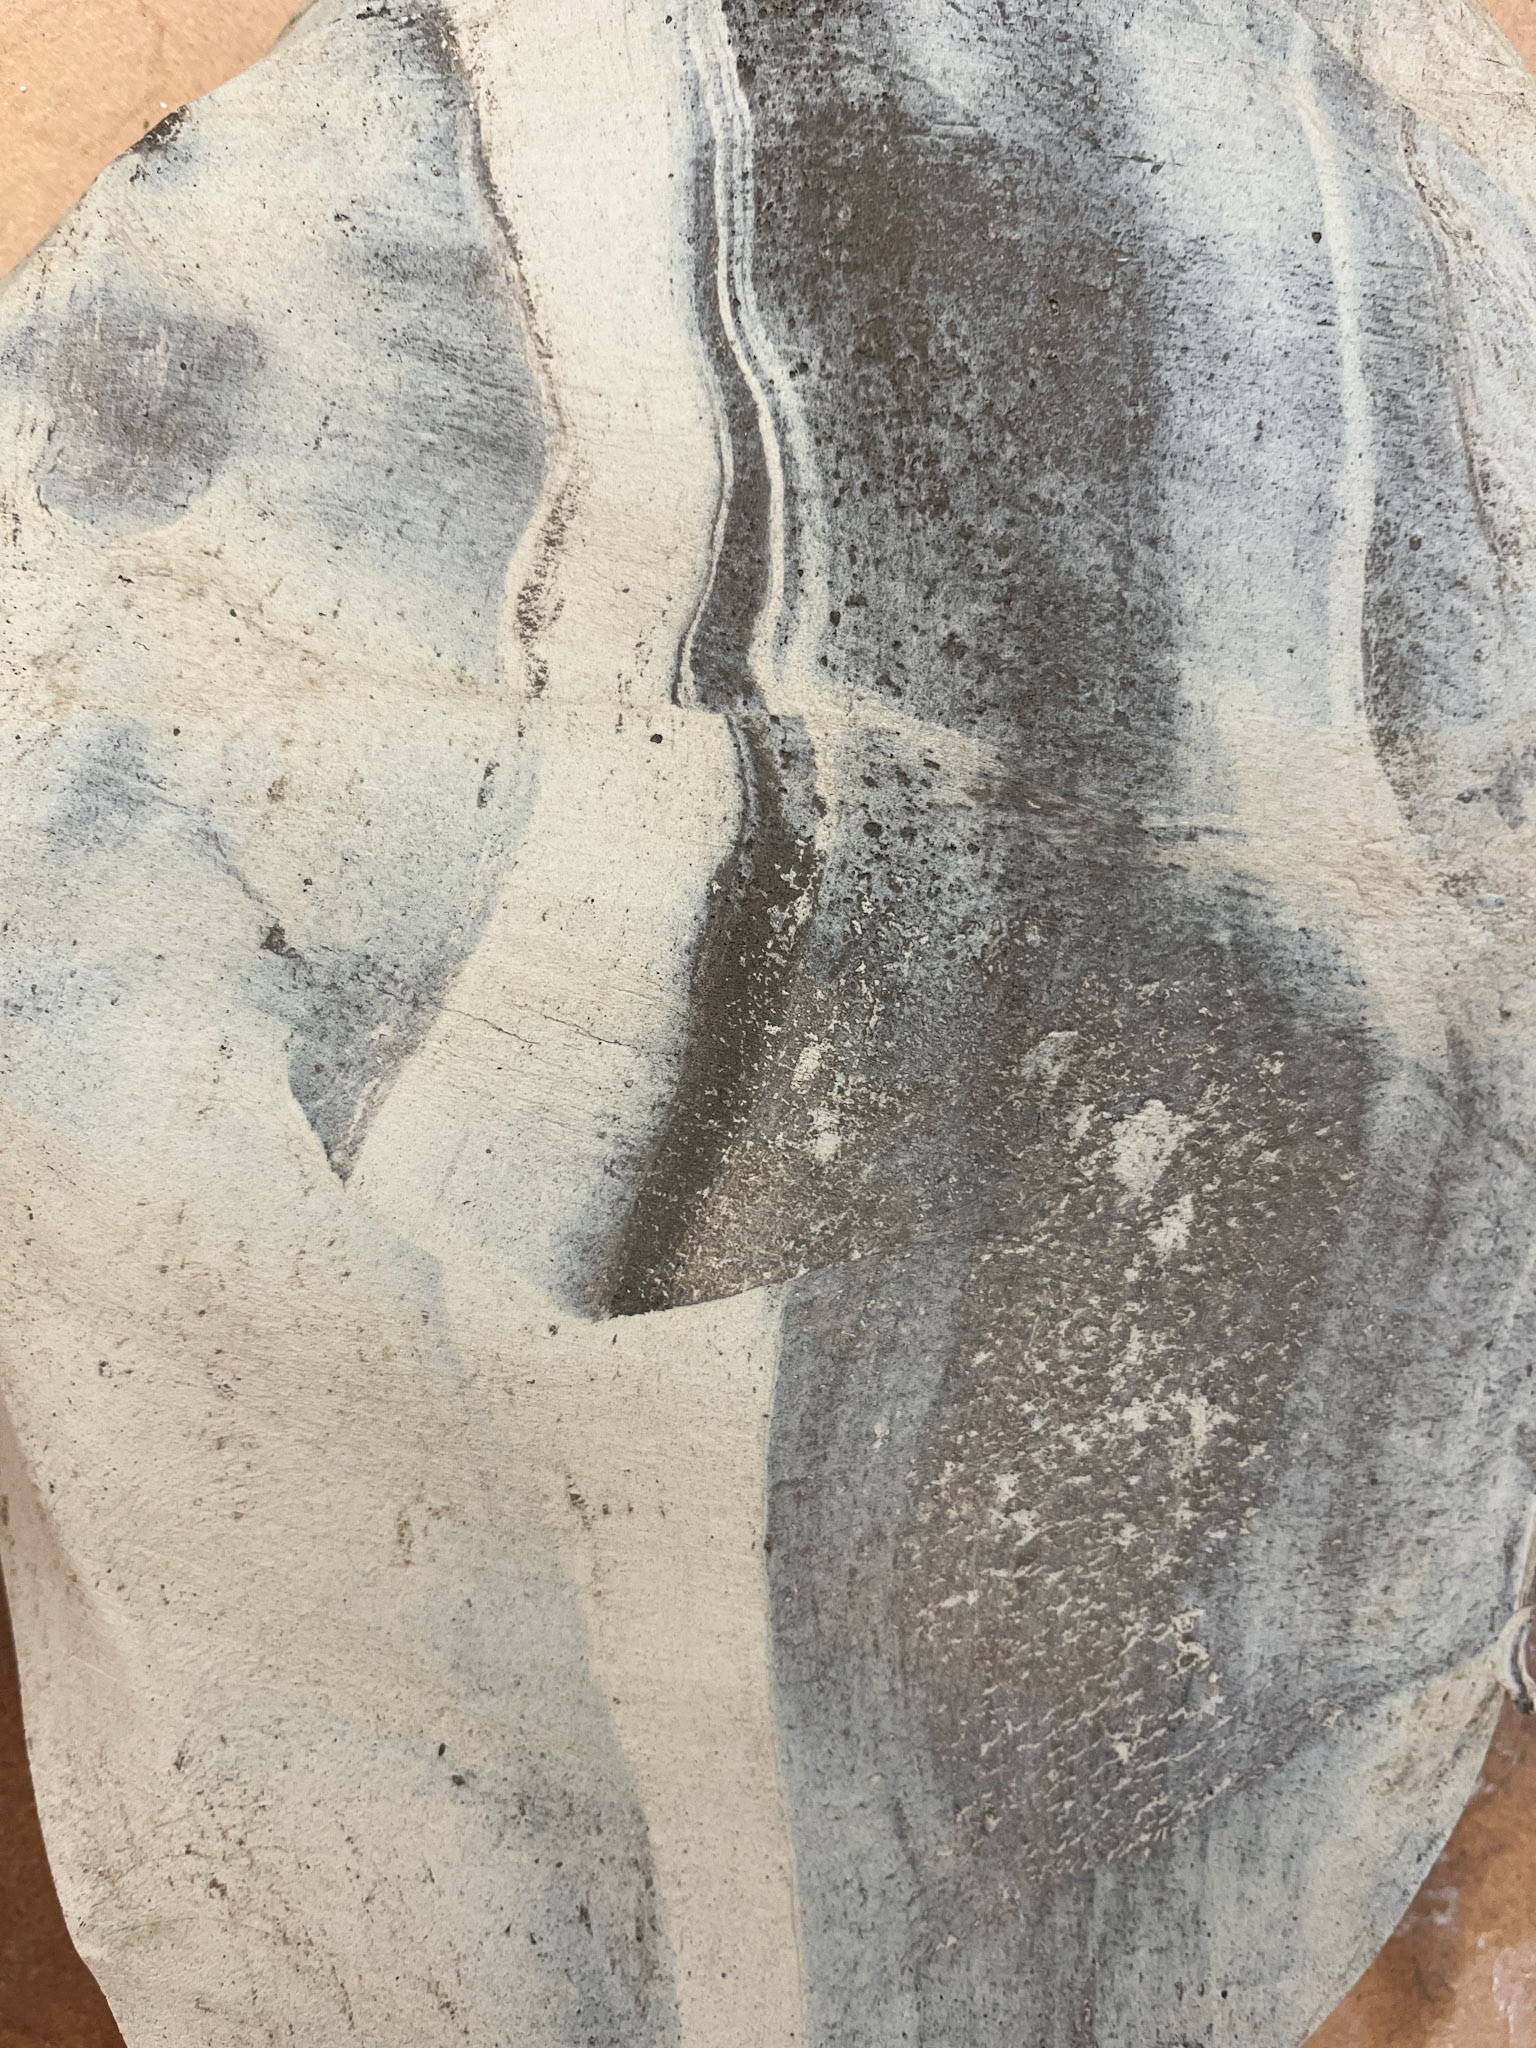
I am mixing the cave and ivory/almington clay to create a marble effect. When fired to earthenware, the cave clay melts into the commercial, leaving an effective, distinctive look to the ceramic. I am doing this as a development into testing the local clay properties and combining clay that I have sourced and processed myself with that which is commercially available and has been factory-produced. This, therefore, relates to how the millstones, which have been mass-produced for commercial factory use, have been imposed in a natural, wild environment.
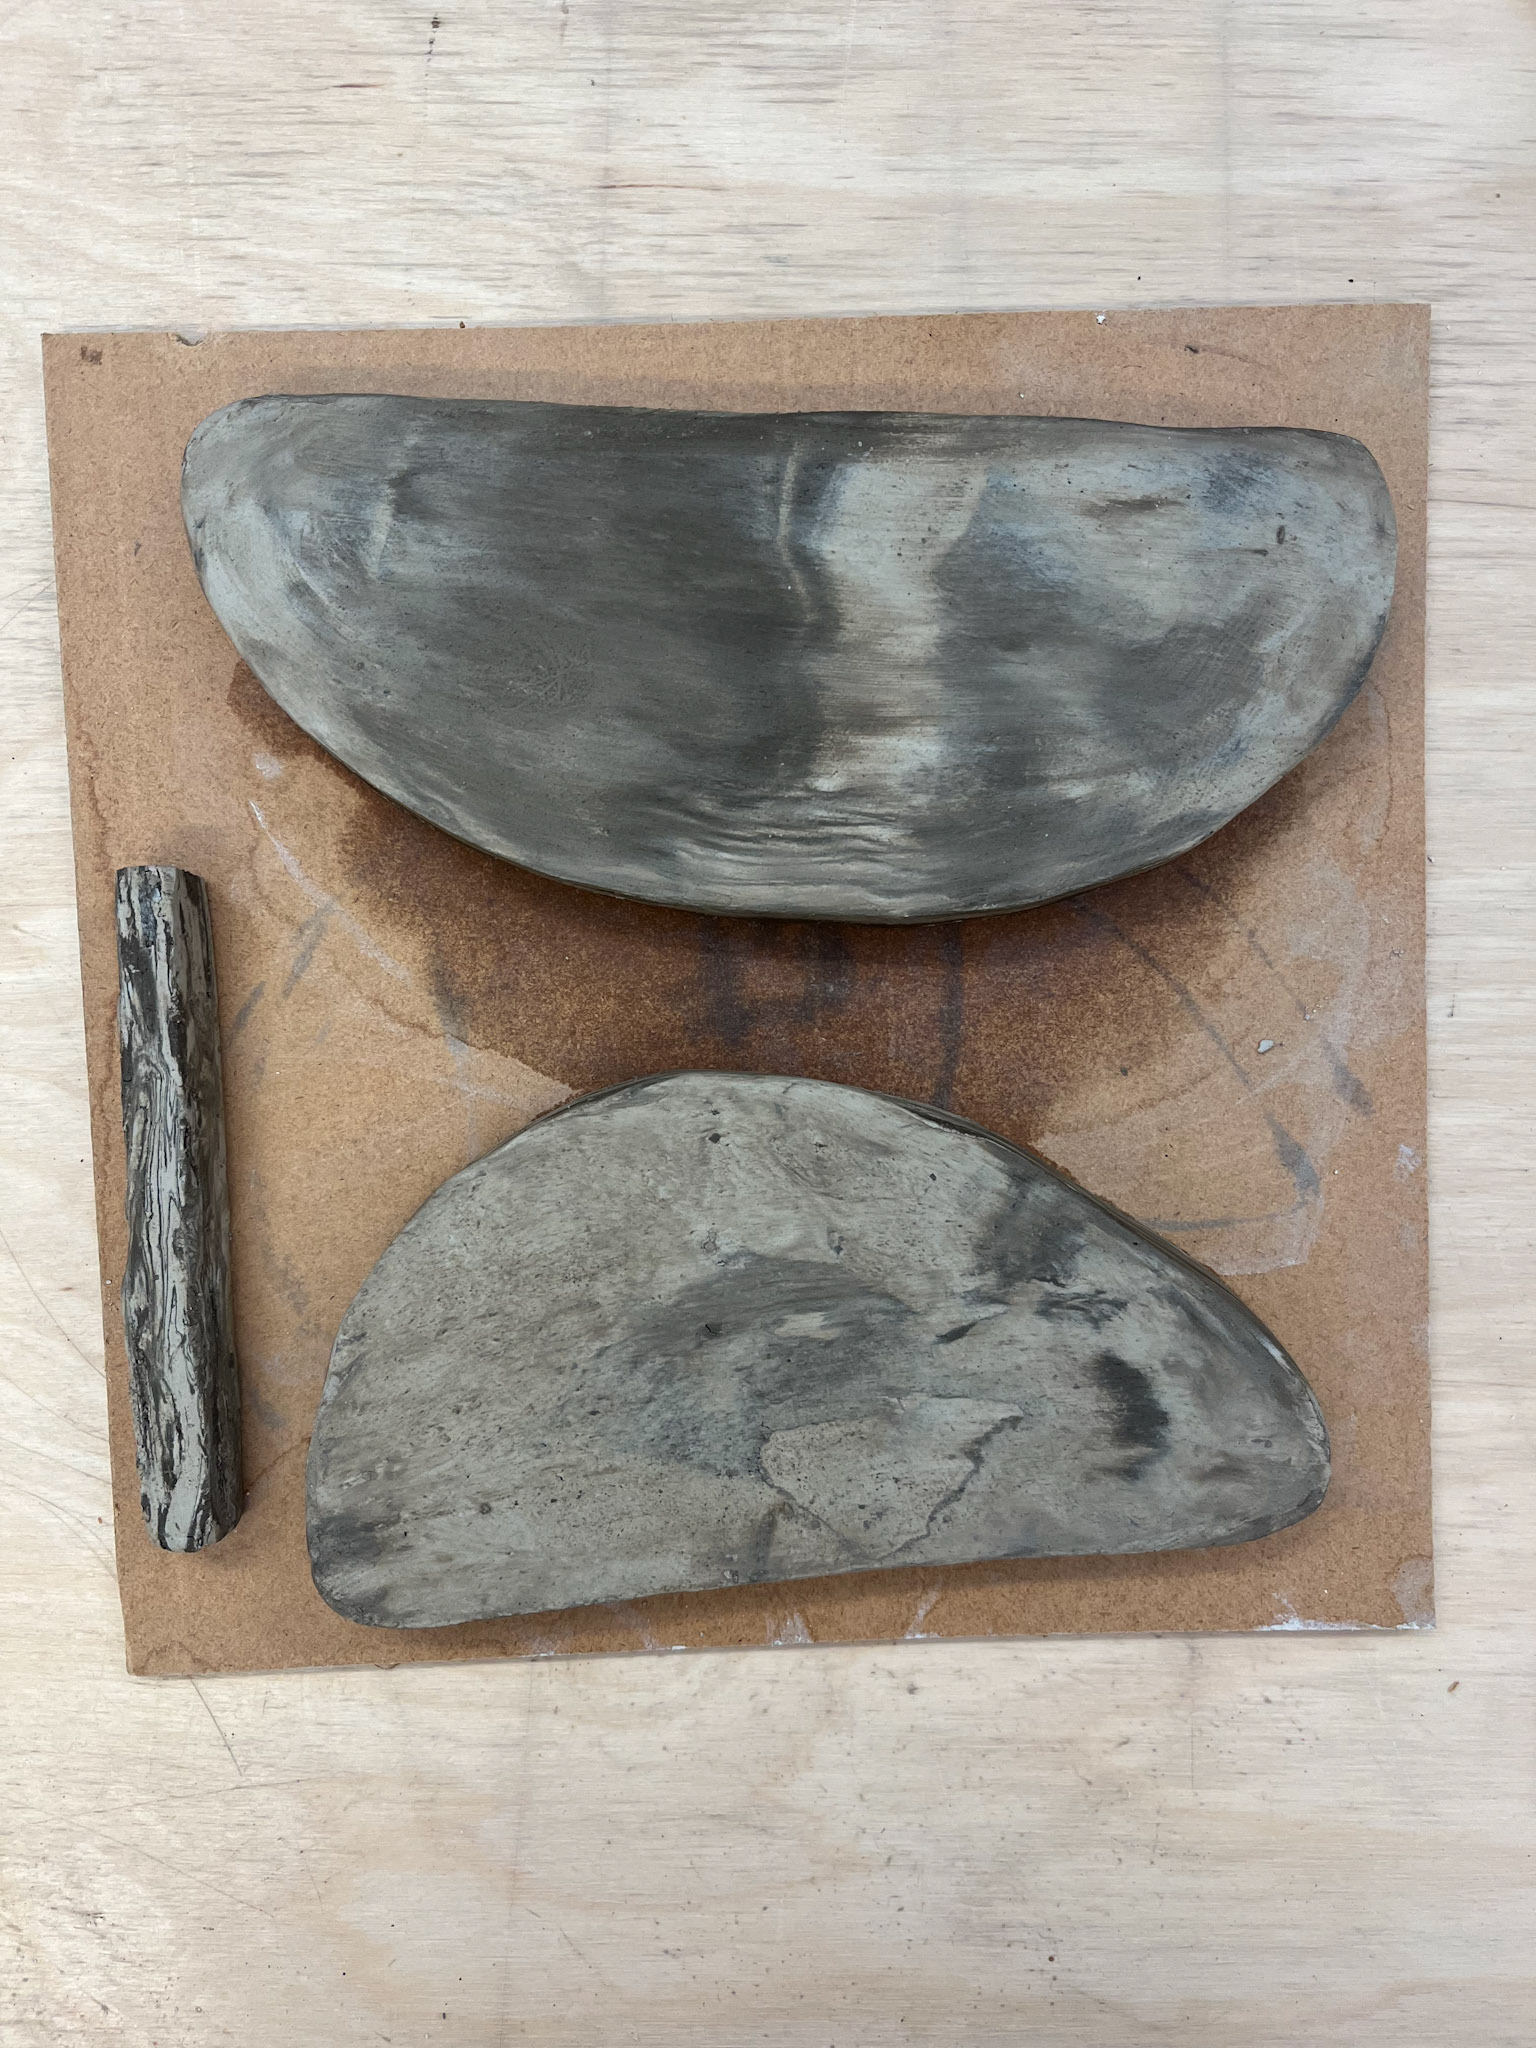
I have made small tester logs that will be fired first to test the clays' compatibility with the kiln, as even though I have tested each clay with each other at the start of my project with the millstones, I want to make sure it works well in the kiln with this technique.
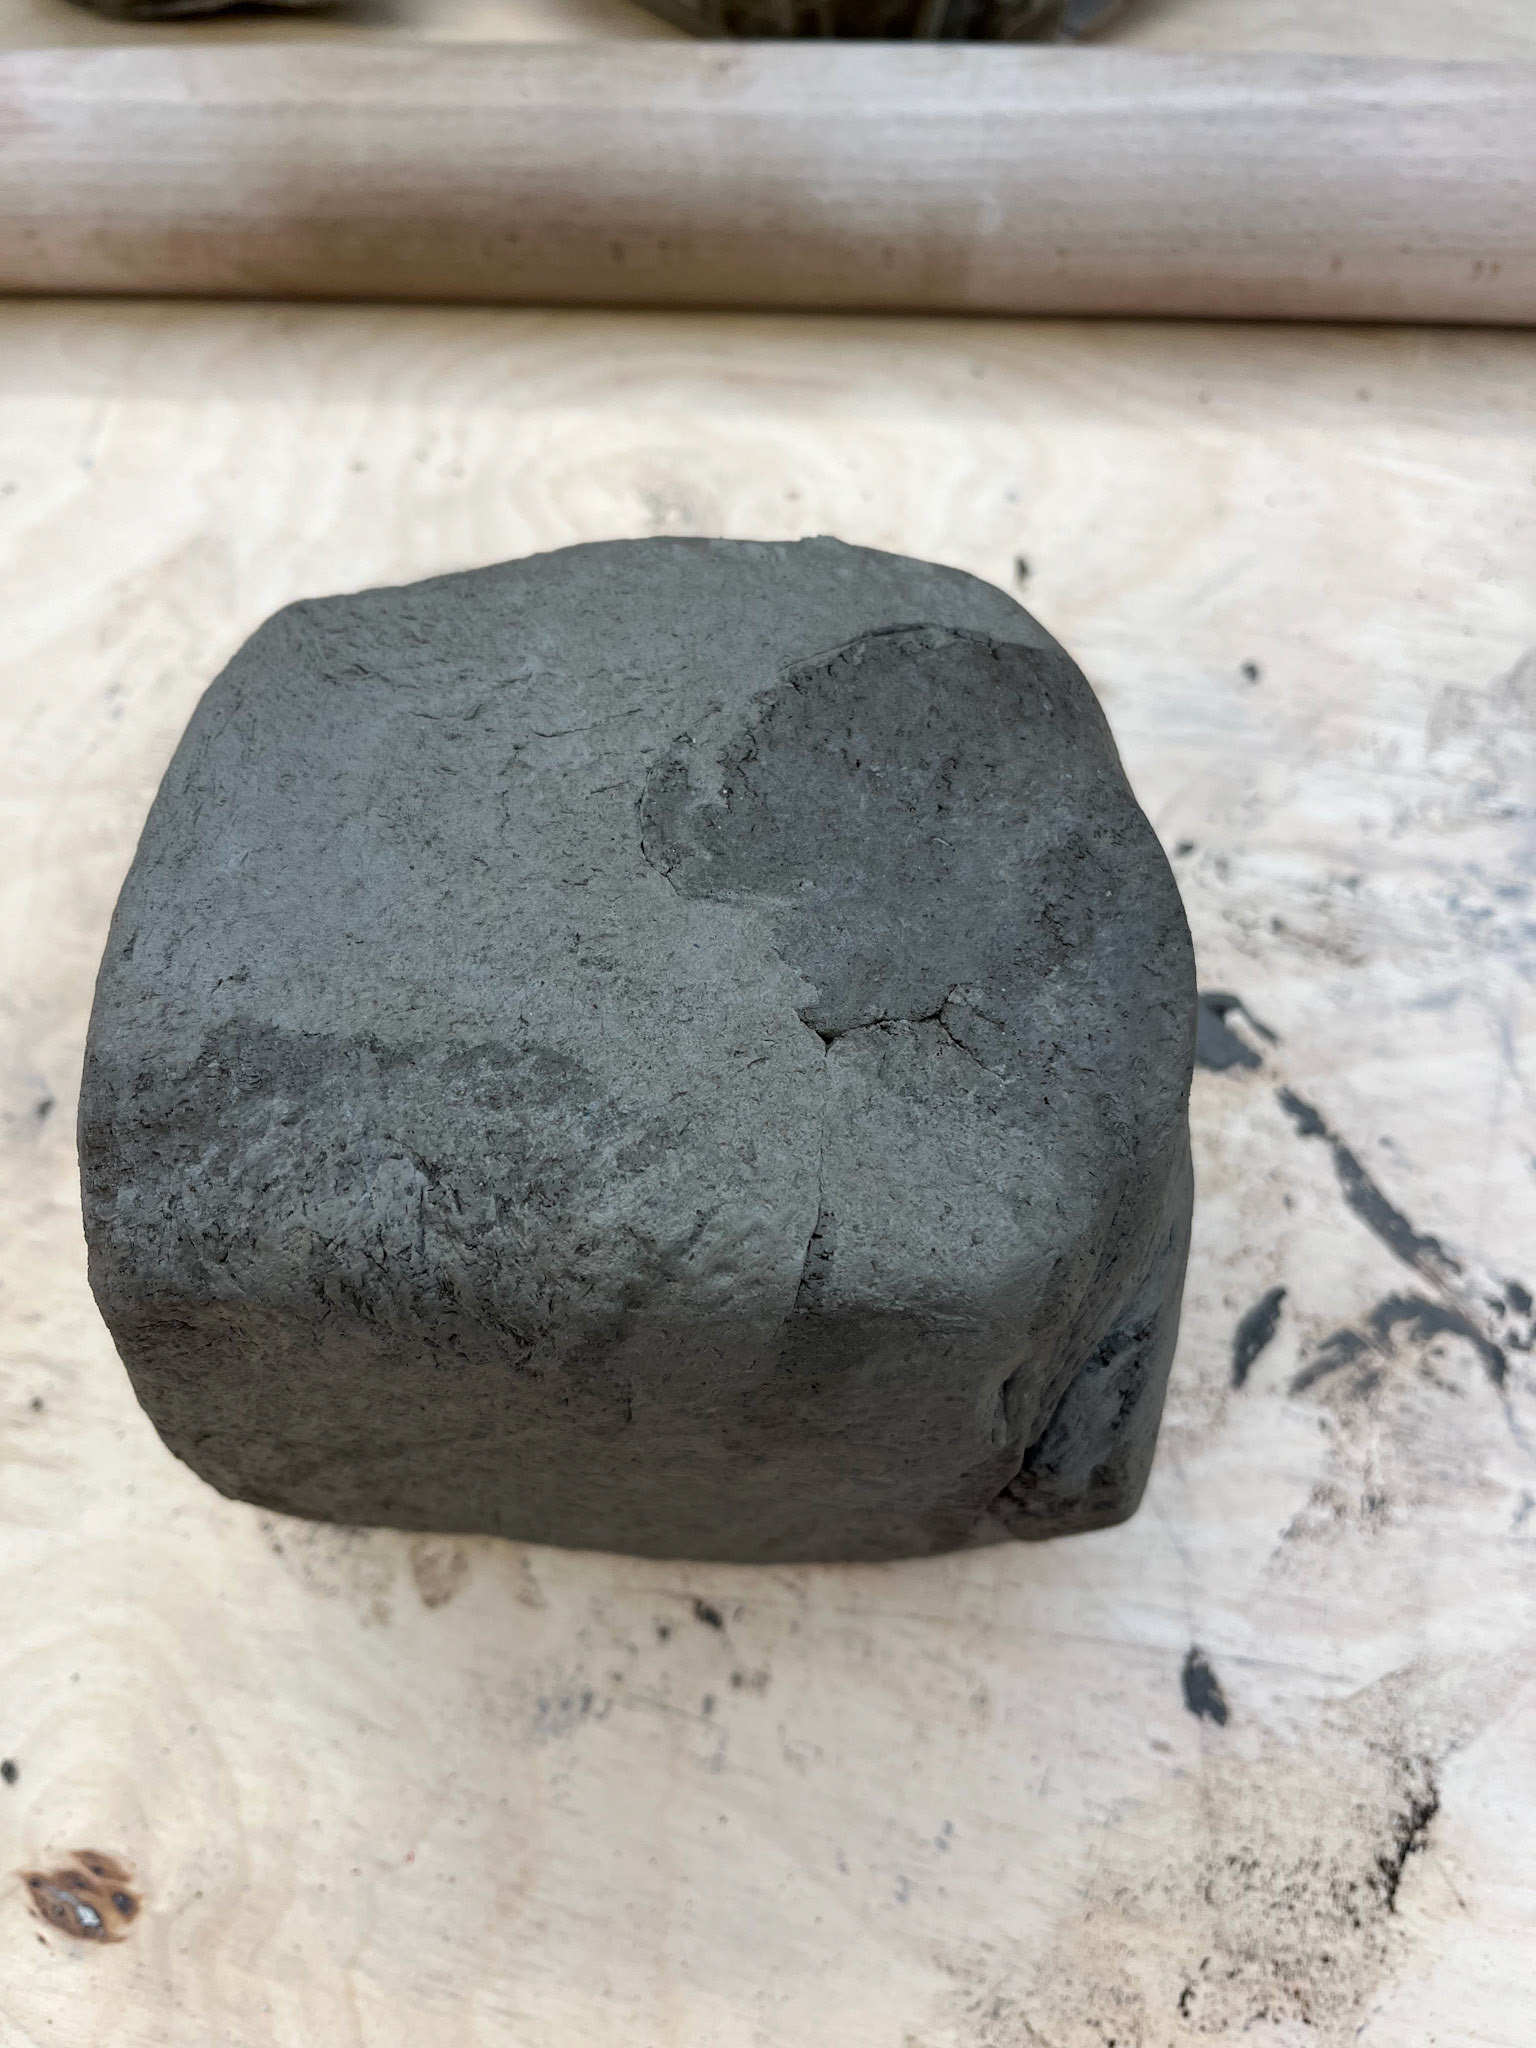
Marbled ball of clay before rolling into slabs
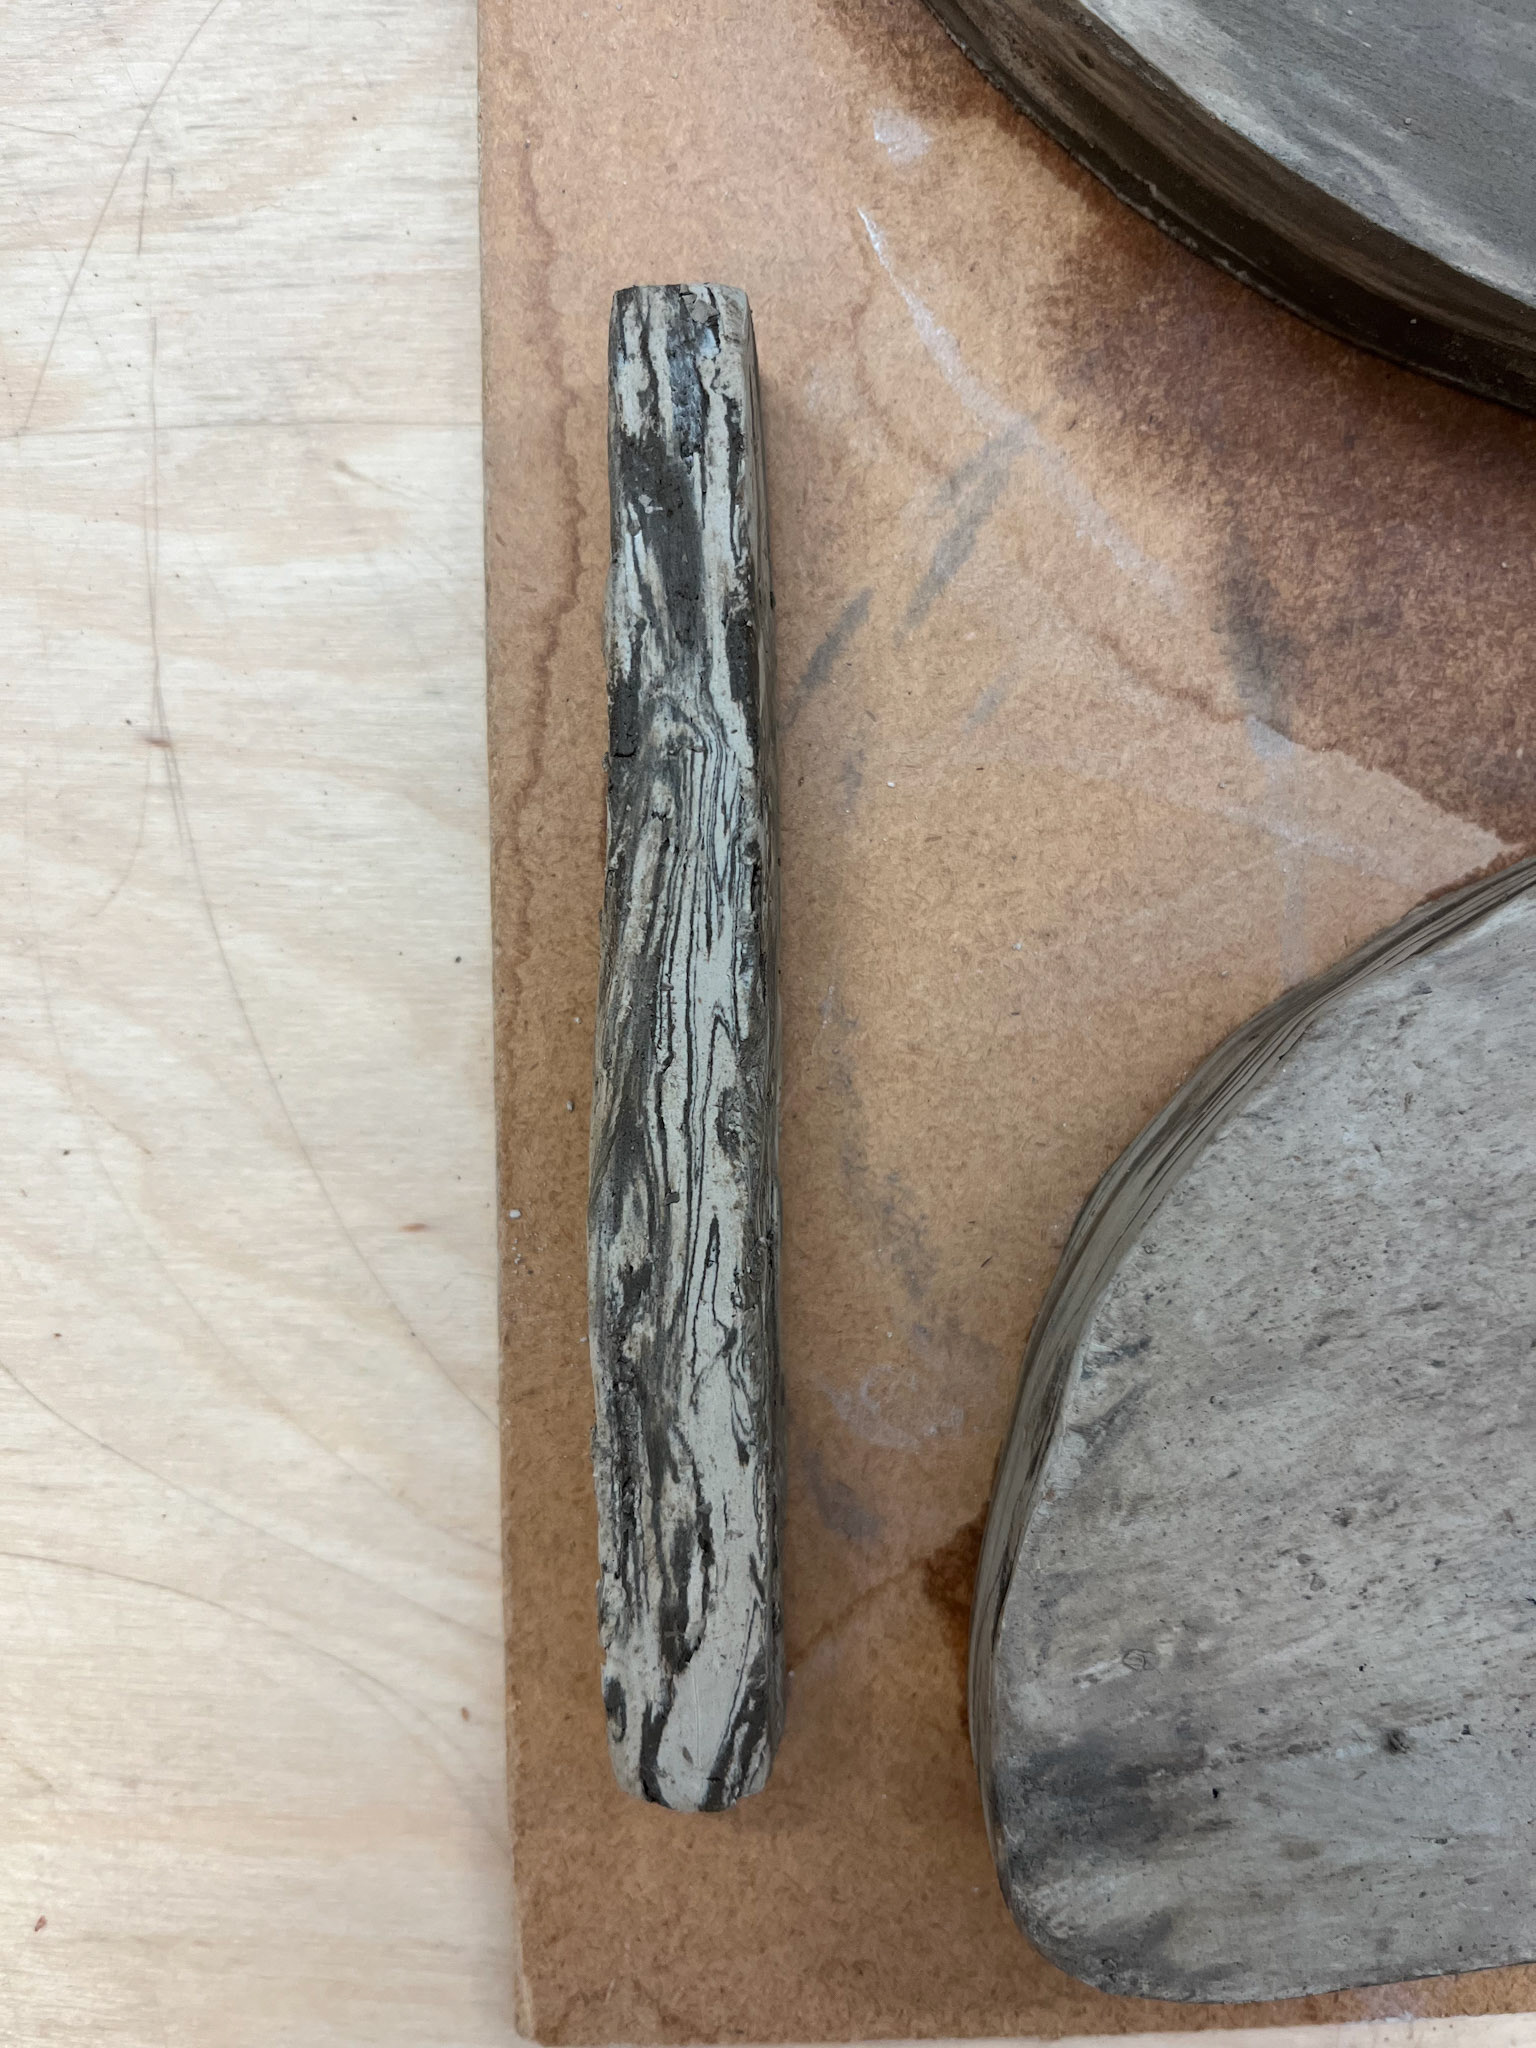
Tester marbled logs
I have created a gritstone glaze made from gritstone that I have collected from the silver birch woods near the Lawrencefield millstones, on which I am basing my work. I have combined this with water to create a deeply coloured paint-like slip, which I am painting onto the clay pre-fire. I am interested in seeing how this fires, as I hope the colour will stick due to the contrast between the clay underneath; however, as the grit is quite loose, I am unsure how well it will stay on the fired ceramic.

Burnishing
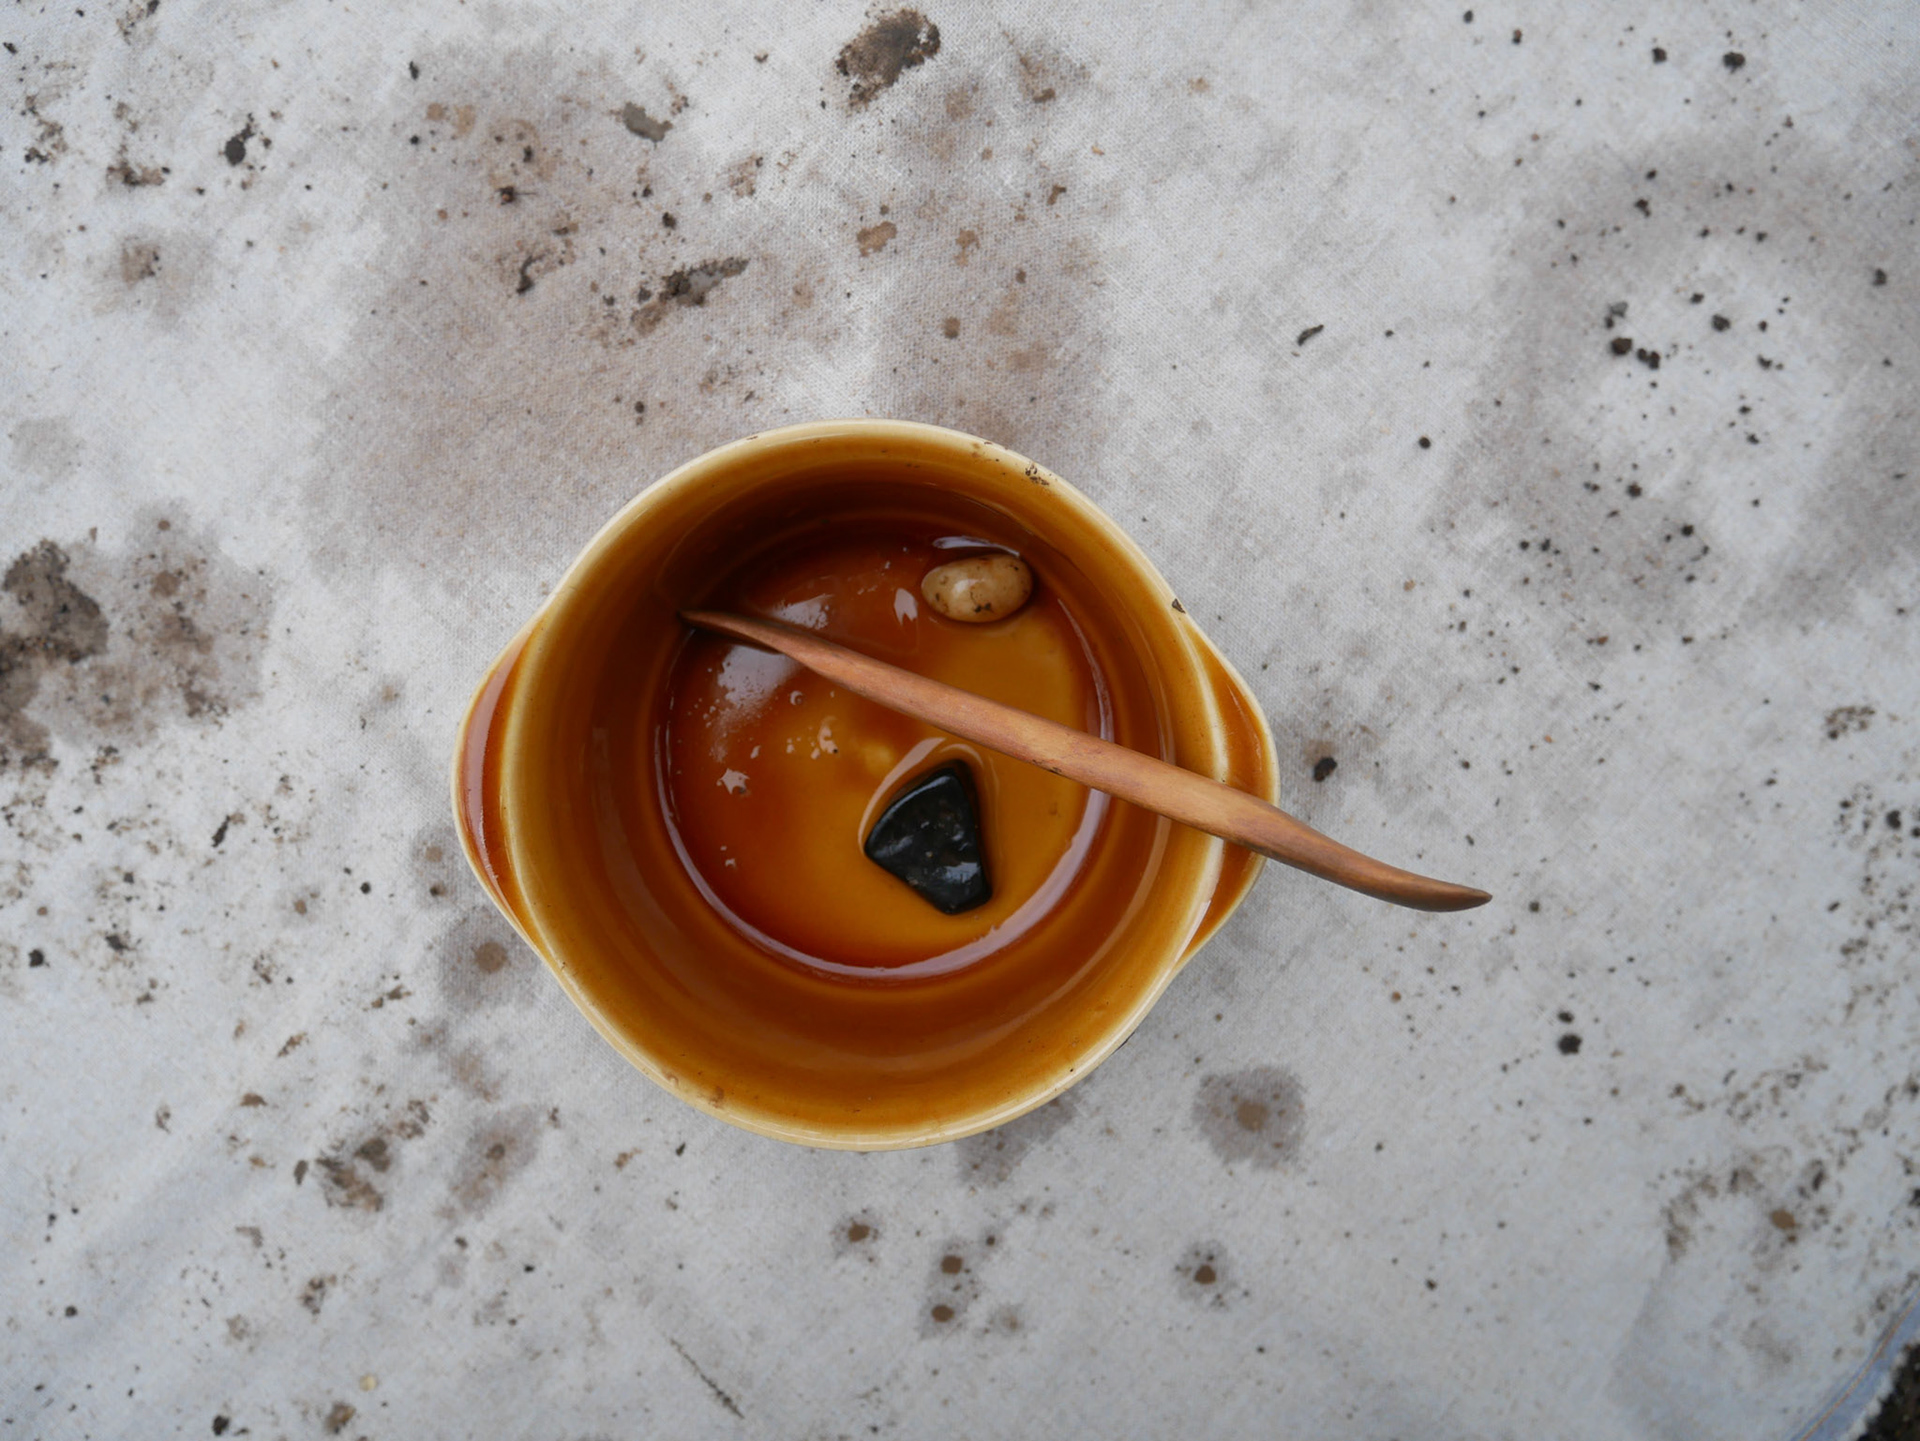
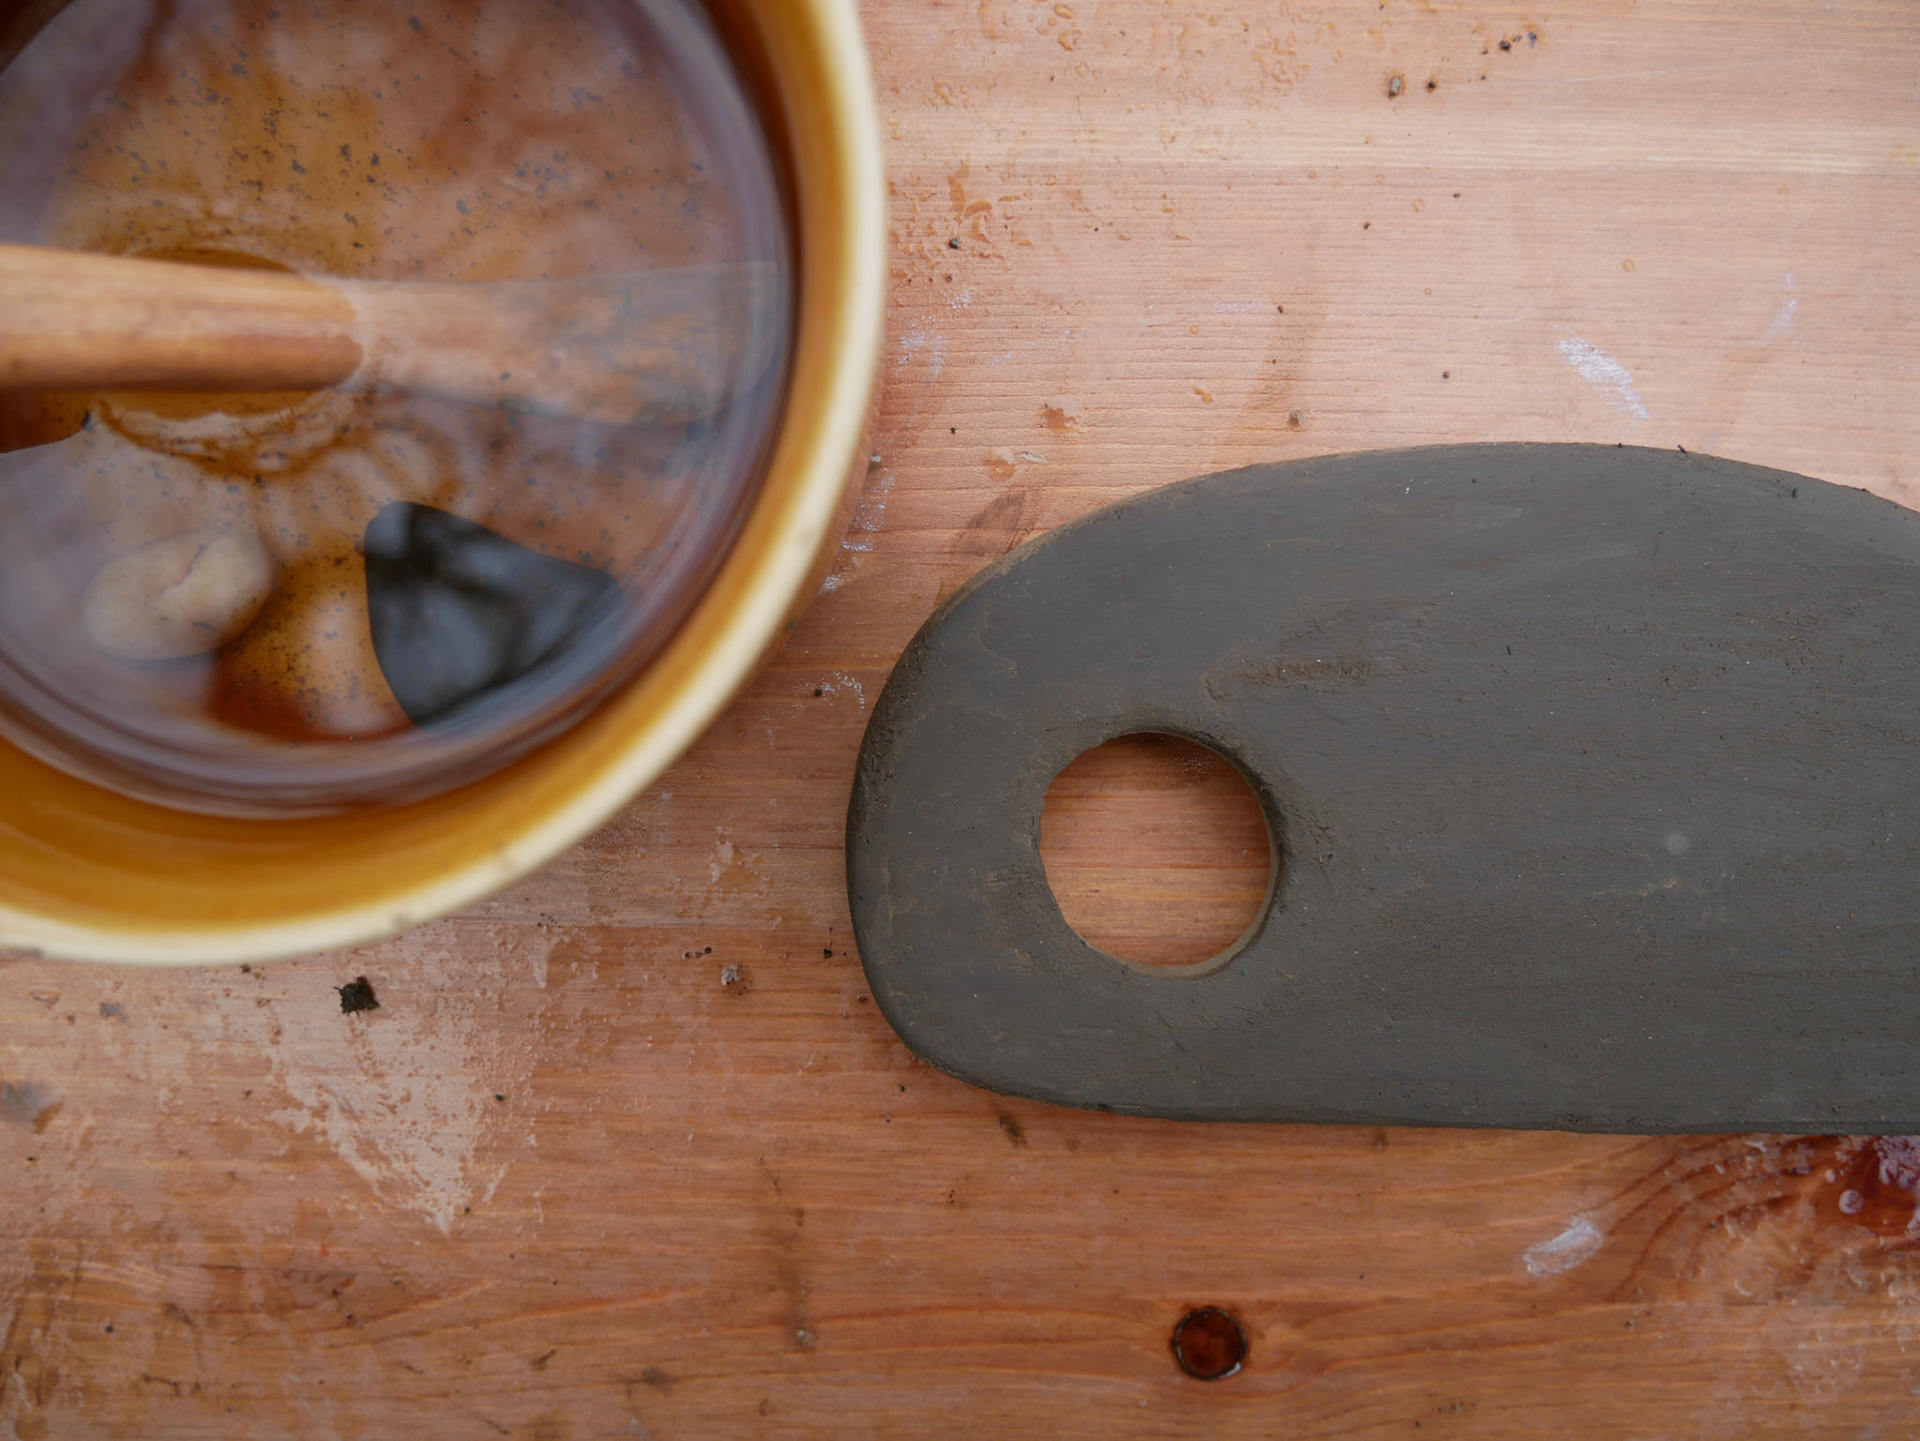
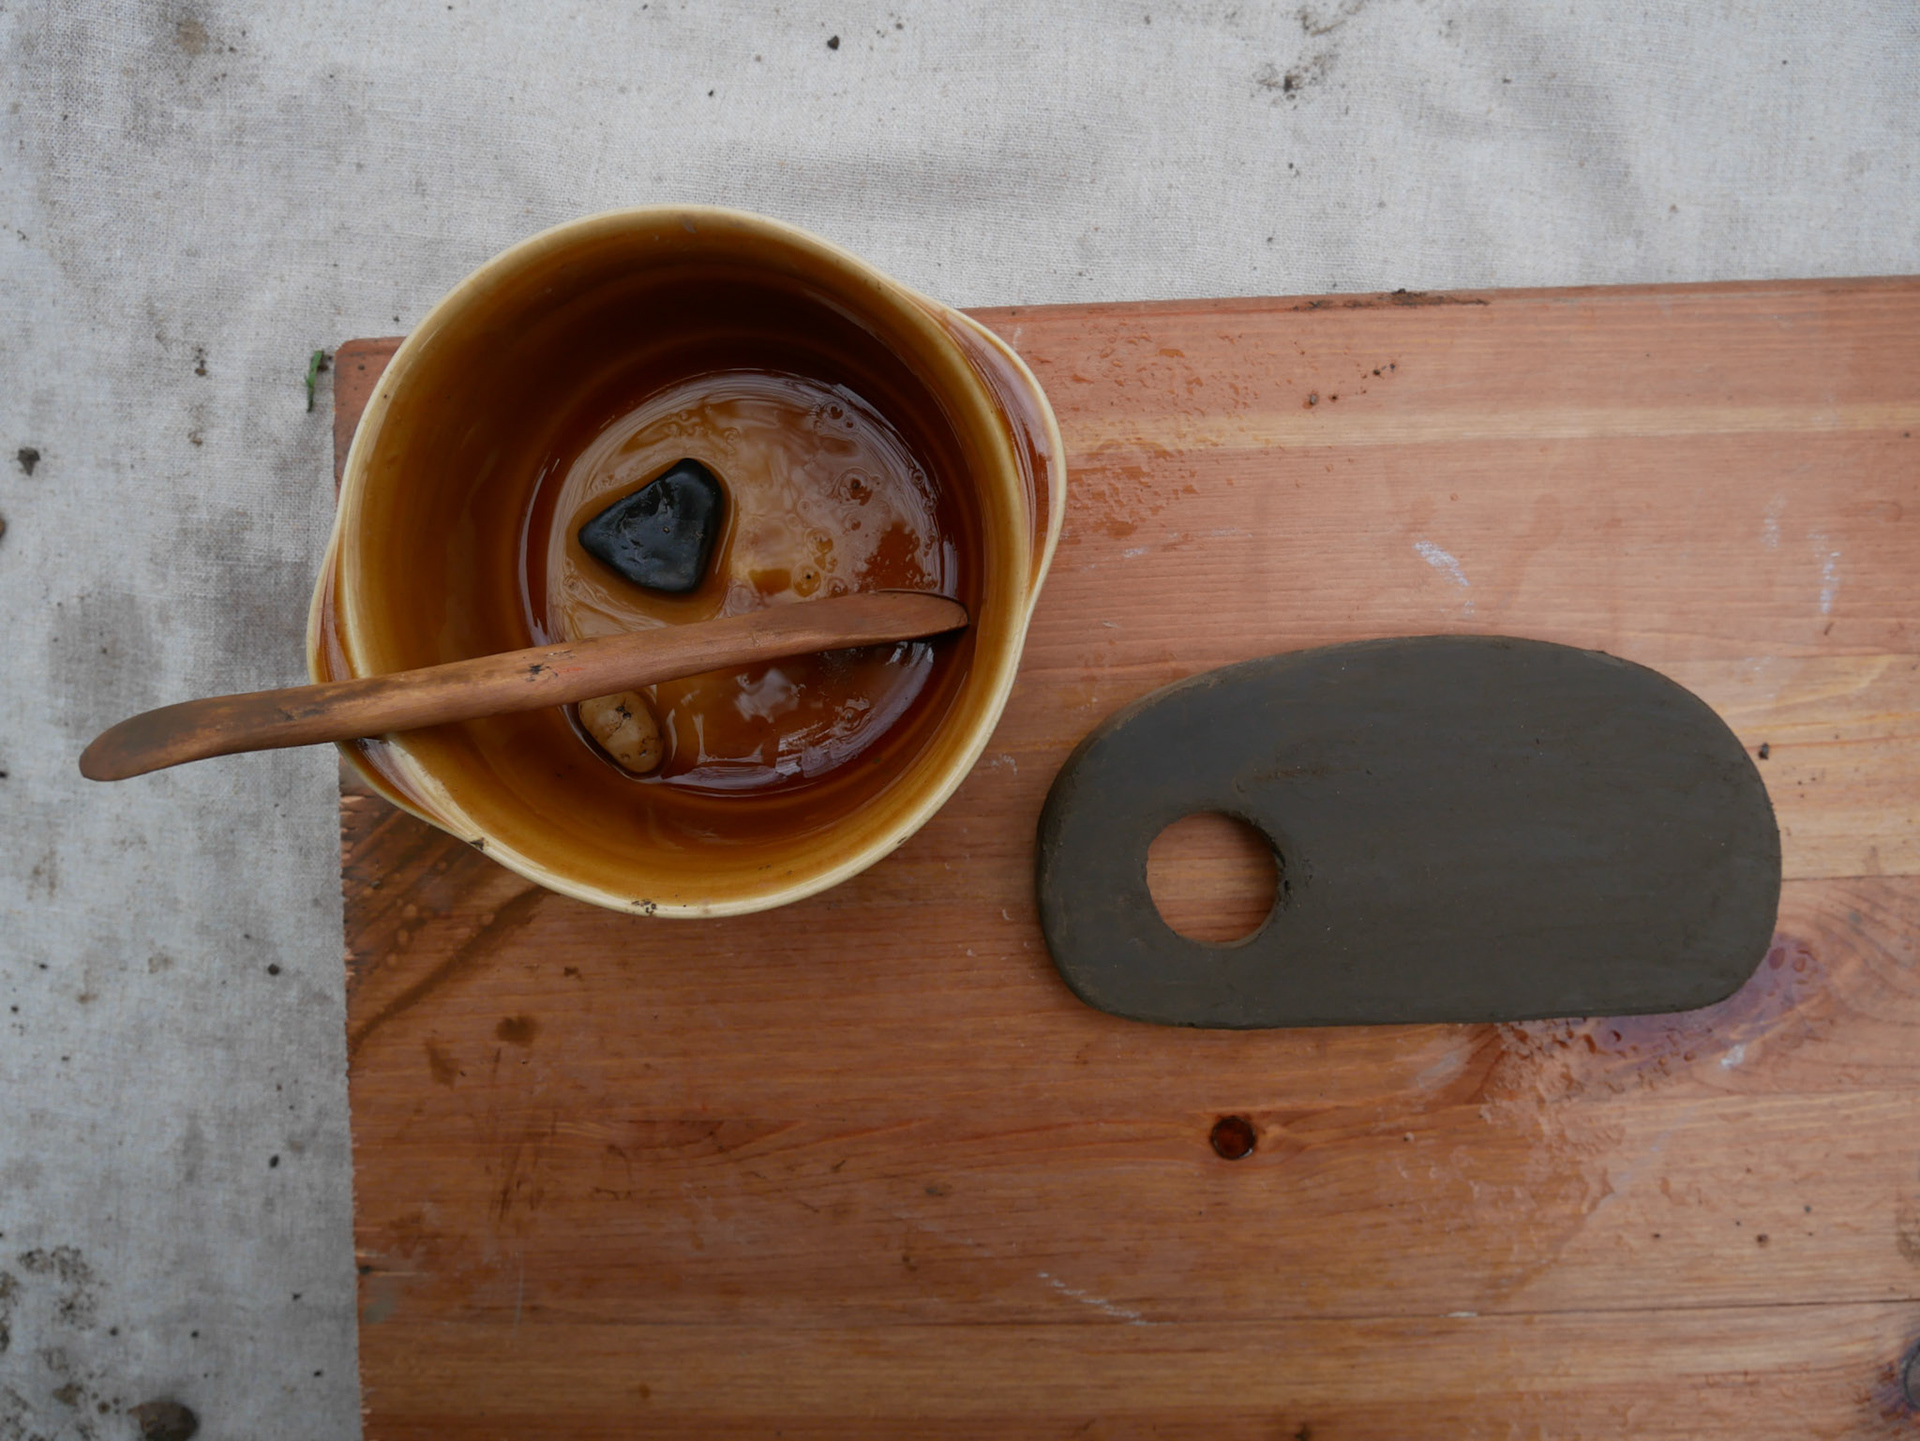
I have looked into the techniques of burnishing clay before firing as an alternative to glazing post-fire. This is a more sustainable way of working with pottery as it minimises the clay's environmental impact. Its low-energy process refines the ceramic more by creating a smooth, glossy effect on the fired pieces without the need for additional commercial glazes. This prehistoric technique uses smooth stones to compact the clay particles, and this practice relates to my own due to using as many natural resources as I can to produce my work.
I have again taken this process outdoors to show that every step of the process really can be done outdoors, in its natural environment, using tools from the earth. With water from the brook and pebbles from the ground, I have blended my processes with the themes of my practice.
Through trialling different materials to burnish my objects with, both with a pebble, a wooden smooth ceramic stick and the back of a metal spoon, I have found that the pebble or spoon works best. I think this is because of the nature of my slab tiles being flat and one smoothness; the rounded hard material of a smooth pebble or spoon works well to get across the most surface area.
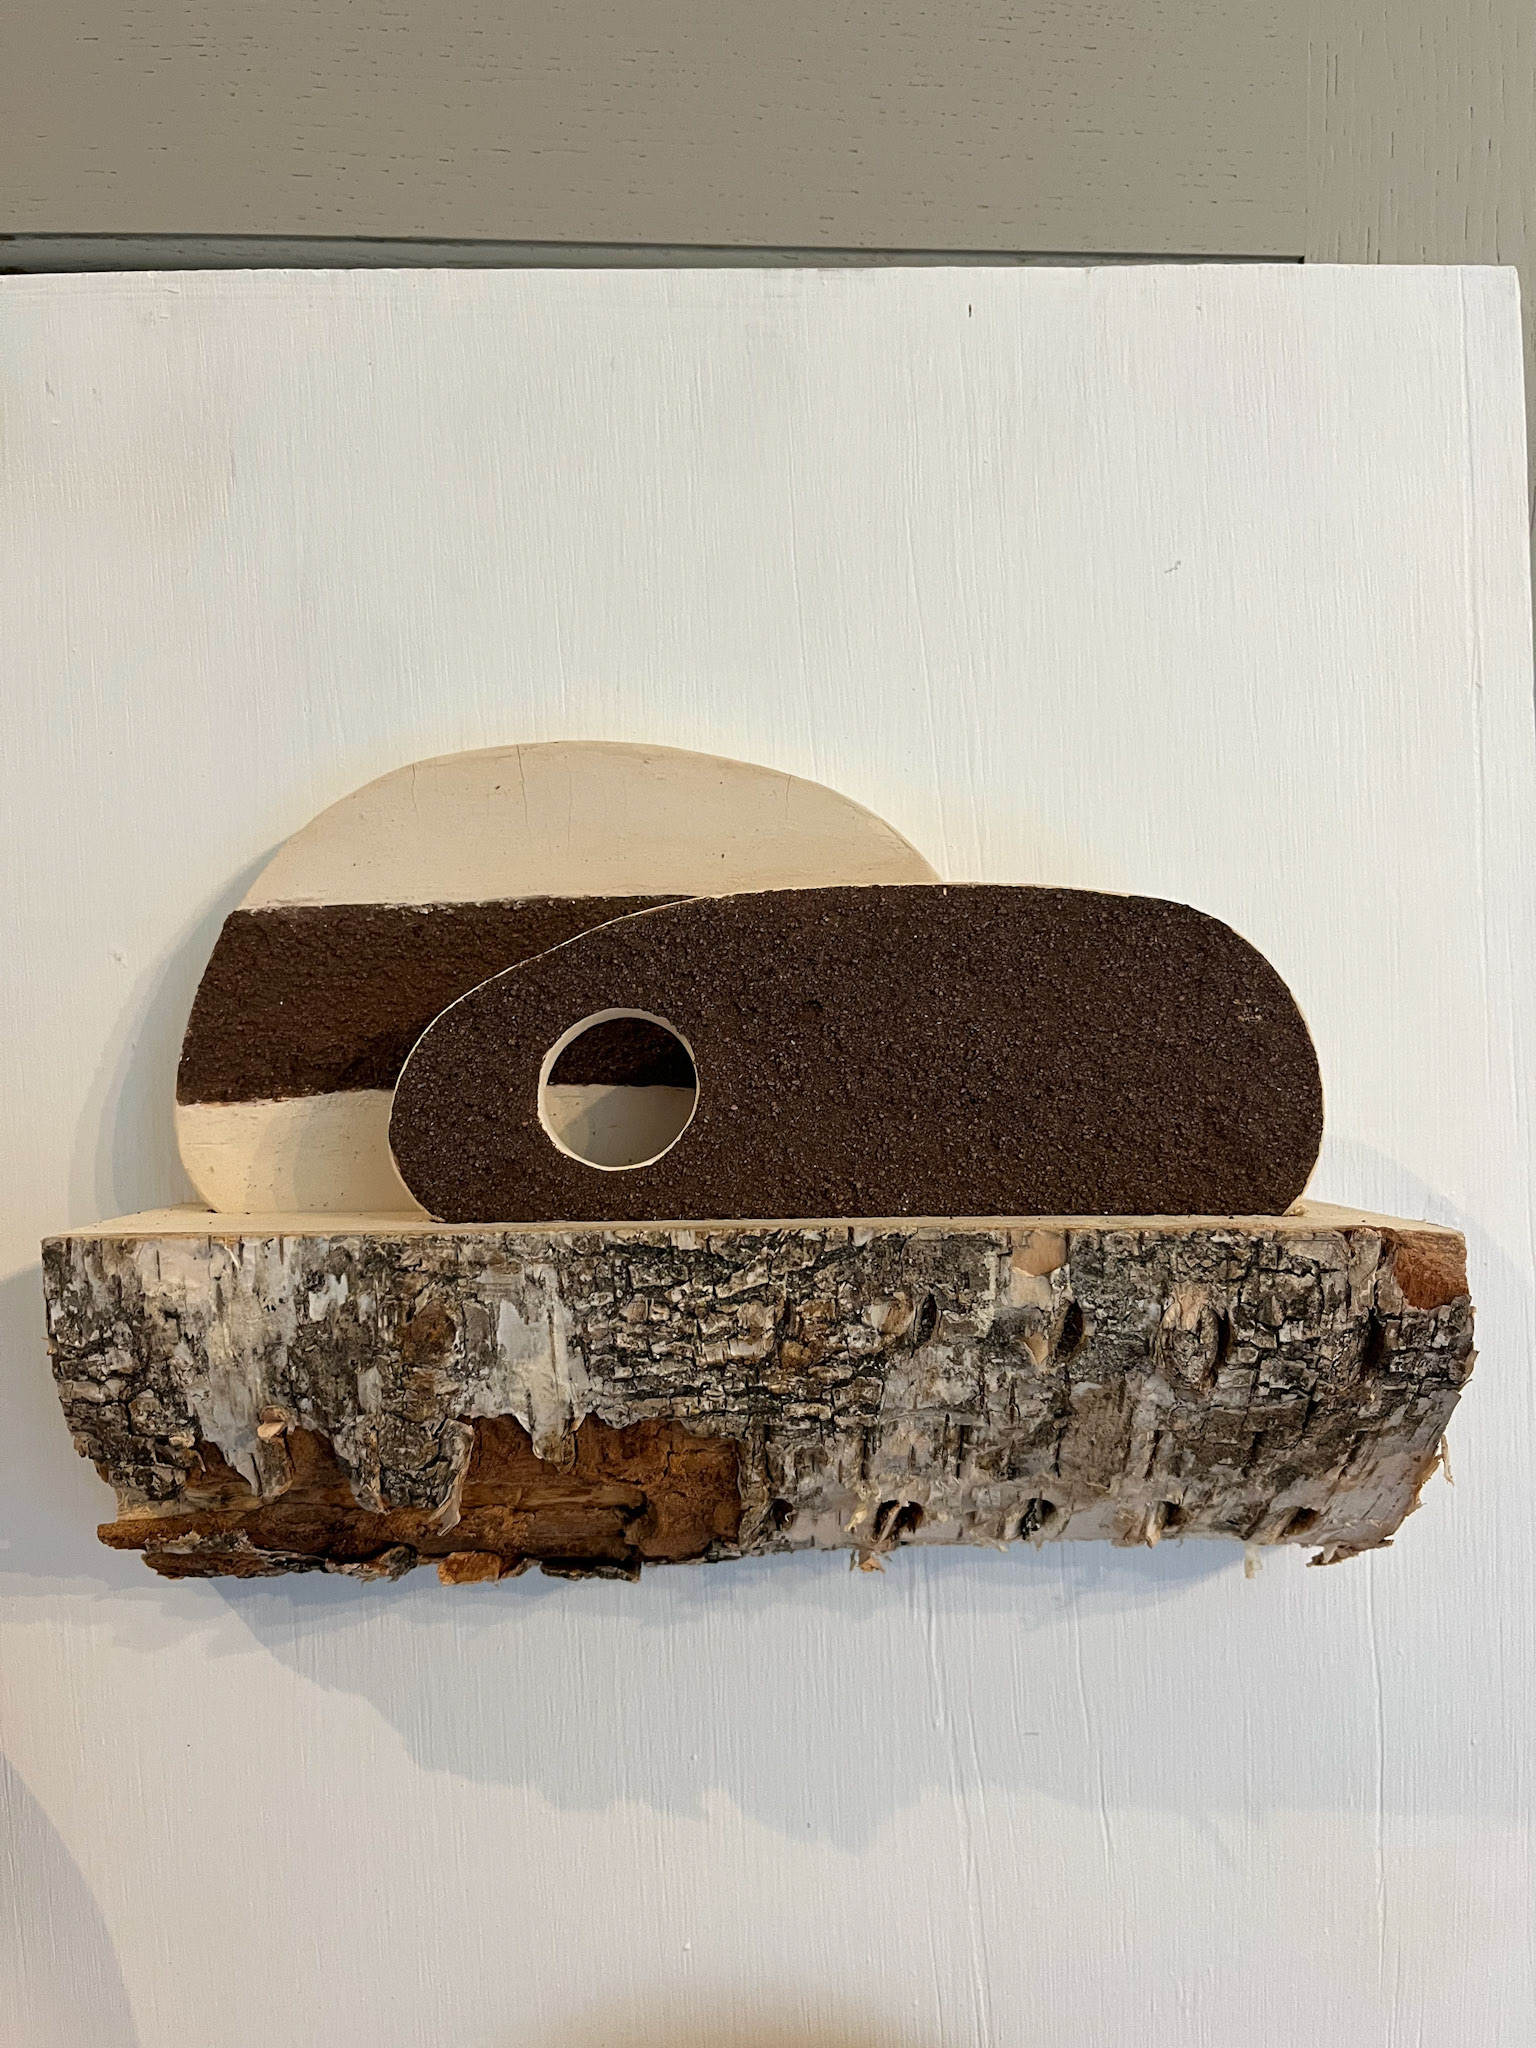
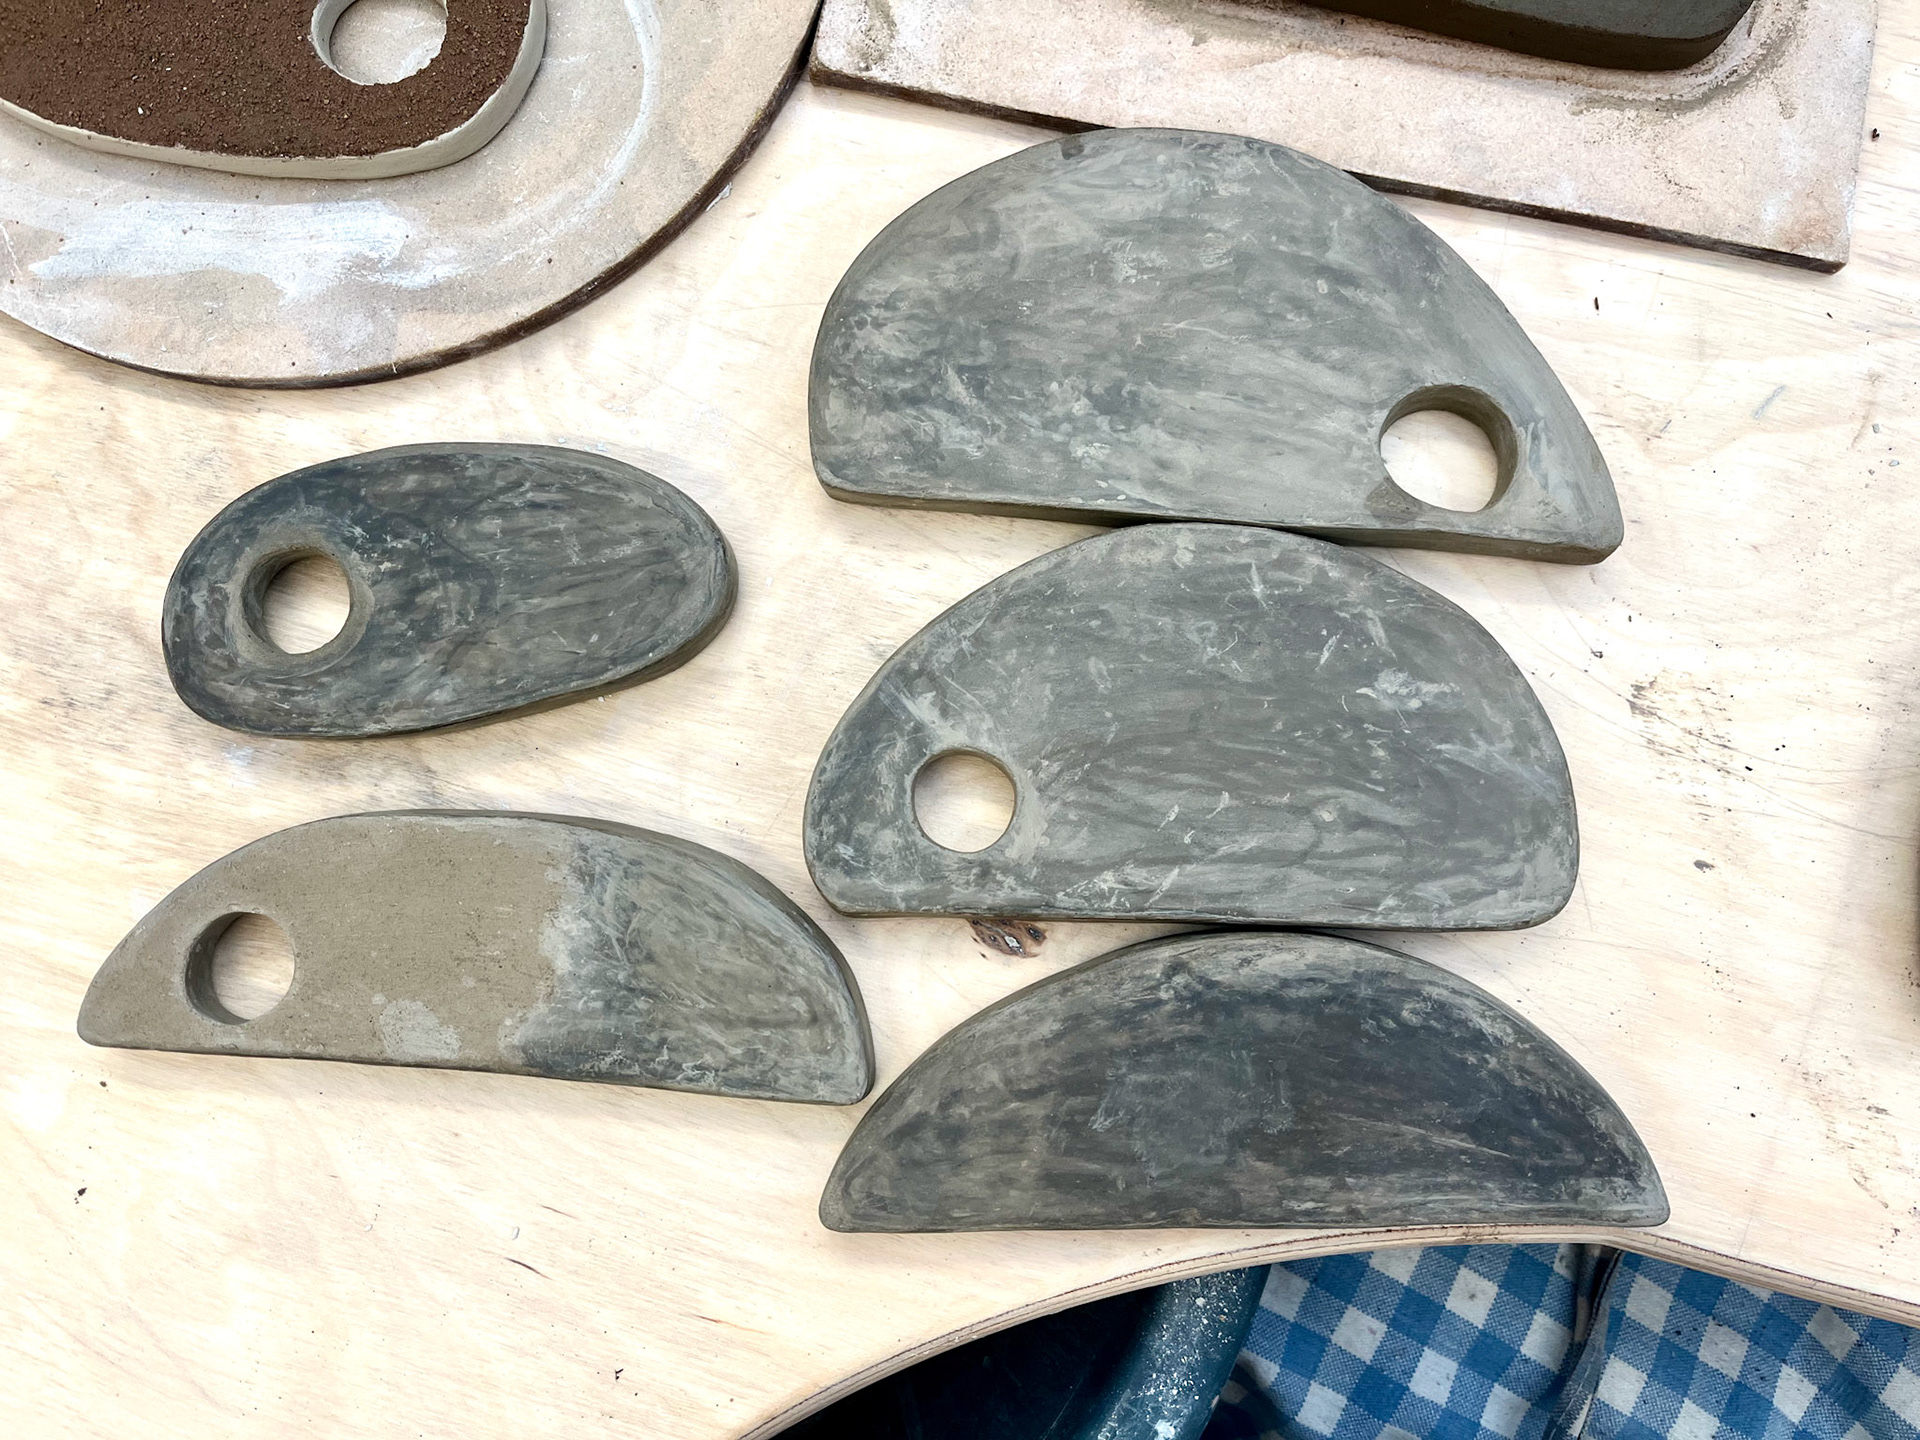
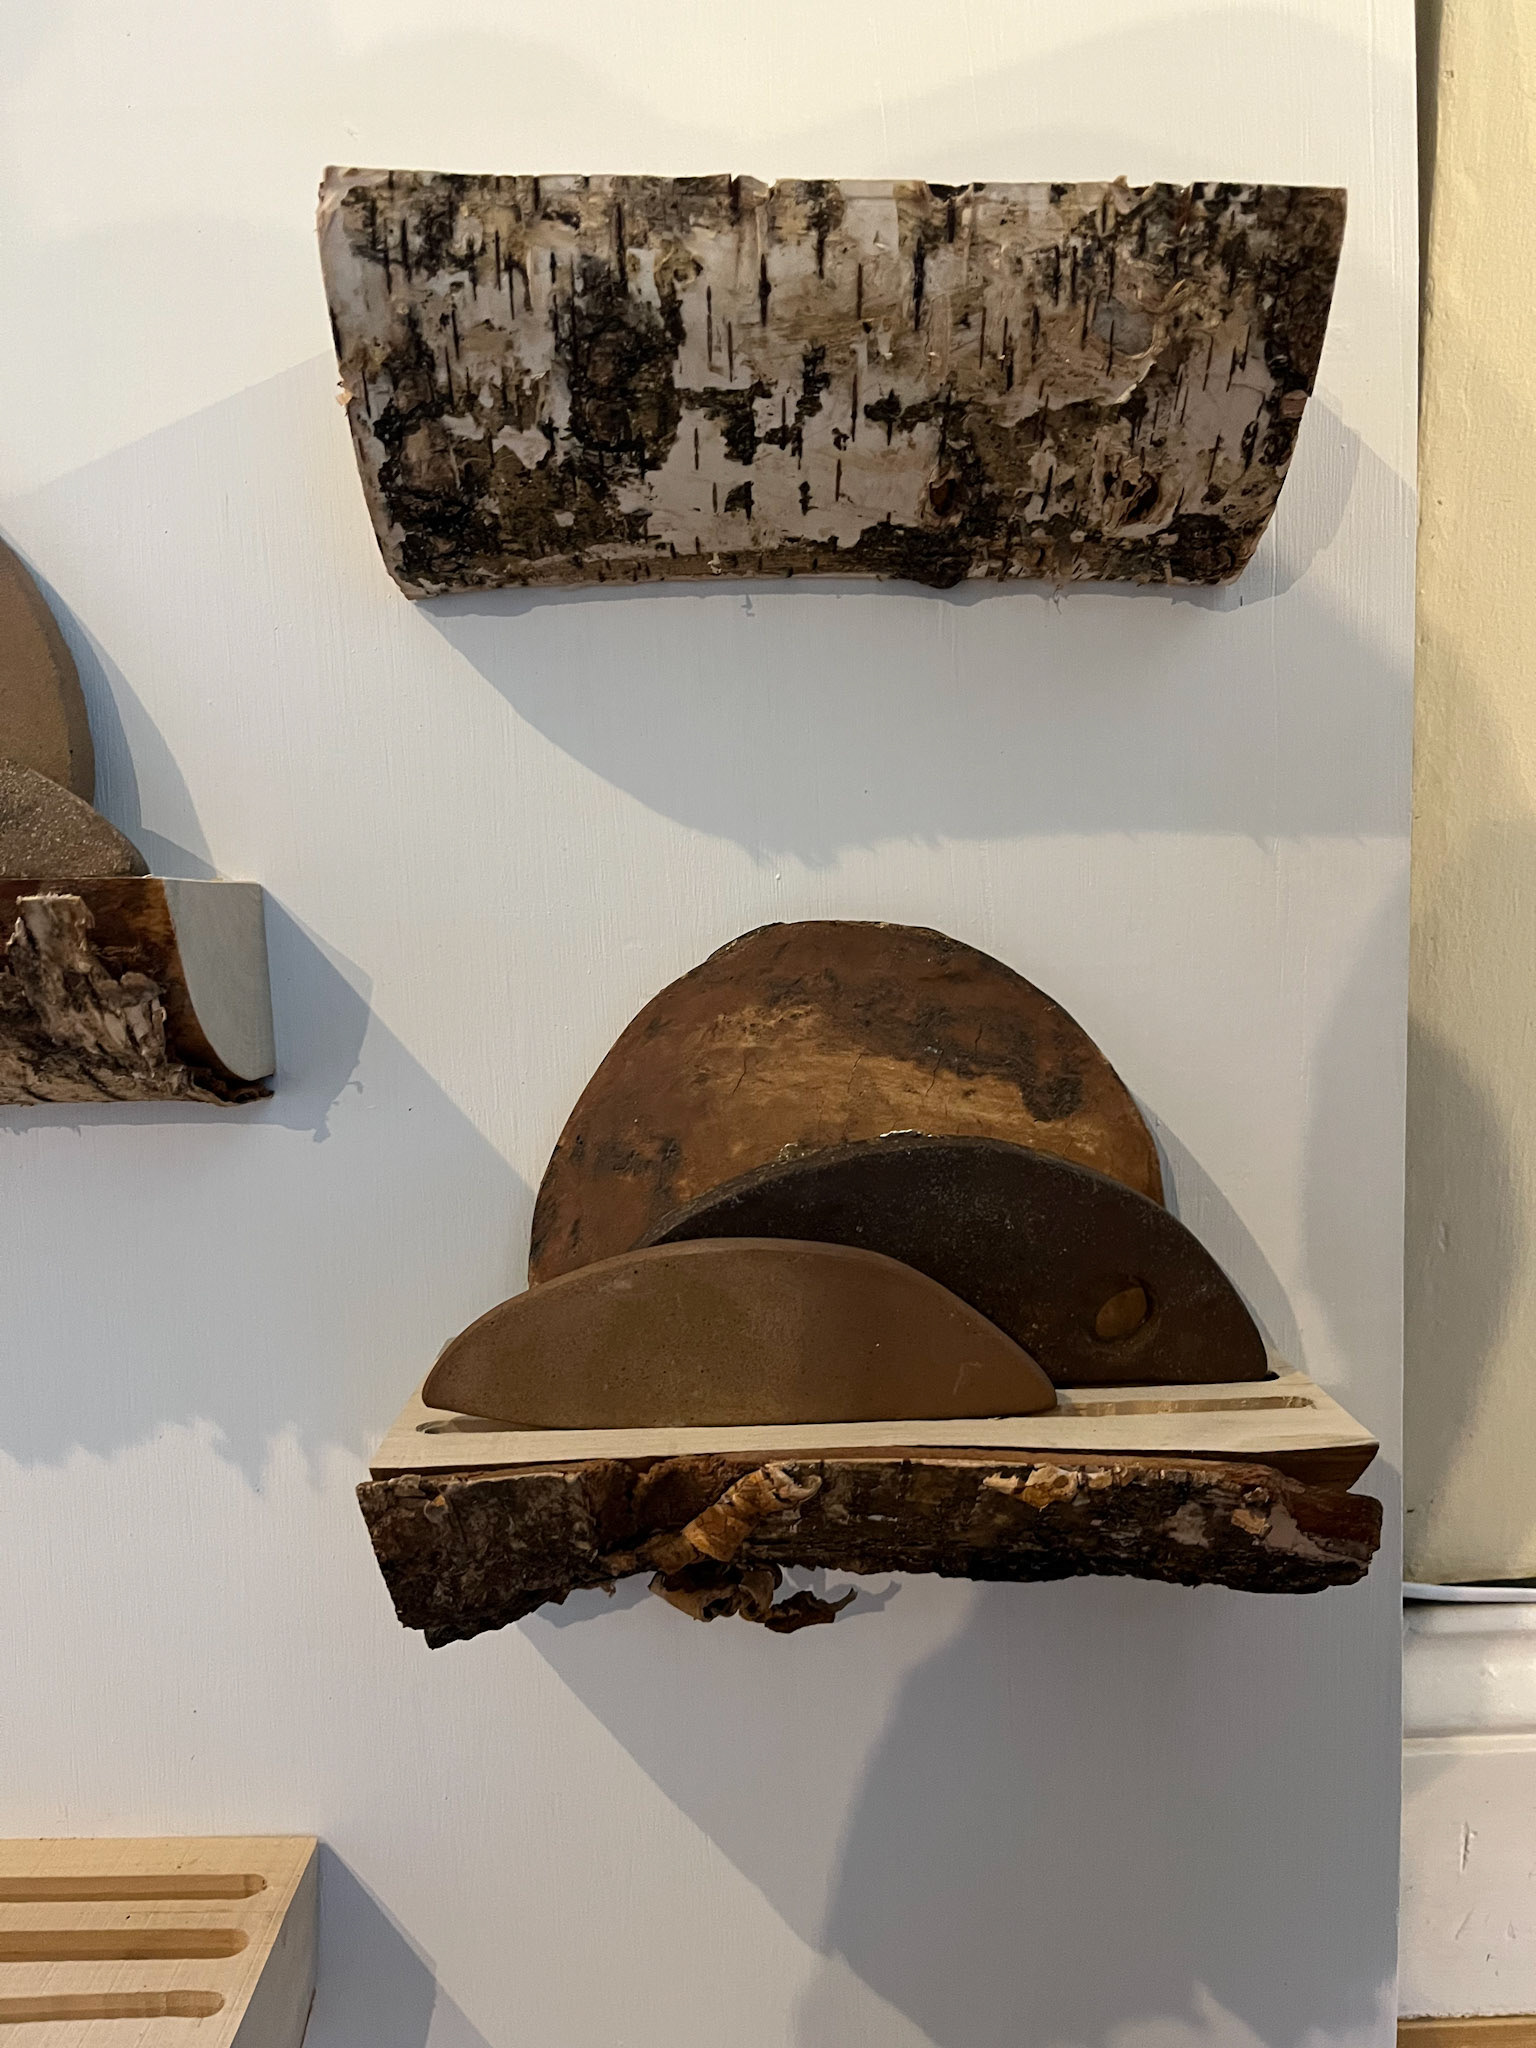
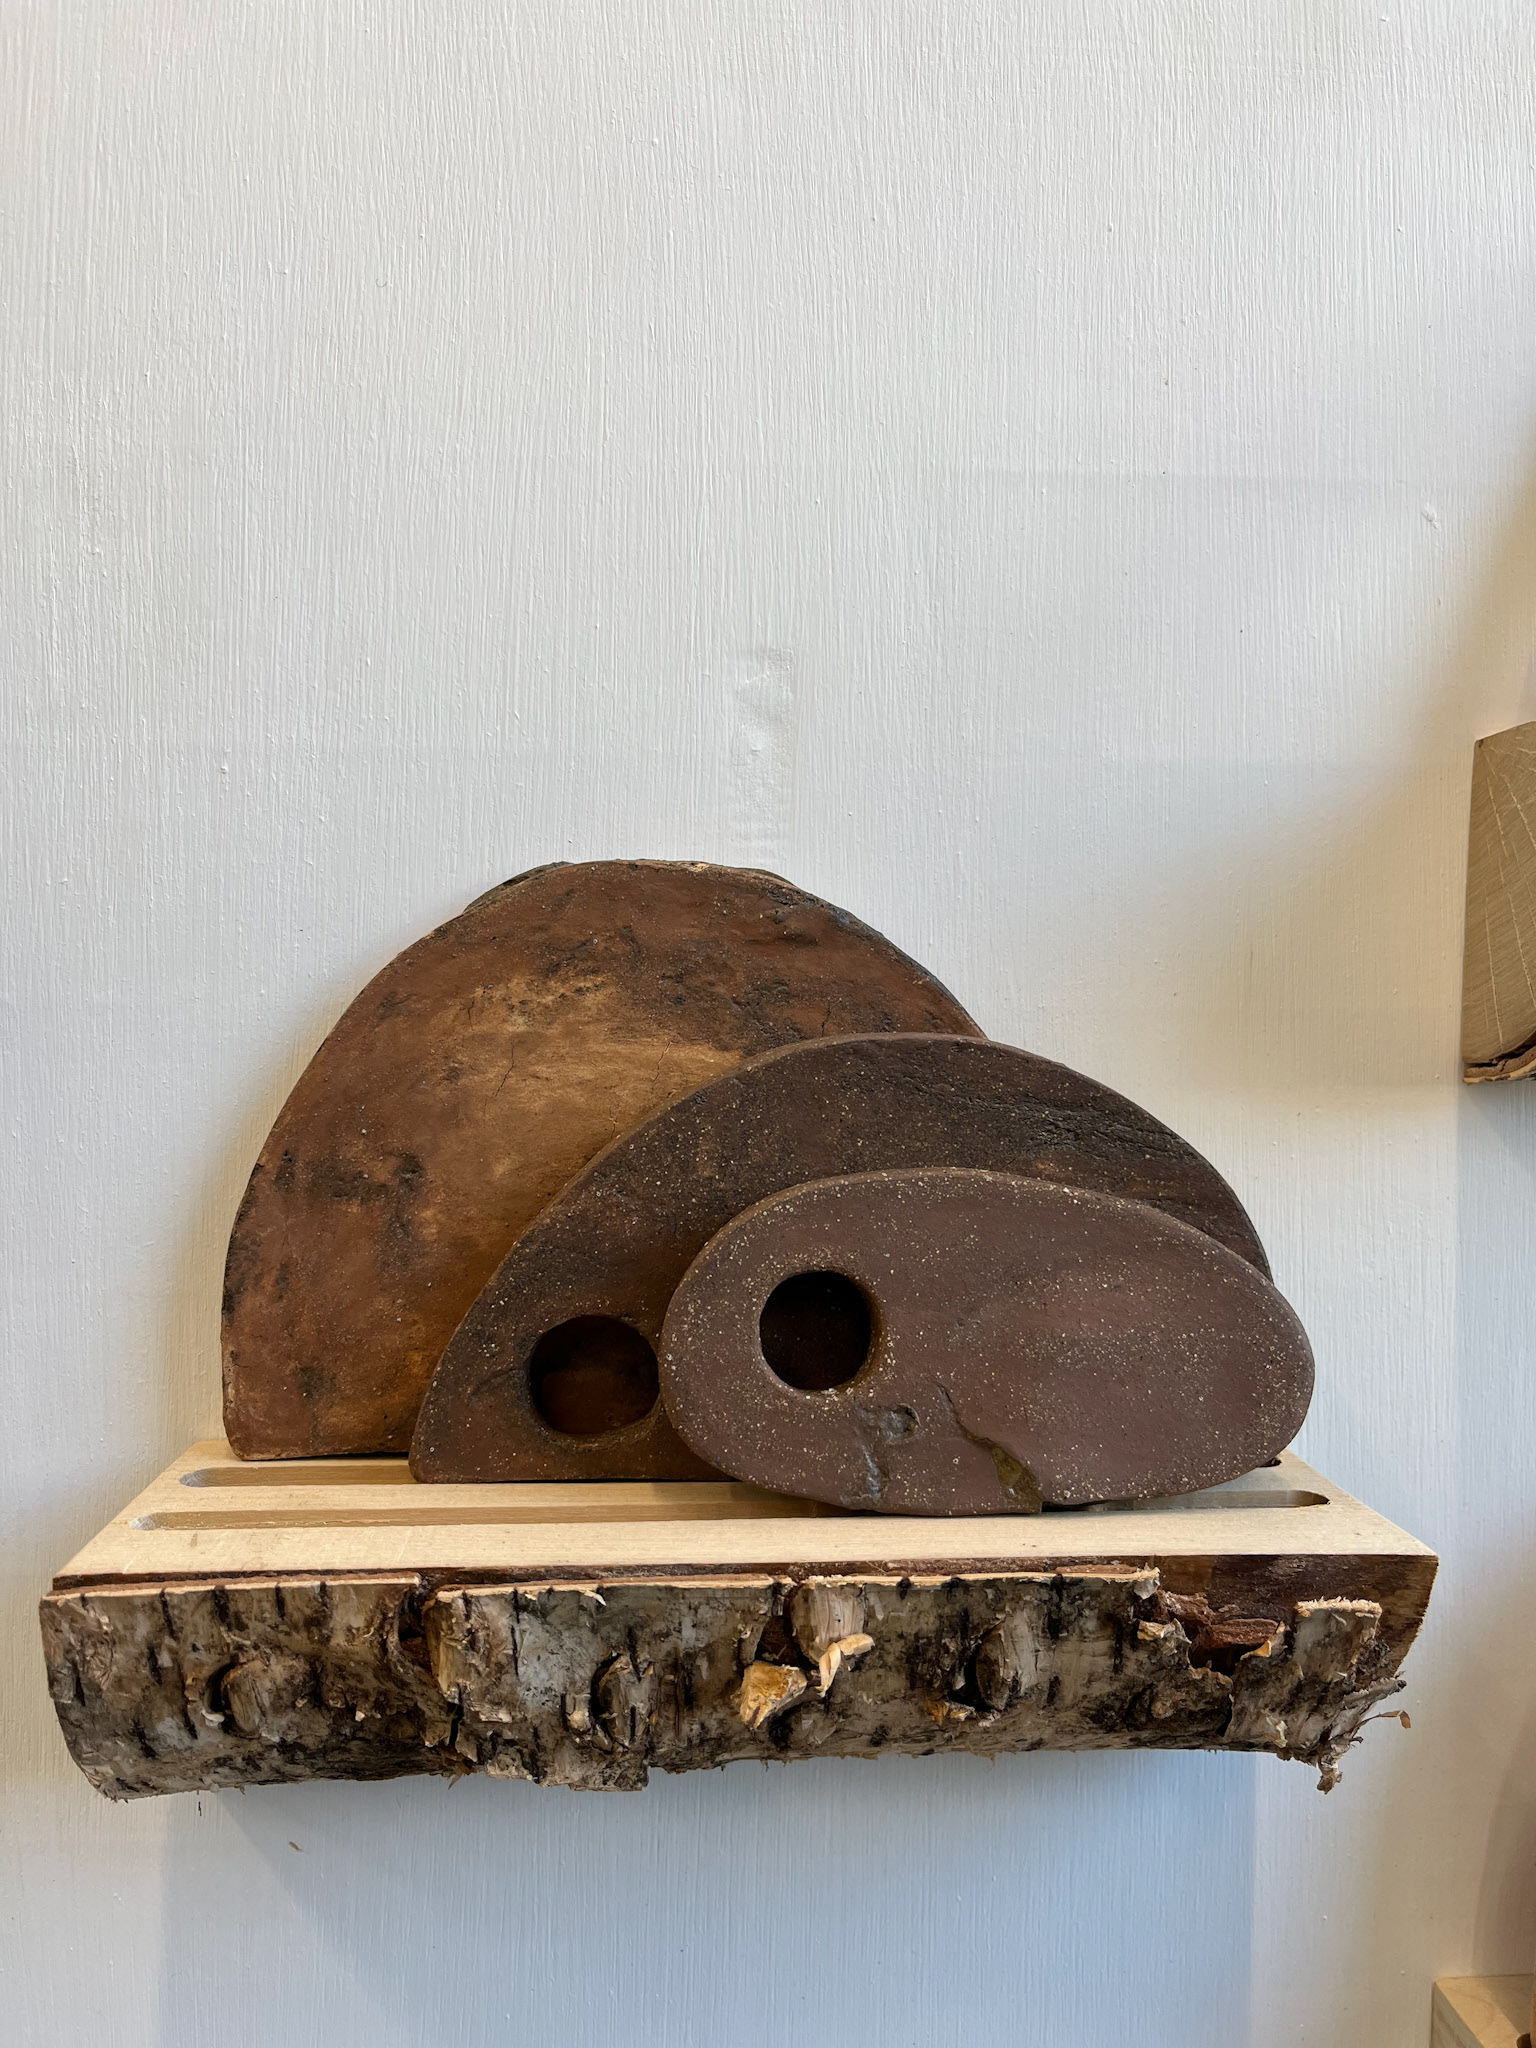
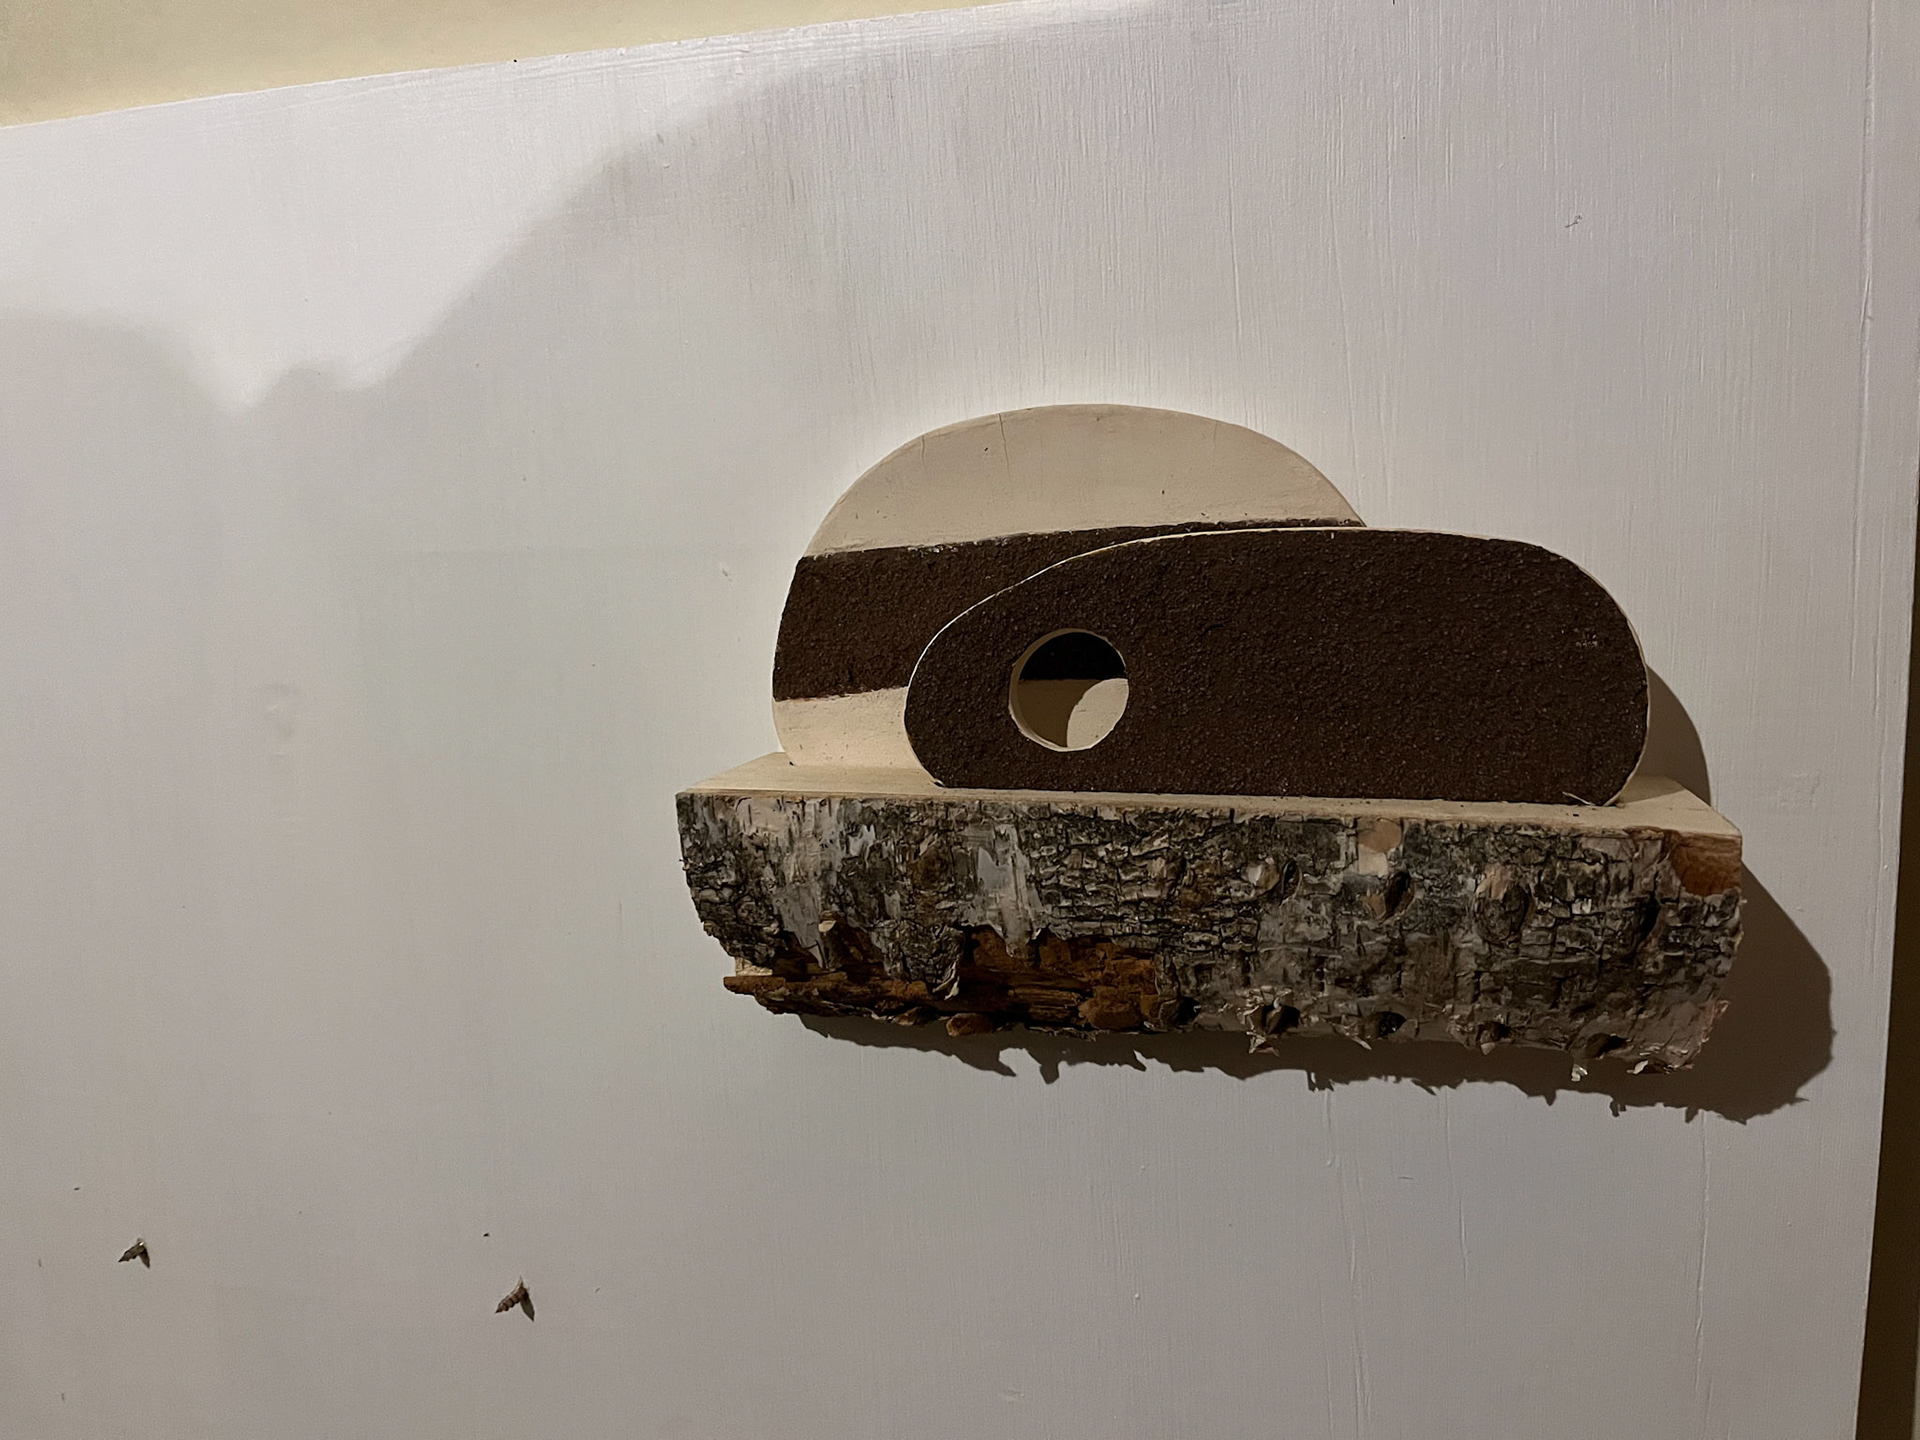
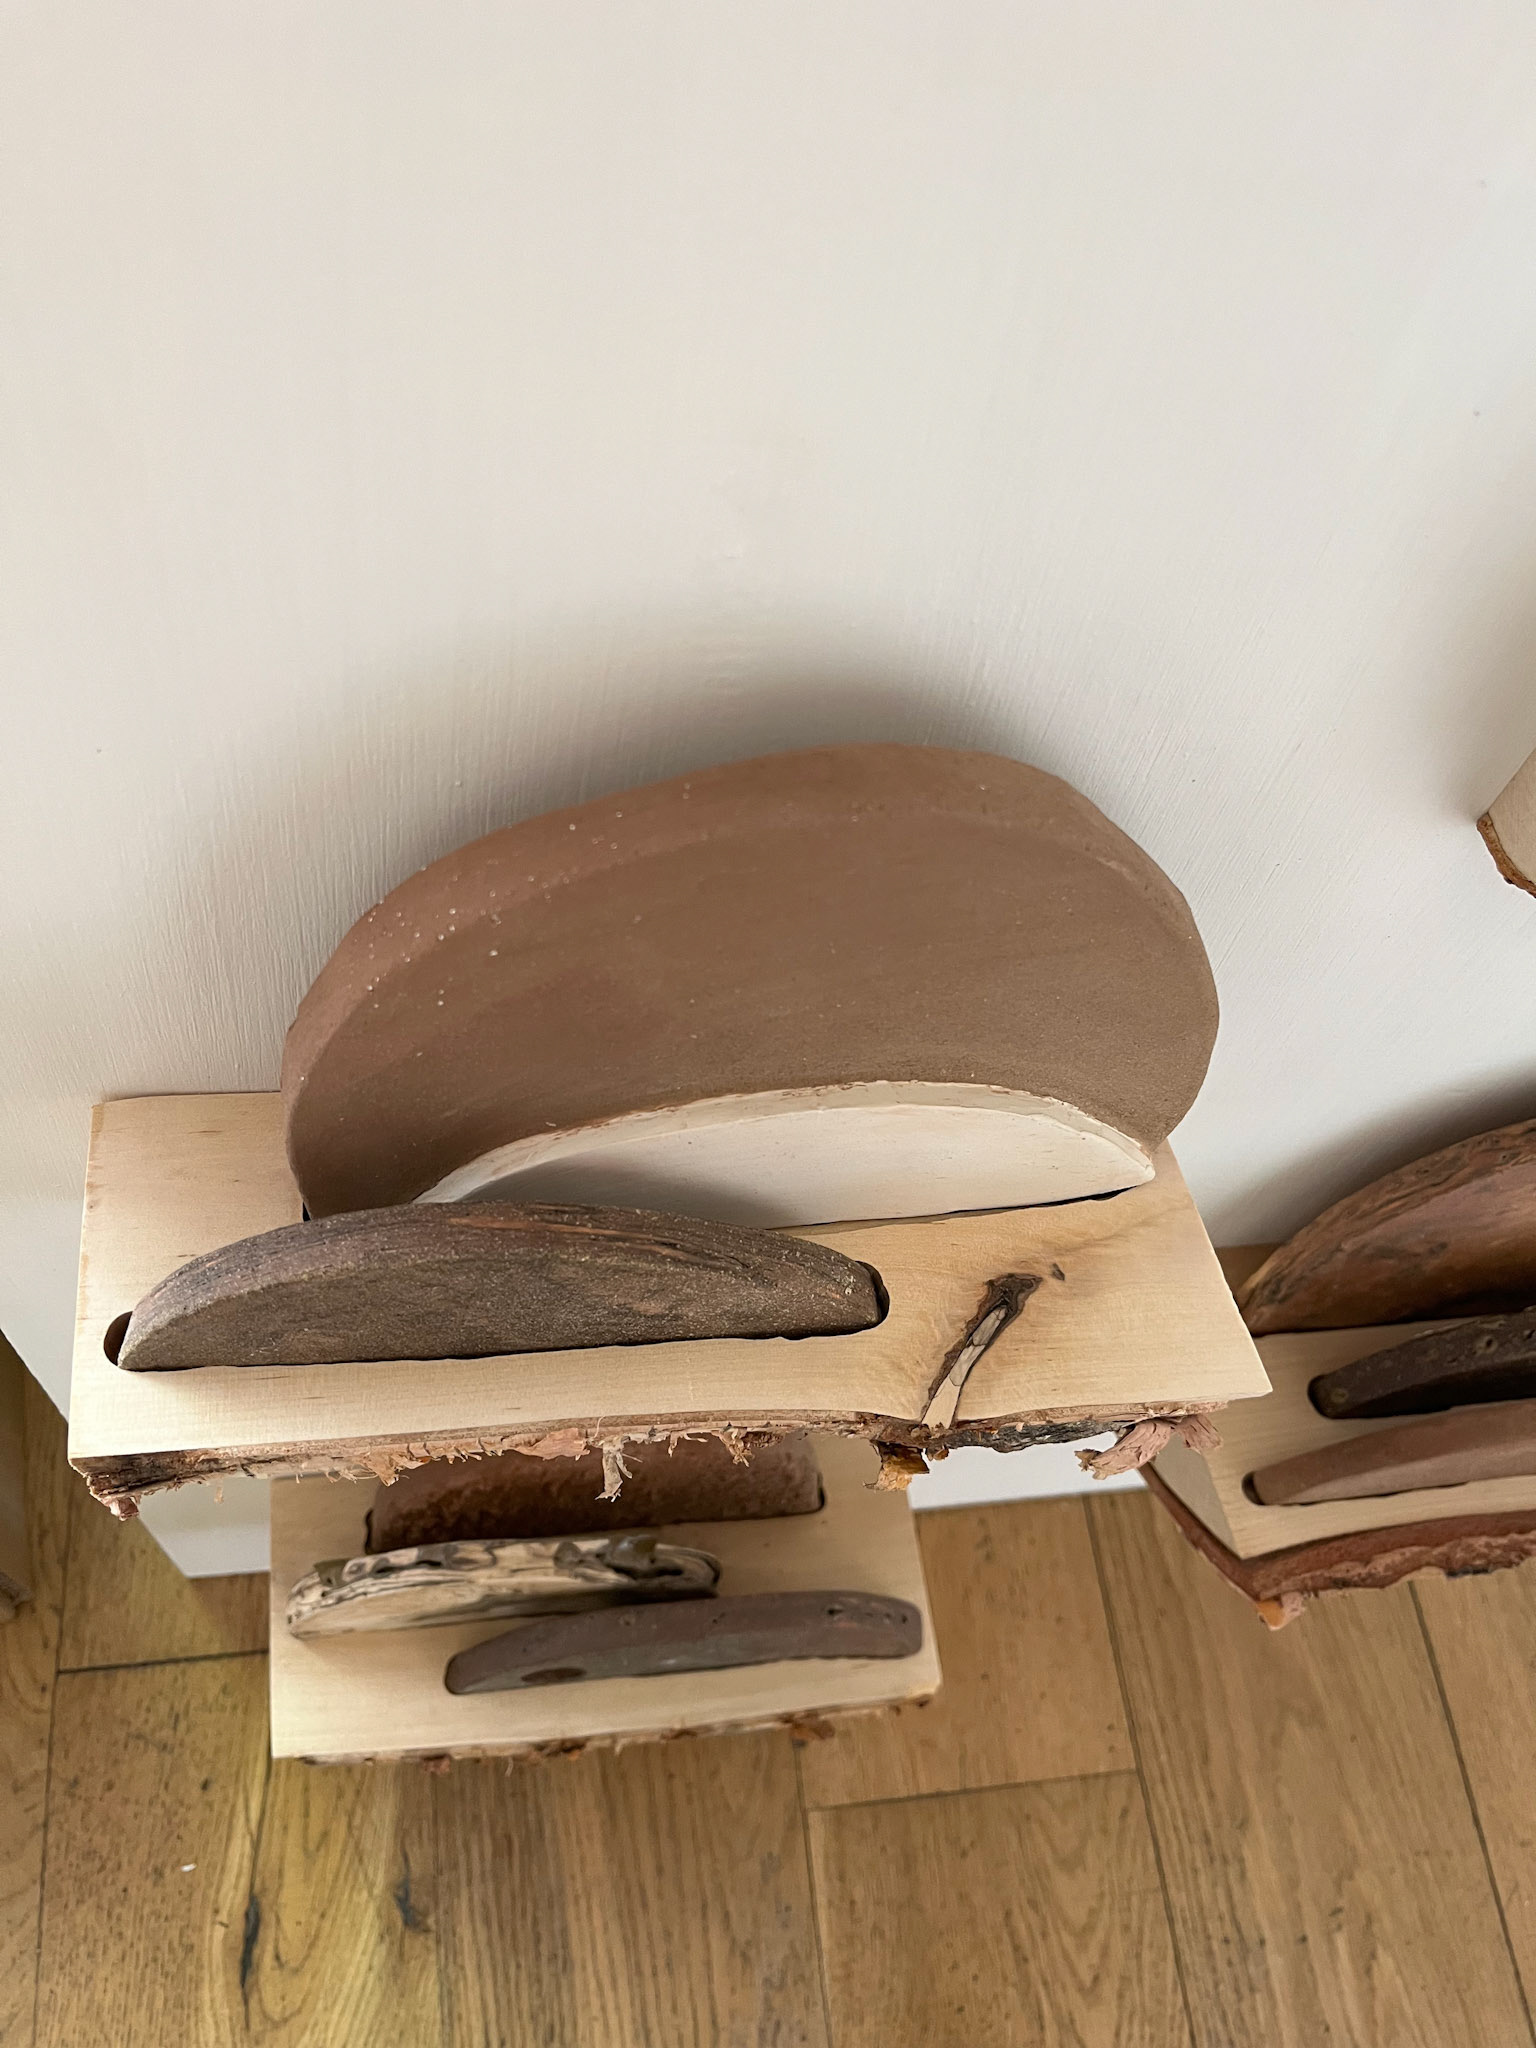
These are a few of the tiles that I have been burnishing, which I have been trialling stacking in preparation for their curation on the shelves. With the addition of holes on some of the slabs, it is important that I get the right order of the slabs so that the viewer can look through to the tiles behind. This is in response to the stacked millstones in Lawrencefield, as through the holes and negative spaces, it is interesting to see what takes up that space behind.
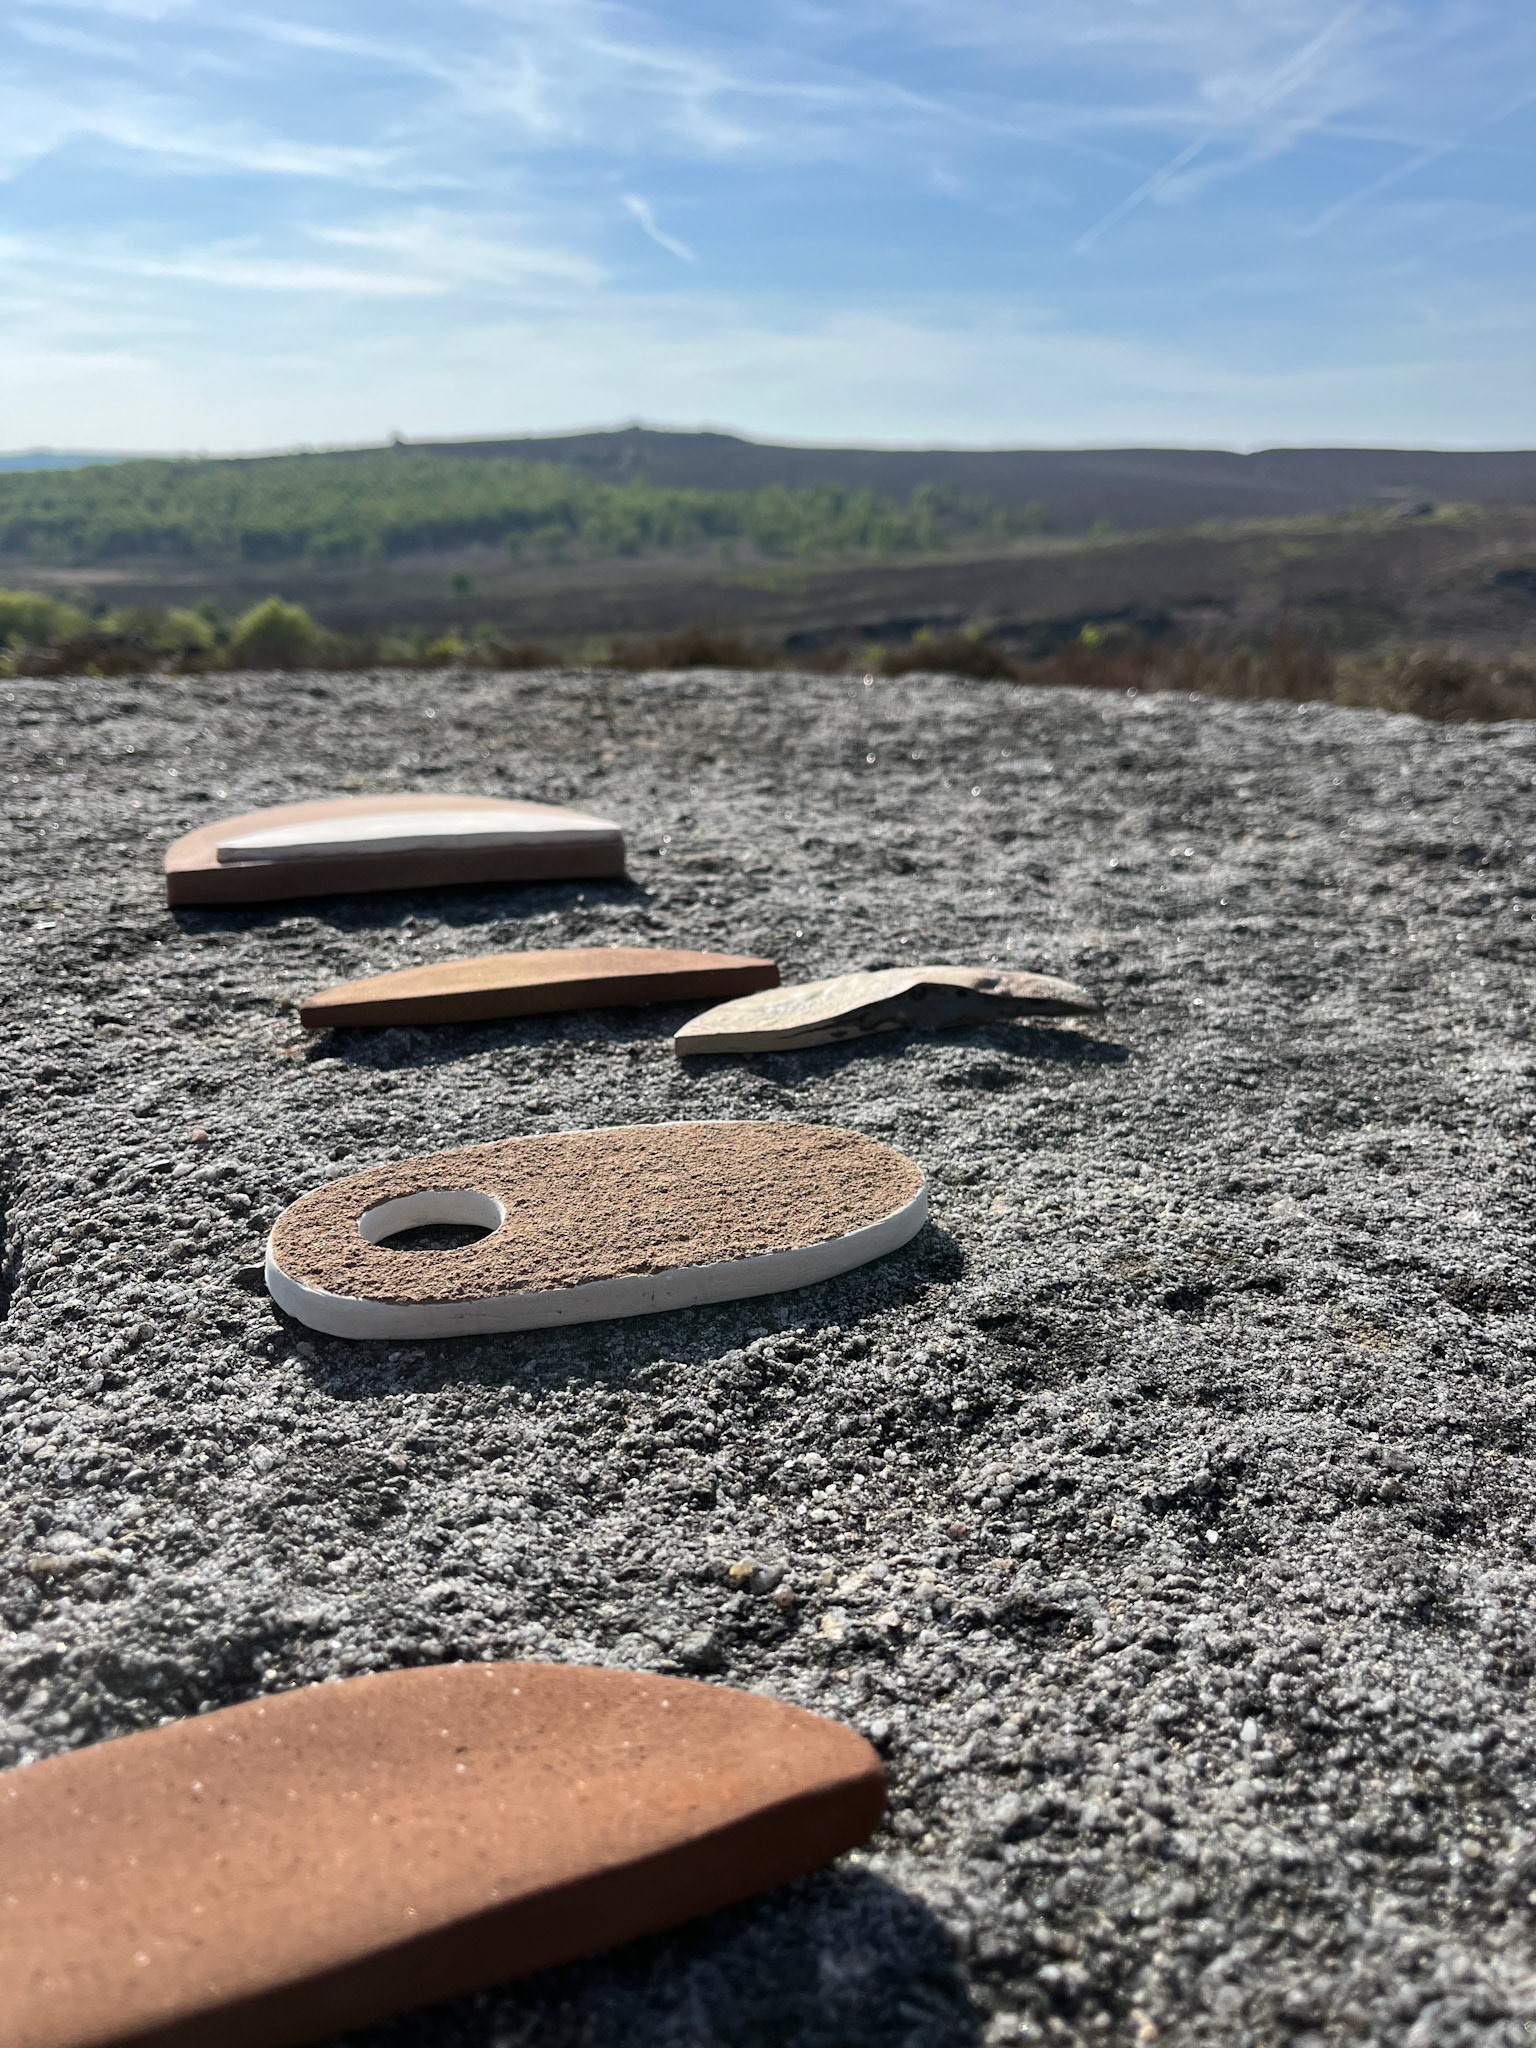
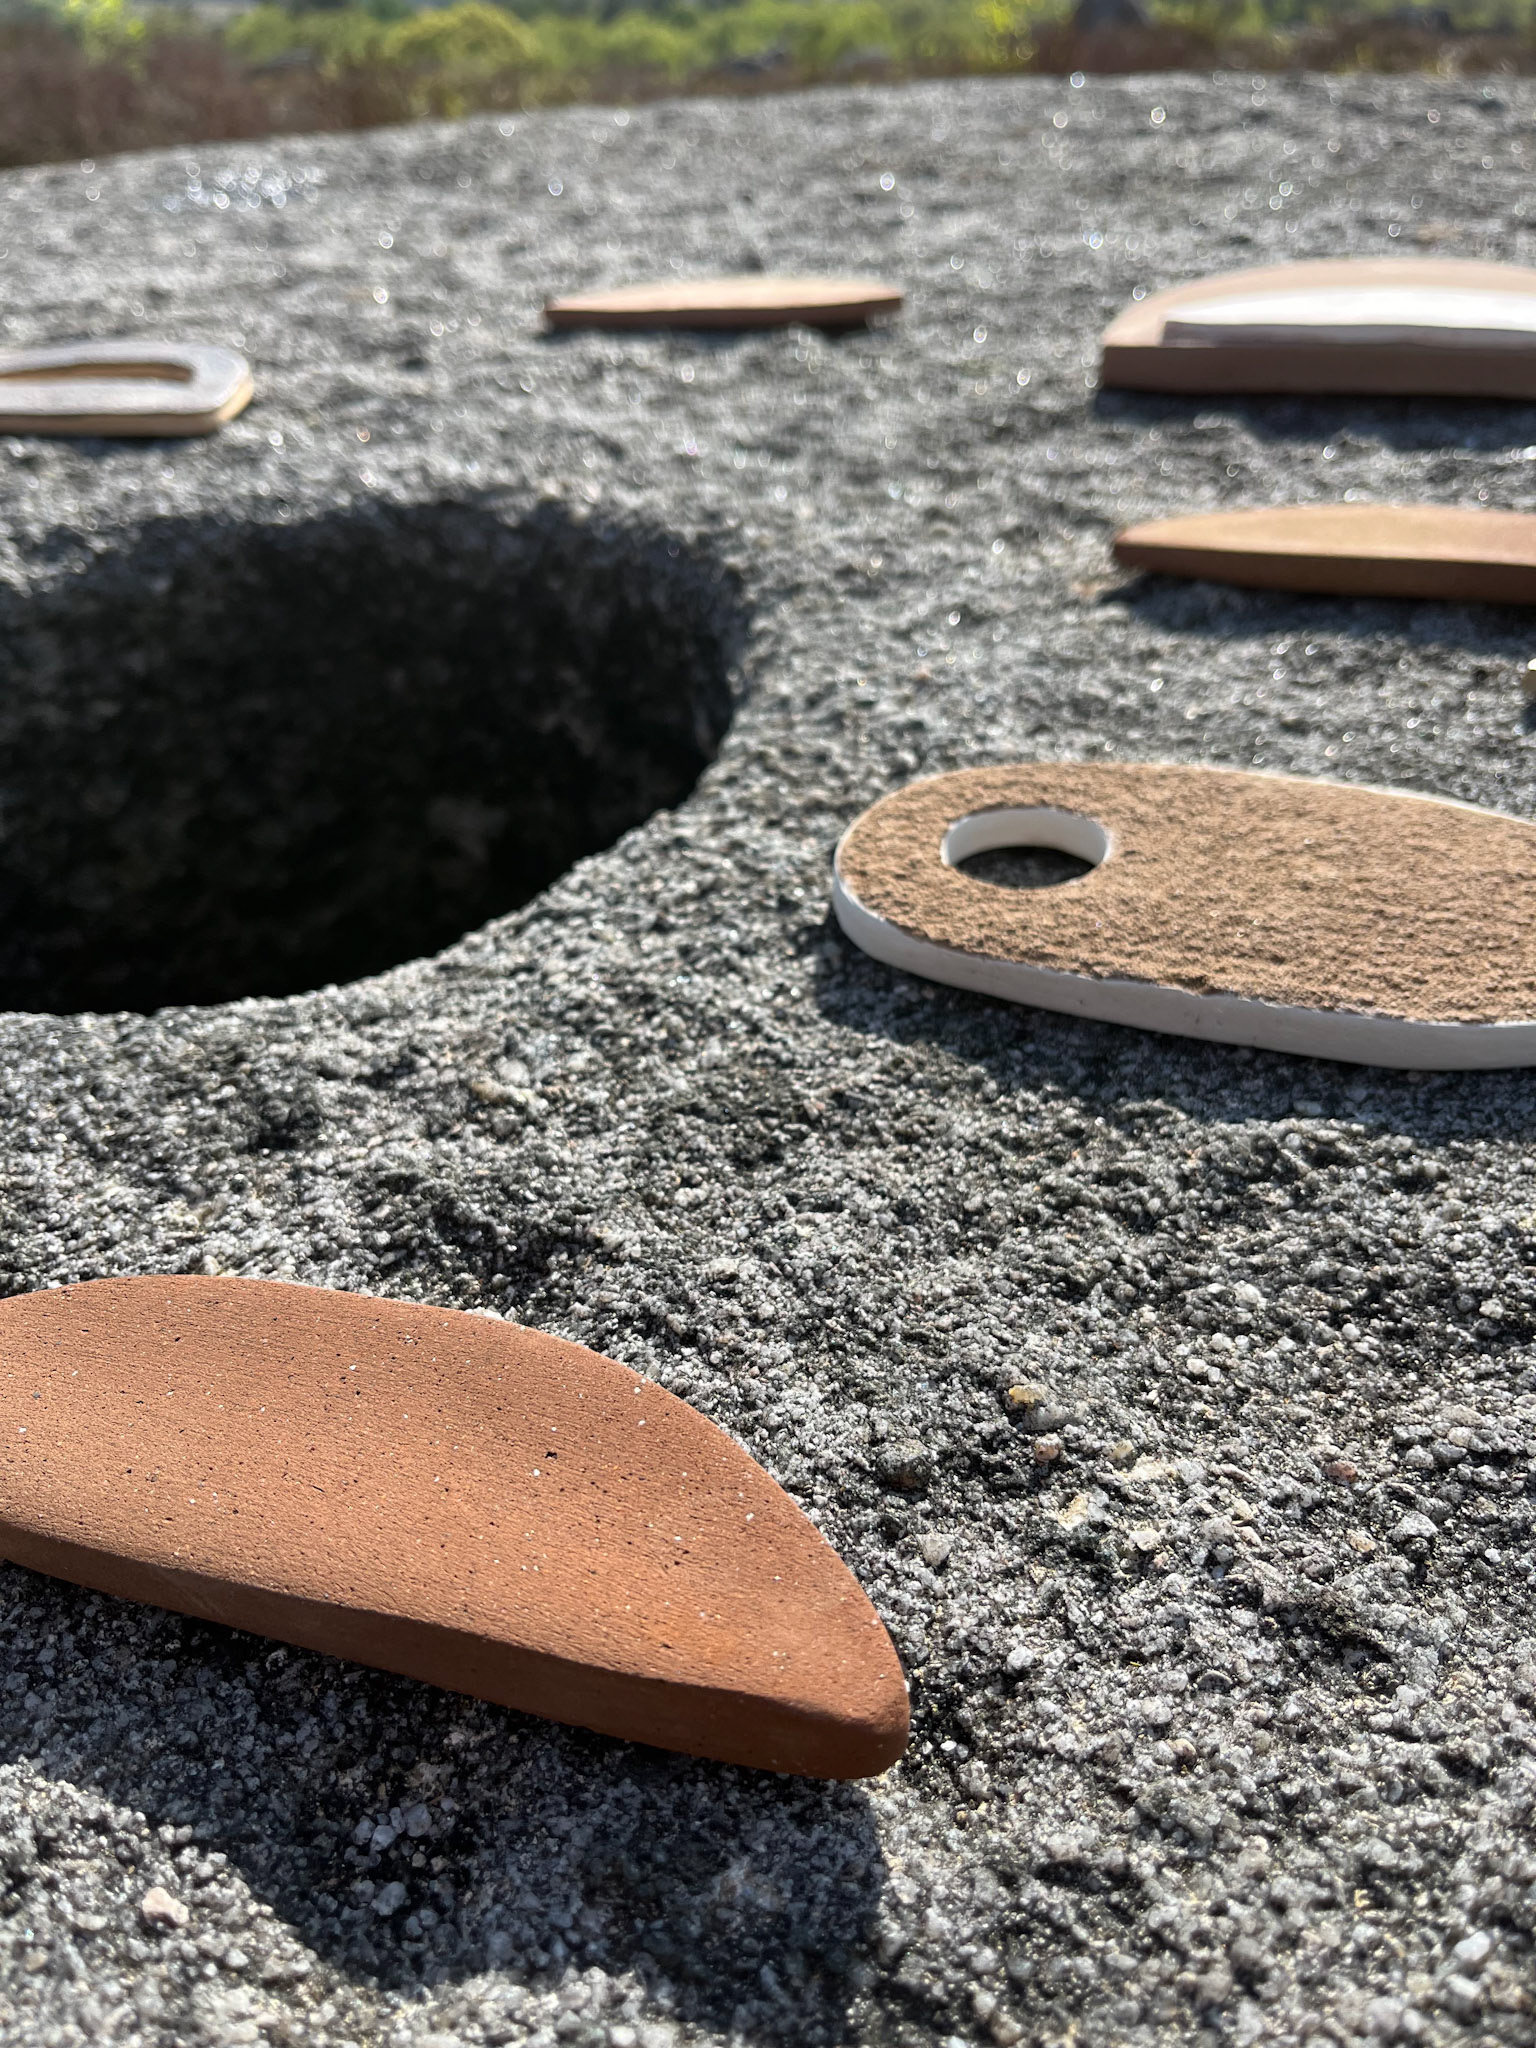
On location
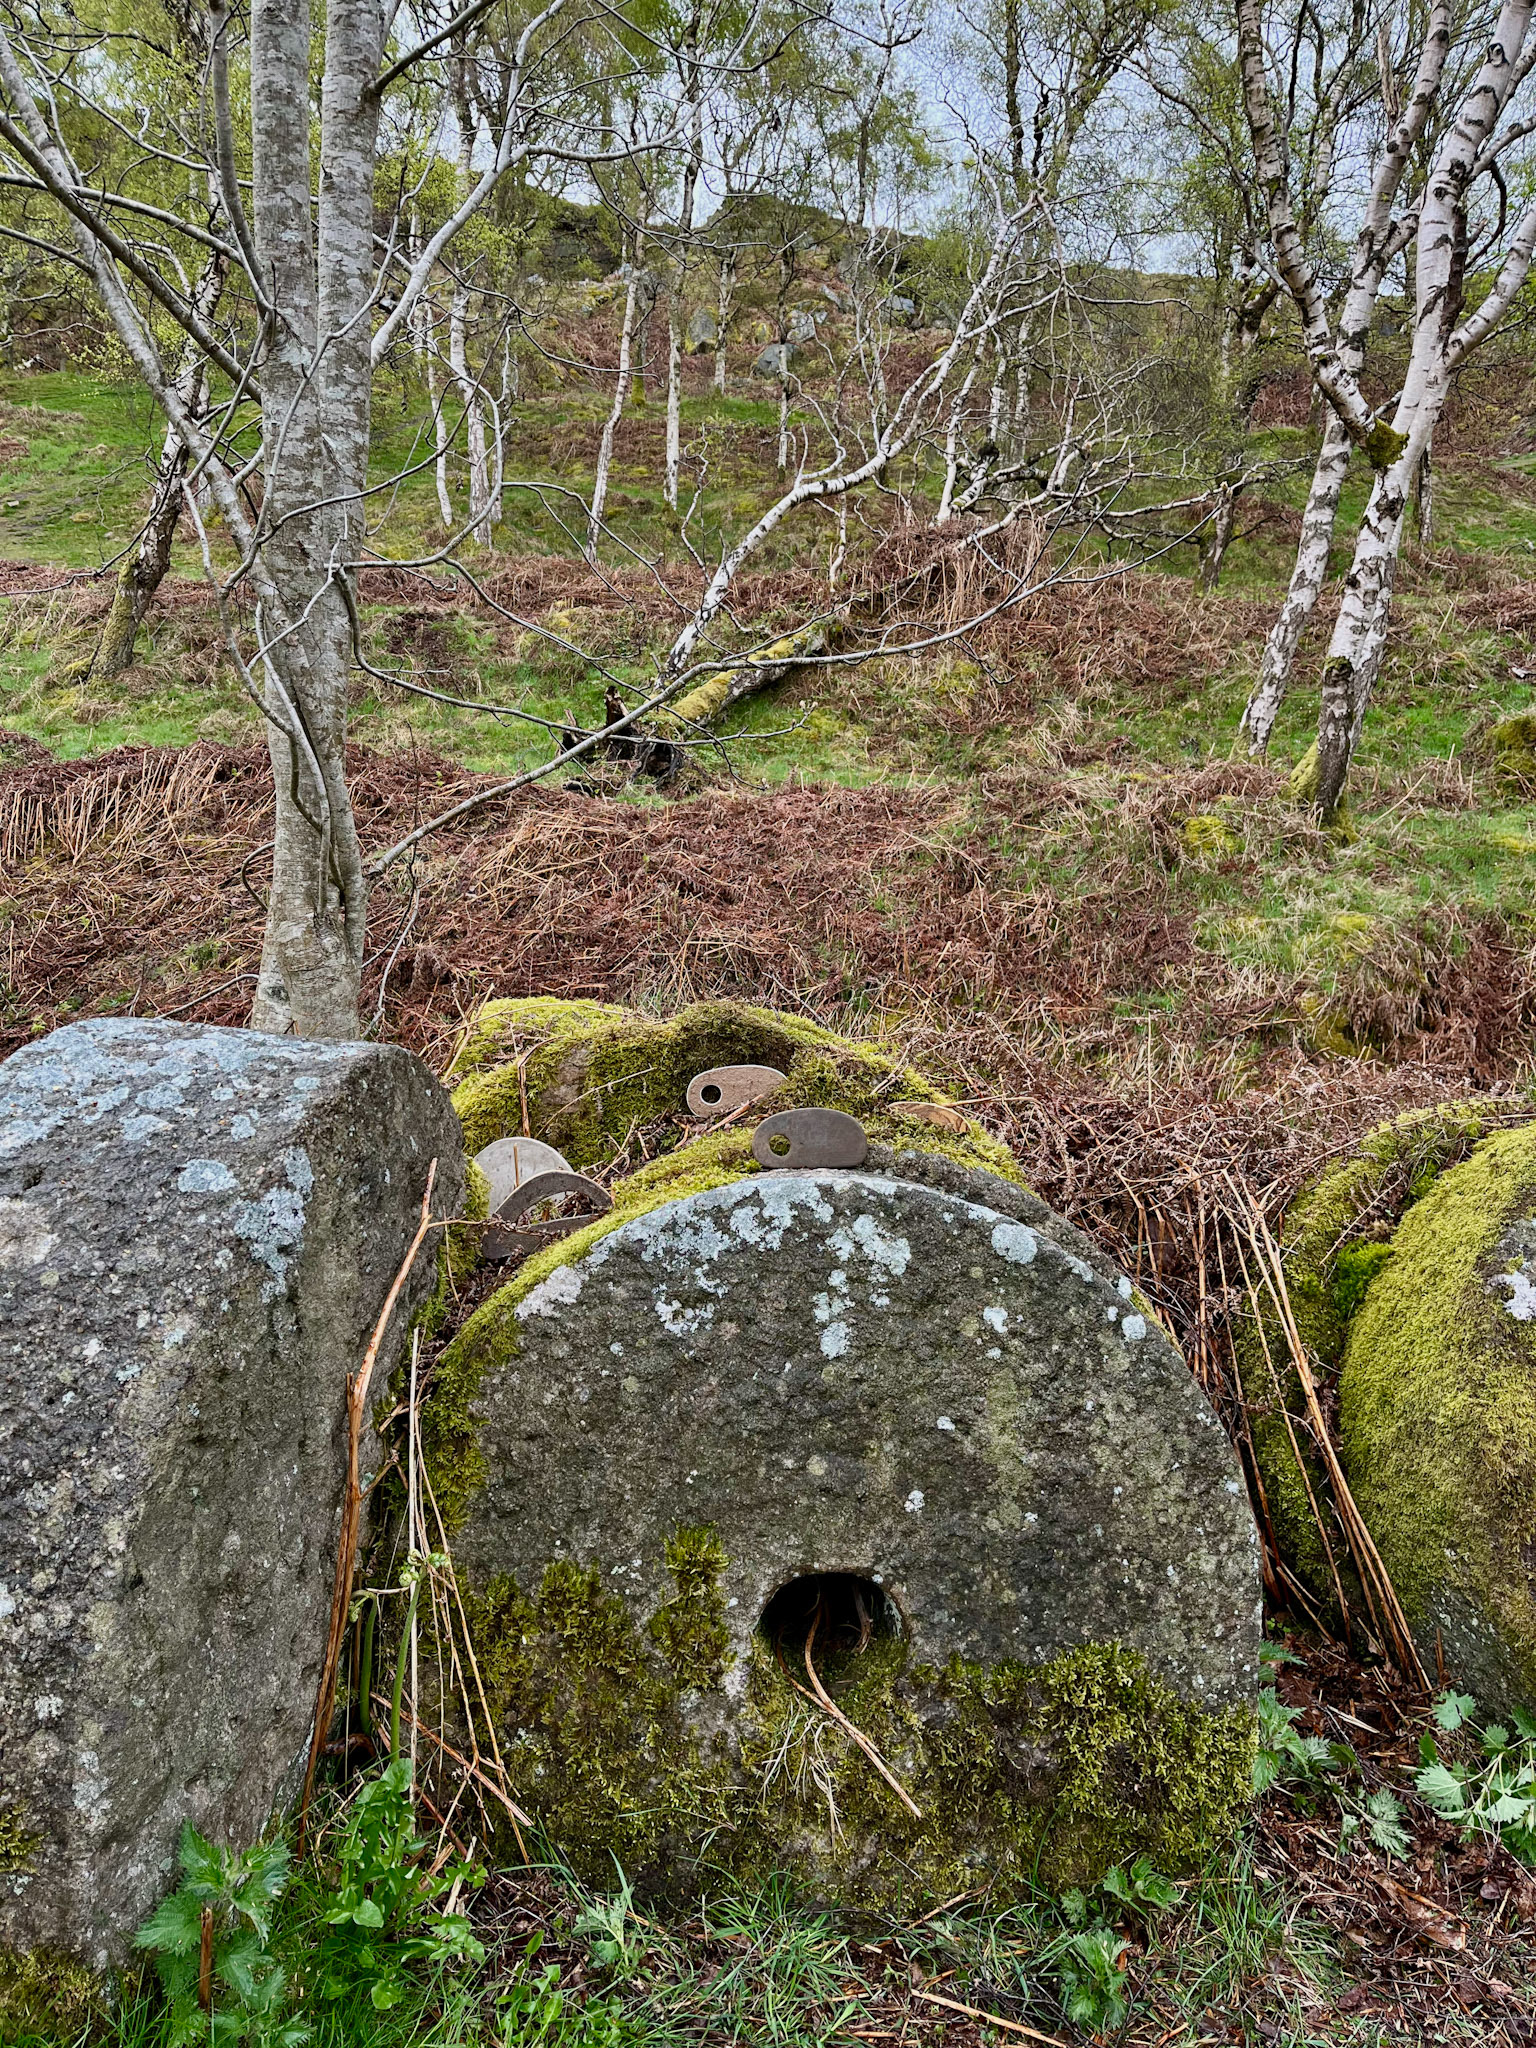
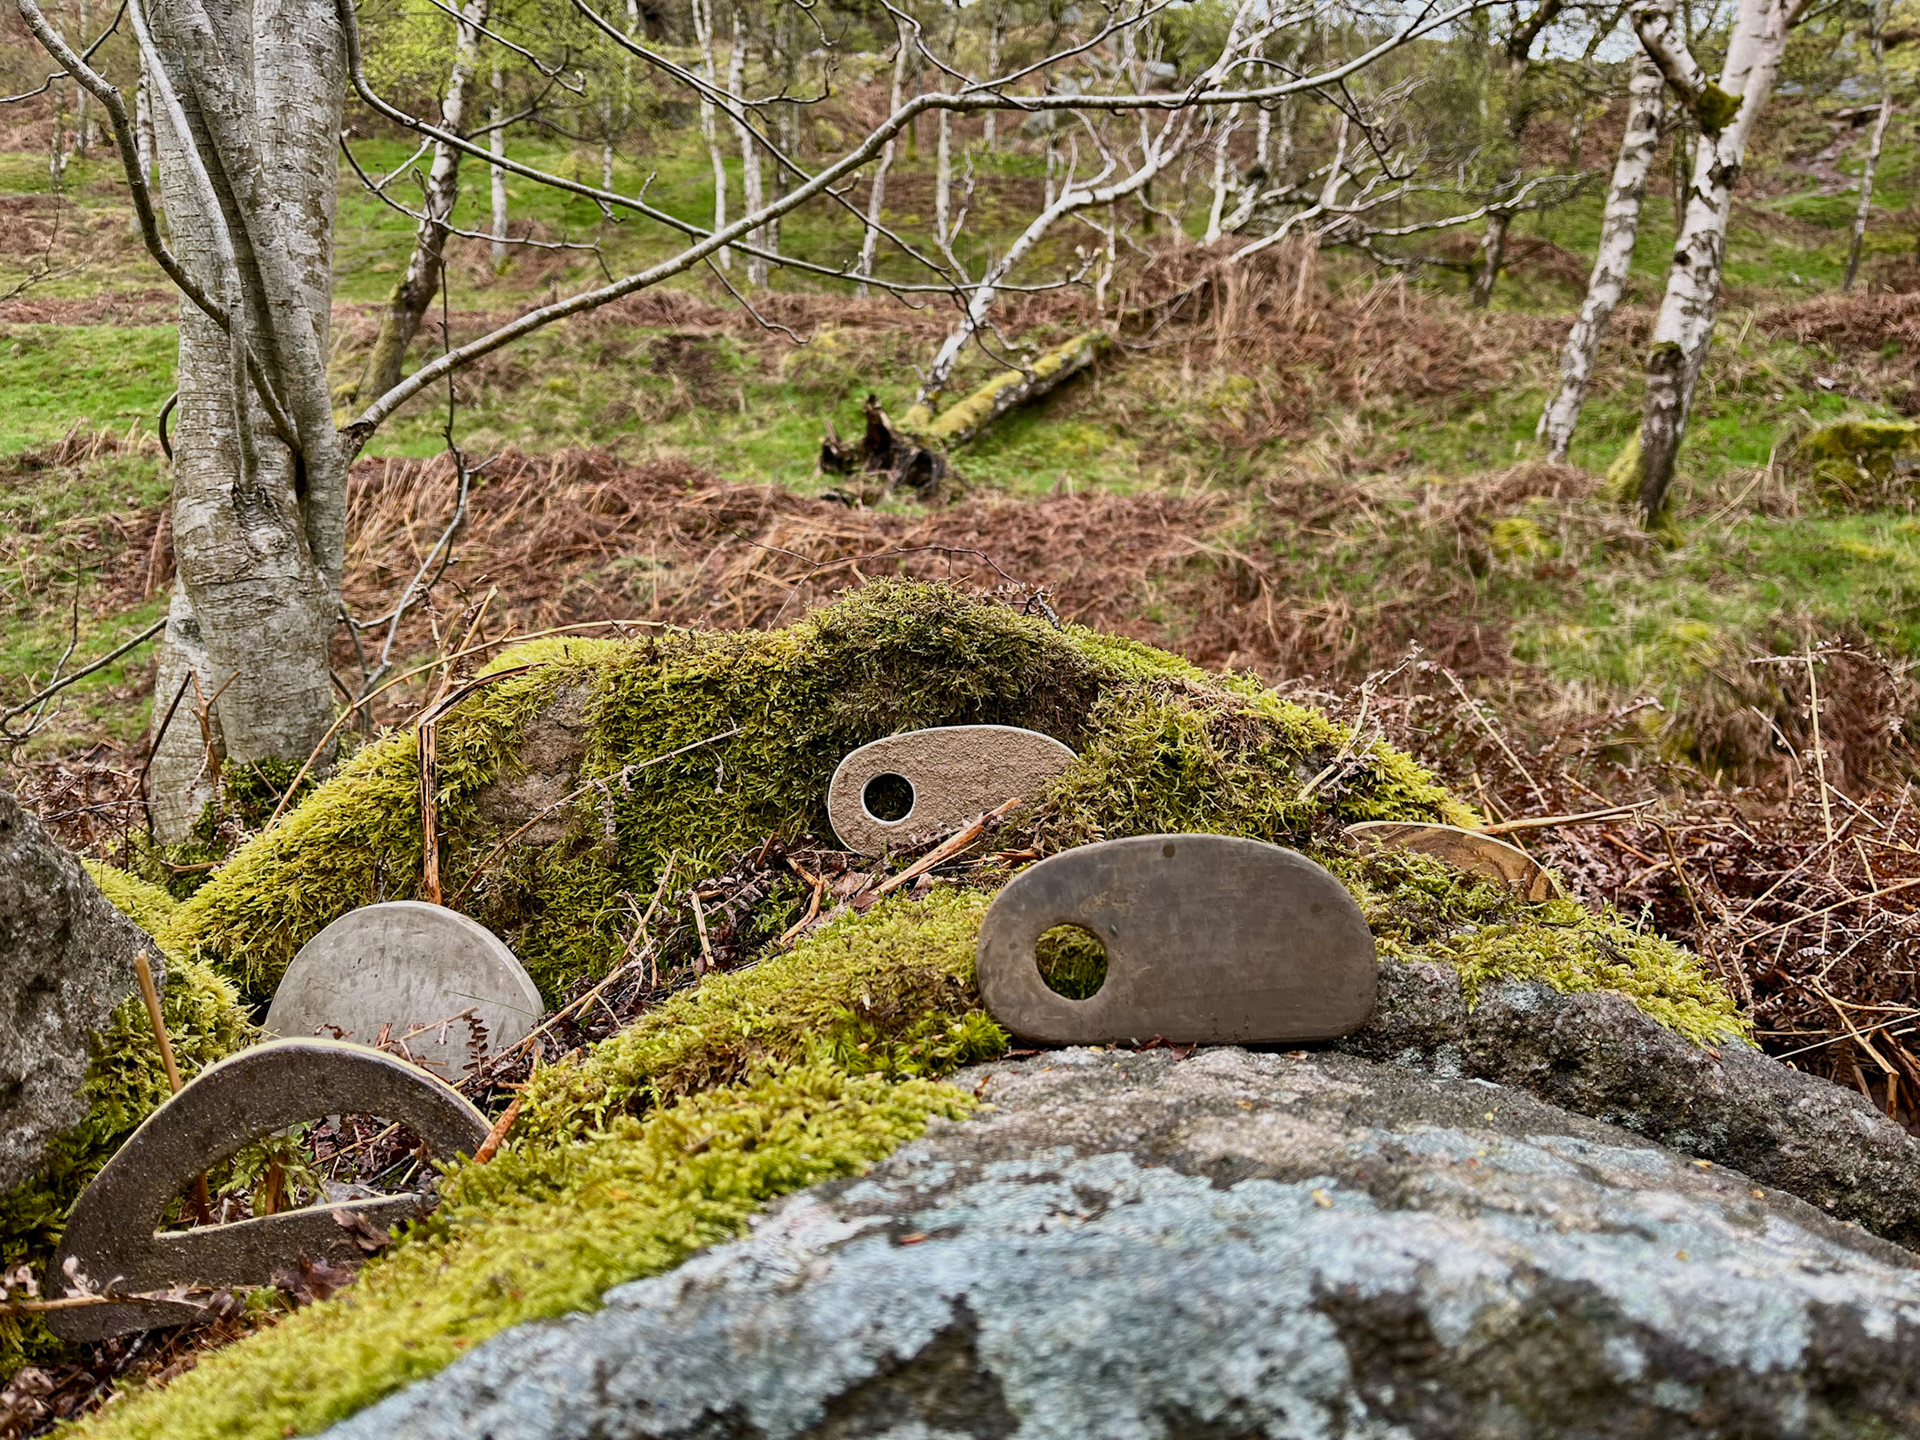
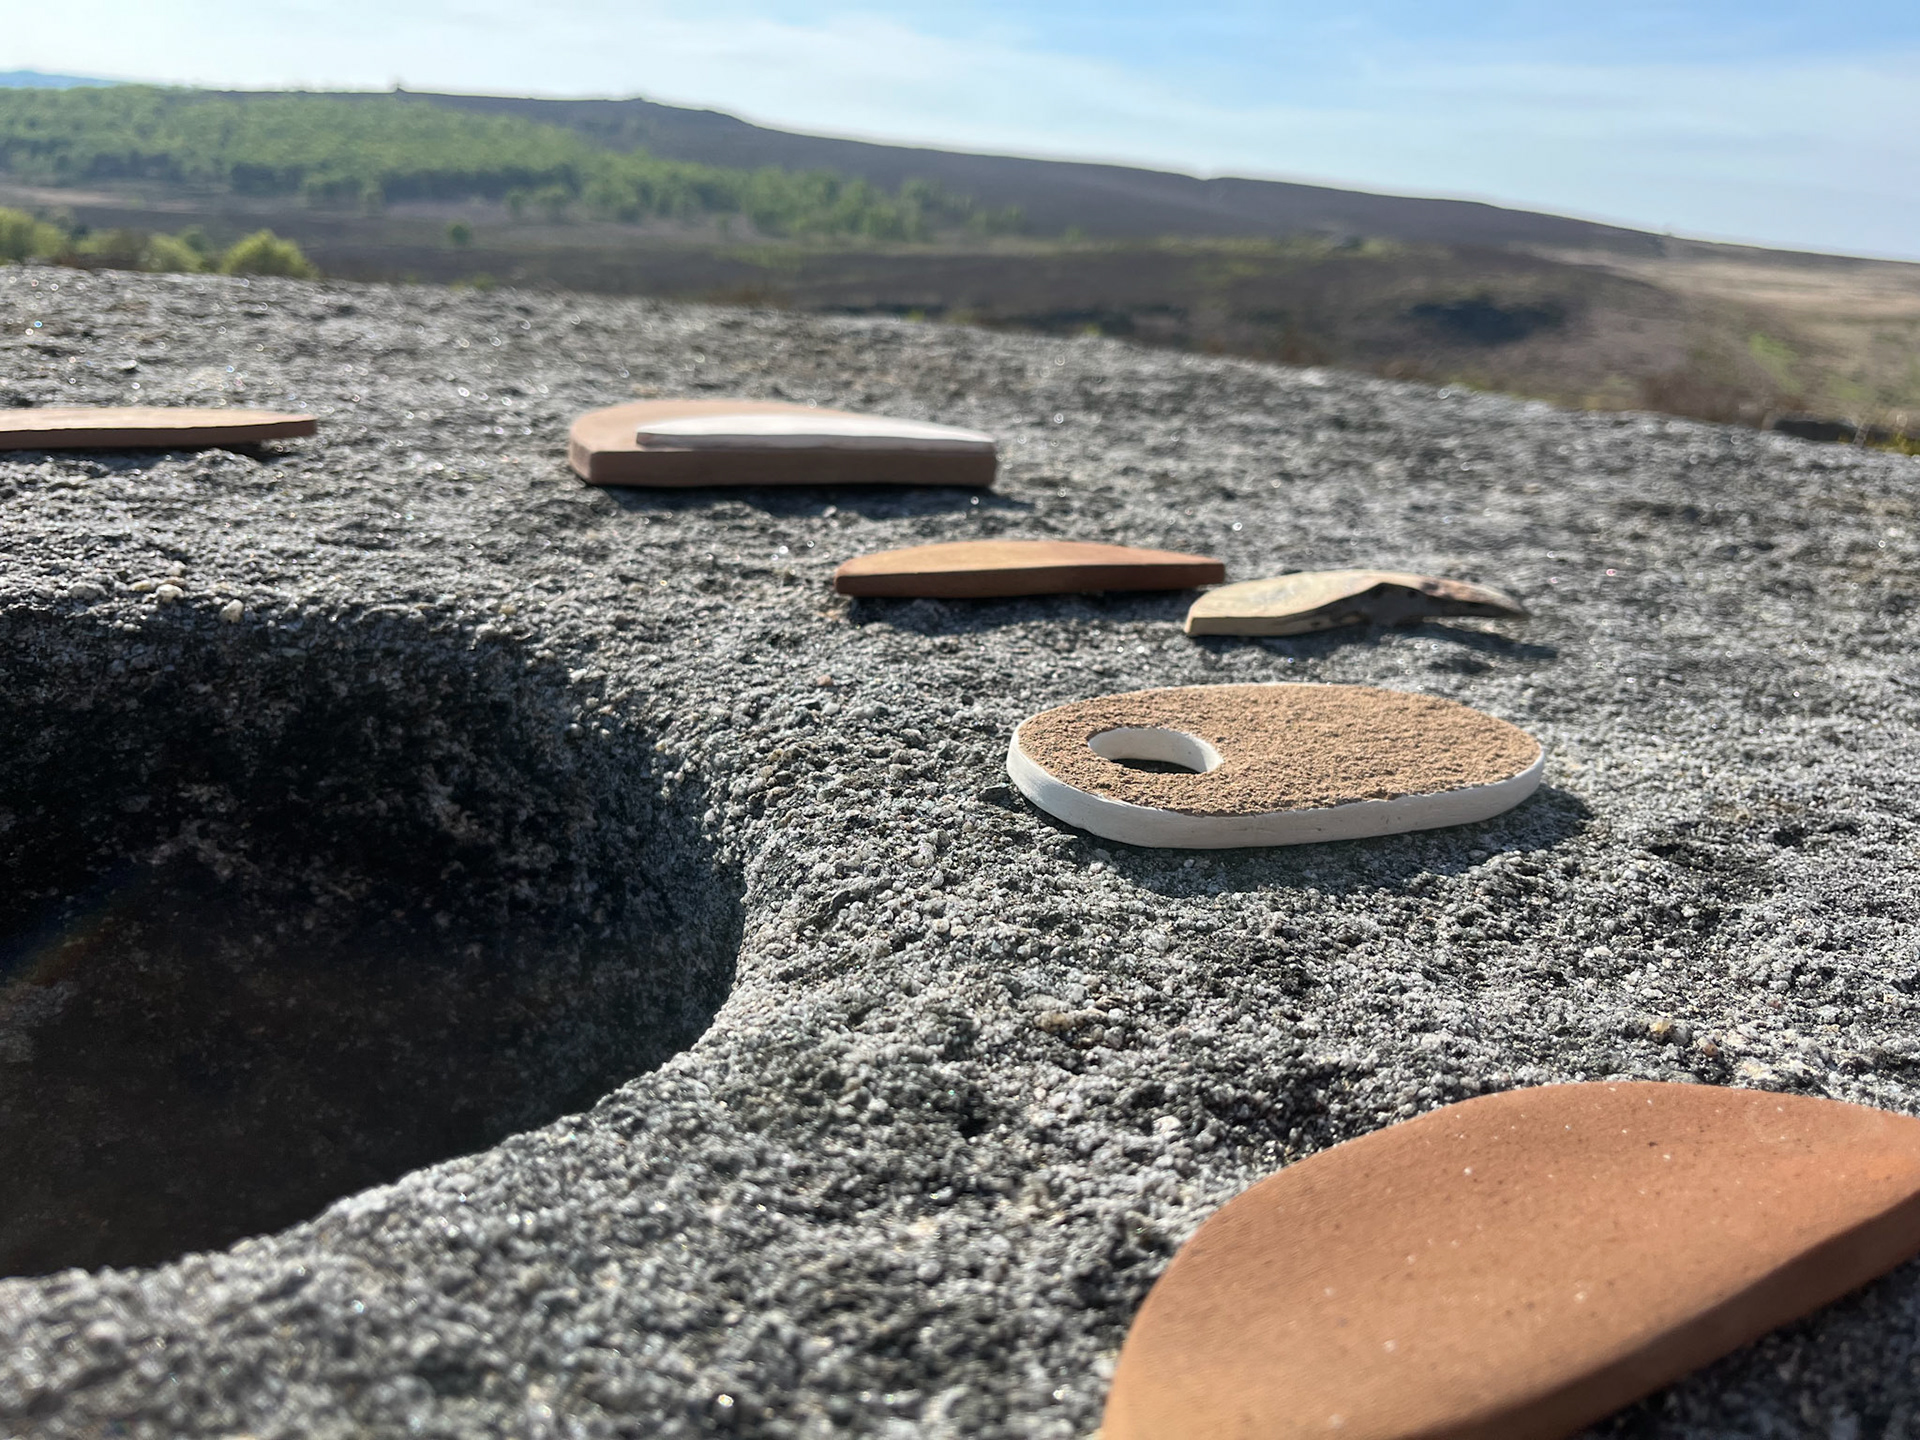
As part of my final film, which will showcase my making process, I have taken a few of the fired slabs out into the landscape to curate them in their natural environment. Placing them in with the moss and bracken that have taken control of the stones, the clay versions almost blend in with their landscape, the colours complementing the colours of the earth.
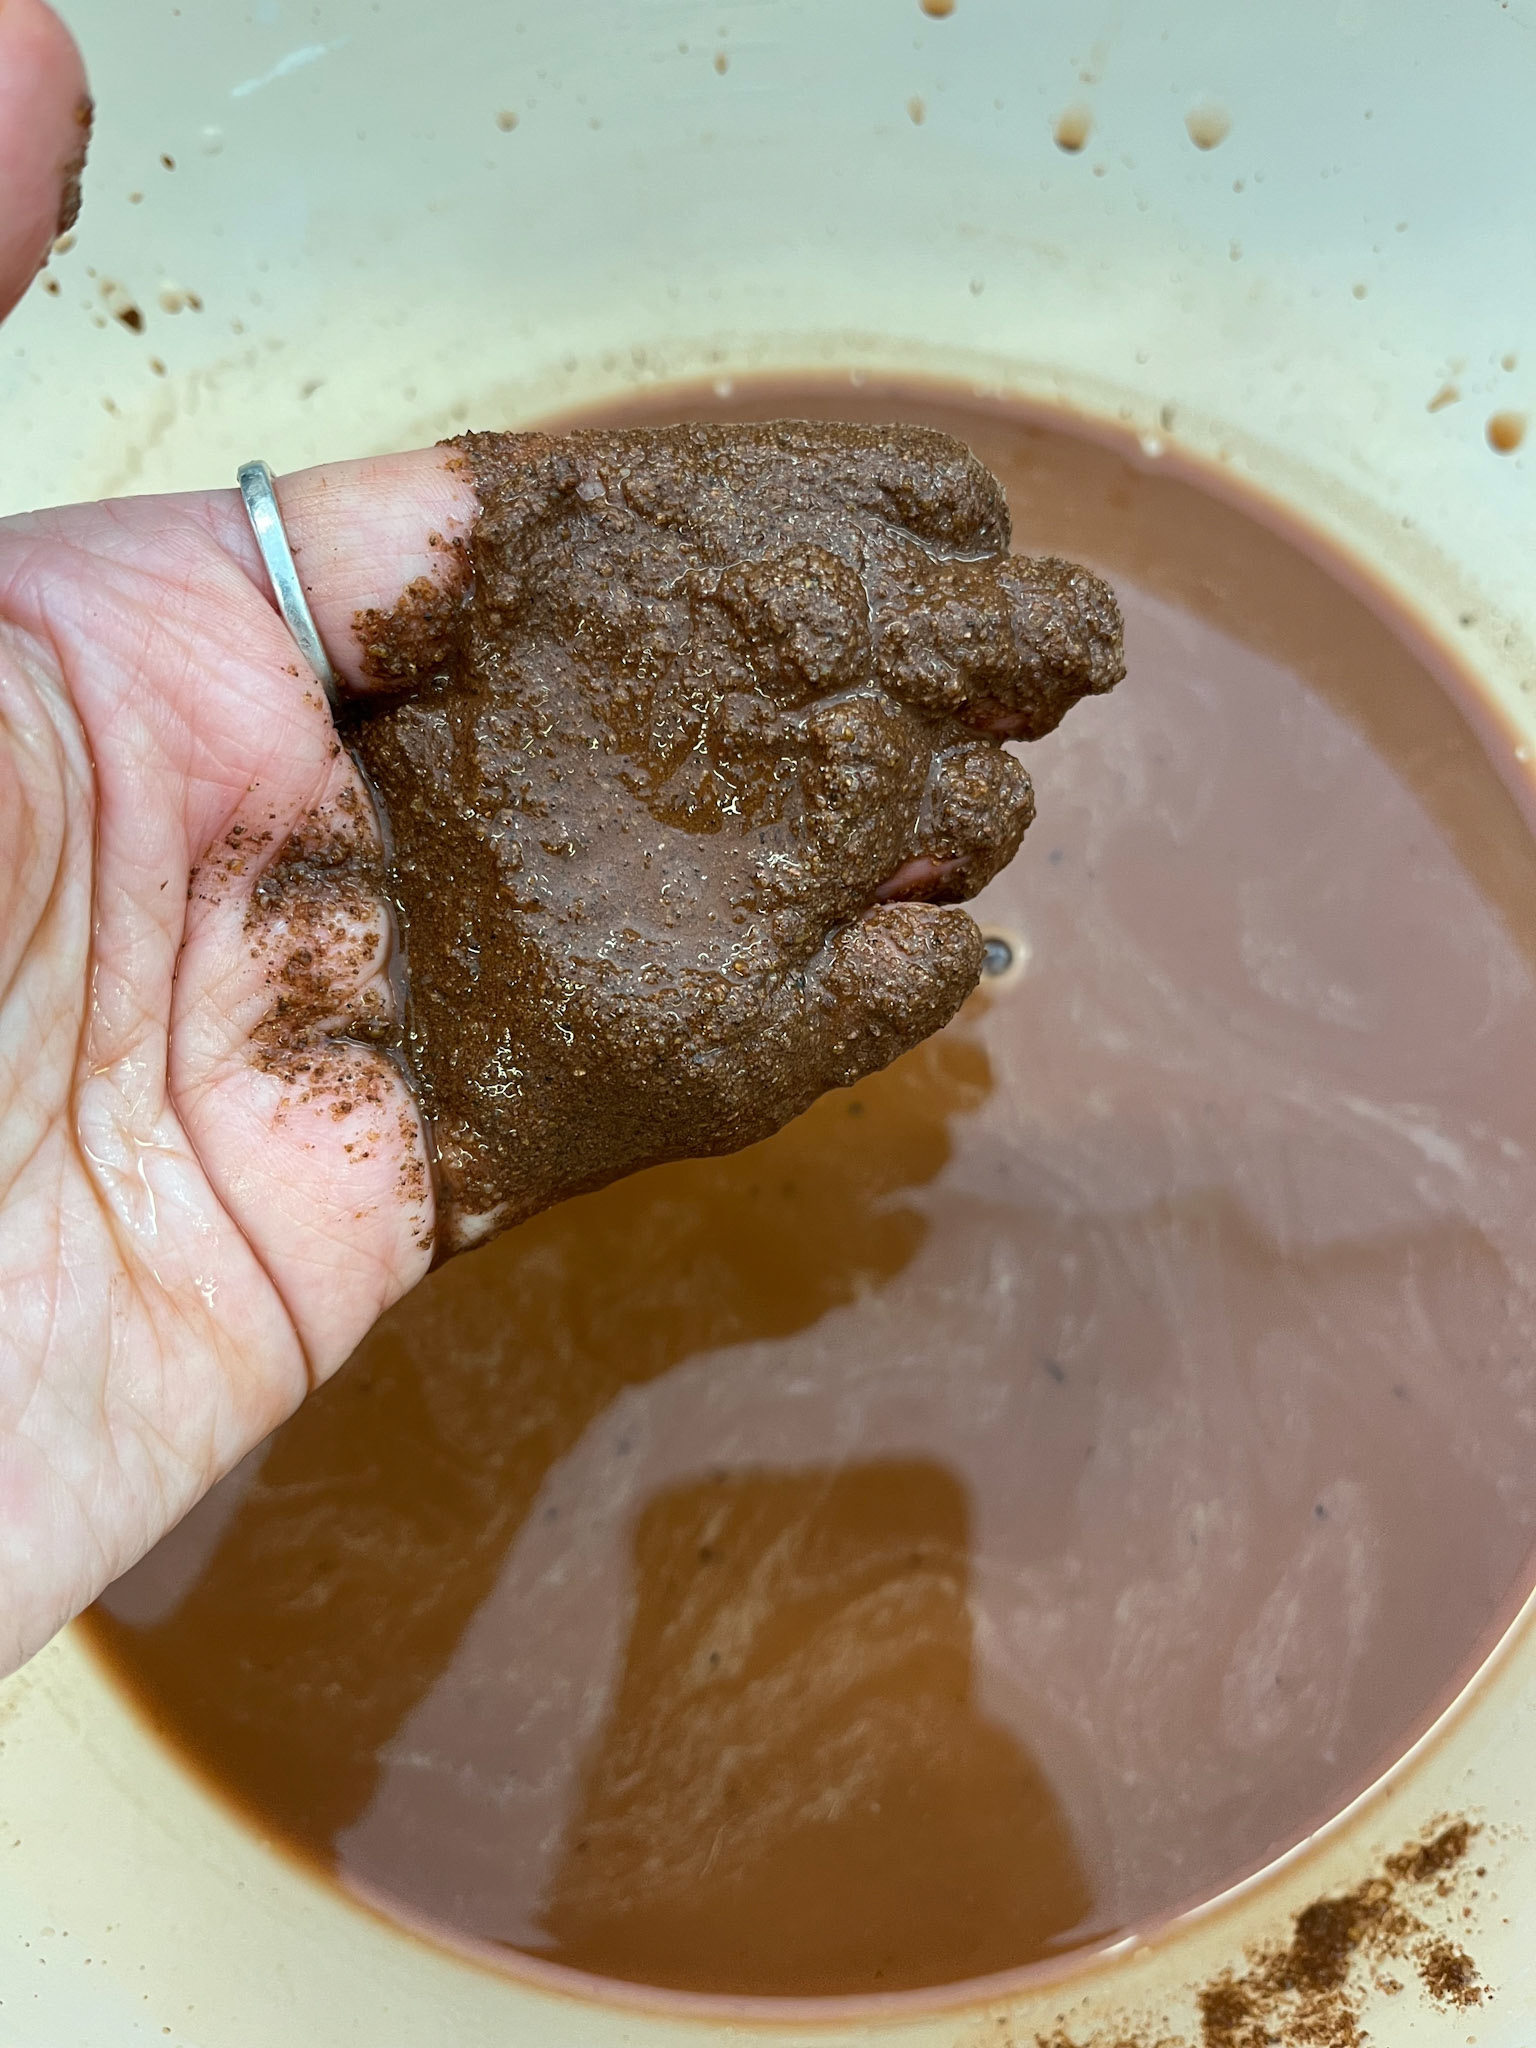
Digging to processing
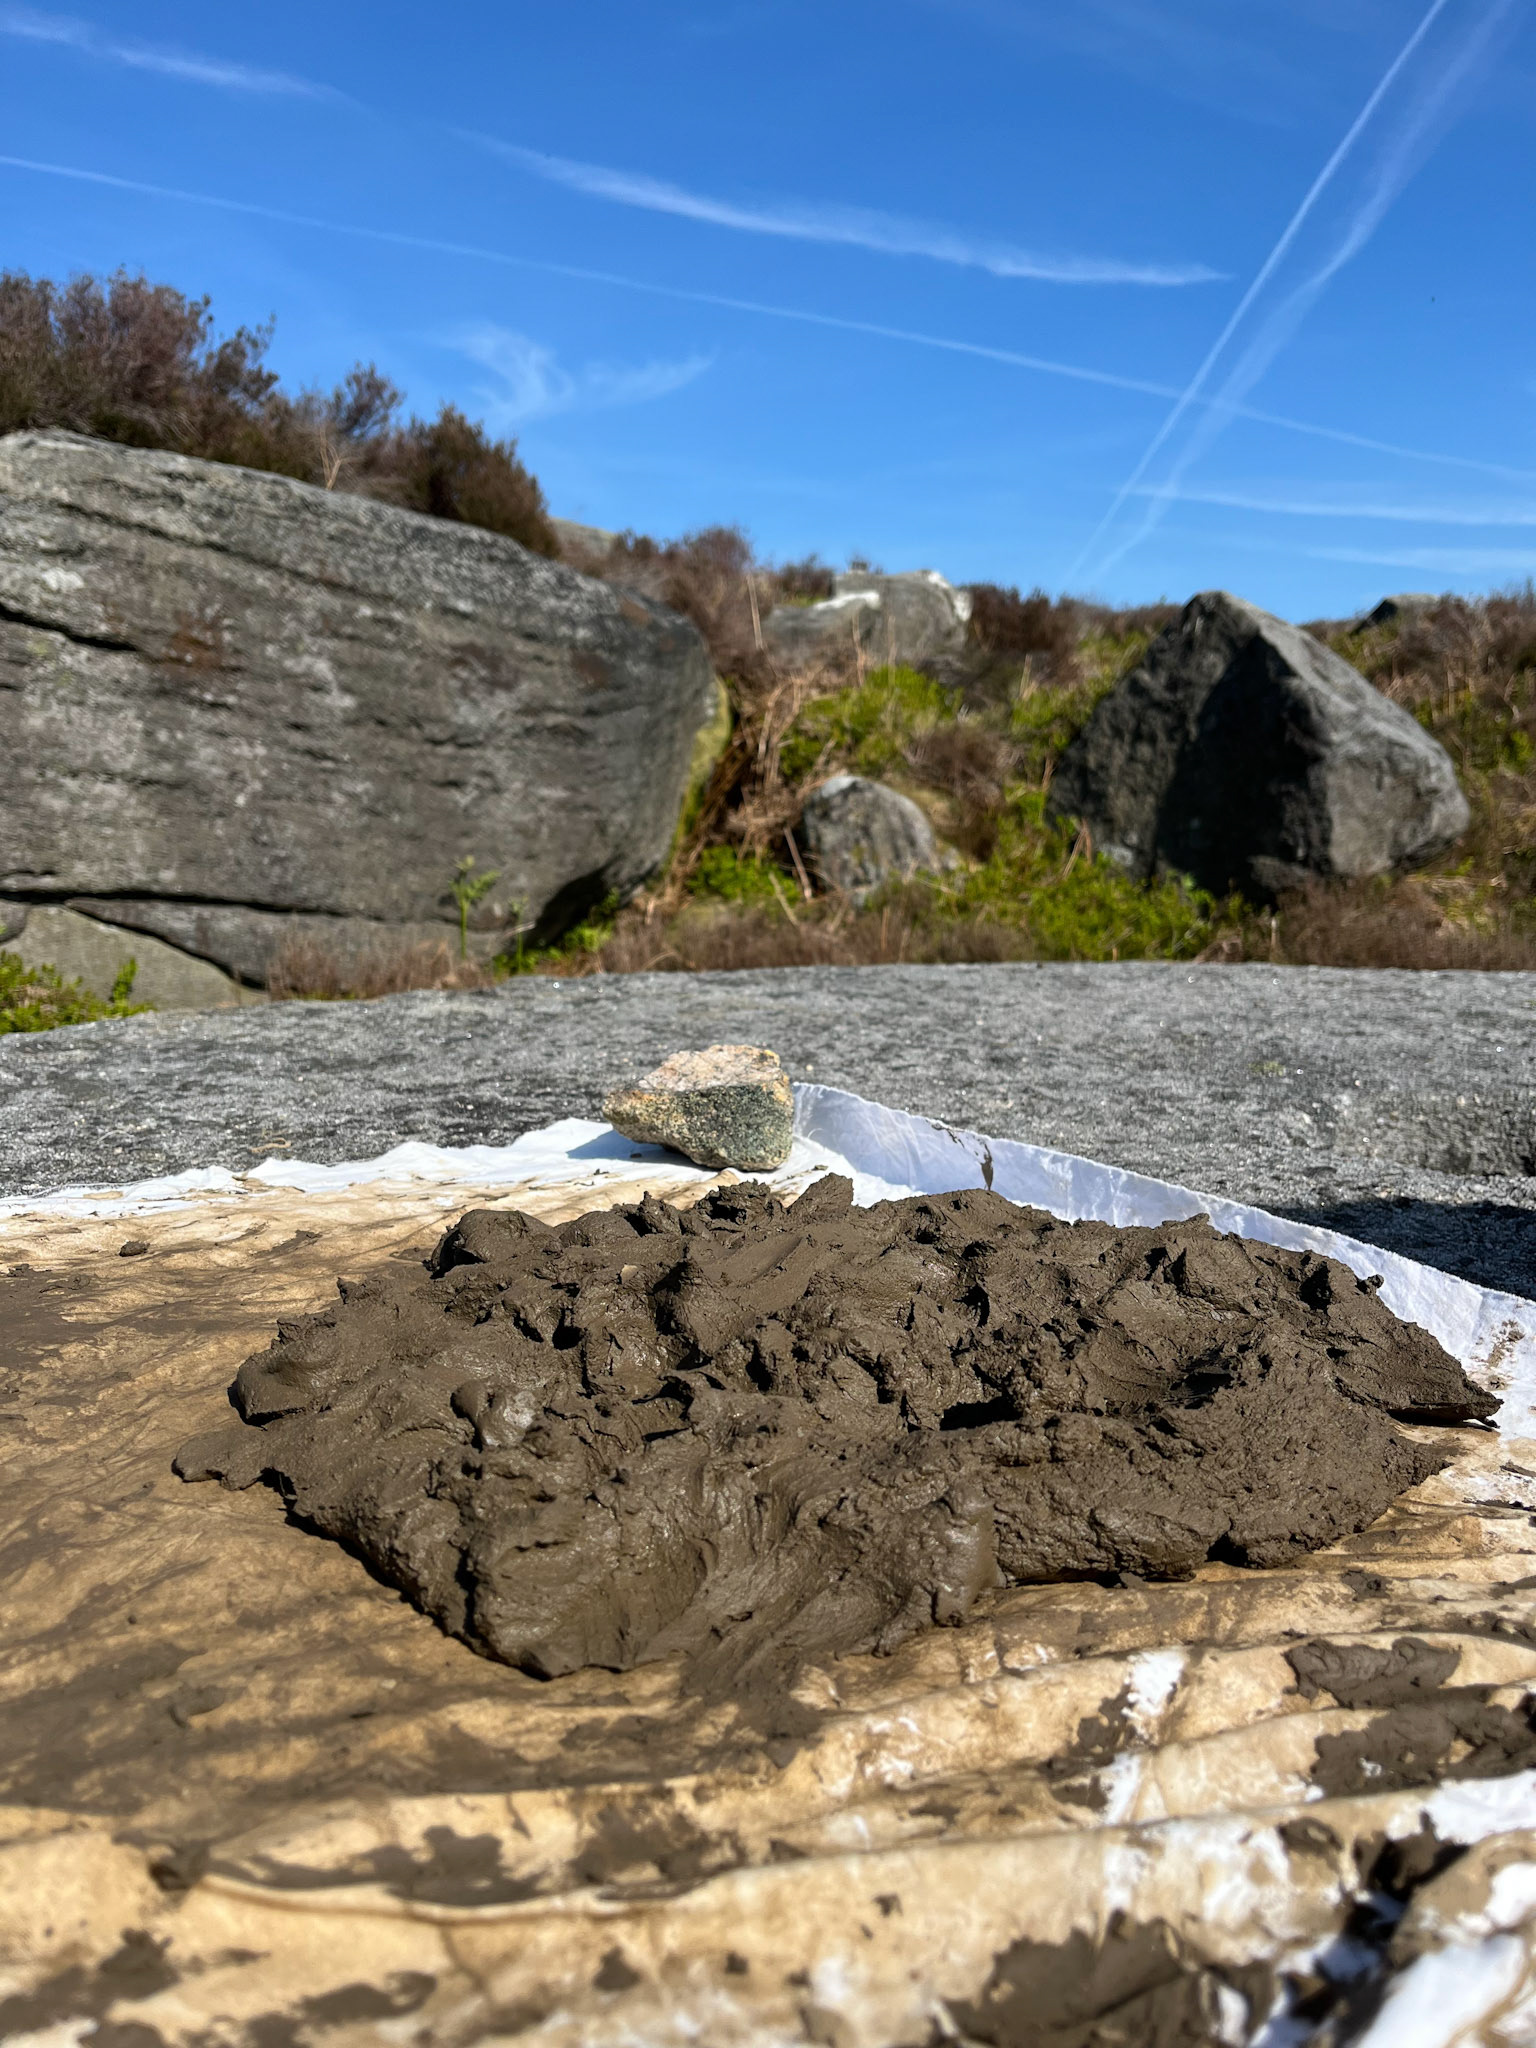
I went caving once more, as it had been a while since I last gathered any cave clay, and I needed some more for processing and working with. This time, I am processing the clay outdoors as I want to show that every step of the process of working with clay can be achieved outside in the landscape. Luckily, it was a sunny day, which meant the clay dried quickly, despite the fact that when harvesting it, I was digging through puddles of water to get to the clay. The clay also required little processing or sieving due to it being very pure and smooth.
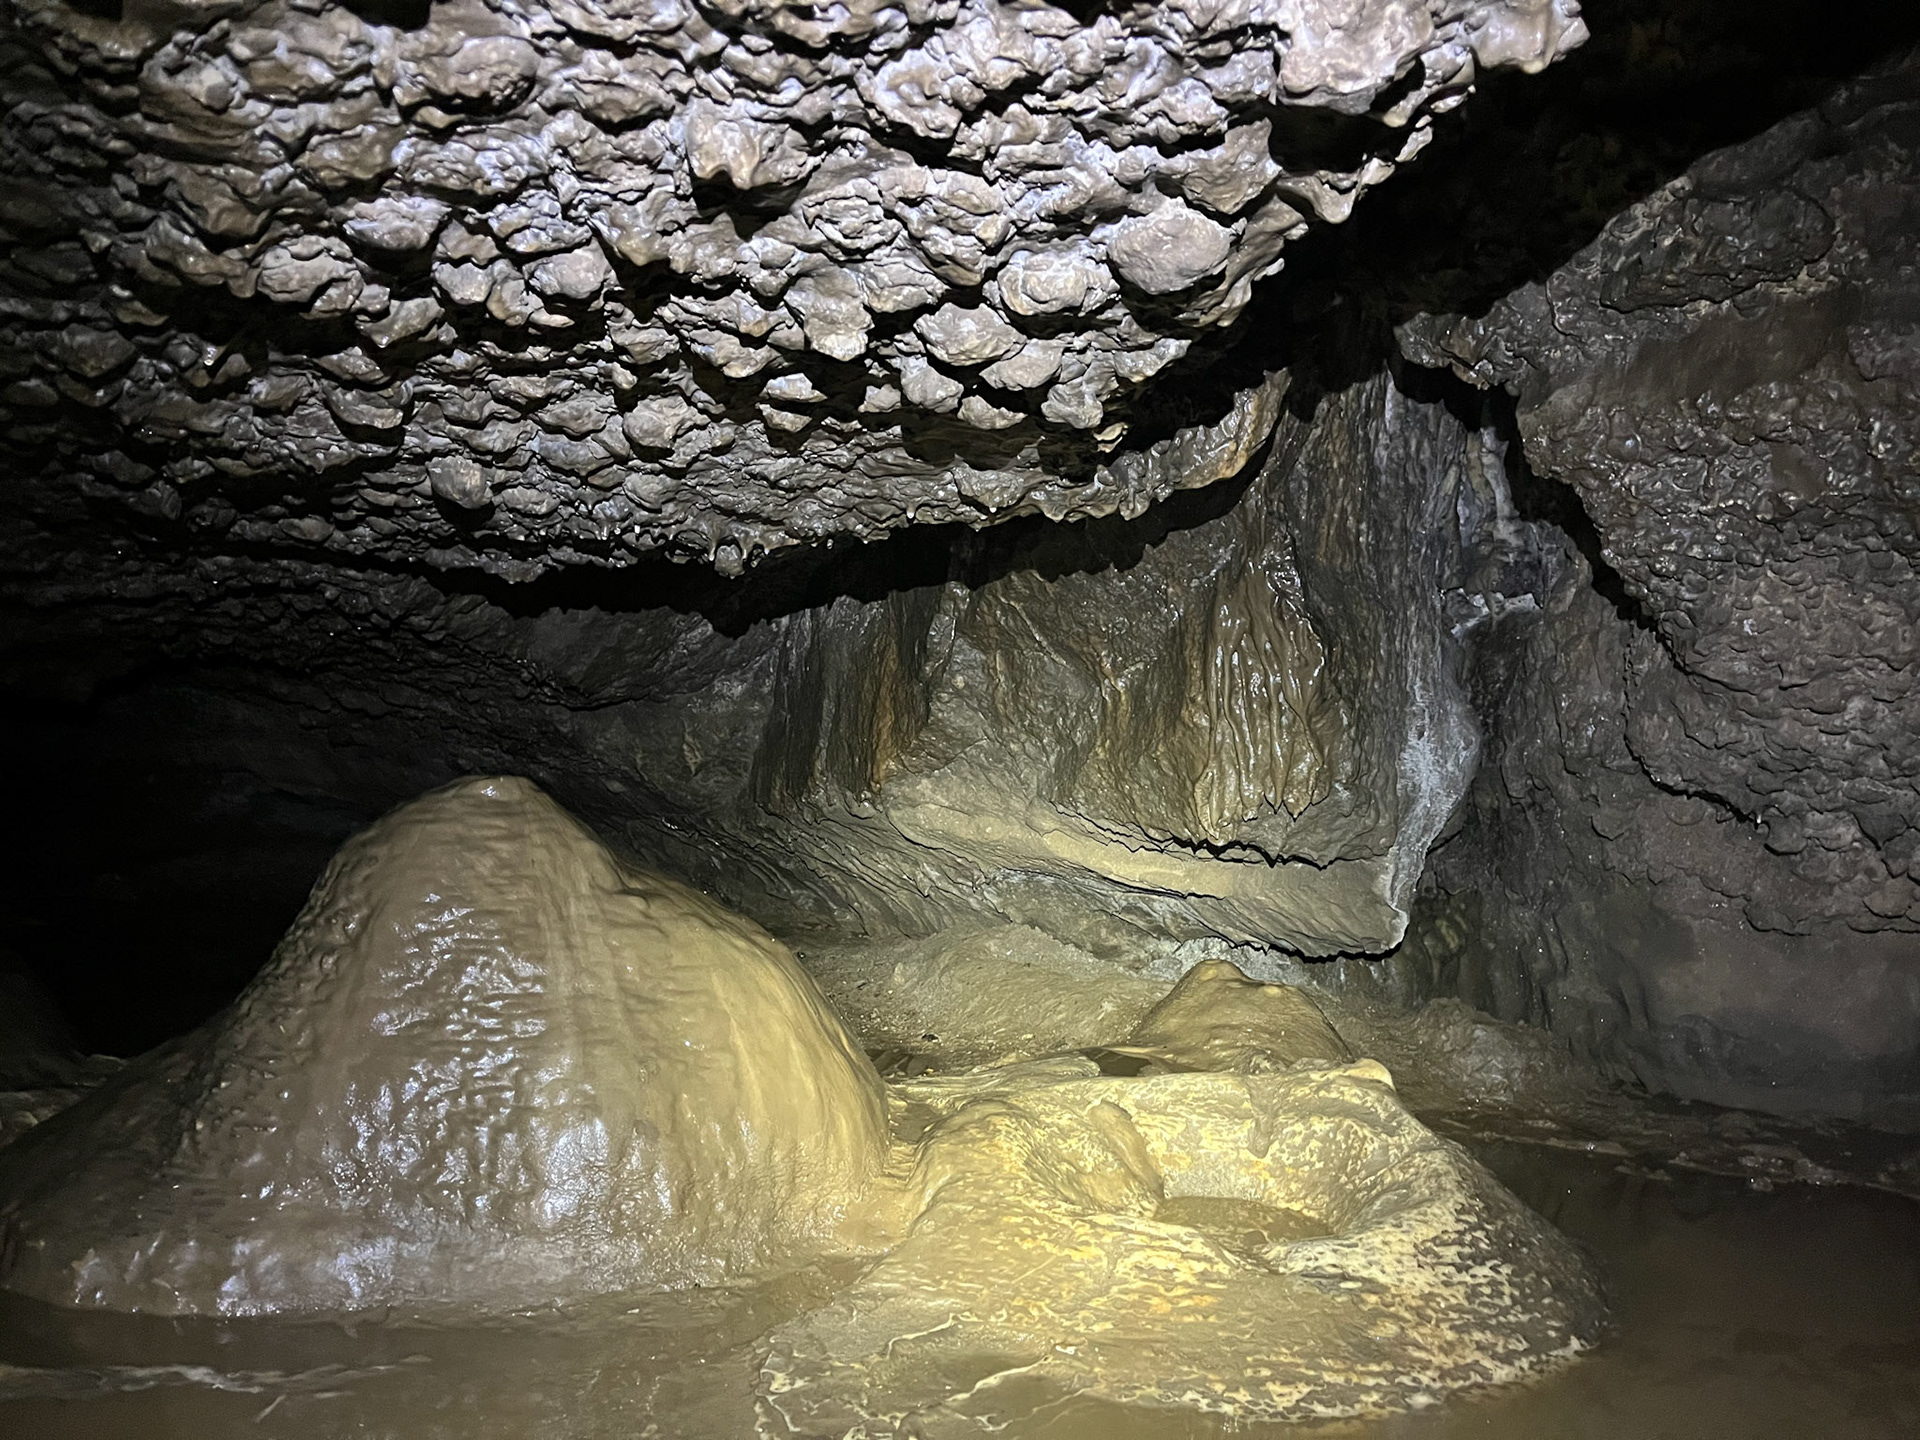
The cave where the clay comes from
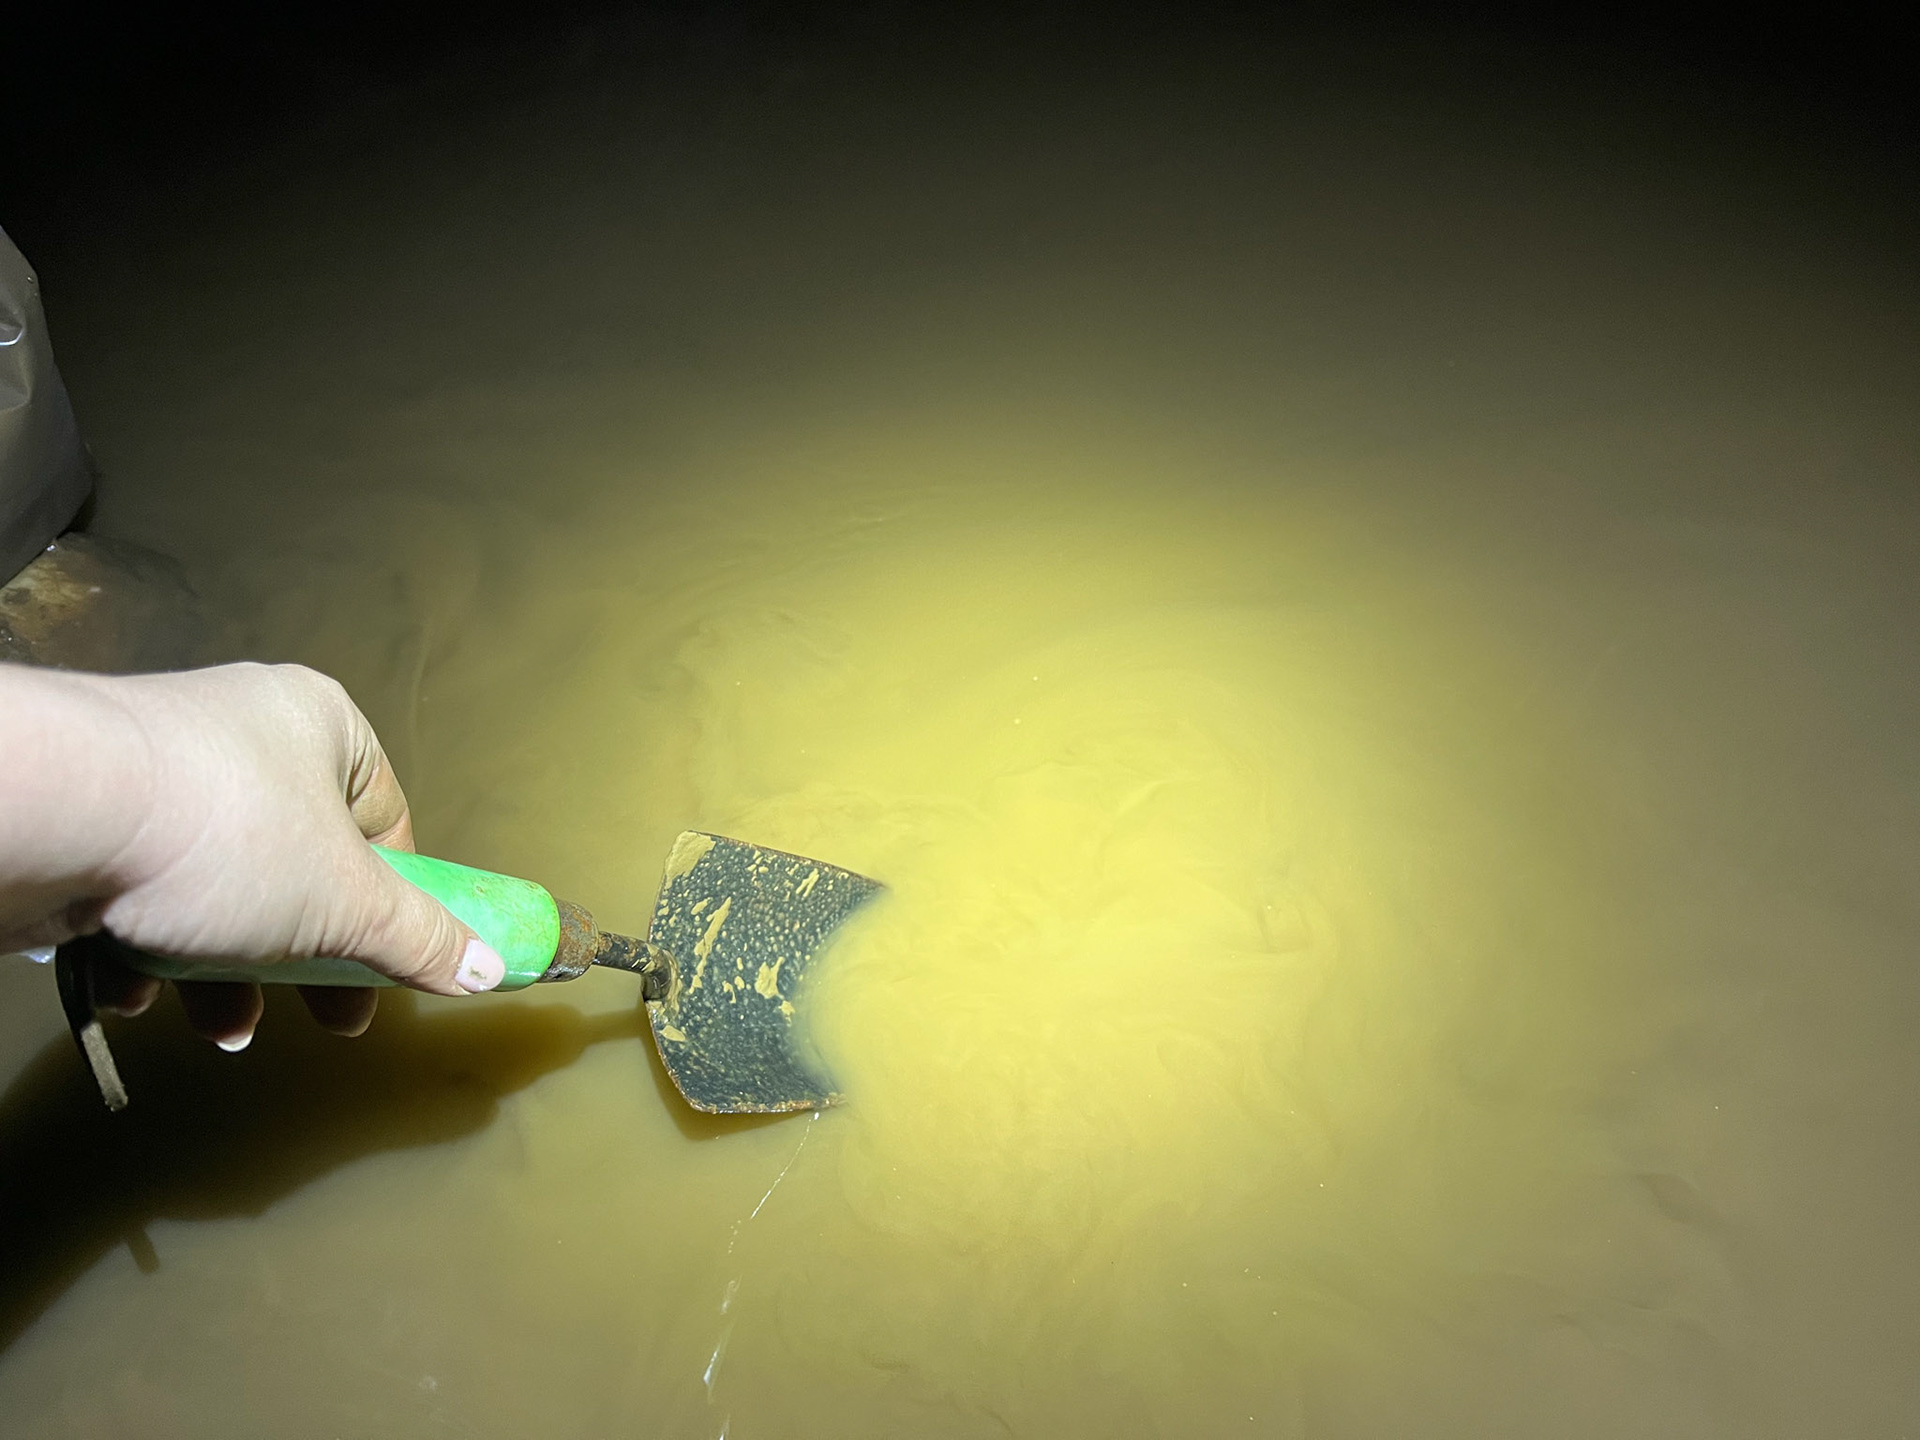
Digging for the clay
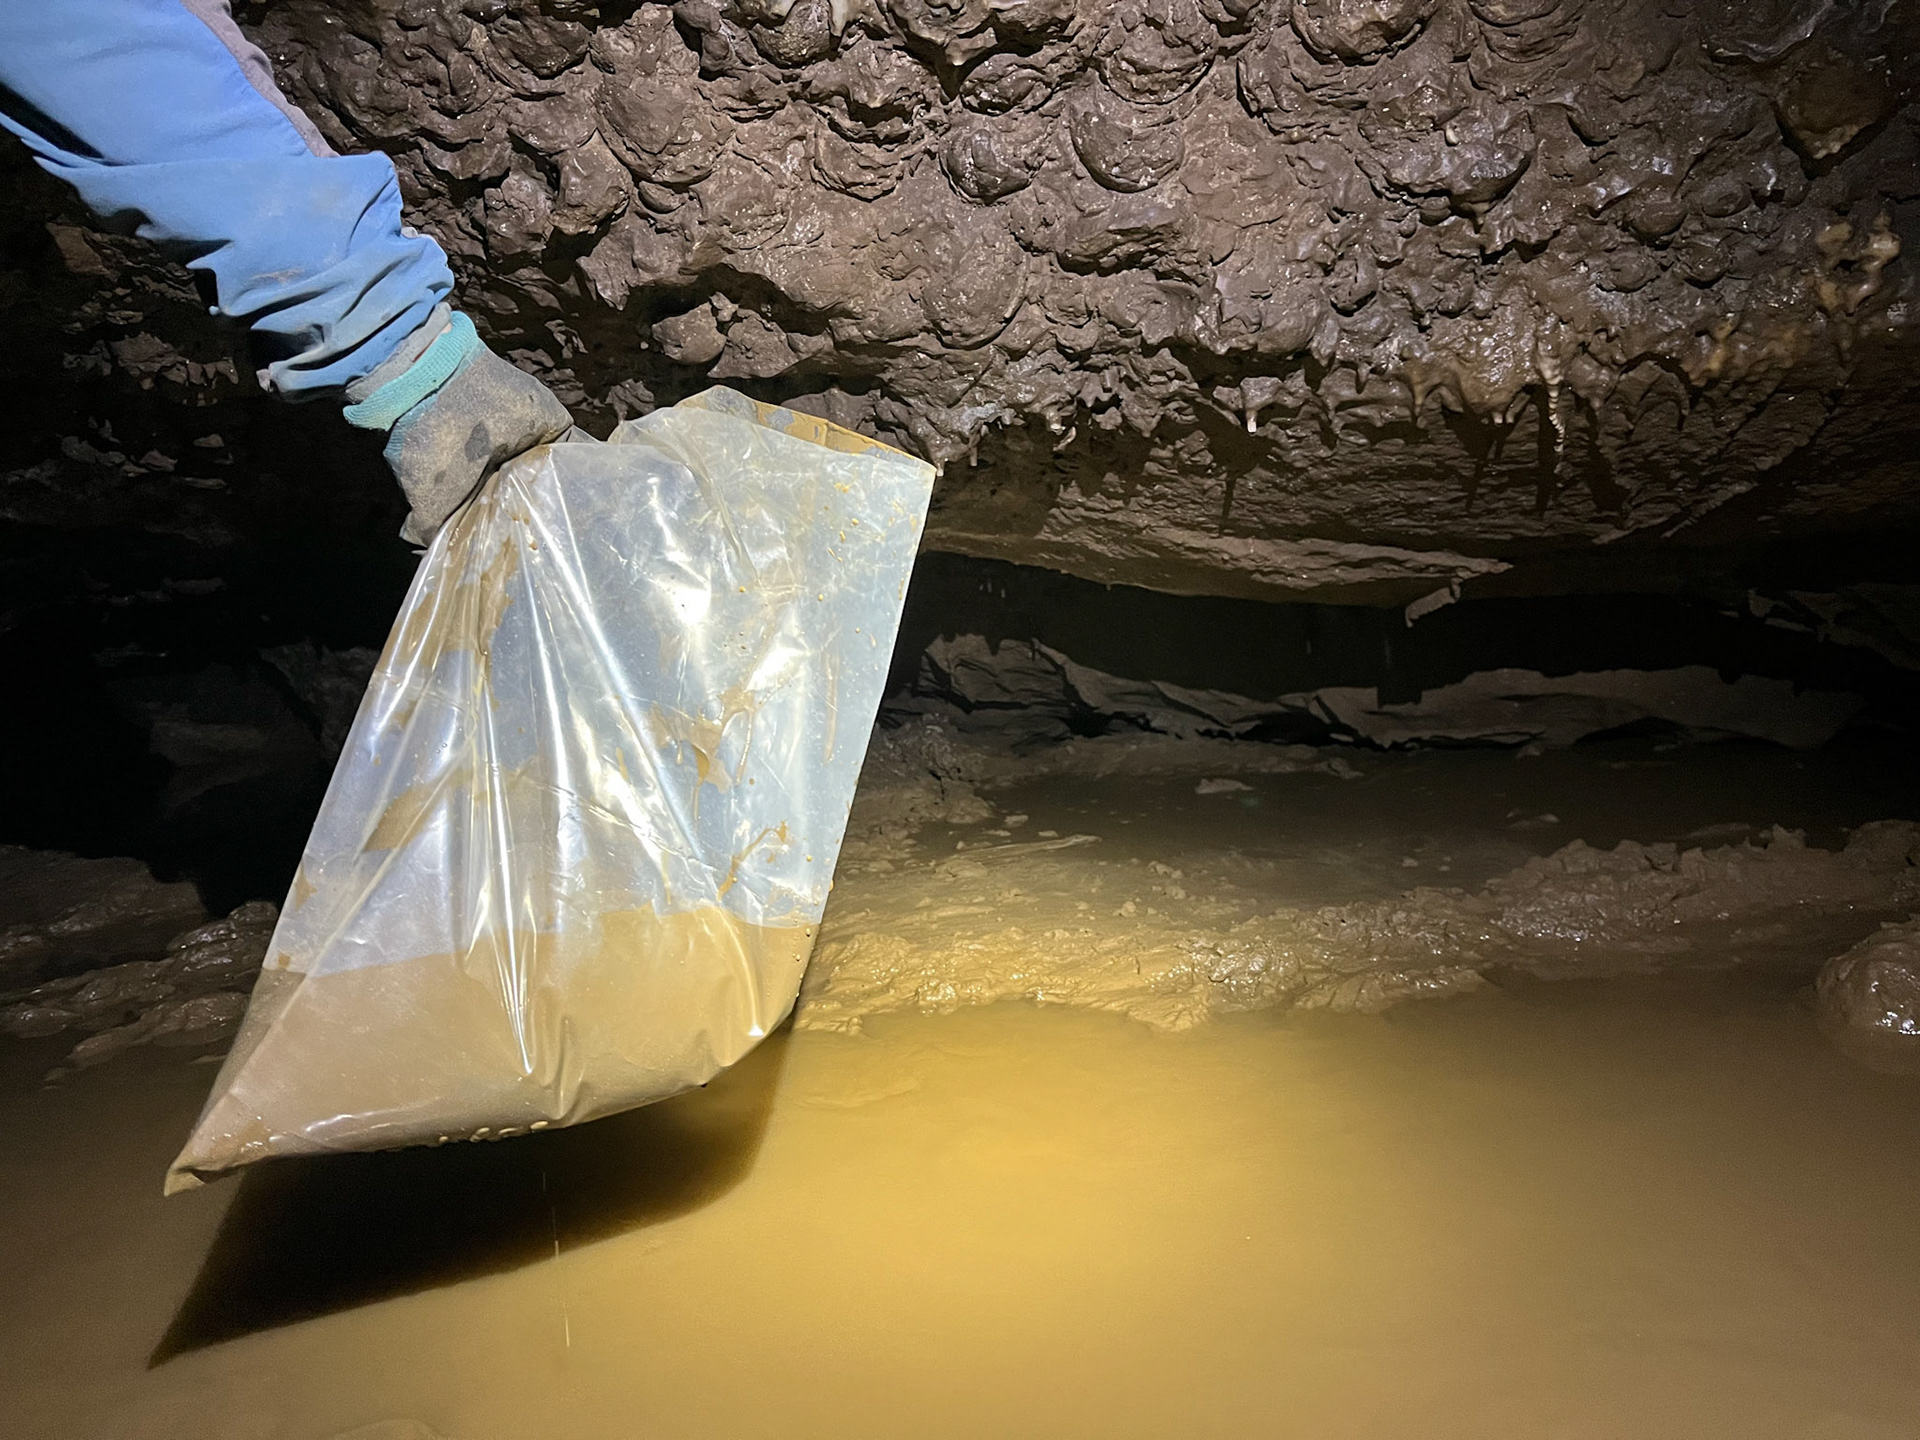
Bagging up the clay
Processing on the millstone
Drying out the clay
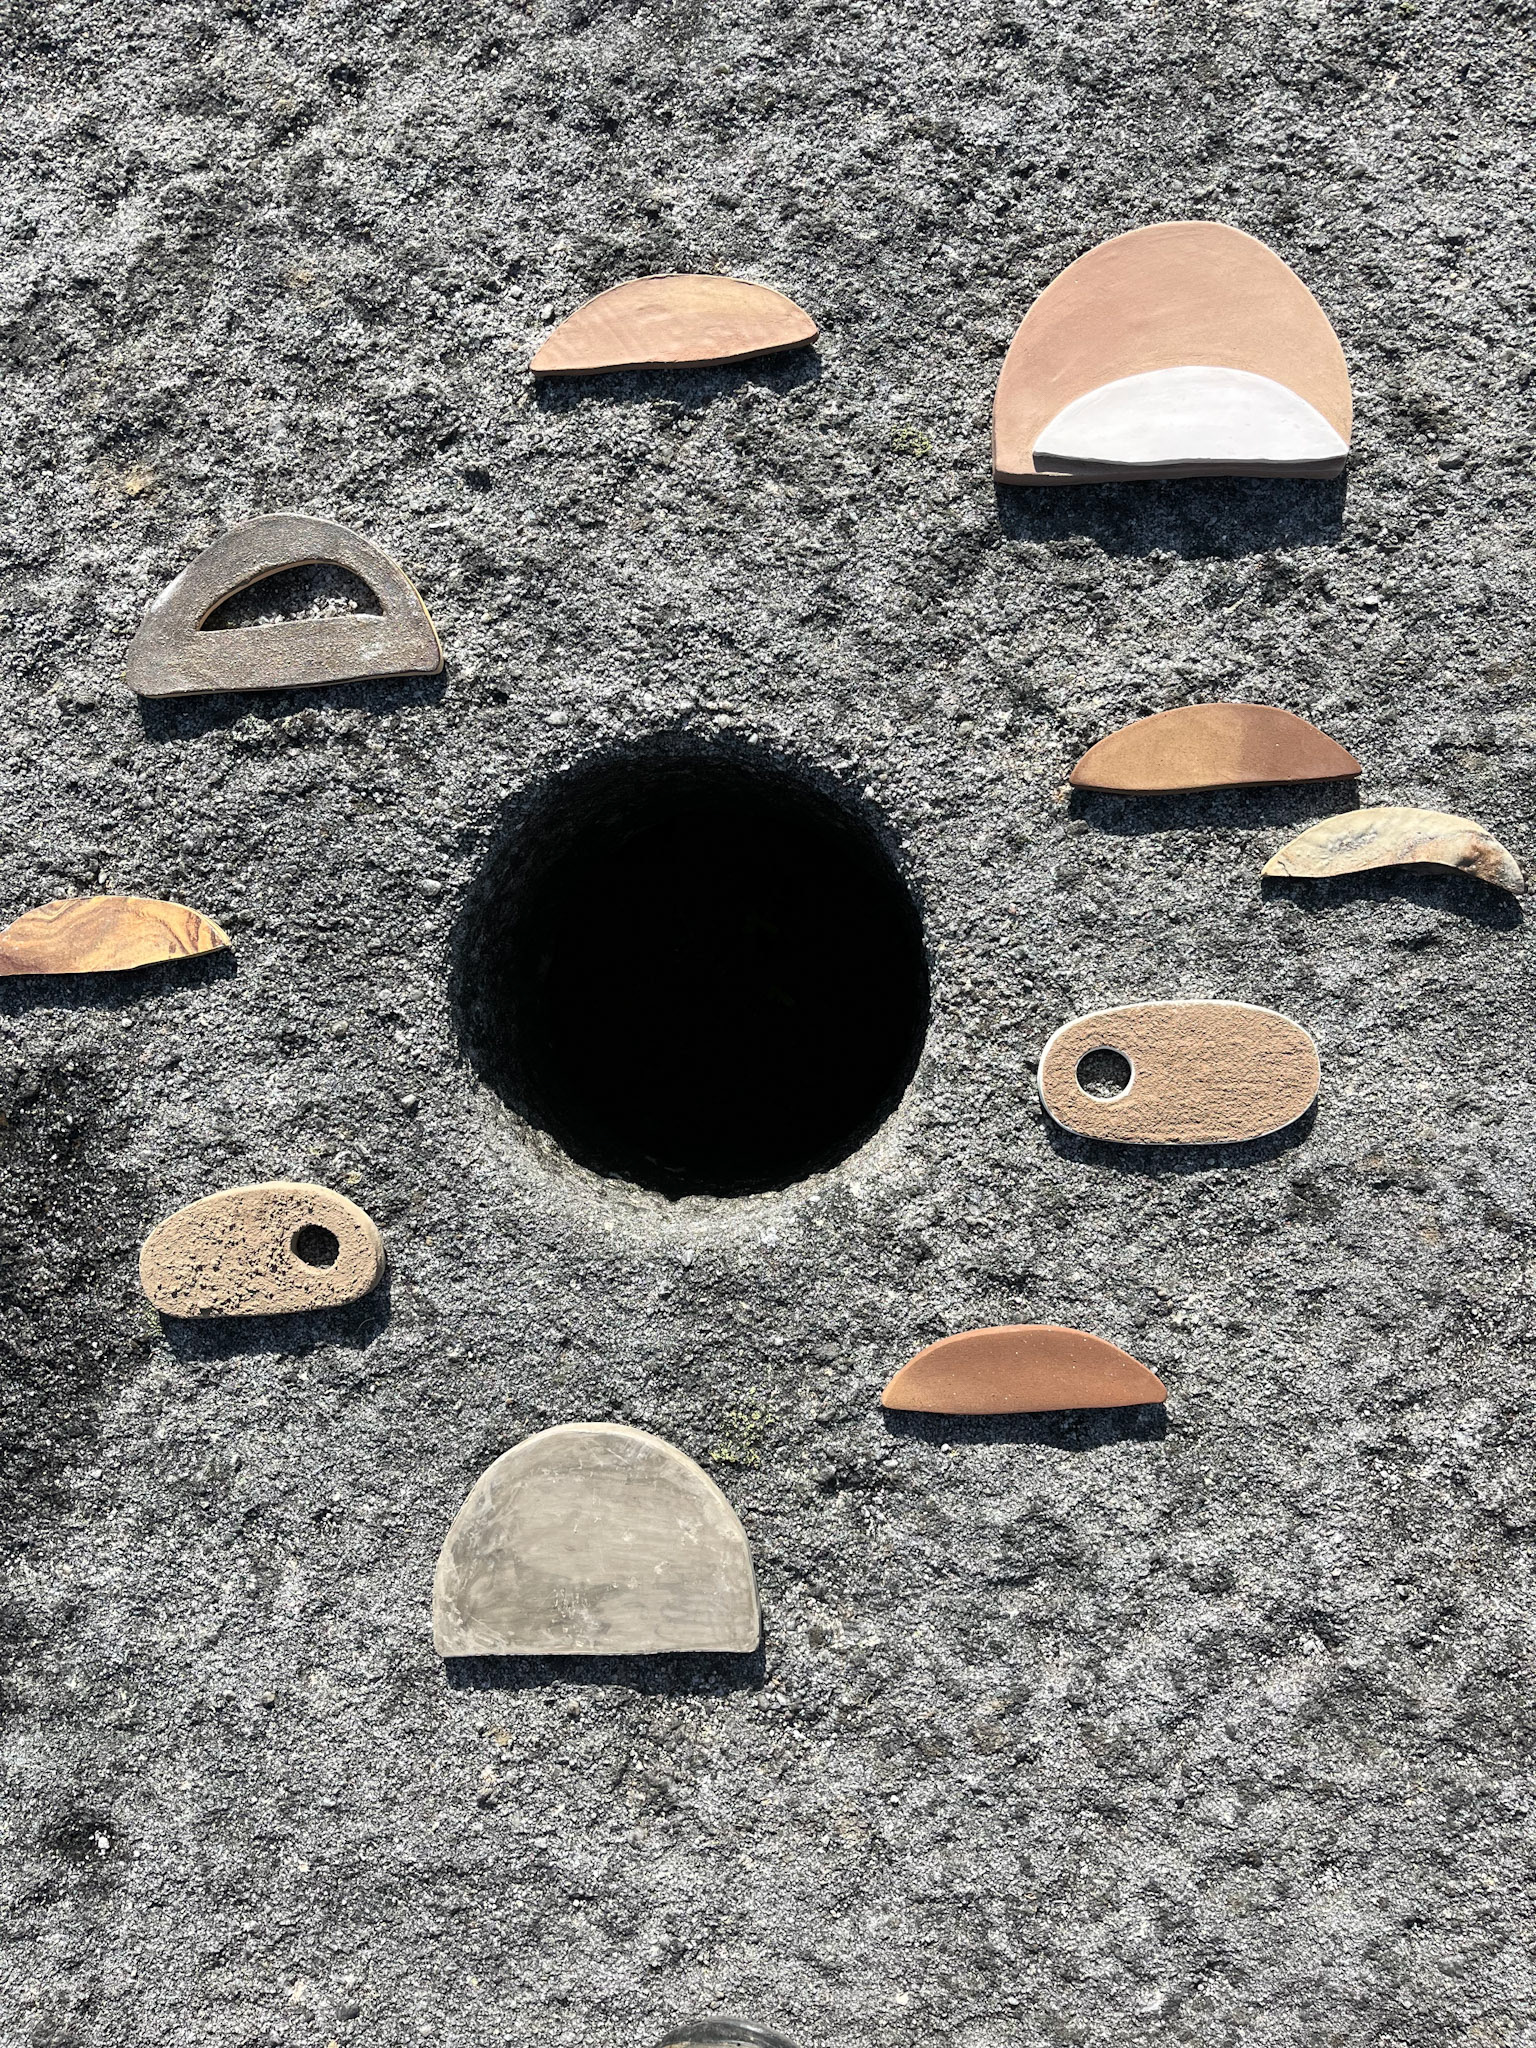
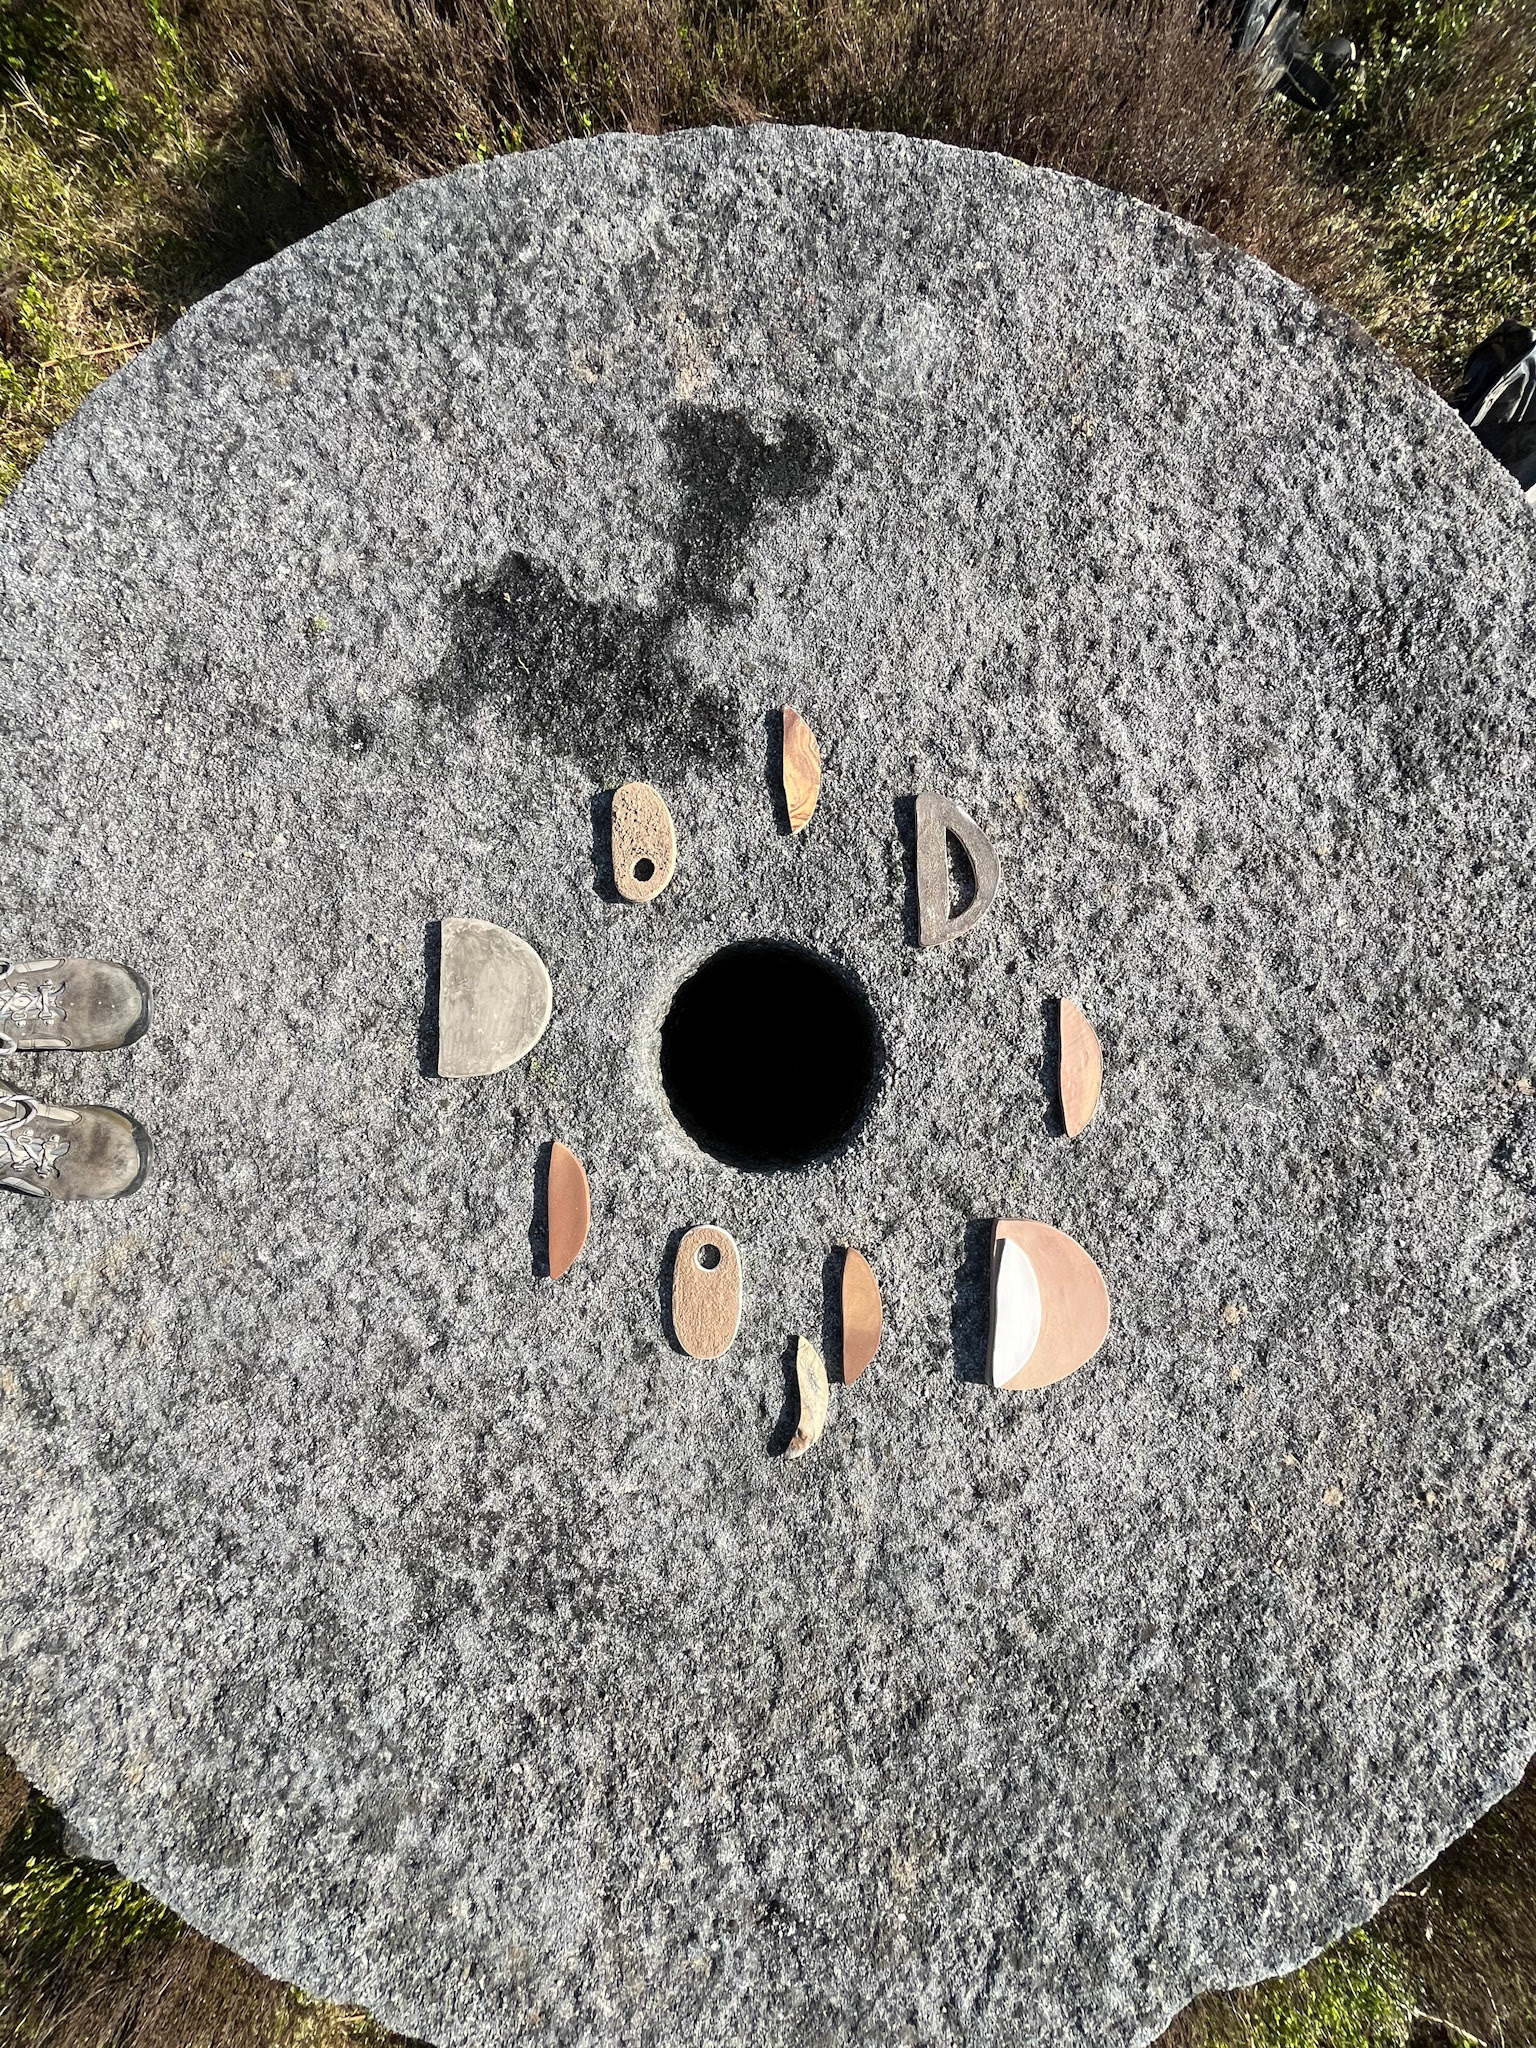
Tiles on a millstone
I have brought a few more of my resolved tiles out into their landscape, this time to display on the largest millstone in the Peak District, the same millstone that I processed the clay on. Due to them all being different sizes, colours and textures, it provides a nice contrast between the ceramic and the stone.
Glaze application
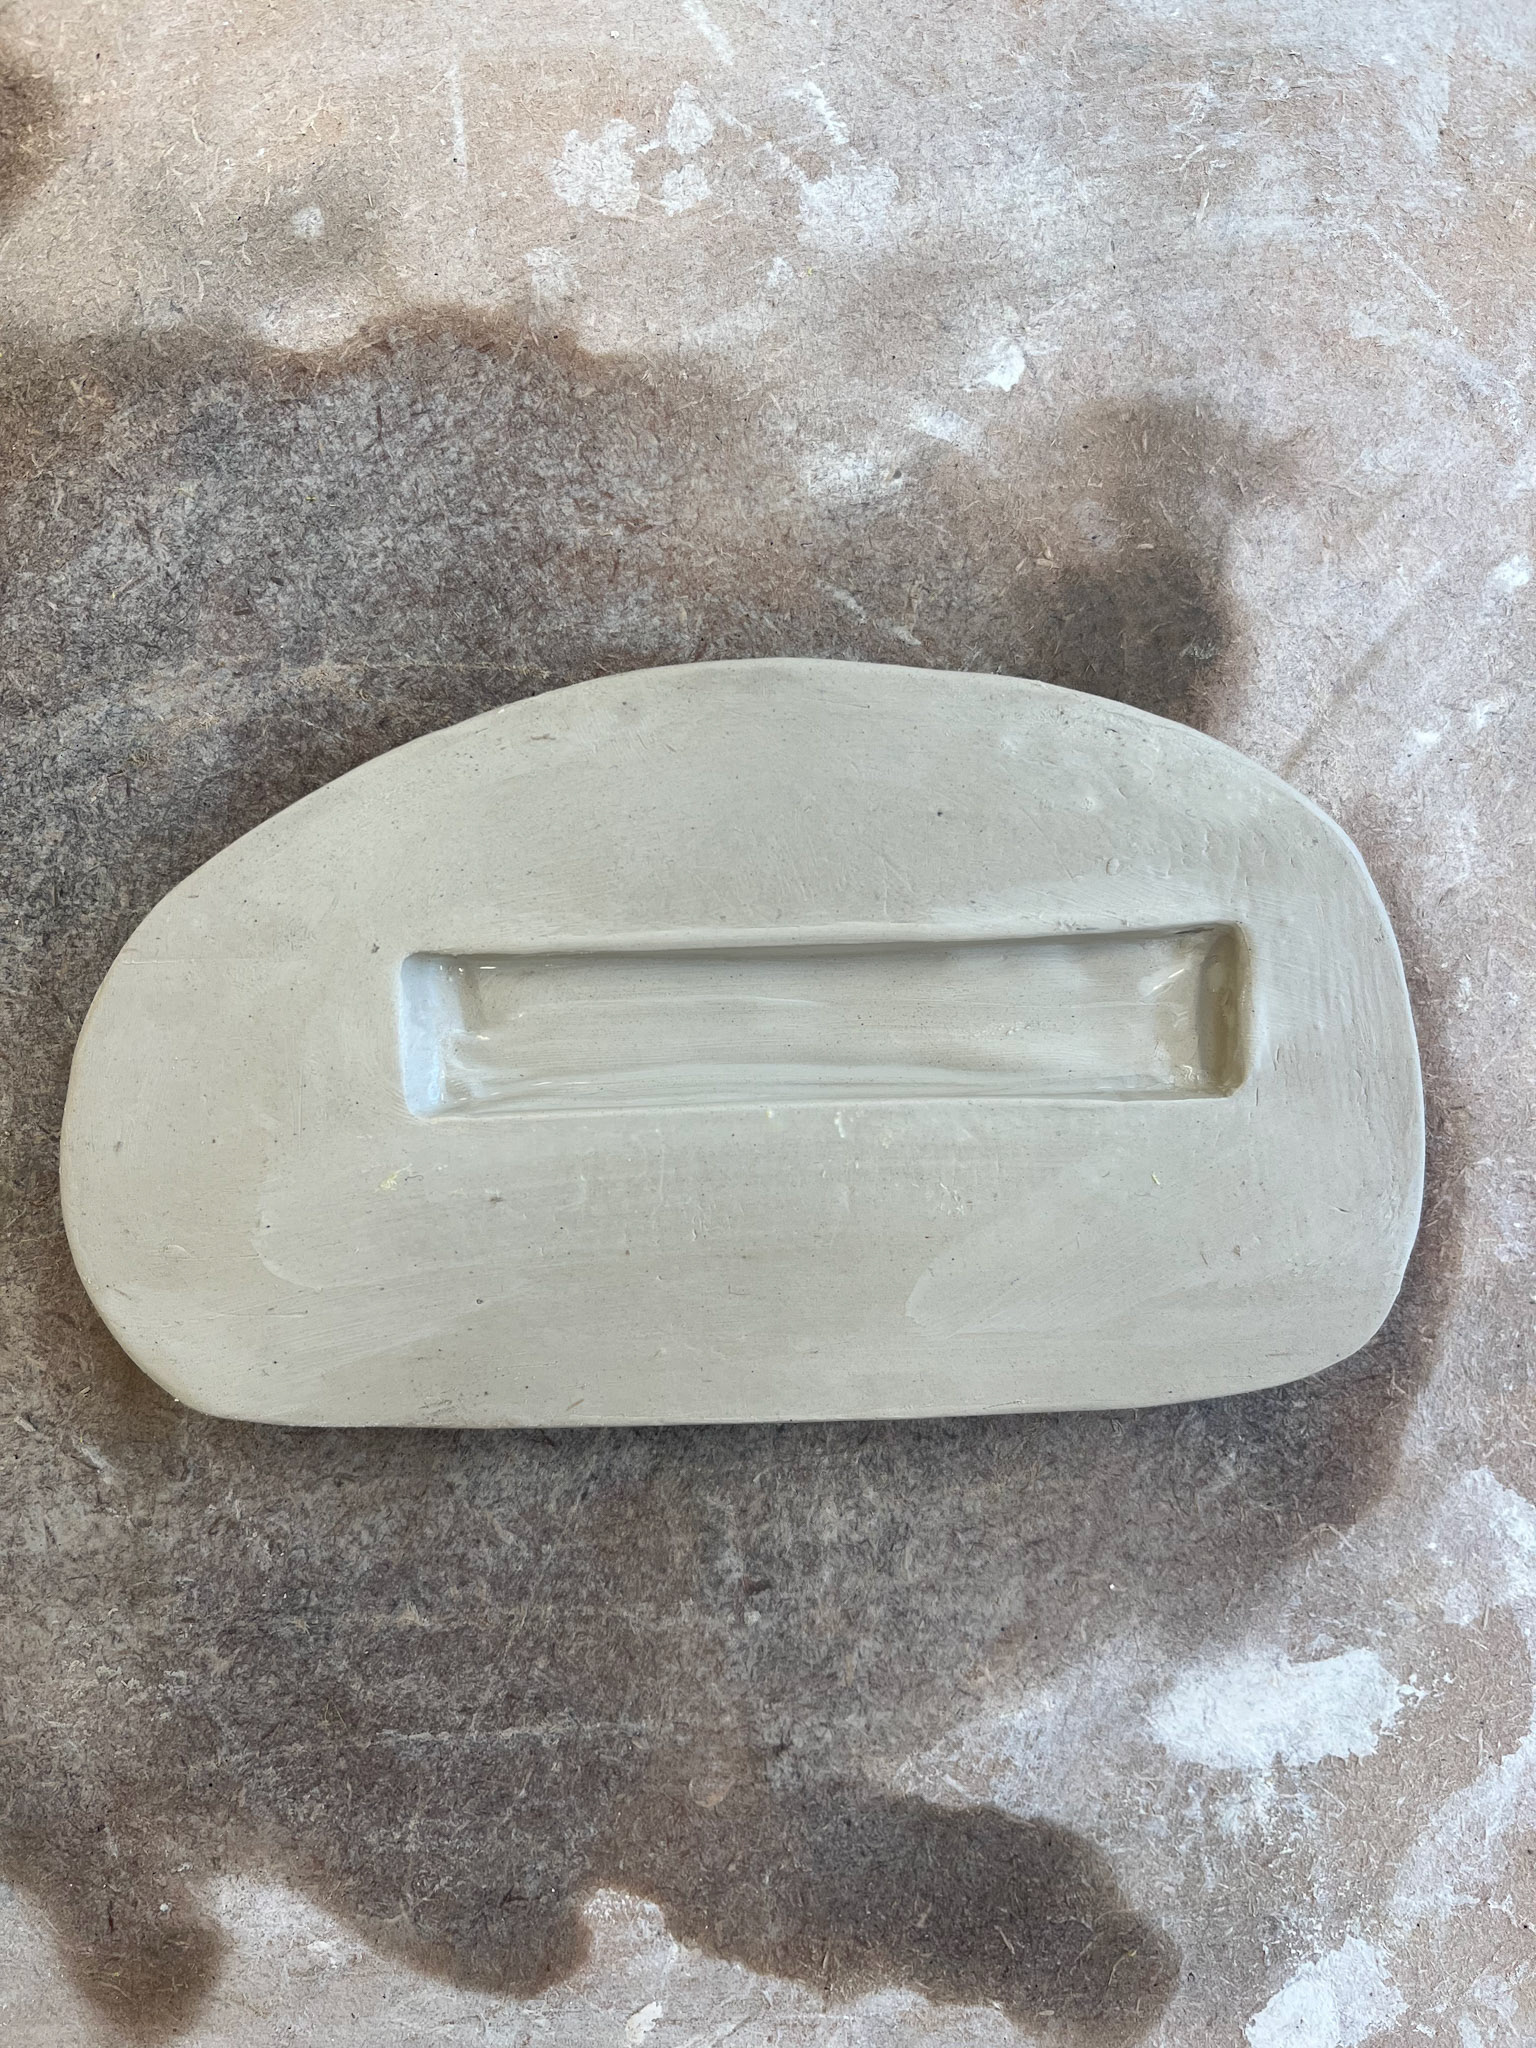
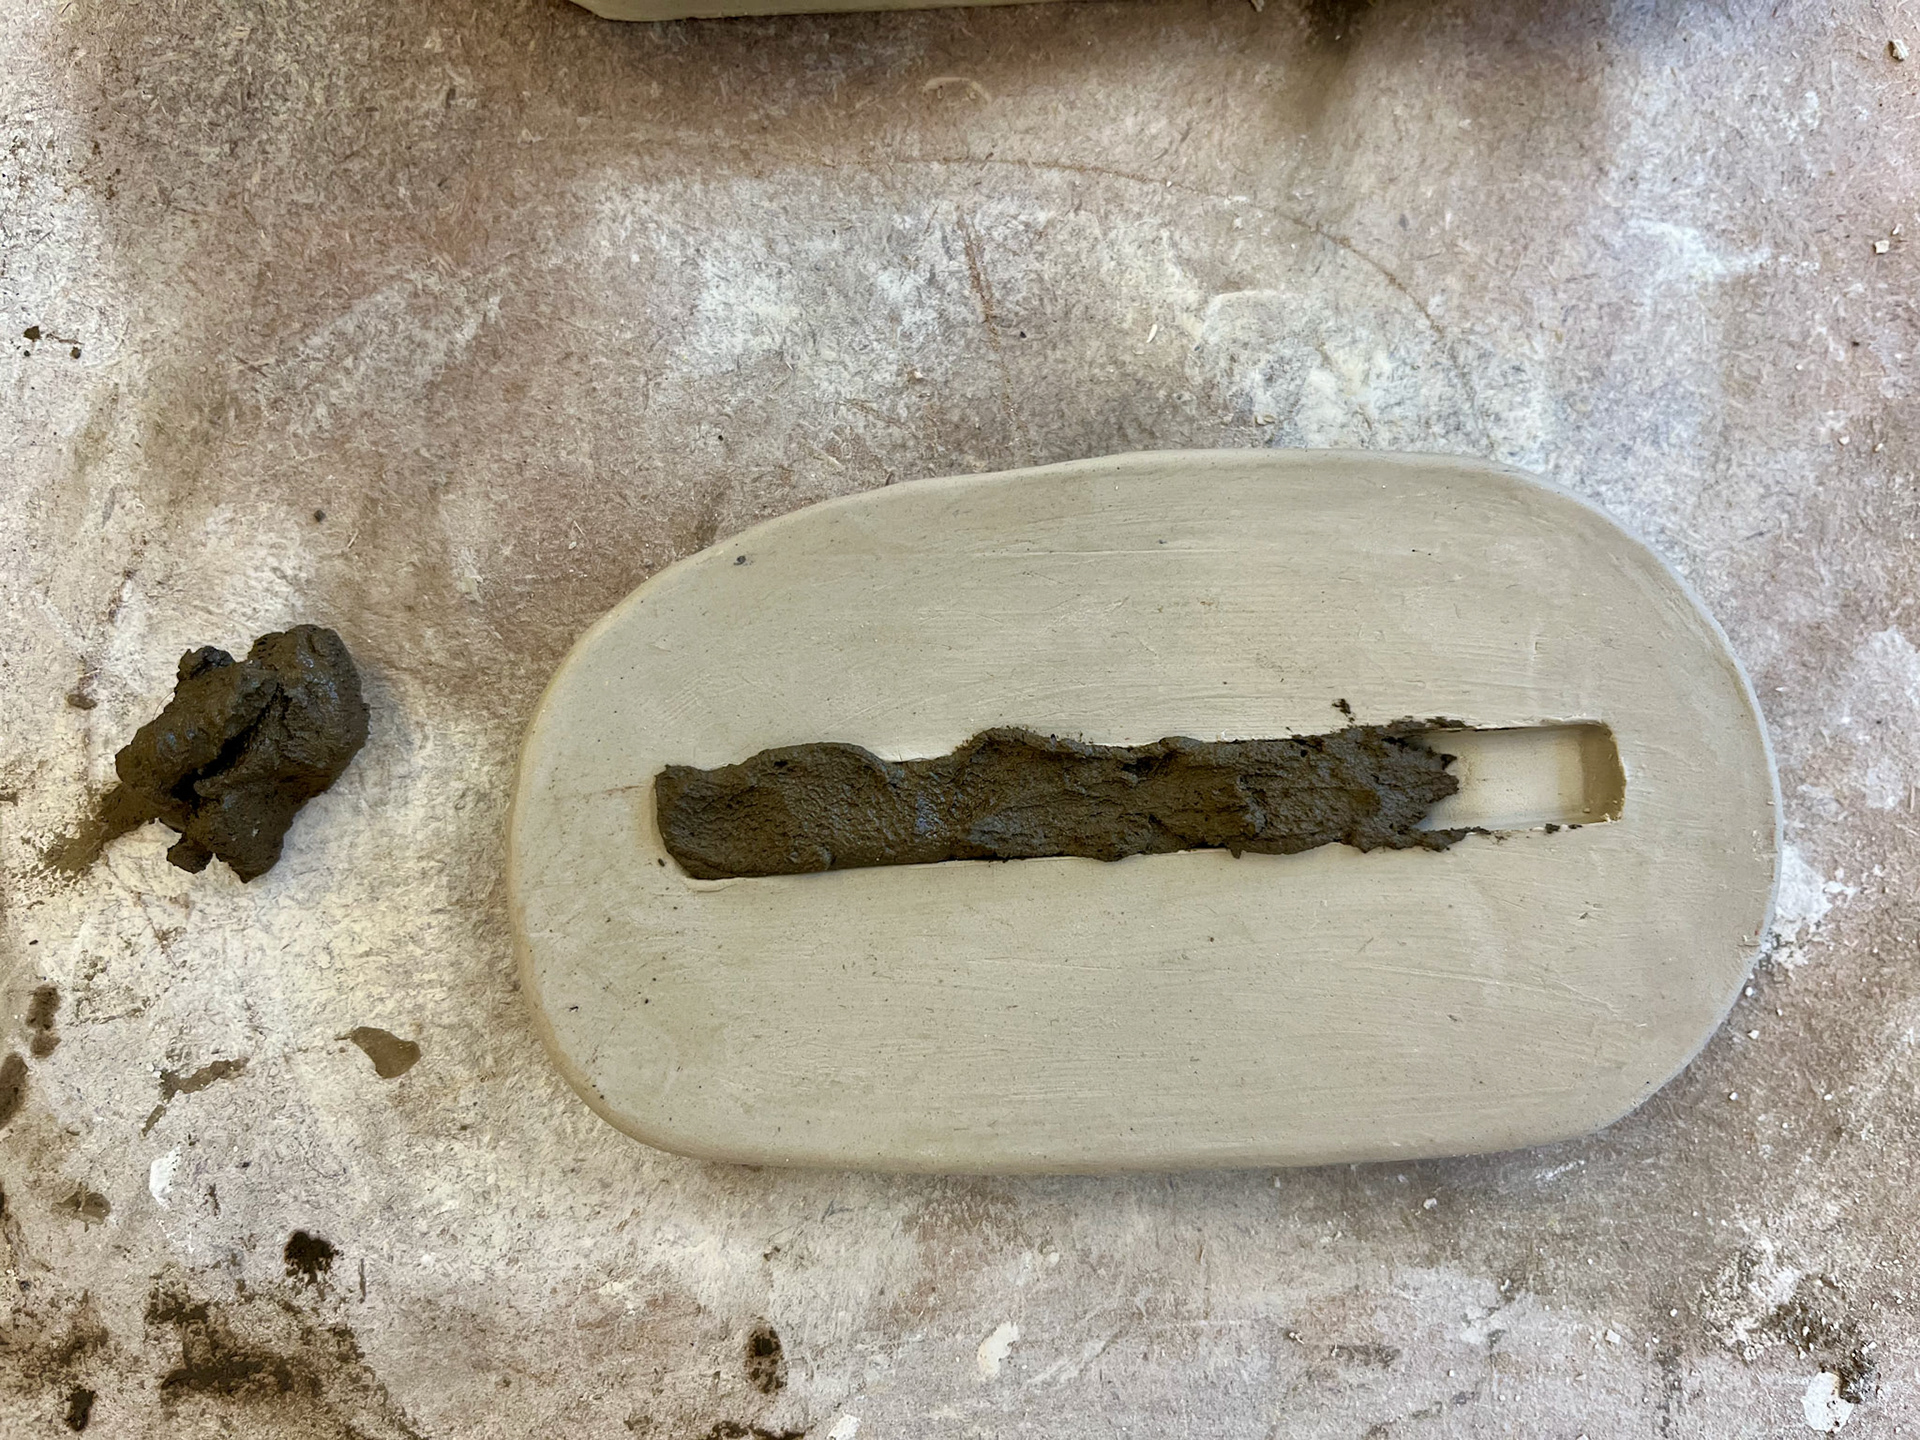
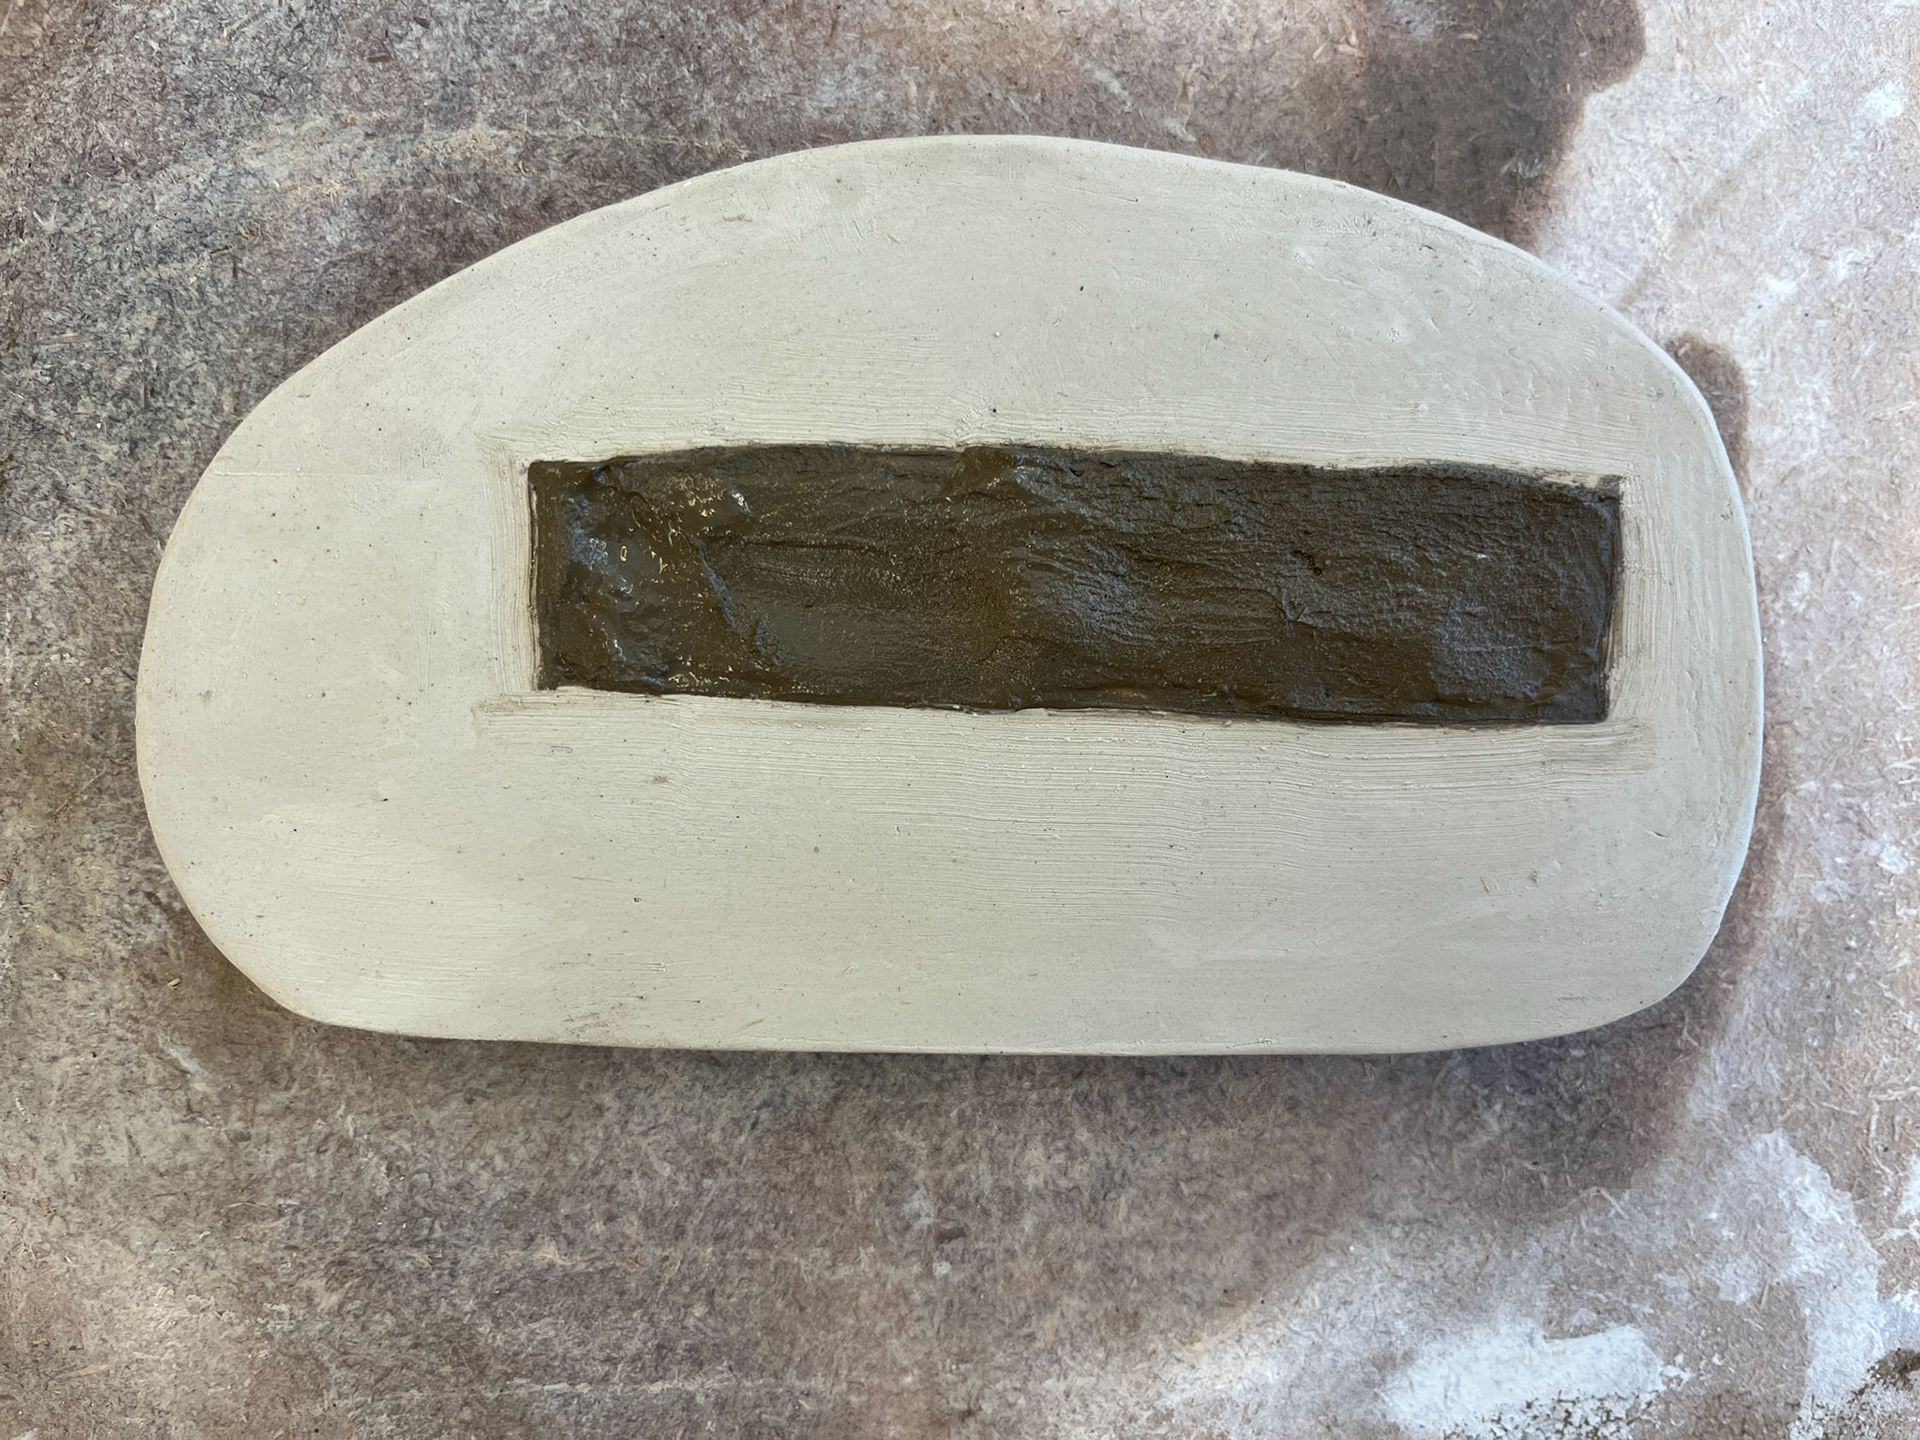
Back in the studio, I decided that I wanted to test different ways of applying the cave clay glaze. One of these is removing a section of the ivory clay to create a trough in the clay to add the cave slip. This will hopefully make the clay more contained and neater when firing, and provide me with more control of the glaze, as I am applying it specifically where I want it, yet it still gives a rather organic, expressive flow of the clay.
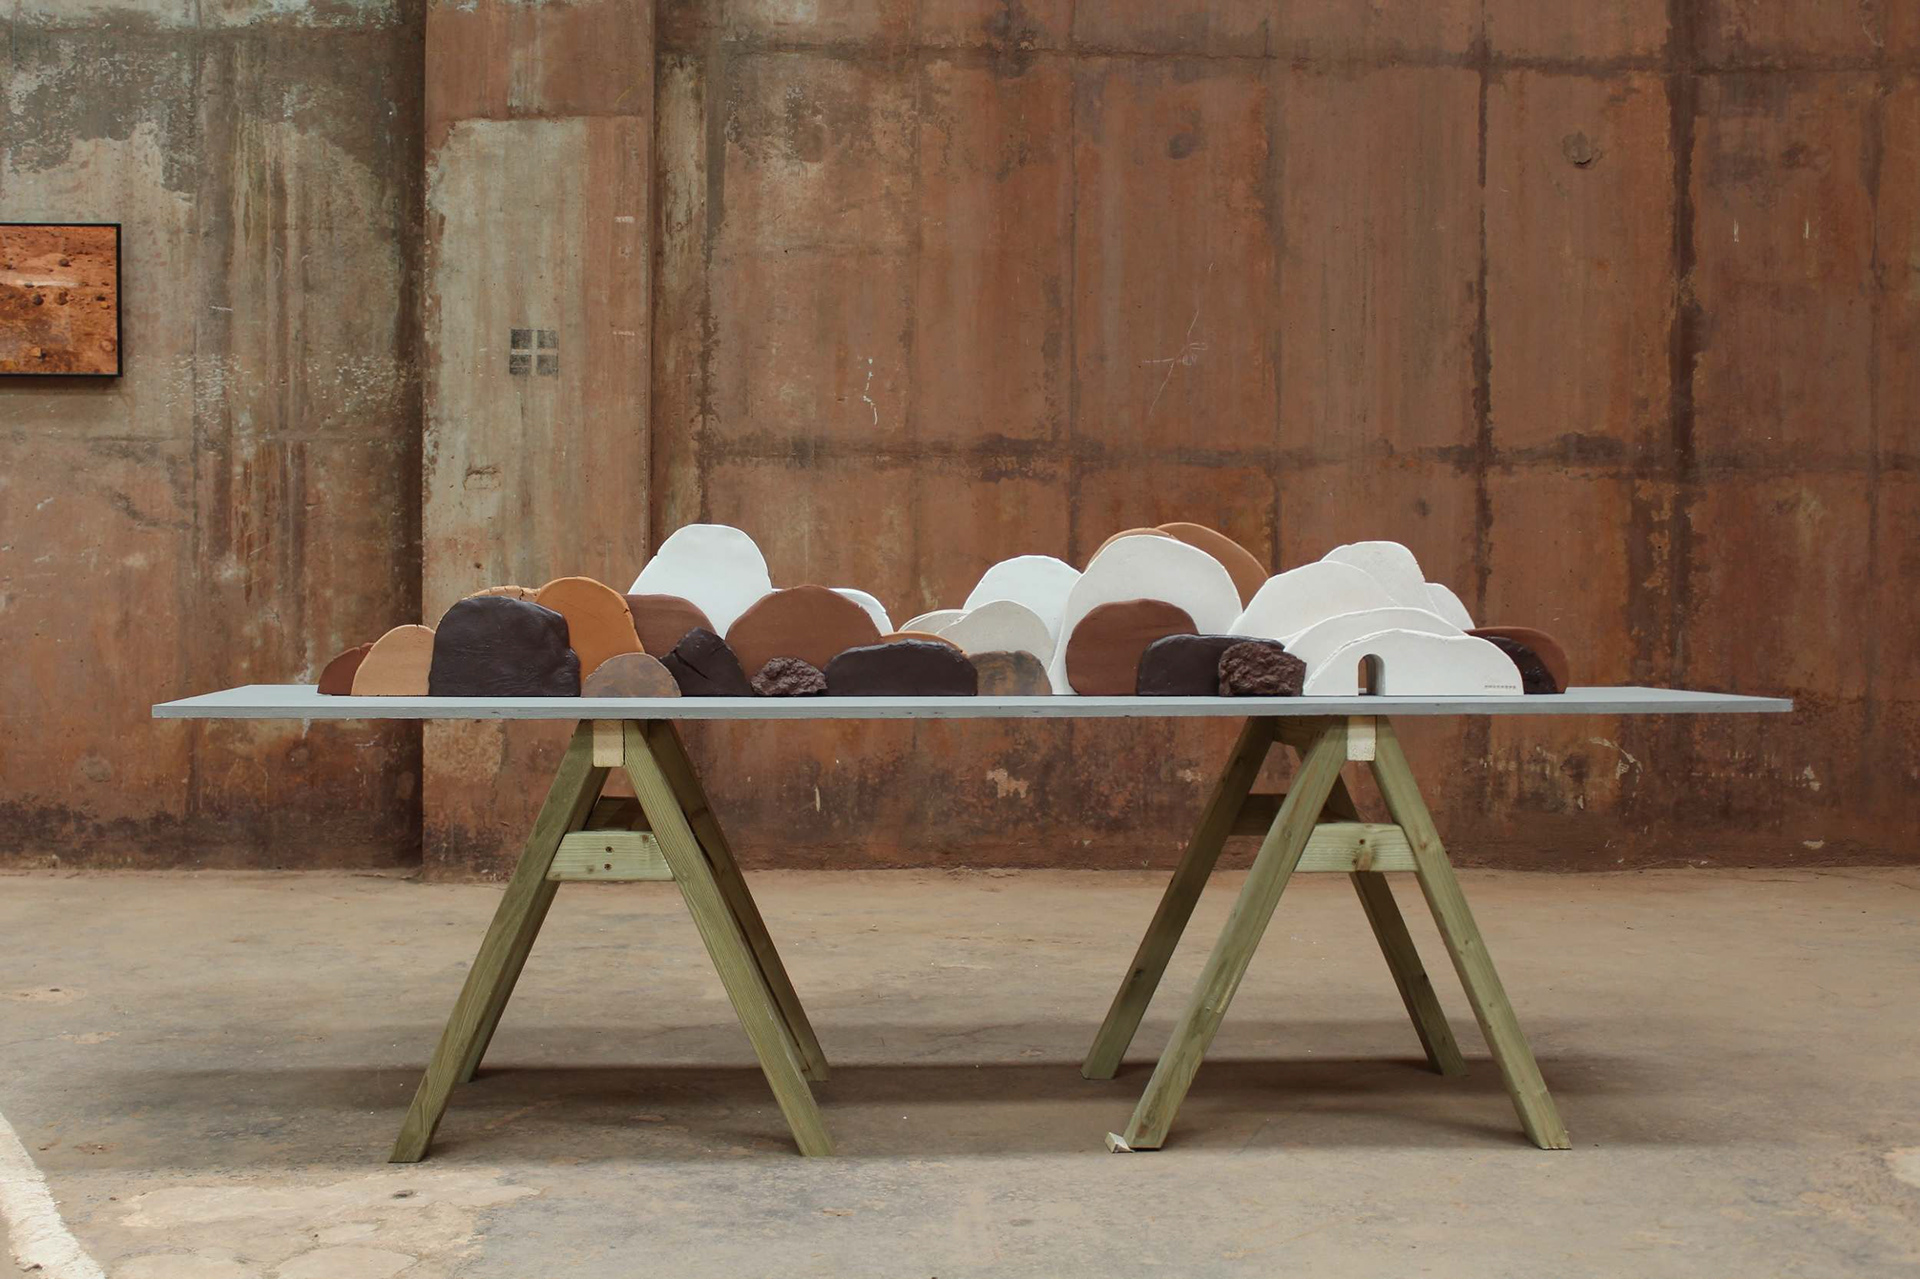
curation
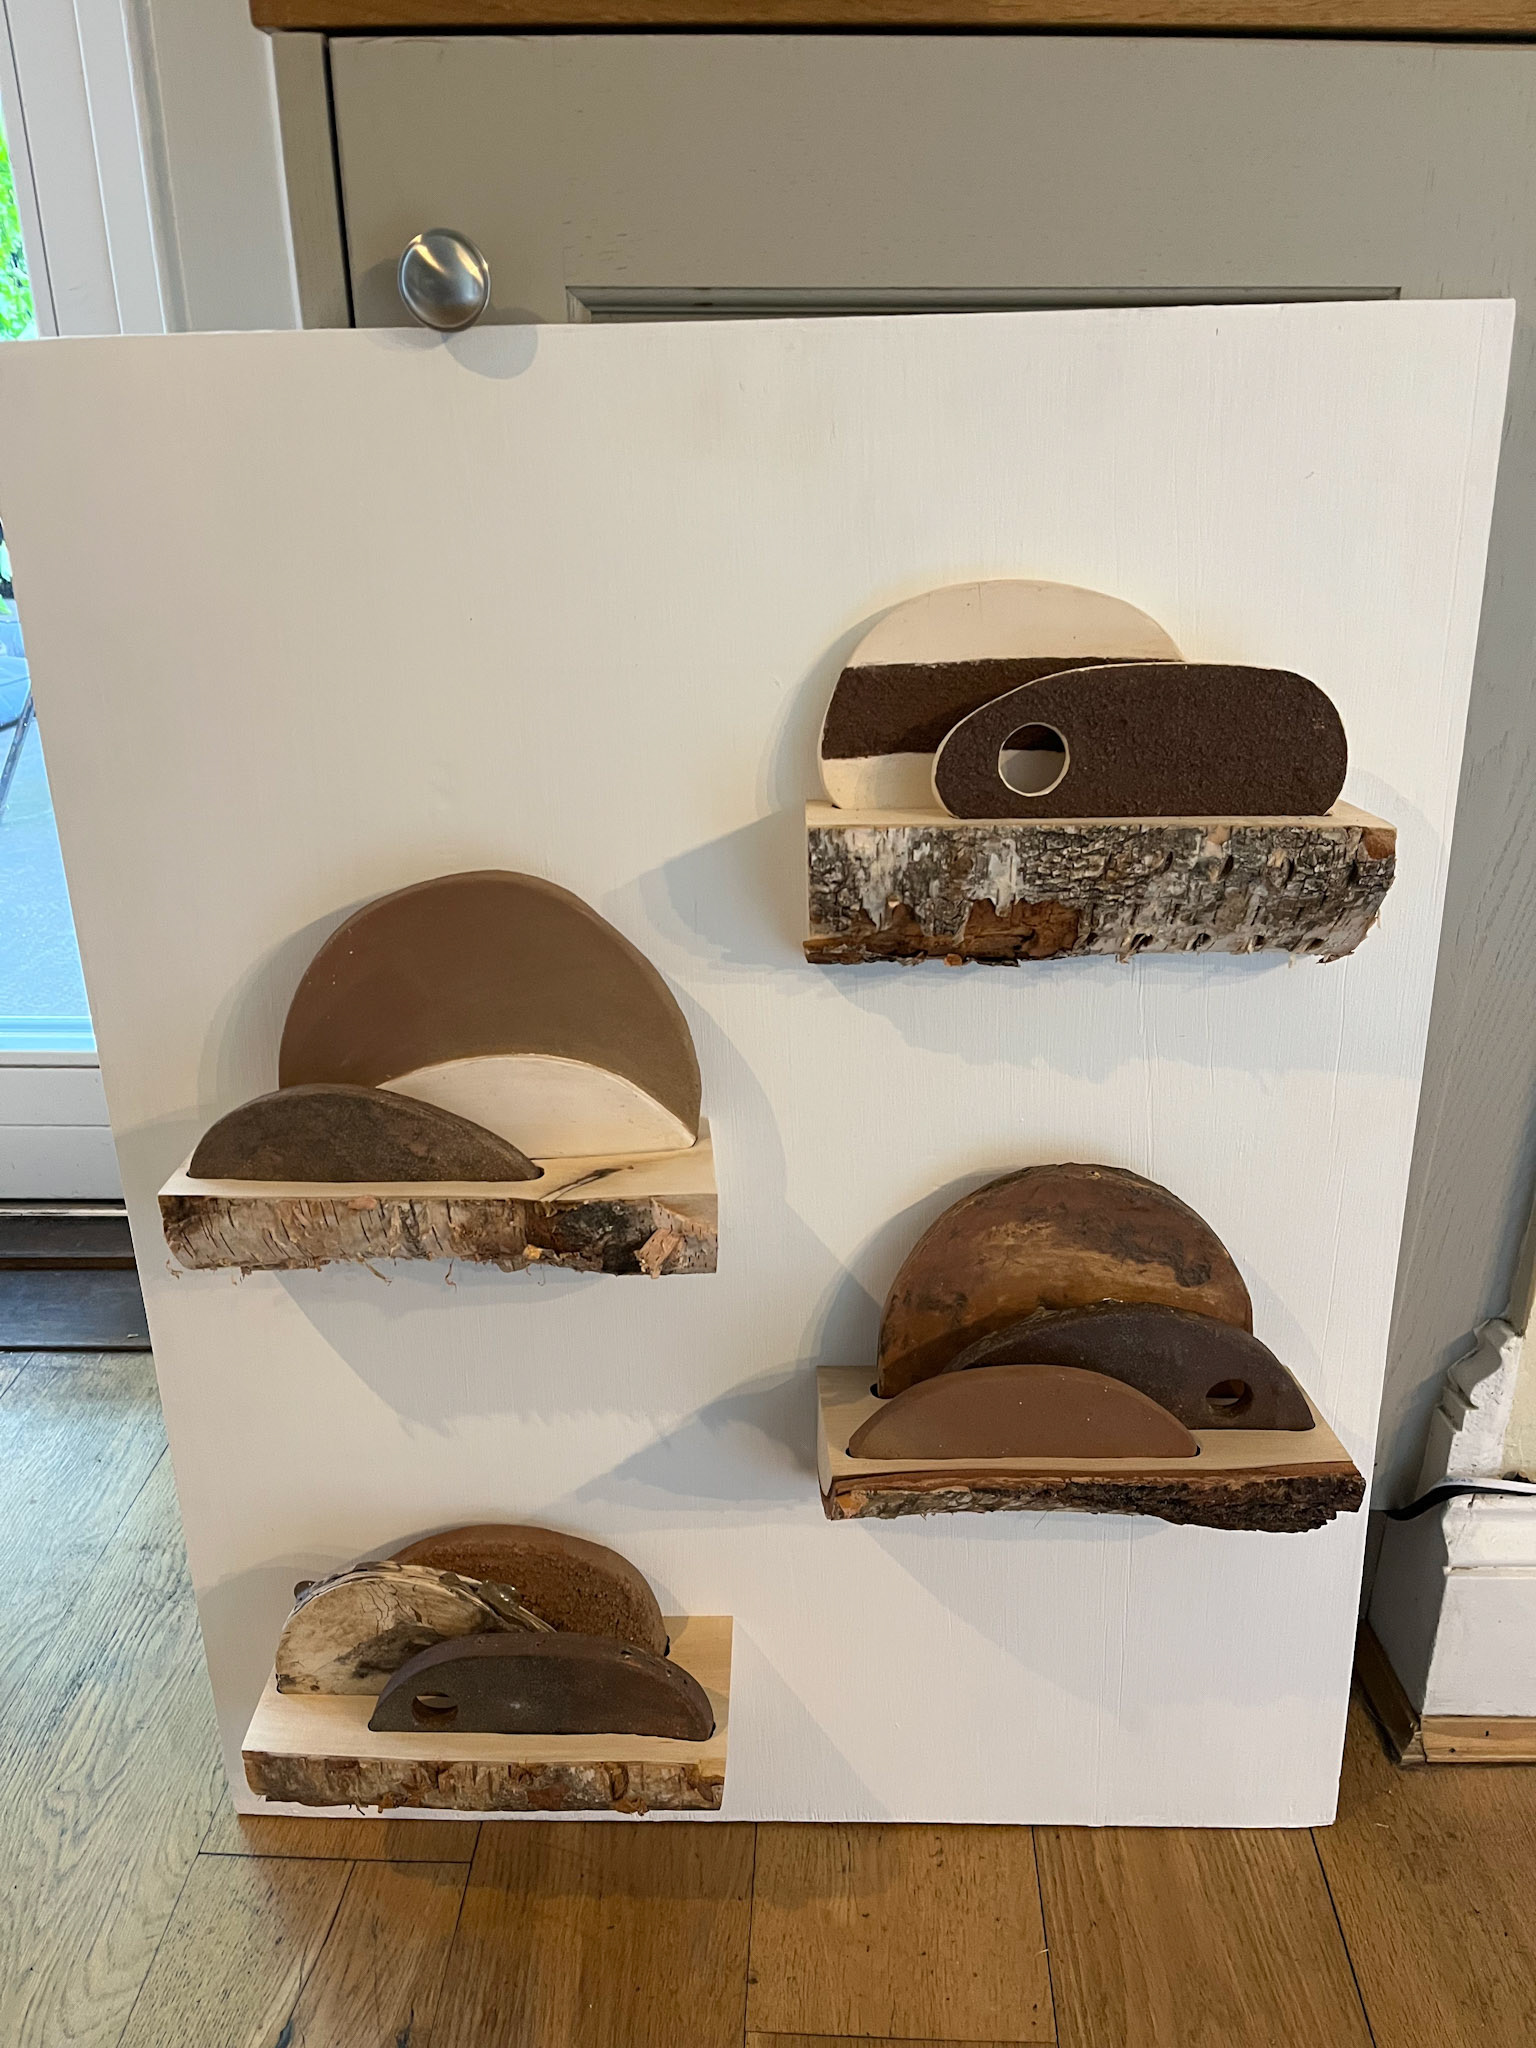
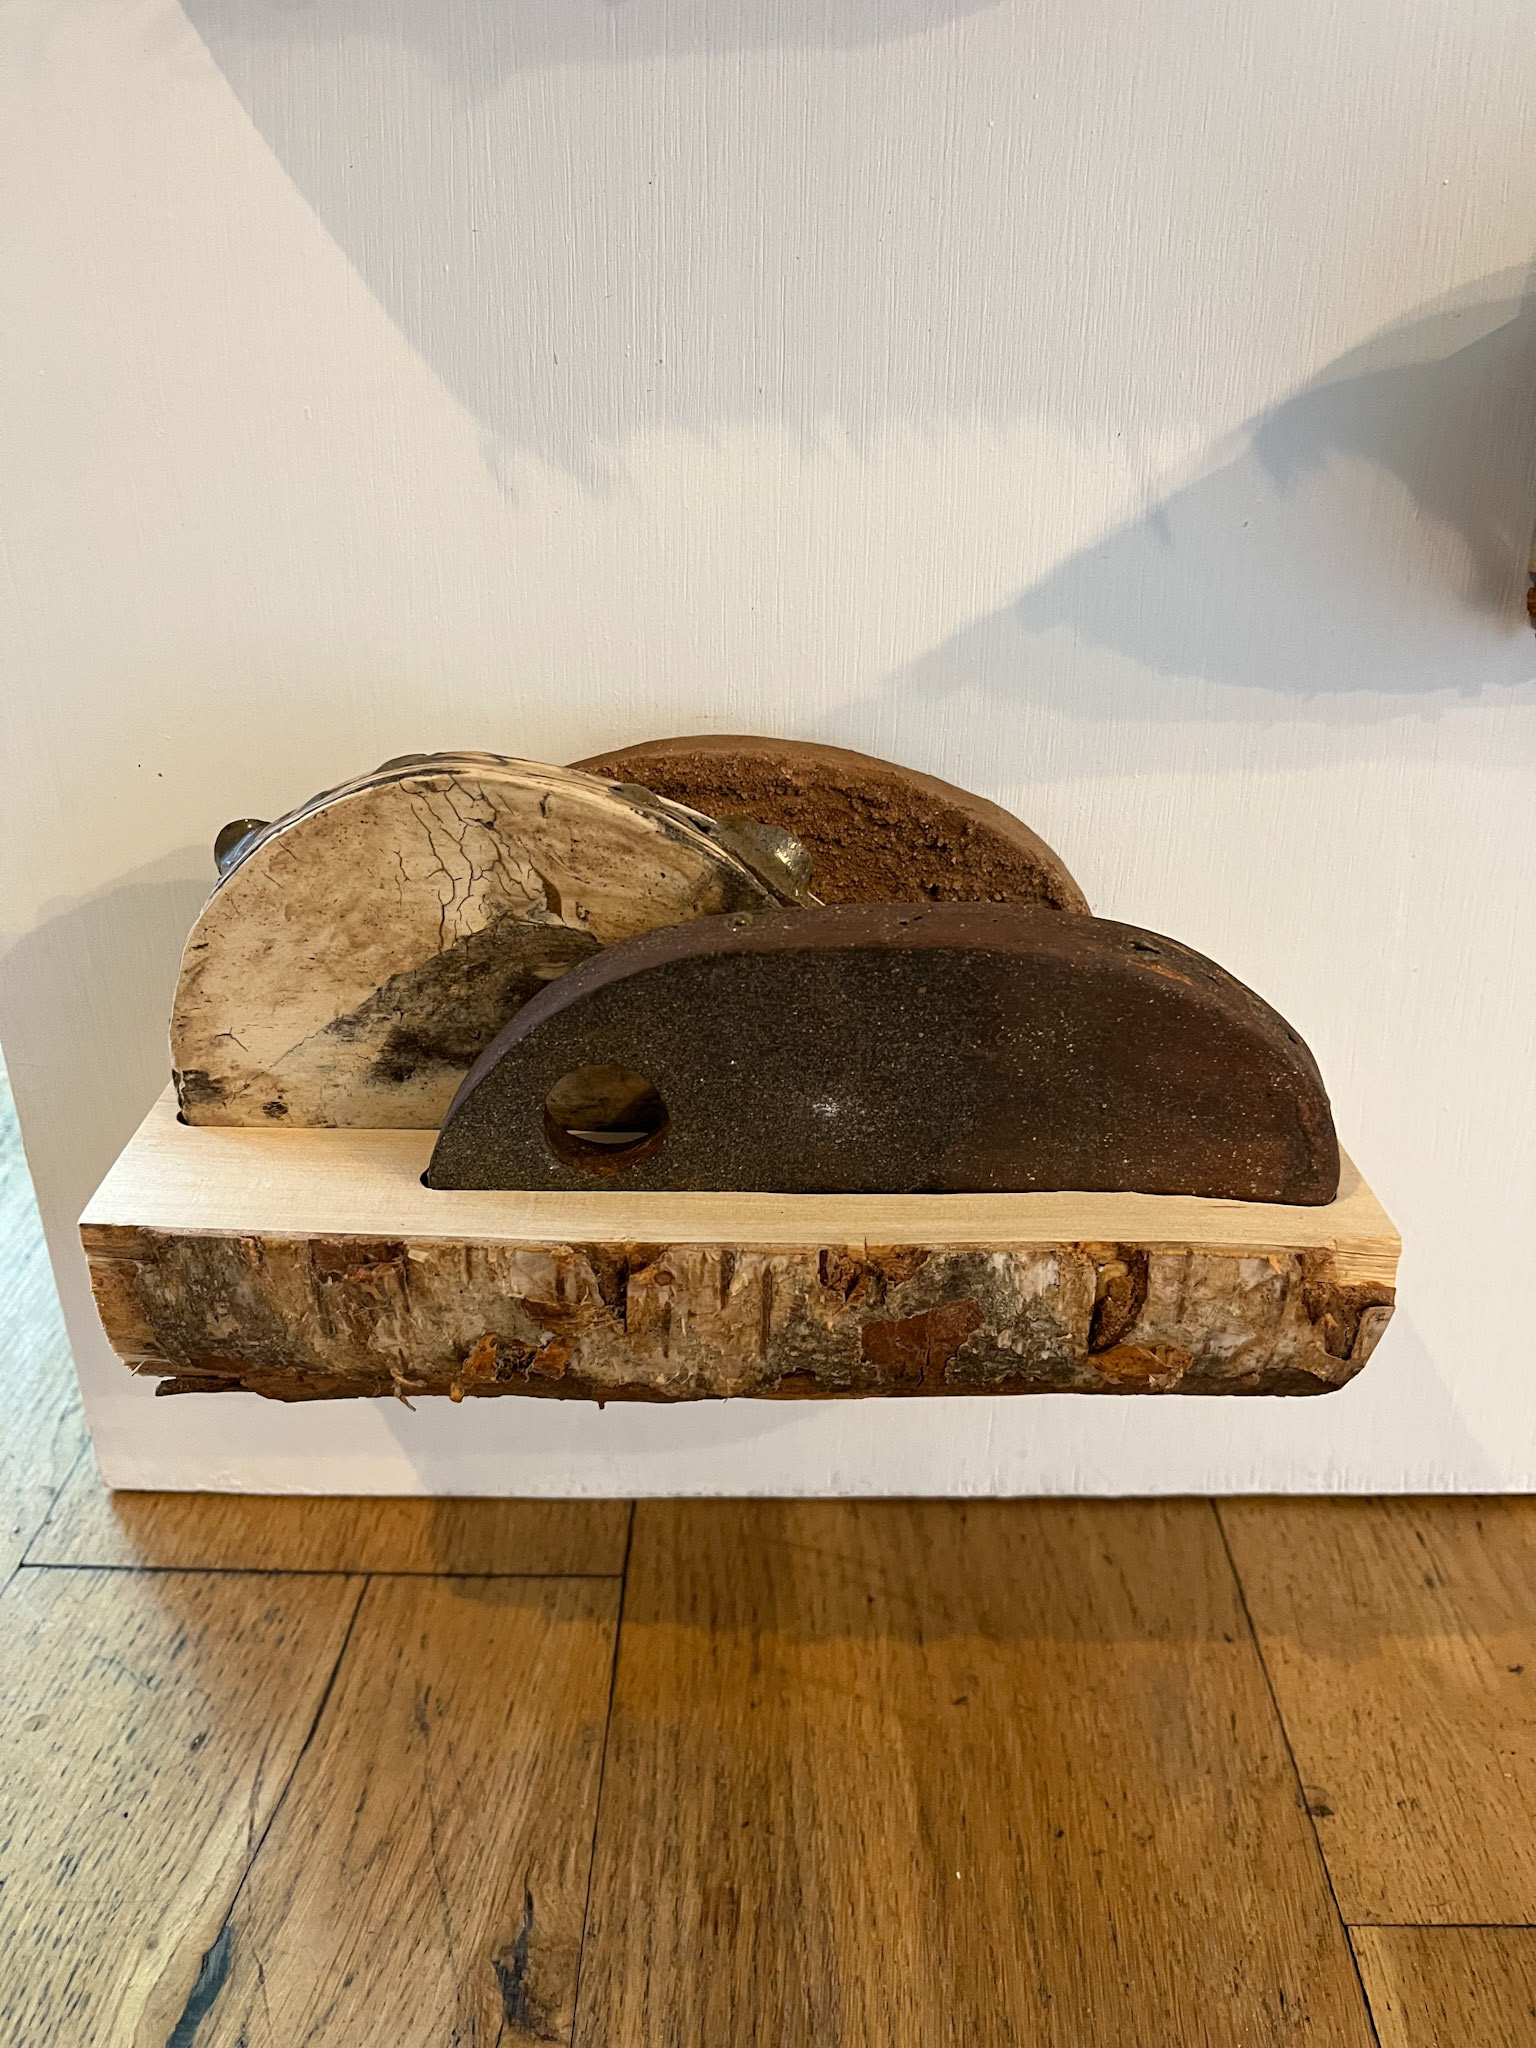
My ideas on the curation of my slabs have developed as my project has continued. As I visit exhibitions and galleries, I feel myself being drawn to more minimalist, natural compositions that are curated with the theme of the project in mind. My original plan was to stack the slabs in layers in a circular formation on a flat table. This was inspired by Alison Cooke, whose project, Tin Mine Clay, included a long, central table with various ceramic, abstract forms stacked horizontally. However, after considering the artist Lubna Chowdhary and her sculptural, stacked ceramic tiles presented at the V&A, I decided to present my slabs in groups on floating shelves. In order to reflect the landscape of my primary location, Lawrencefield, where there is a beautiful silver birch forest, I chose to build my shelves using silver birch. In my opinion, it brings a true circularity to my process of making in the landscape.
Alison Cooke

Lubna Chowdhary
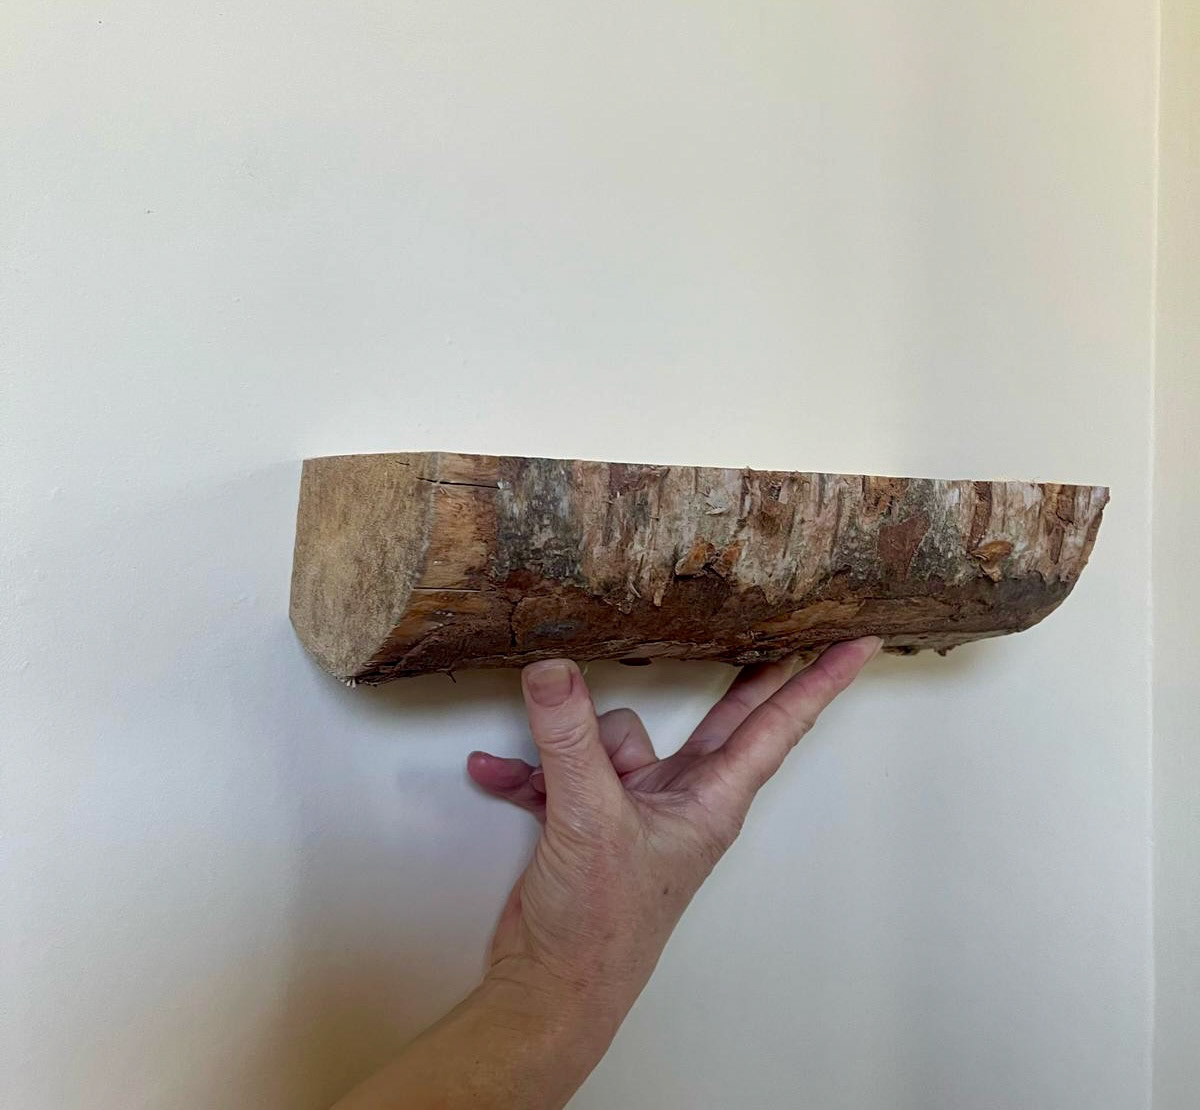
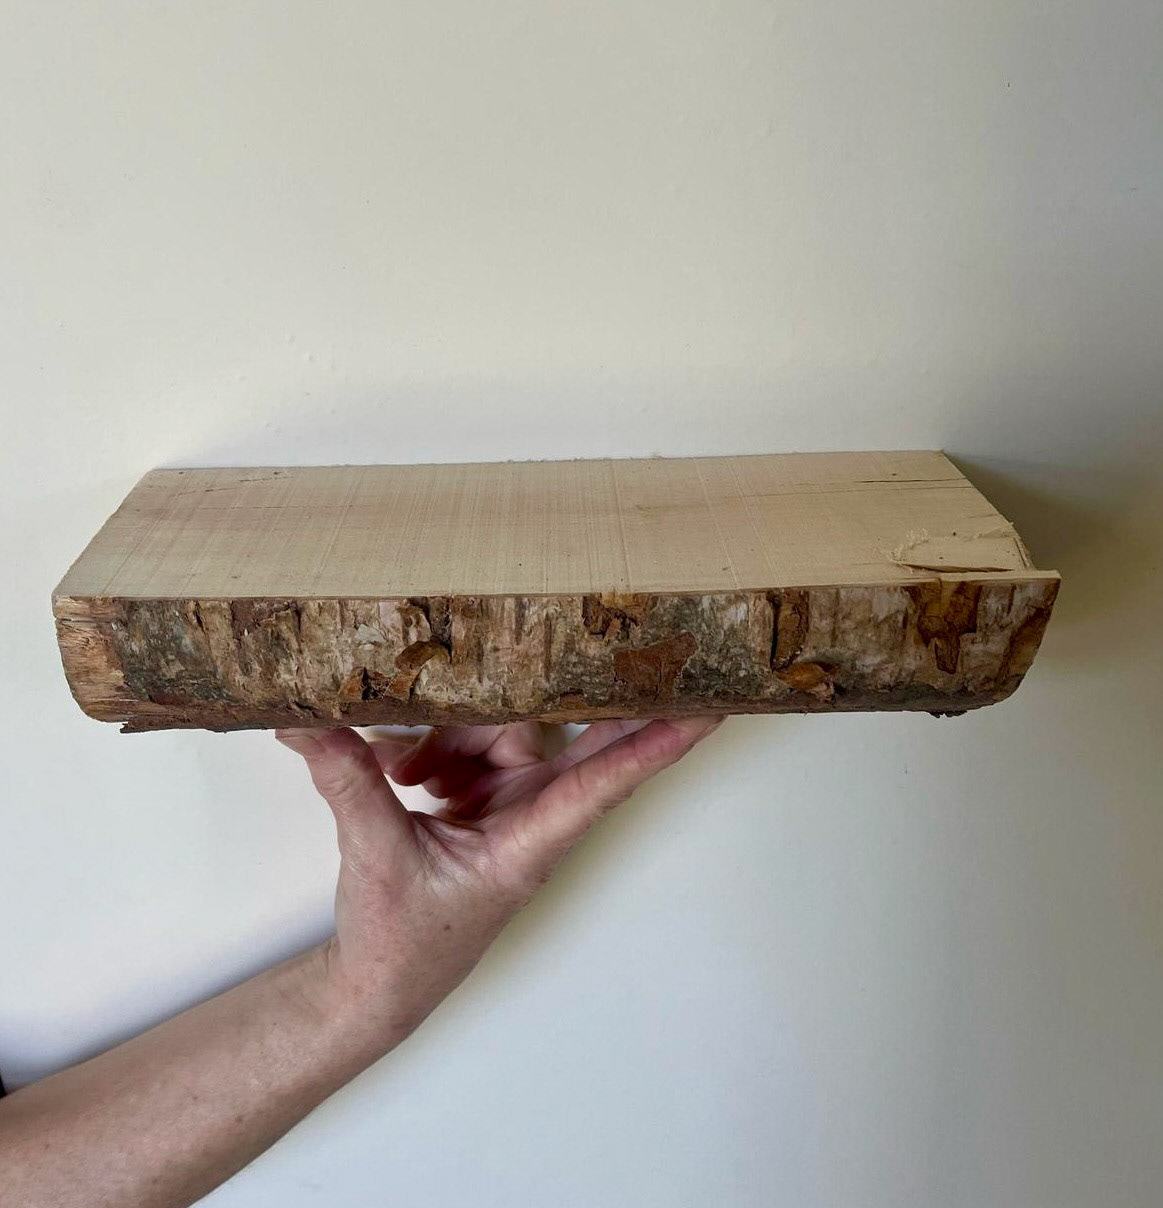
The wood used to make the shelves is silver birch, which is the wood in the forests of Lawrencefield, where my work takes place. This shows a circularity in my project, which is important for me to understand the locality of my making and honour the location where I work.
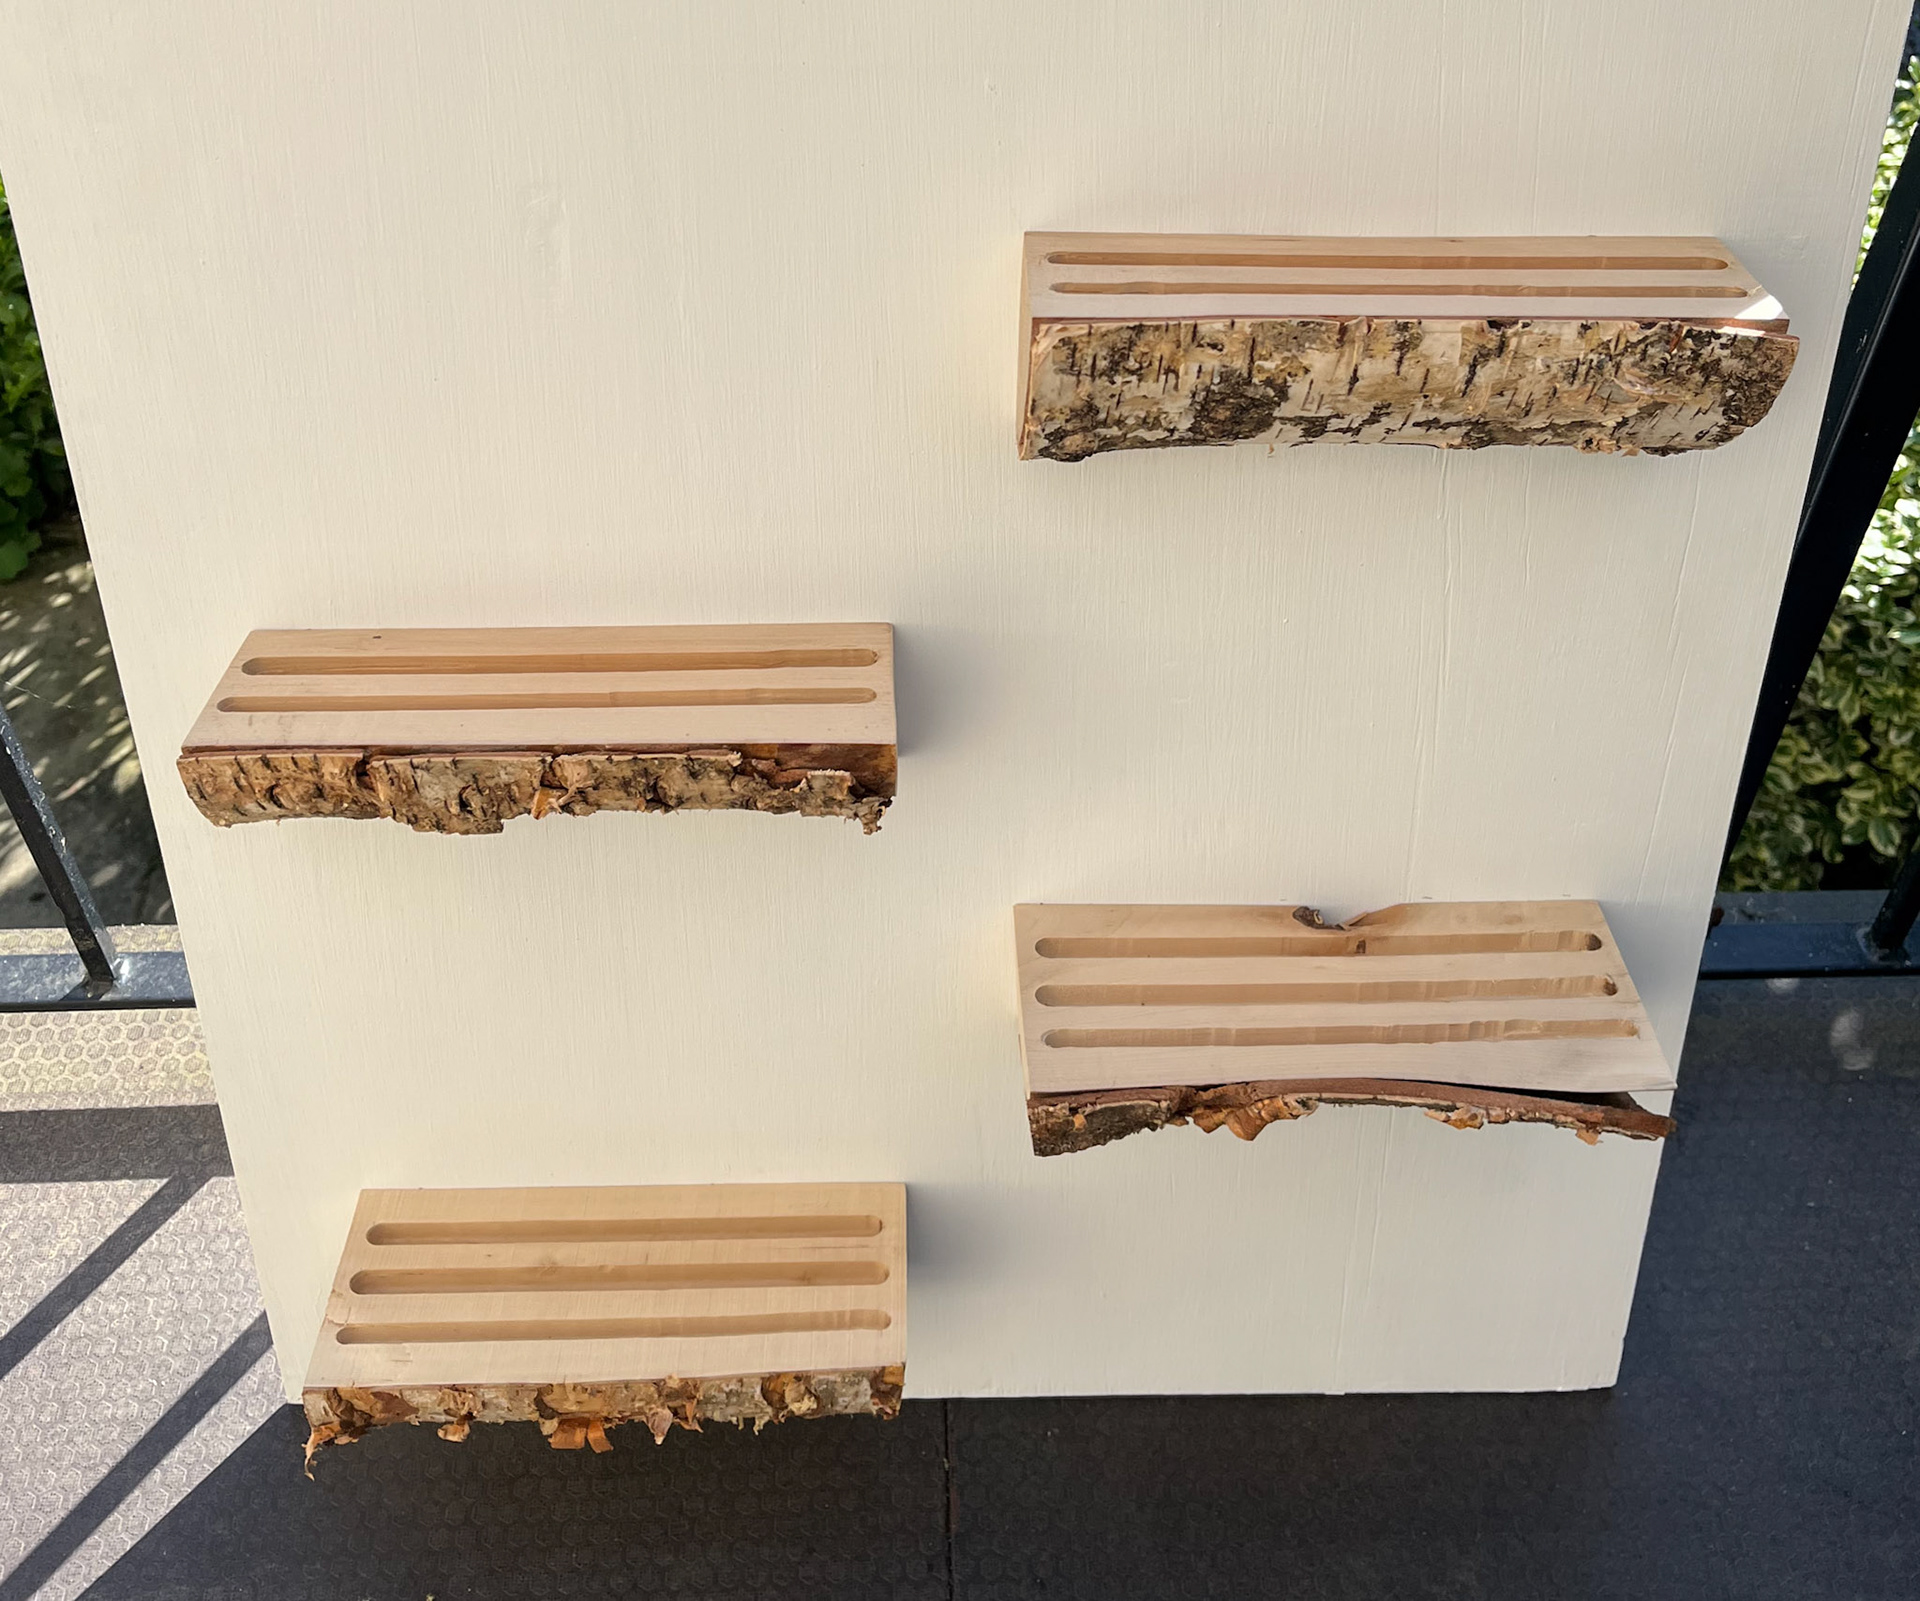
These shelves are 10 inches long and 4 inches wide, and I plan to curate 3-5 slabs on the shelves. I am considering having different sizes of shelves due to the different sizes of the slabs that I am making. I am also considering putting slits in the wood due to not all of the slabs being able to be freestanding.

Shelf making
I have begun to create a board of shelves ready for the submission. I am making a smaller, mock version for the submission, and then for the degree show, I will make a larger board with more shelves. This is because for the degree show, I will have more space to work with, and I want to see how the tiles work on the shelves first, before cutting and making all the wood. For the submission, I am using a plywood board, painted white to blend with the rest of the space, and so my tiles and the wood stand out; however, for the degree show, I aim to have an MDF piece of wood so it looks smoother.
With the wood shelves, I am making them with my dad in his wood studio, and he is kindly supporting me in the cutting and routing, so the tiles are held up by the shelves. We have tested different ways of routing the shelves, as my aim is to hold up the ceramic slabs in the grooves of the wood.
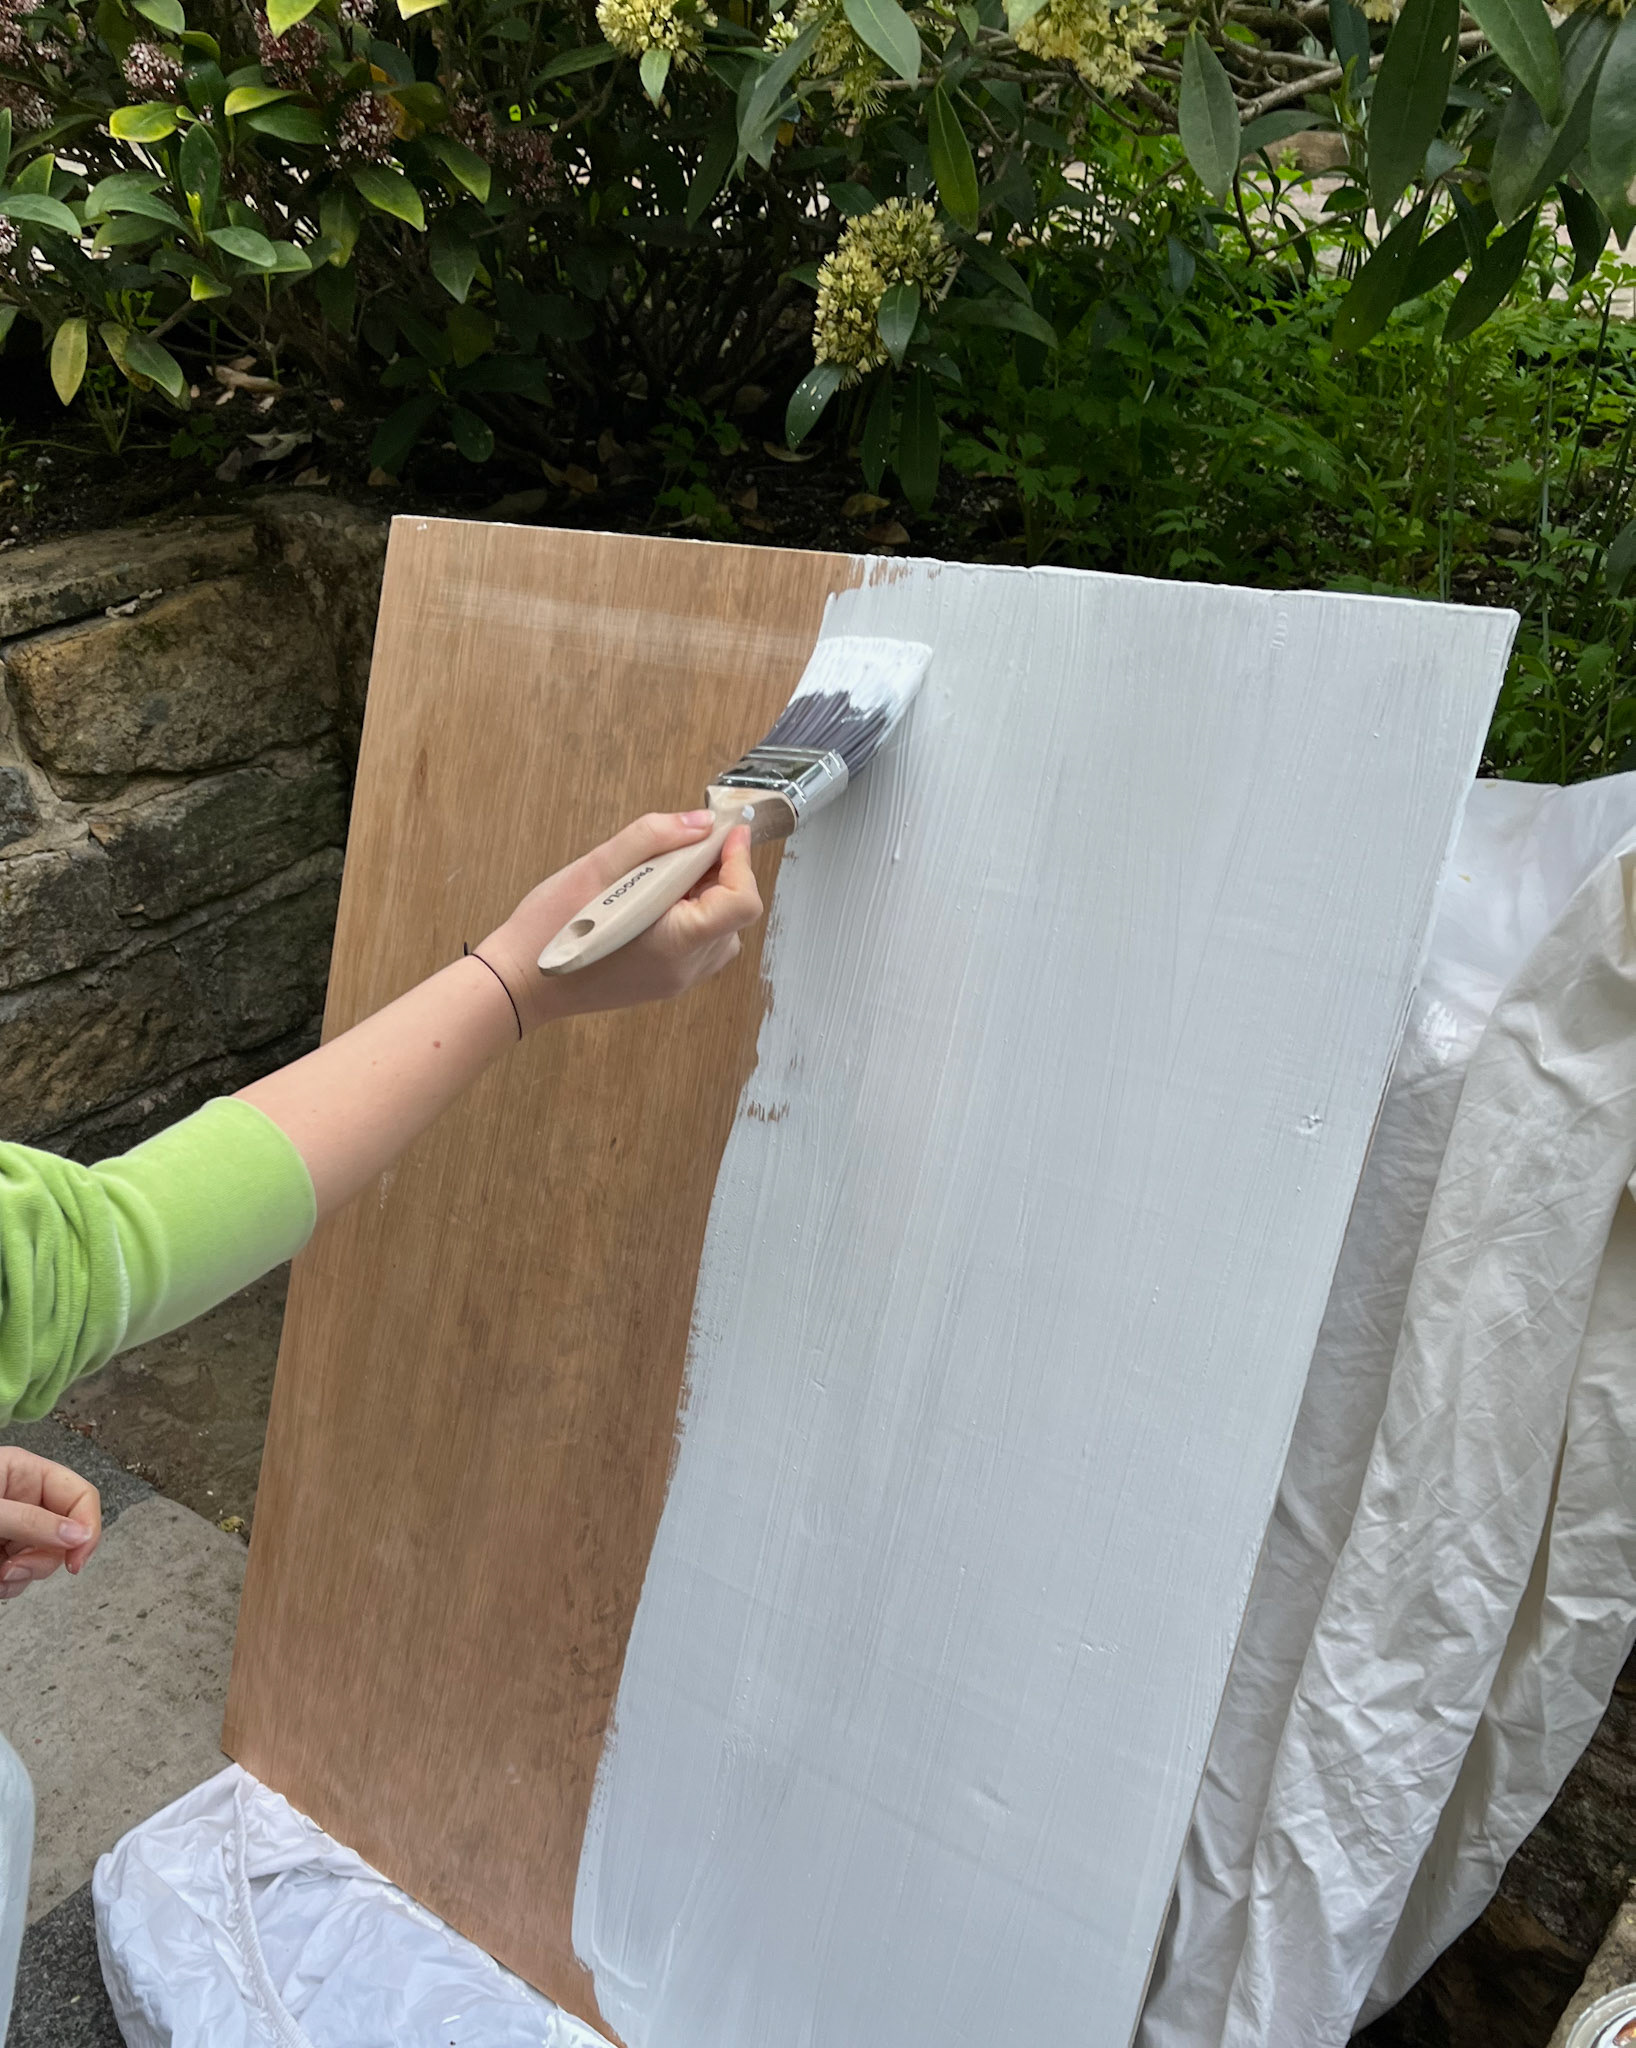
Painting plywood board
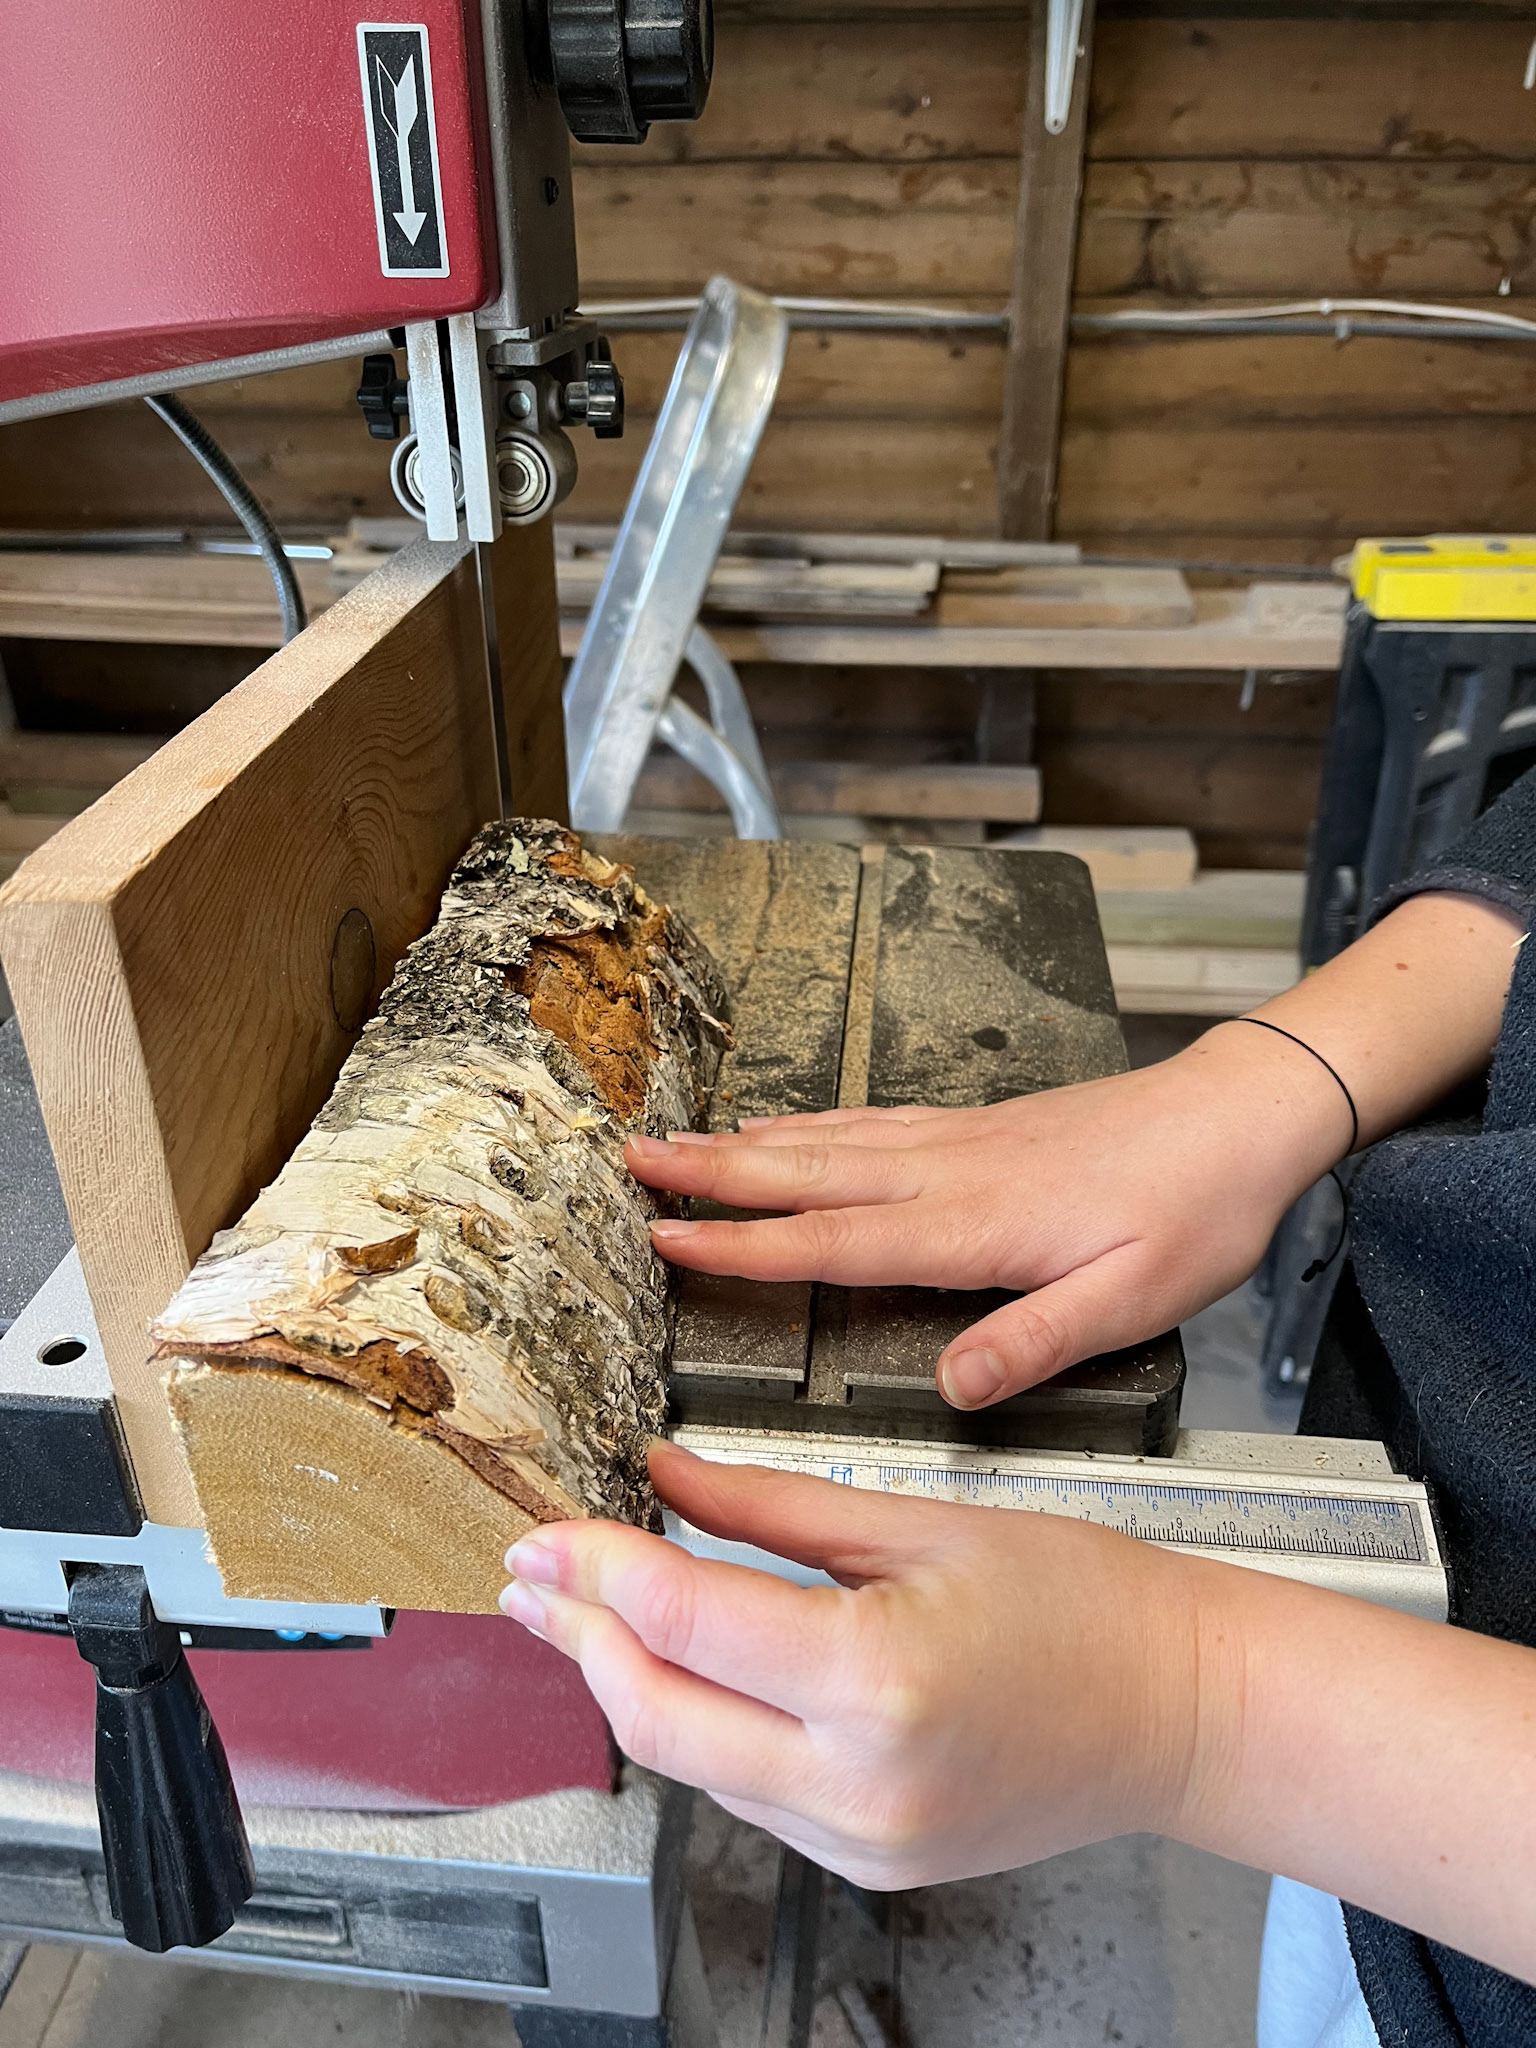
Cutting wood for the shelves
This was the first attempt at routing the shelves. My dad has very kindly assisted me in the technical building side of making these shelves, and I am very grateful for his support in this. These grooves didn't fit my tiles properly due to the thickness of the ceramic, and when talking to Geoff about this, we decided it would look better if the grooves matched the exact length and width of the specific ceramic tile. From this, I brought the board back home, and with my dad, we reassessed the shelves. Luckily, I have lots of spare birchwood, so we got four more logs and I decided on which finalised tiles I wanted to go in which order. We then recreated the shelves in the exact dimensions of the specific tiles I have chosen.
When considering the layout of the tiles, I wanted to consider the colours that matched each one, the sizes of each to complement each other and also the types of clay that each tile showcased. Also, with the holes in some of the tiles, it was important that I placed them in a suitable way to see the clay behind the tile.

Attaching the shelves by nails screwed from the back of the board
Routing specific for tiles