Statement of Intent (Synthesis & Resolution Proposal):
(As submitted at the end of unit x)
Going forward into Synthesis and Resolution, I would like to continue with the intention of working with the natural land and sustainability as the focus. From the conversation with Tim Copsey, whom I met earlier this month, there are exciting opportunities for the new year in terms of being able to collaborate and work alongside him. I am interested in bringing my sculptures out of the cave and into more resolved forms going into the next unit, and Tim has very generously suggested that I use his smoke-fired kiln to fire my pieces, and in return, I will do some wild clay firing tests to test the qualities of the clay, so we can both use it for making with.
Over the break, I intend to gather wild clay from the Holderness coast. This clay is also glacial clay, which is what I have been using during Unit X. However, collecting it from the coastline instead of the caves will provide a slightly varied outcome, which I am interested in experimenting with. I am also interested in working with natural glazes such as grit and stone, and collecting them from the natural landscape, to bring more texture and contrast to the ceramics I am producing.
I aim to still make work as organically and collaboratively as I can, and I am still very much interested in the craft of filmmaking and photography as a product. I would like to continue working this way in Synthesis and Resolution, as a way of supporting my practice.
semester one reflections
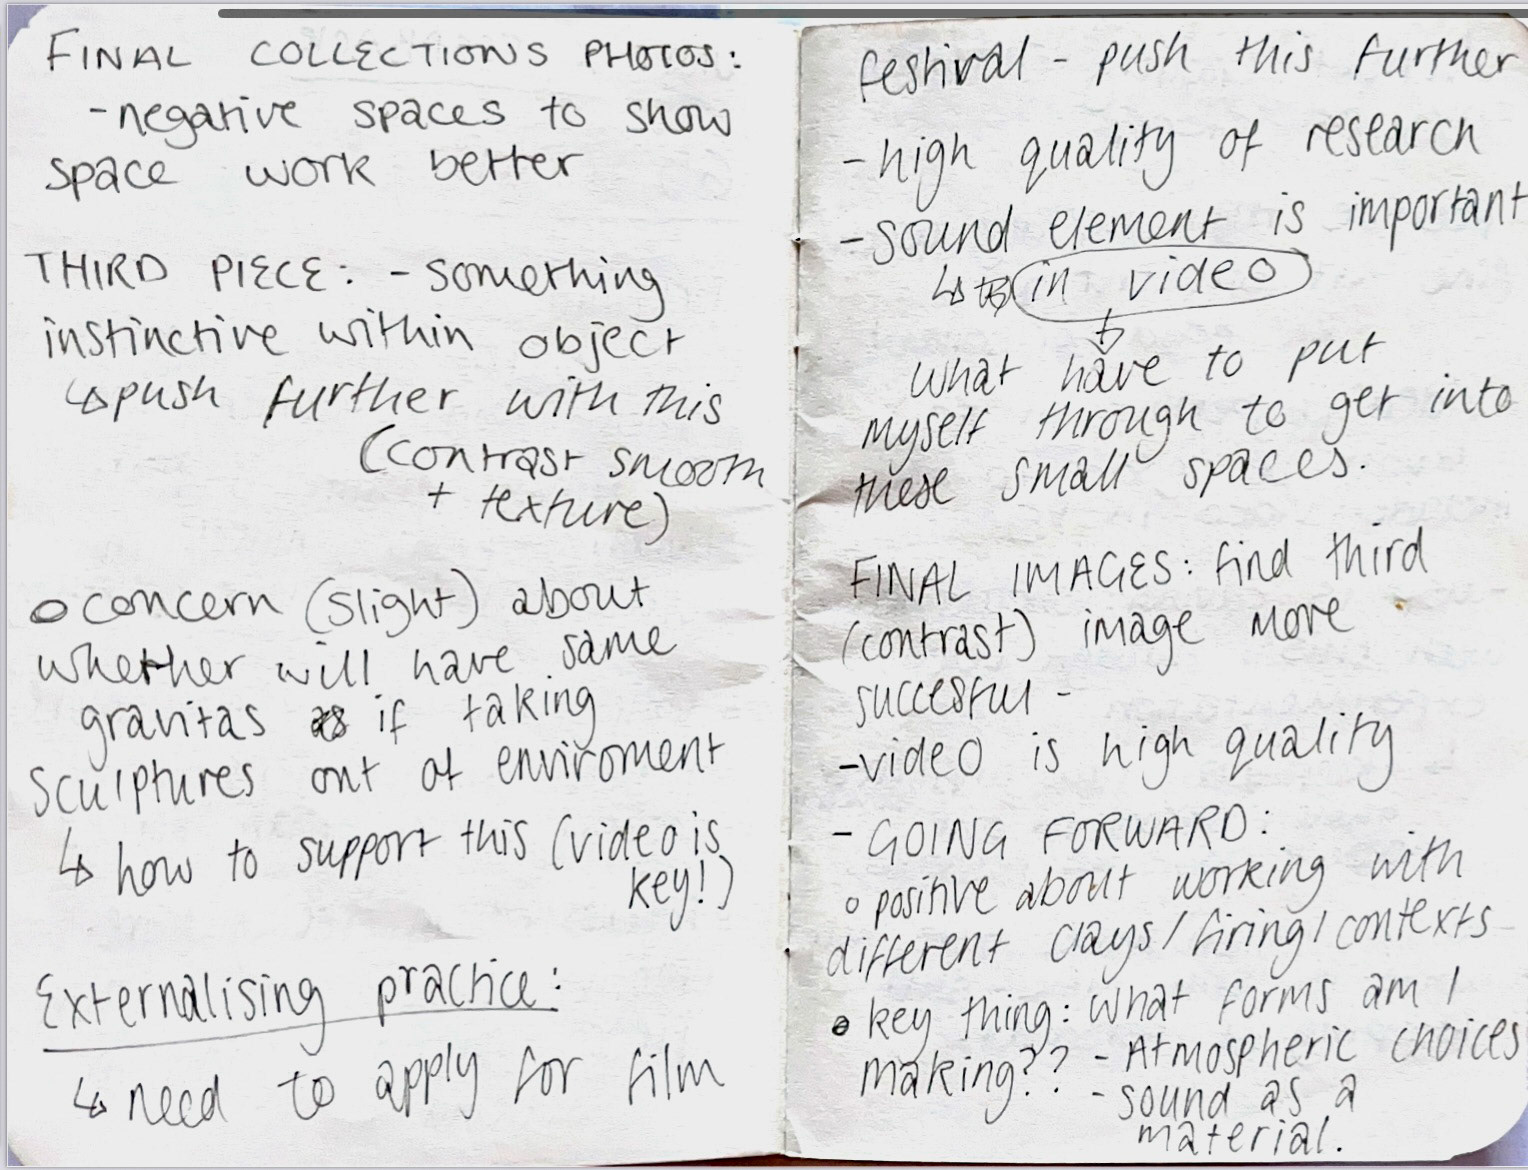
After a successful first semester of L6, with positive feedback from both Unit X and DC3, I was excited to further my development into Synthesis and Resolution, pushing my exploration into Cave Clay and research into the Peak District.
Below is the link to my DC3 report, 'In Conversation with Clay'. This report was a significant moment of clarity for me in how I see myself as a designer and how I want to move forward. Writing about a subject that I have such a personal passion for, and being able to thoroughly research and investigate what it means to be a land-based ecological craft maker, was essential for my development into the Synthesis and Resolution unit.
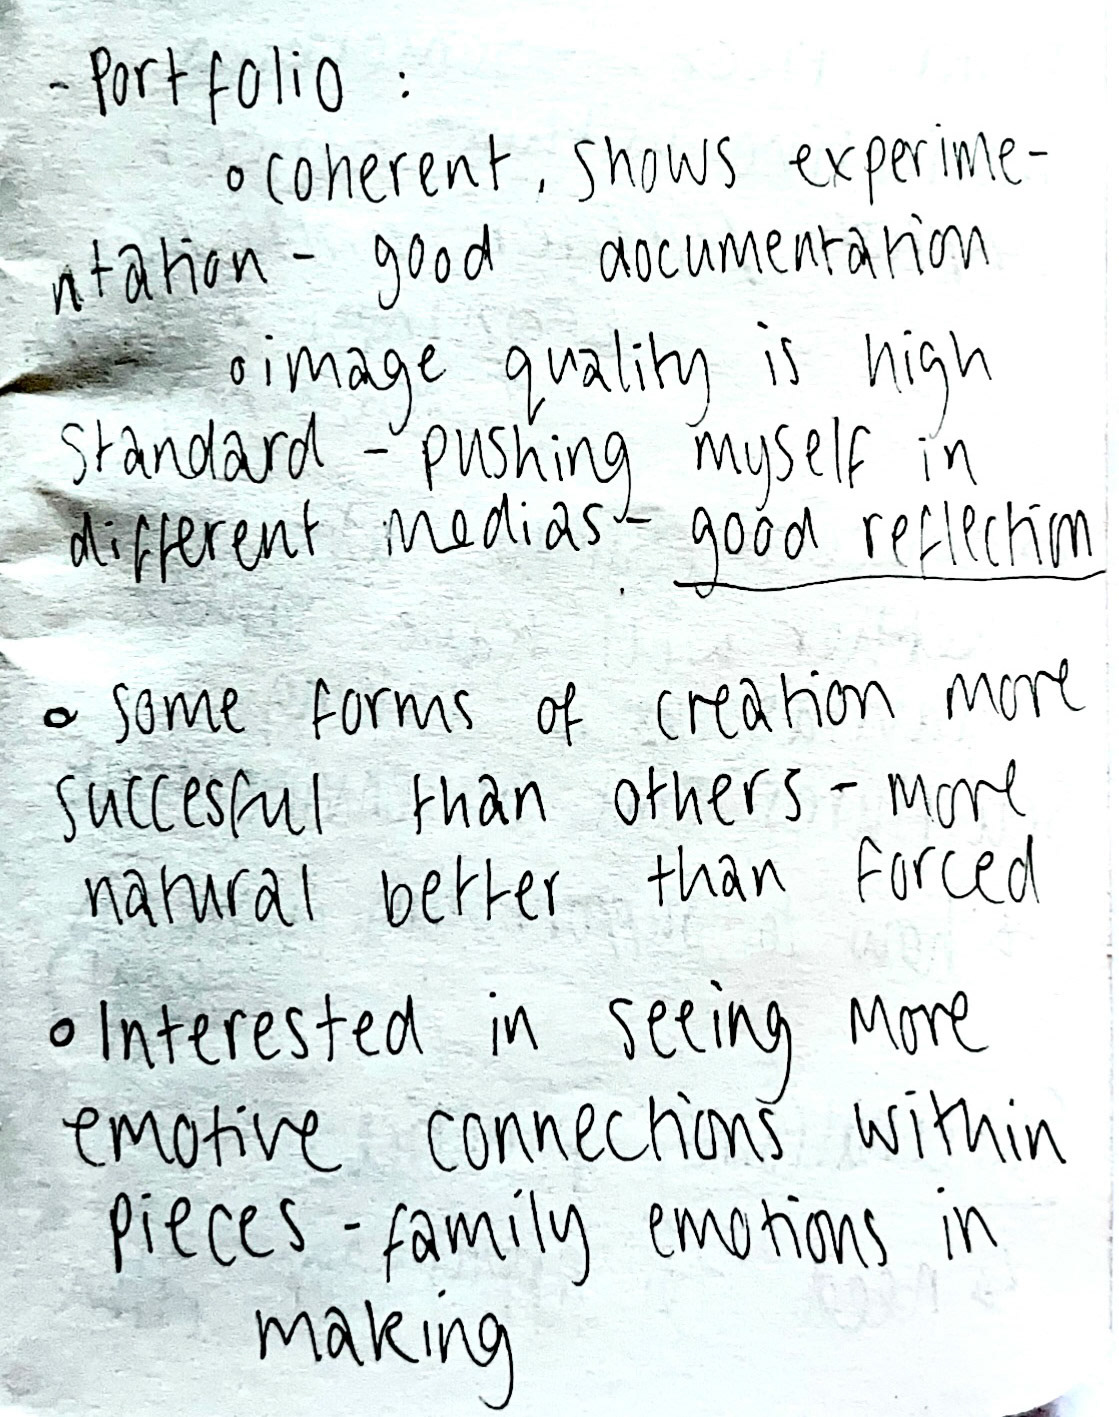
I also received very useful feedback from Unit X, which I have included in my notes below. From this feedback, I have decided to continue my development into filmmaking, as I believe that it is a successful way of portraying my craft. I am also going to start working with different clays to bring more contexts into my making.
Tutorial Notes
Through the Monday meetings, I have been able to get more clarification on the specifics of how I should be spending my time to reach each learning outcome. This has also been supported by the tutorials with Cj, as I have decided to spread my work out into different sections for Synthesis and Resolution.
Collaboration in craft is very important to me. I am very interested in exploring this further in this unit through walking workshops and potentially having the opportunity to work with artist Tim Copsey on smoke firing ceramics.
First Monday meeting
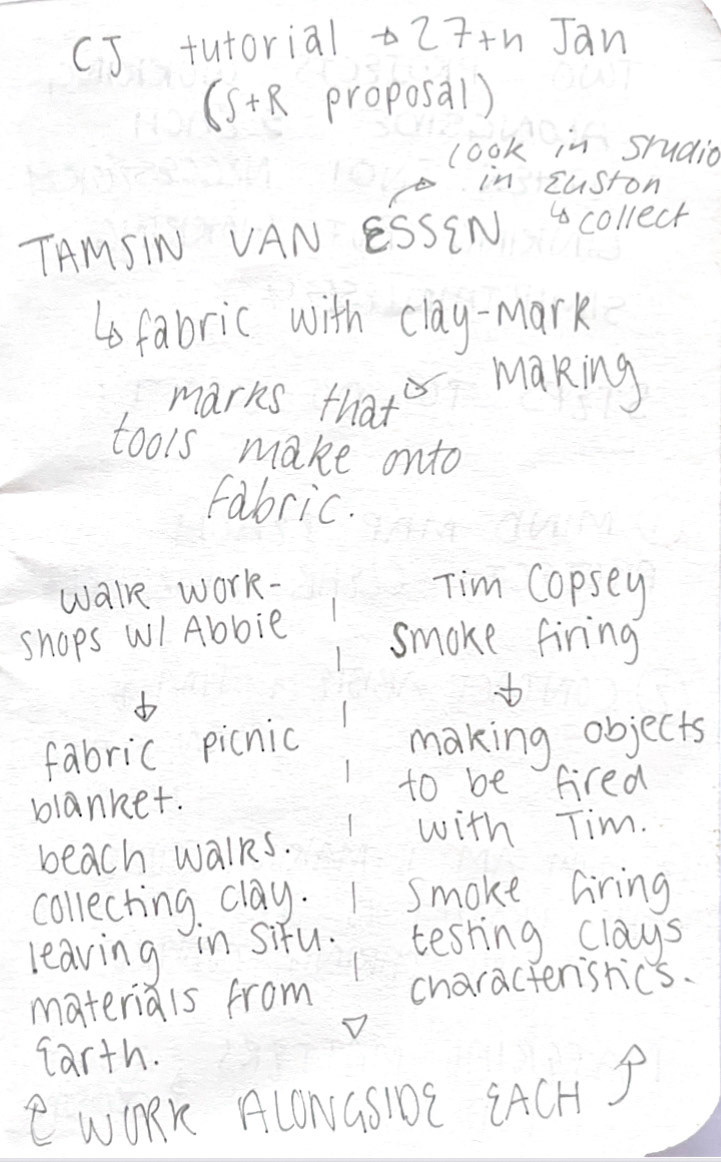
CJ tutorial notes
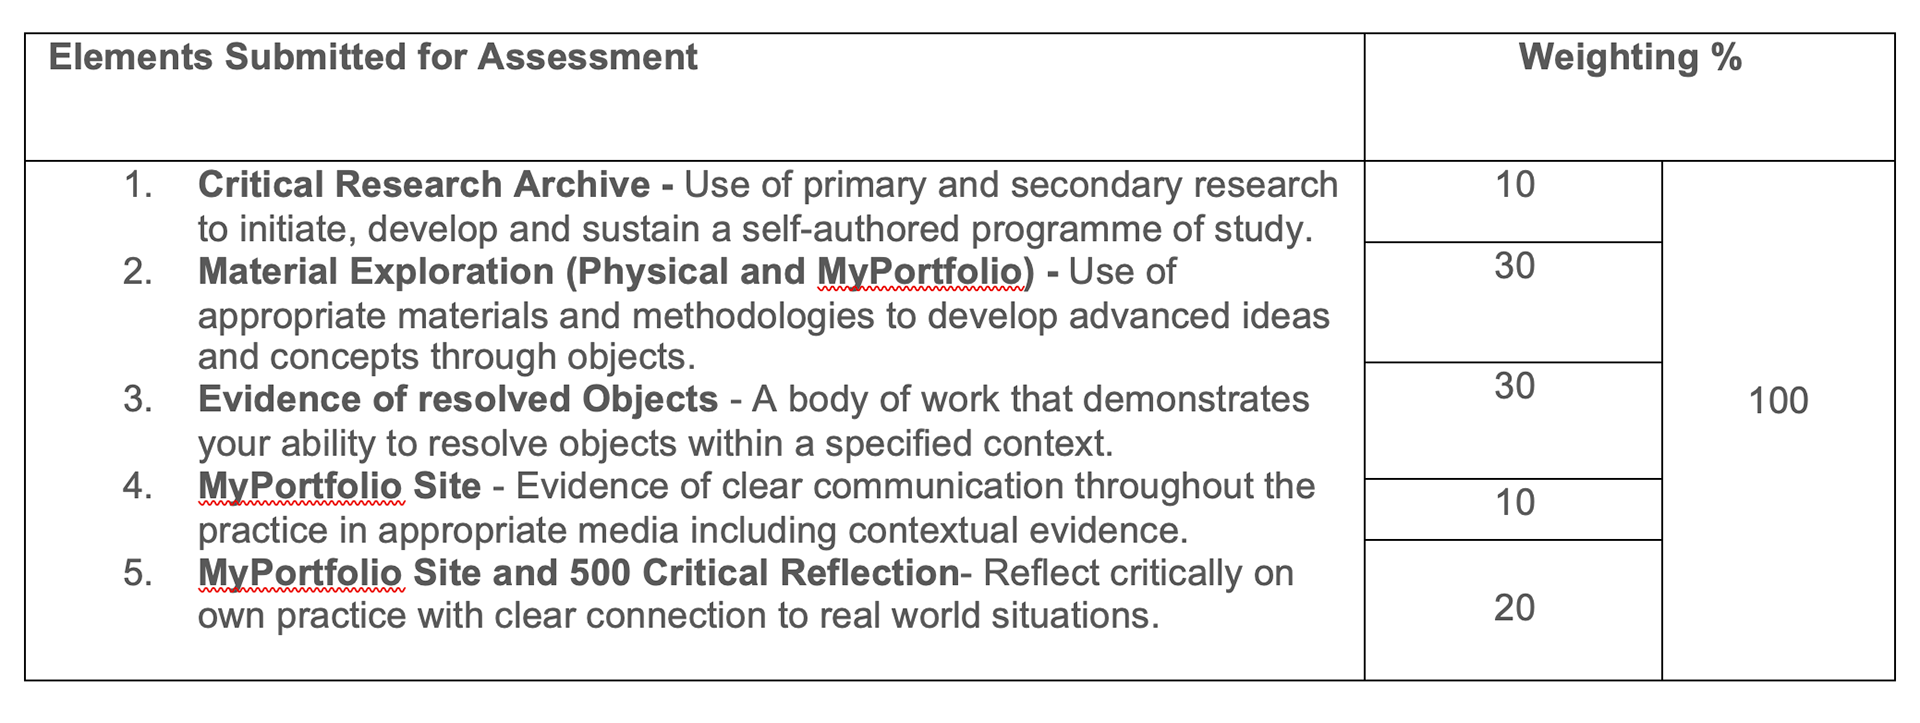
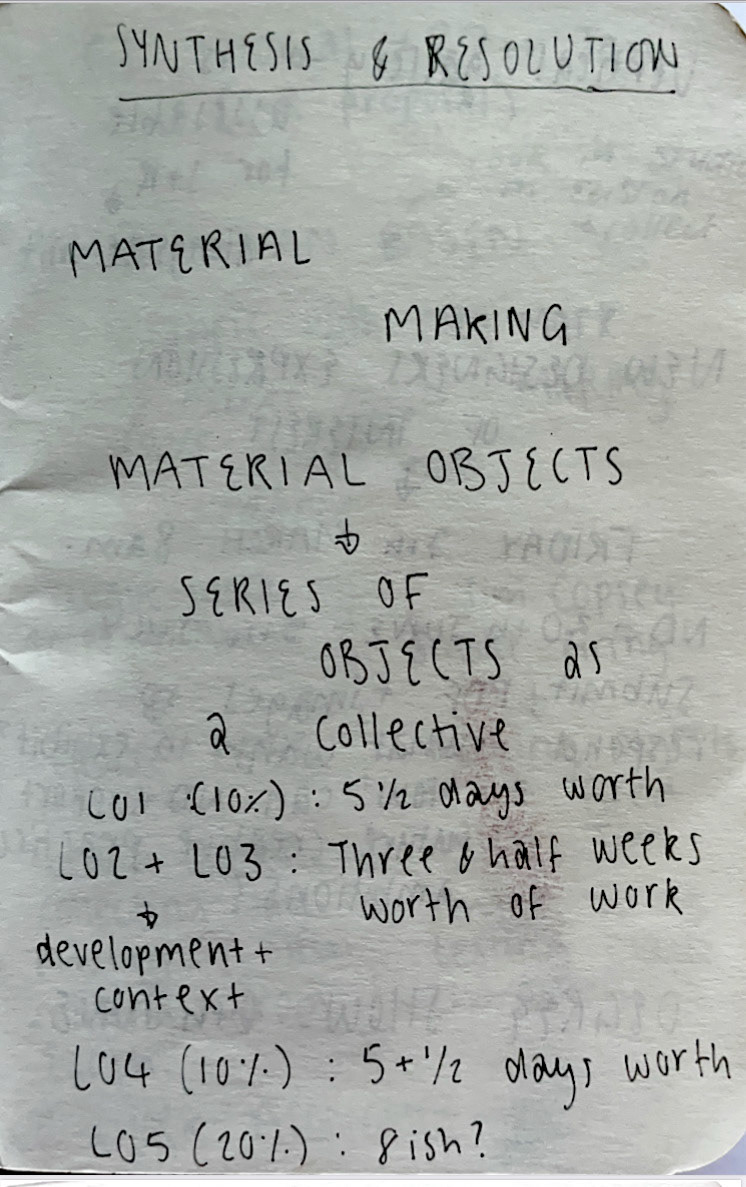
Learning objectives for Synthesis and Resolution assessment
I have included the assessment guidelines in this section, as I feel like it is important for me to consistently look back on this throughout this unit's development, to ensure I am meeting the correct criteria. As this project is covering a lot of different areas, through working with different people and subjects working alongside each other, it is important that I keep consistent with meeting every element.
Collaboration through the vertical gallery
Through the support from the Vertical Gallery's commissions team, I have been part of forming an artists' collective, alongside two other Manchester School of Art students. Common Ground, the title of the collective, has given me the opportunity to bring this collaborative work into my Synthesis & Resolution unit. The link opposite shows my progression and development throughout this collaborative side of my unit.
Bringing my practice above ground
Instead of working underground and leaving my work in situ as my practice revolved around in Unit X, in Synthesis & Resolution, I am bringing my practice above ground, experimenting with various firing techniques and different clays. This approach creates a more physically crafted outcome for my project and results in a more technically resolved practice.
This unit investigates the materials of the ground, bringing them above the surface and uncovering all that they have to offer. I believe it is essential to elevate my practice above the surface and introduce it to a new audience. In Unit X, my work was confined to the caves, documented through film and photography, leading me to question why a product should exist anywhere other than the place where the craft originated. However, moving forward, as I consider how I see my work in context, I am eager to showcase the unique materiality of the clay I am exploring to a broader audience, fostering more interaction and discussion regarding the tangible engagement that pertains to my craft.
Extracting glacial clay and transporting it back to Manchester enables a more thorough examination of the geological studies surrounding this unique material and its reactions to various environments. Collecting clay from the Peak District caves sparks considerable discussion and interest among a diverse range of individuals. Frequently, I engage in conversations with people who know little about the sport of caving and are eager to learn about my journey to excavate clay from these uncharted areas. Raising awareness of the stunning landscapes found underground is one of the principal reasons for my passion for this project. My aim is to offer my audience a fresh perspective on the Peak District landscape and to illustrate the remarkable array of exquisite materials sourced from this region.
This perspective is coming in the way of material explorations of the land that I investigate through its unique tactility and texture. Bringing light to the material that is so dark and undiscovered, and bringing it above the surface through the use of physical objects and material investigations.
I am aware that when harvesting this material, it should be only collected in small quantities, leaving no unnecessary traces on the landscape, and ensuring that the utmost respect and consideration of the earth is being met.
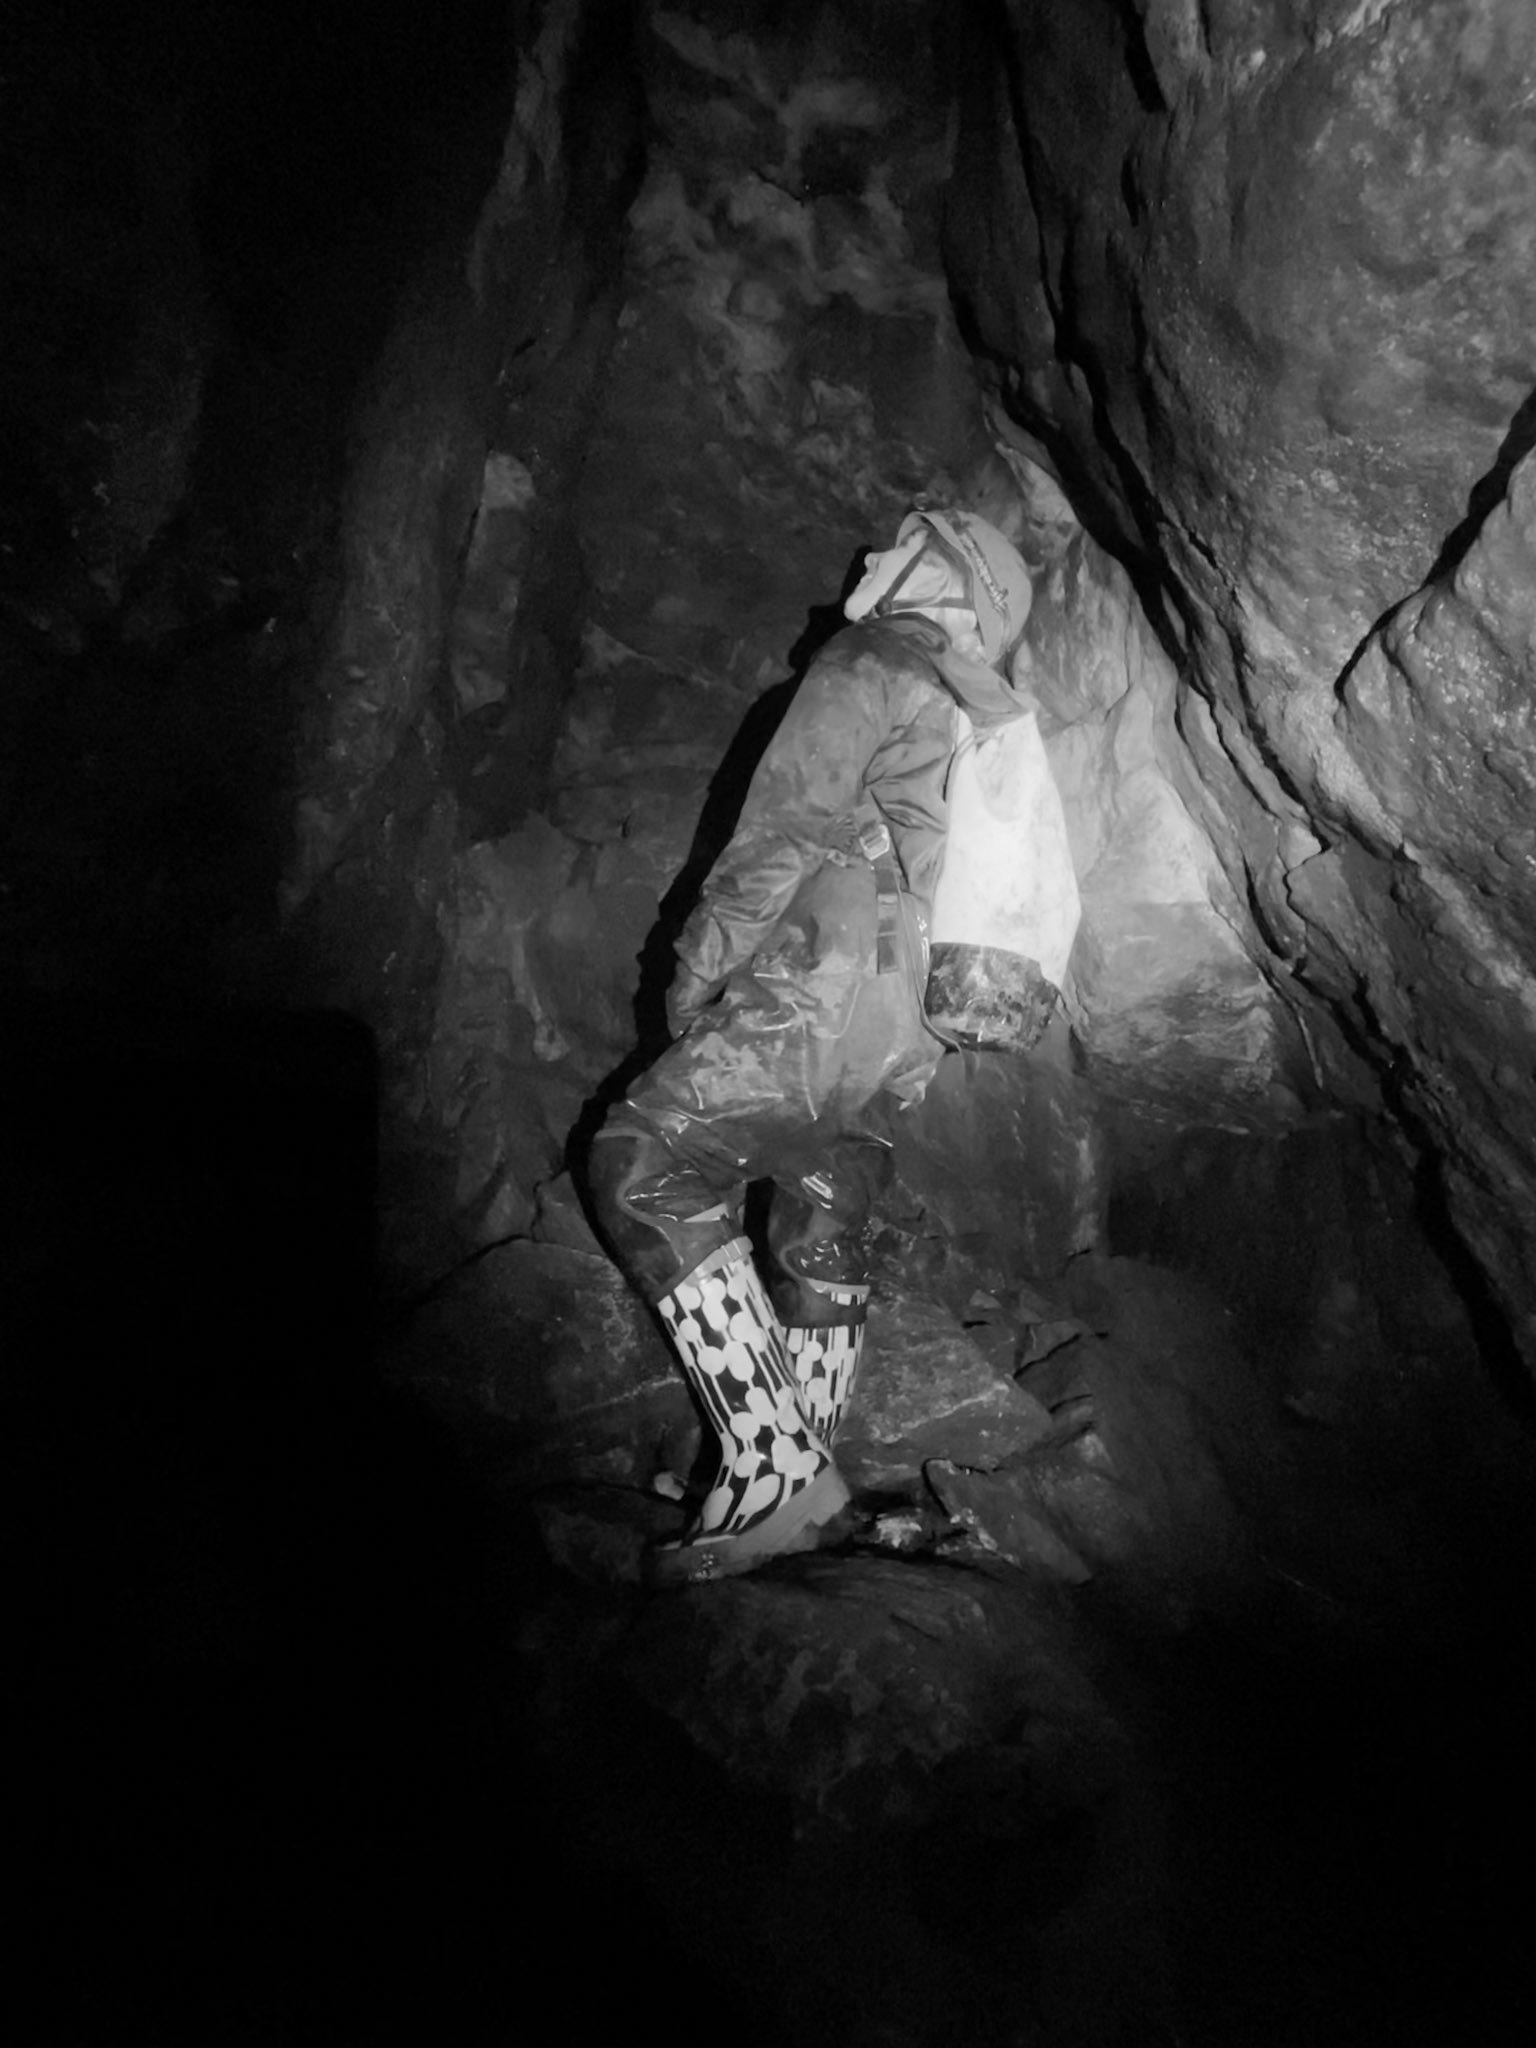
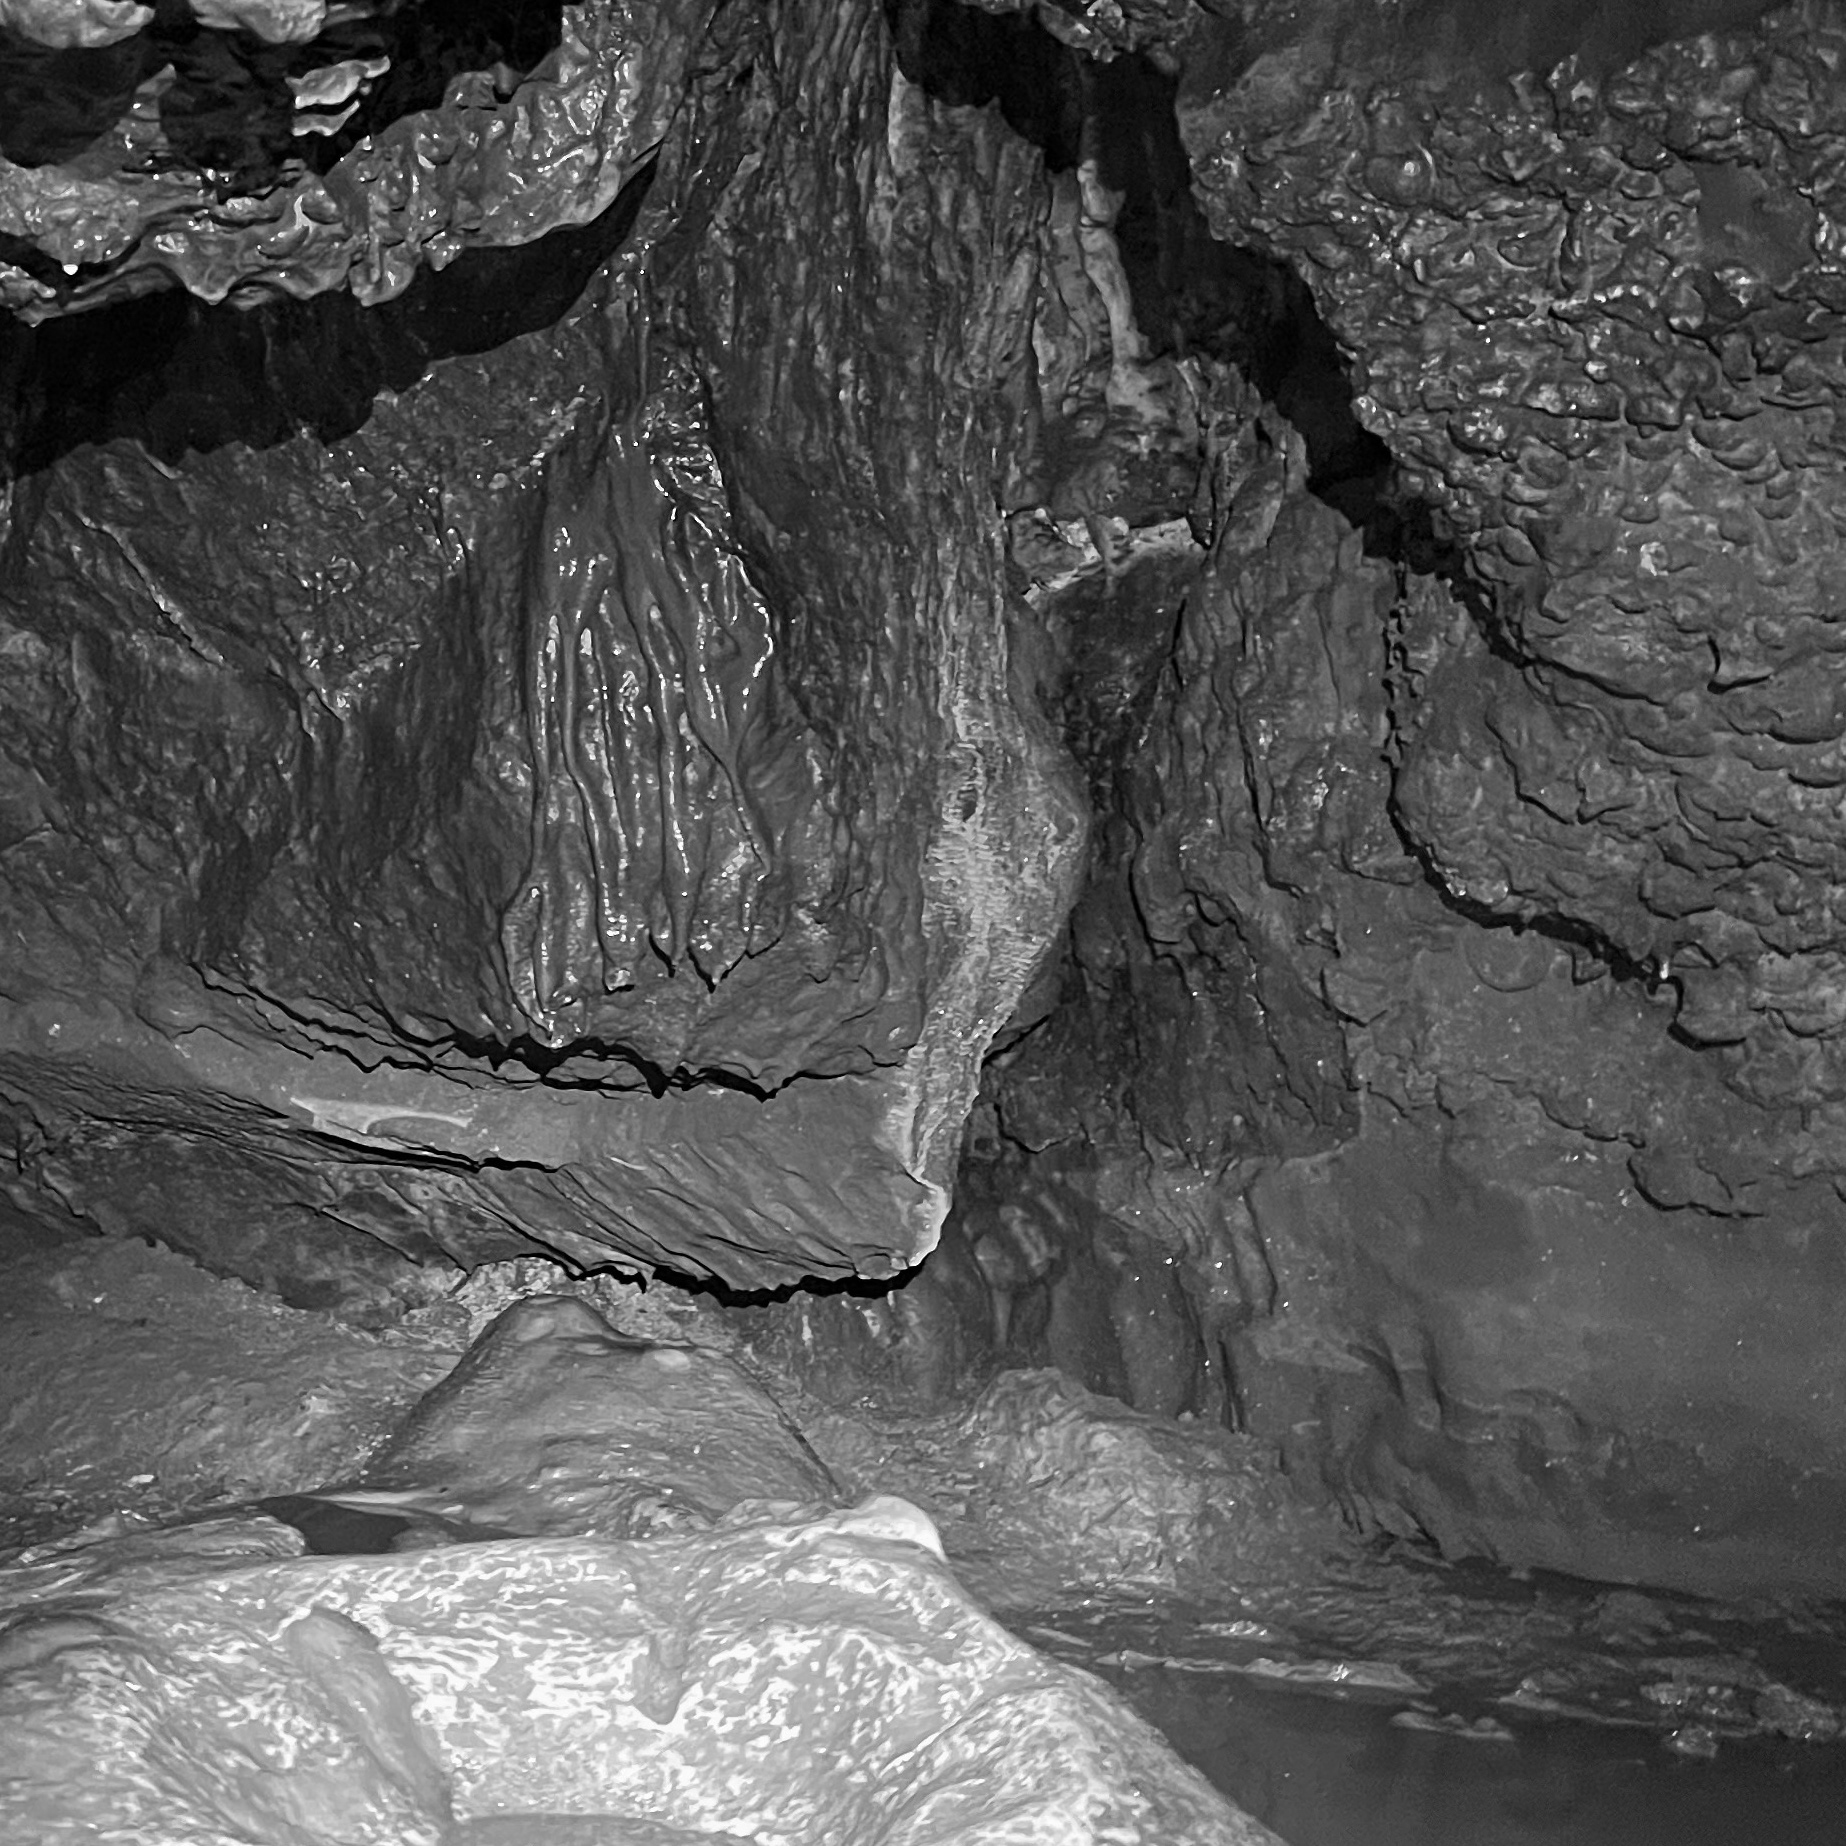
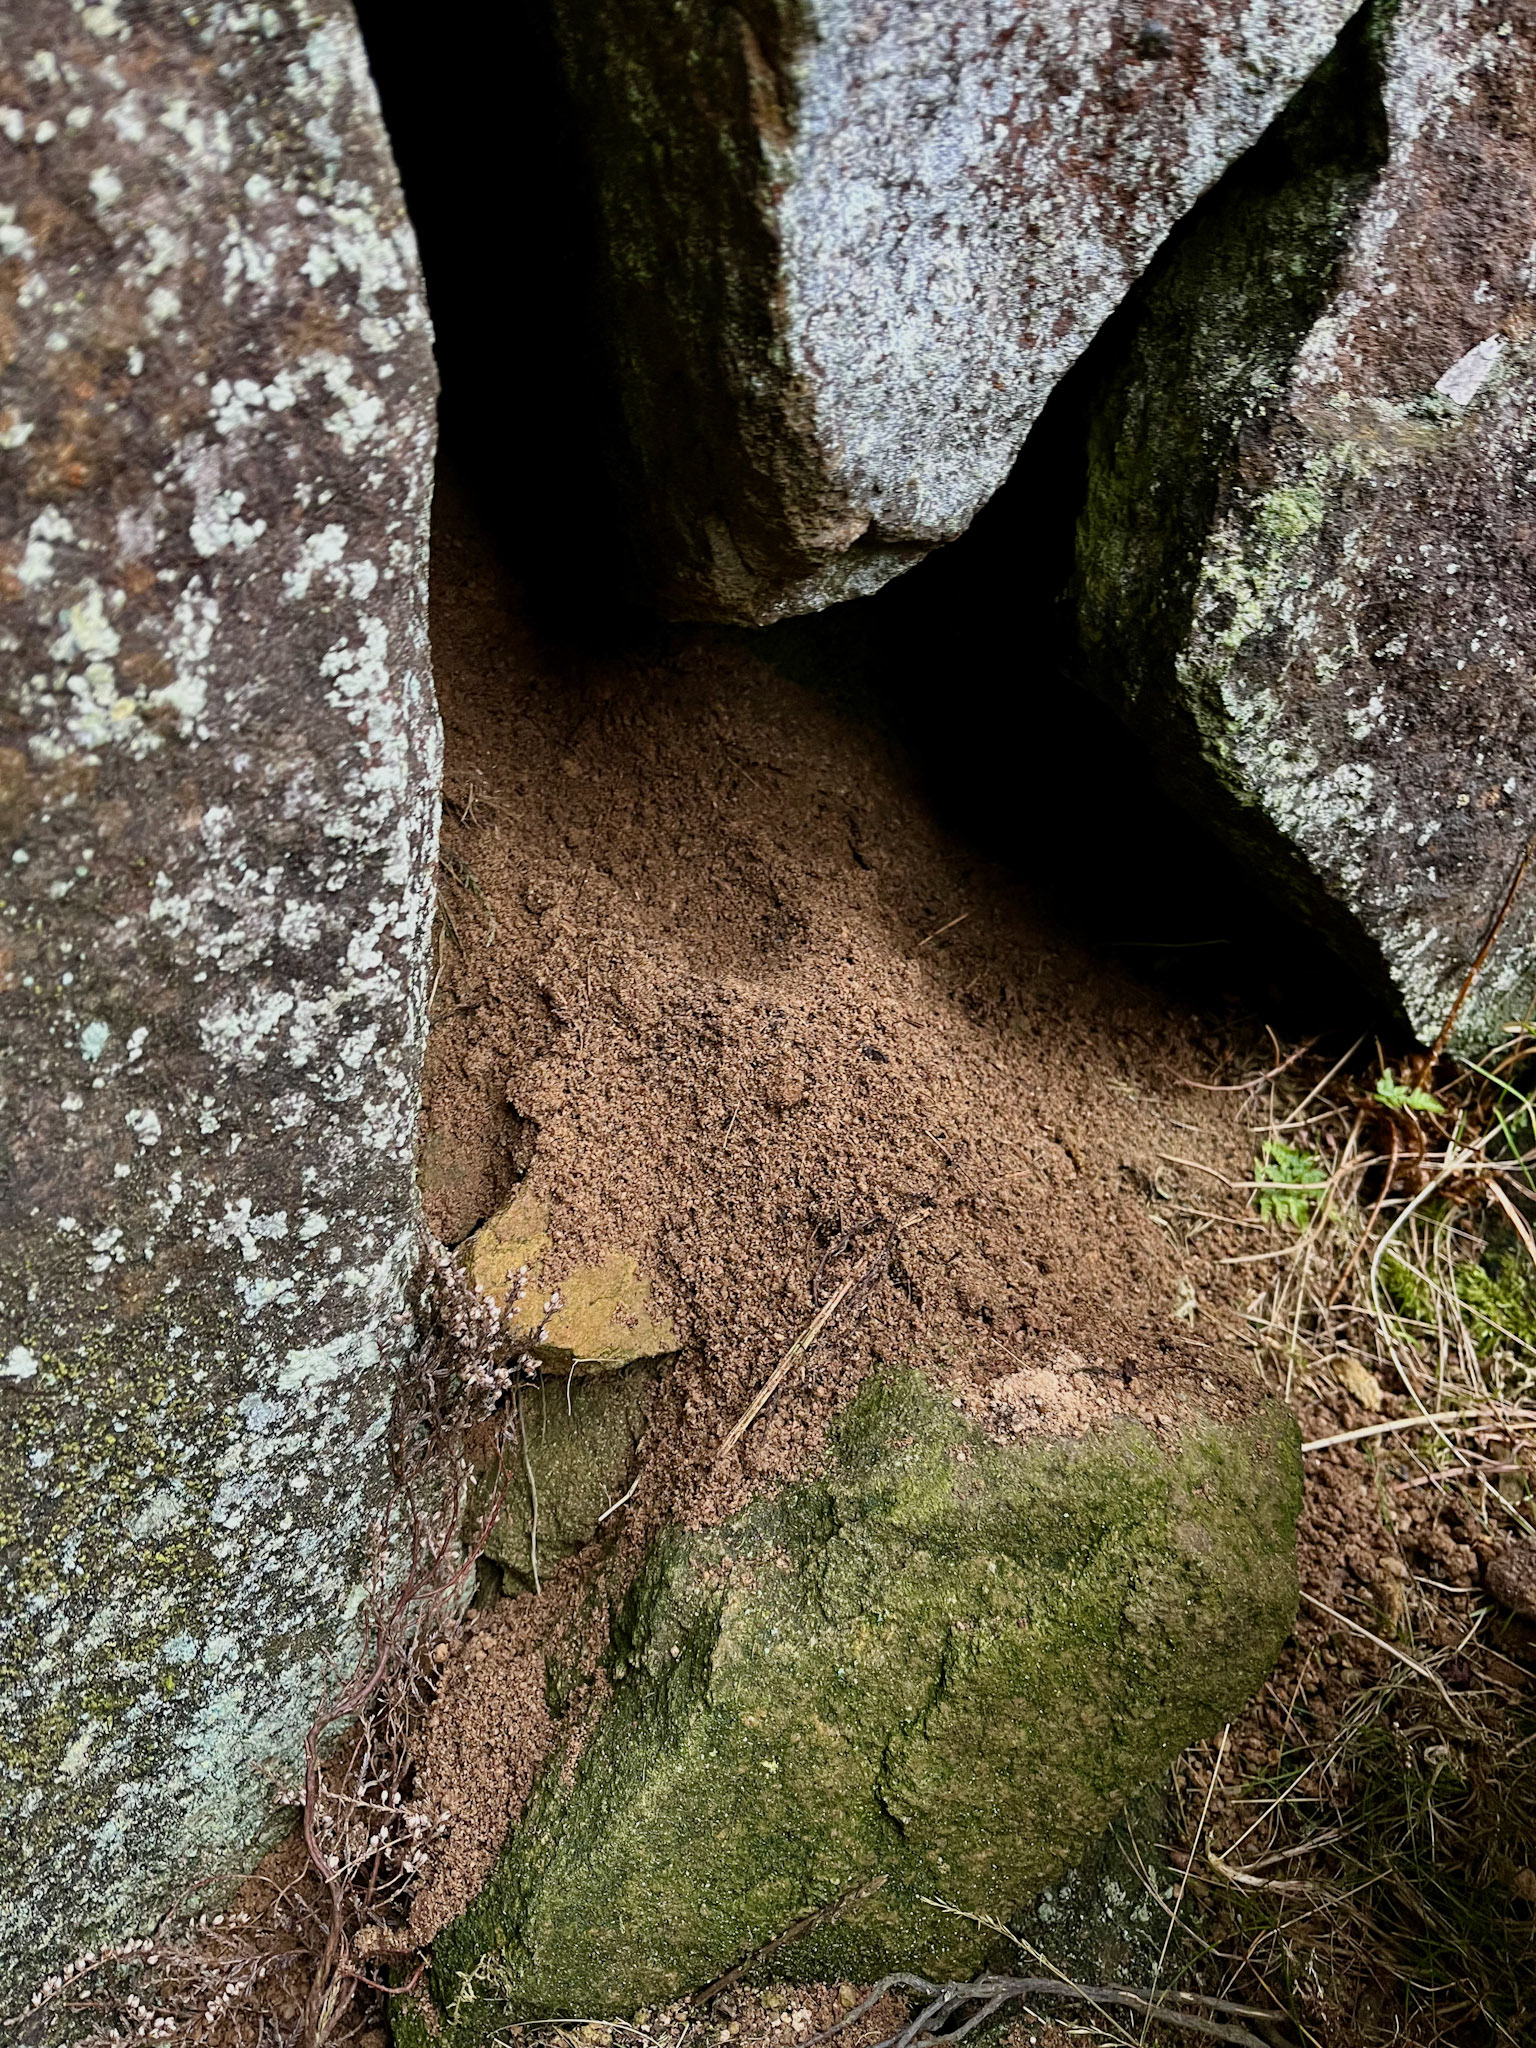
Caving in the Peak District, 2024

Caving in the Peak District, 2024
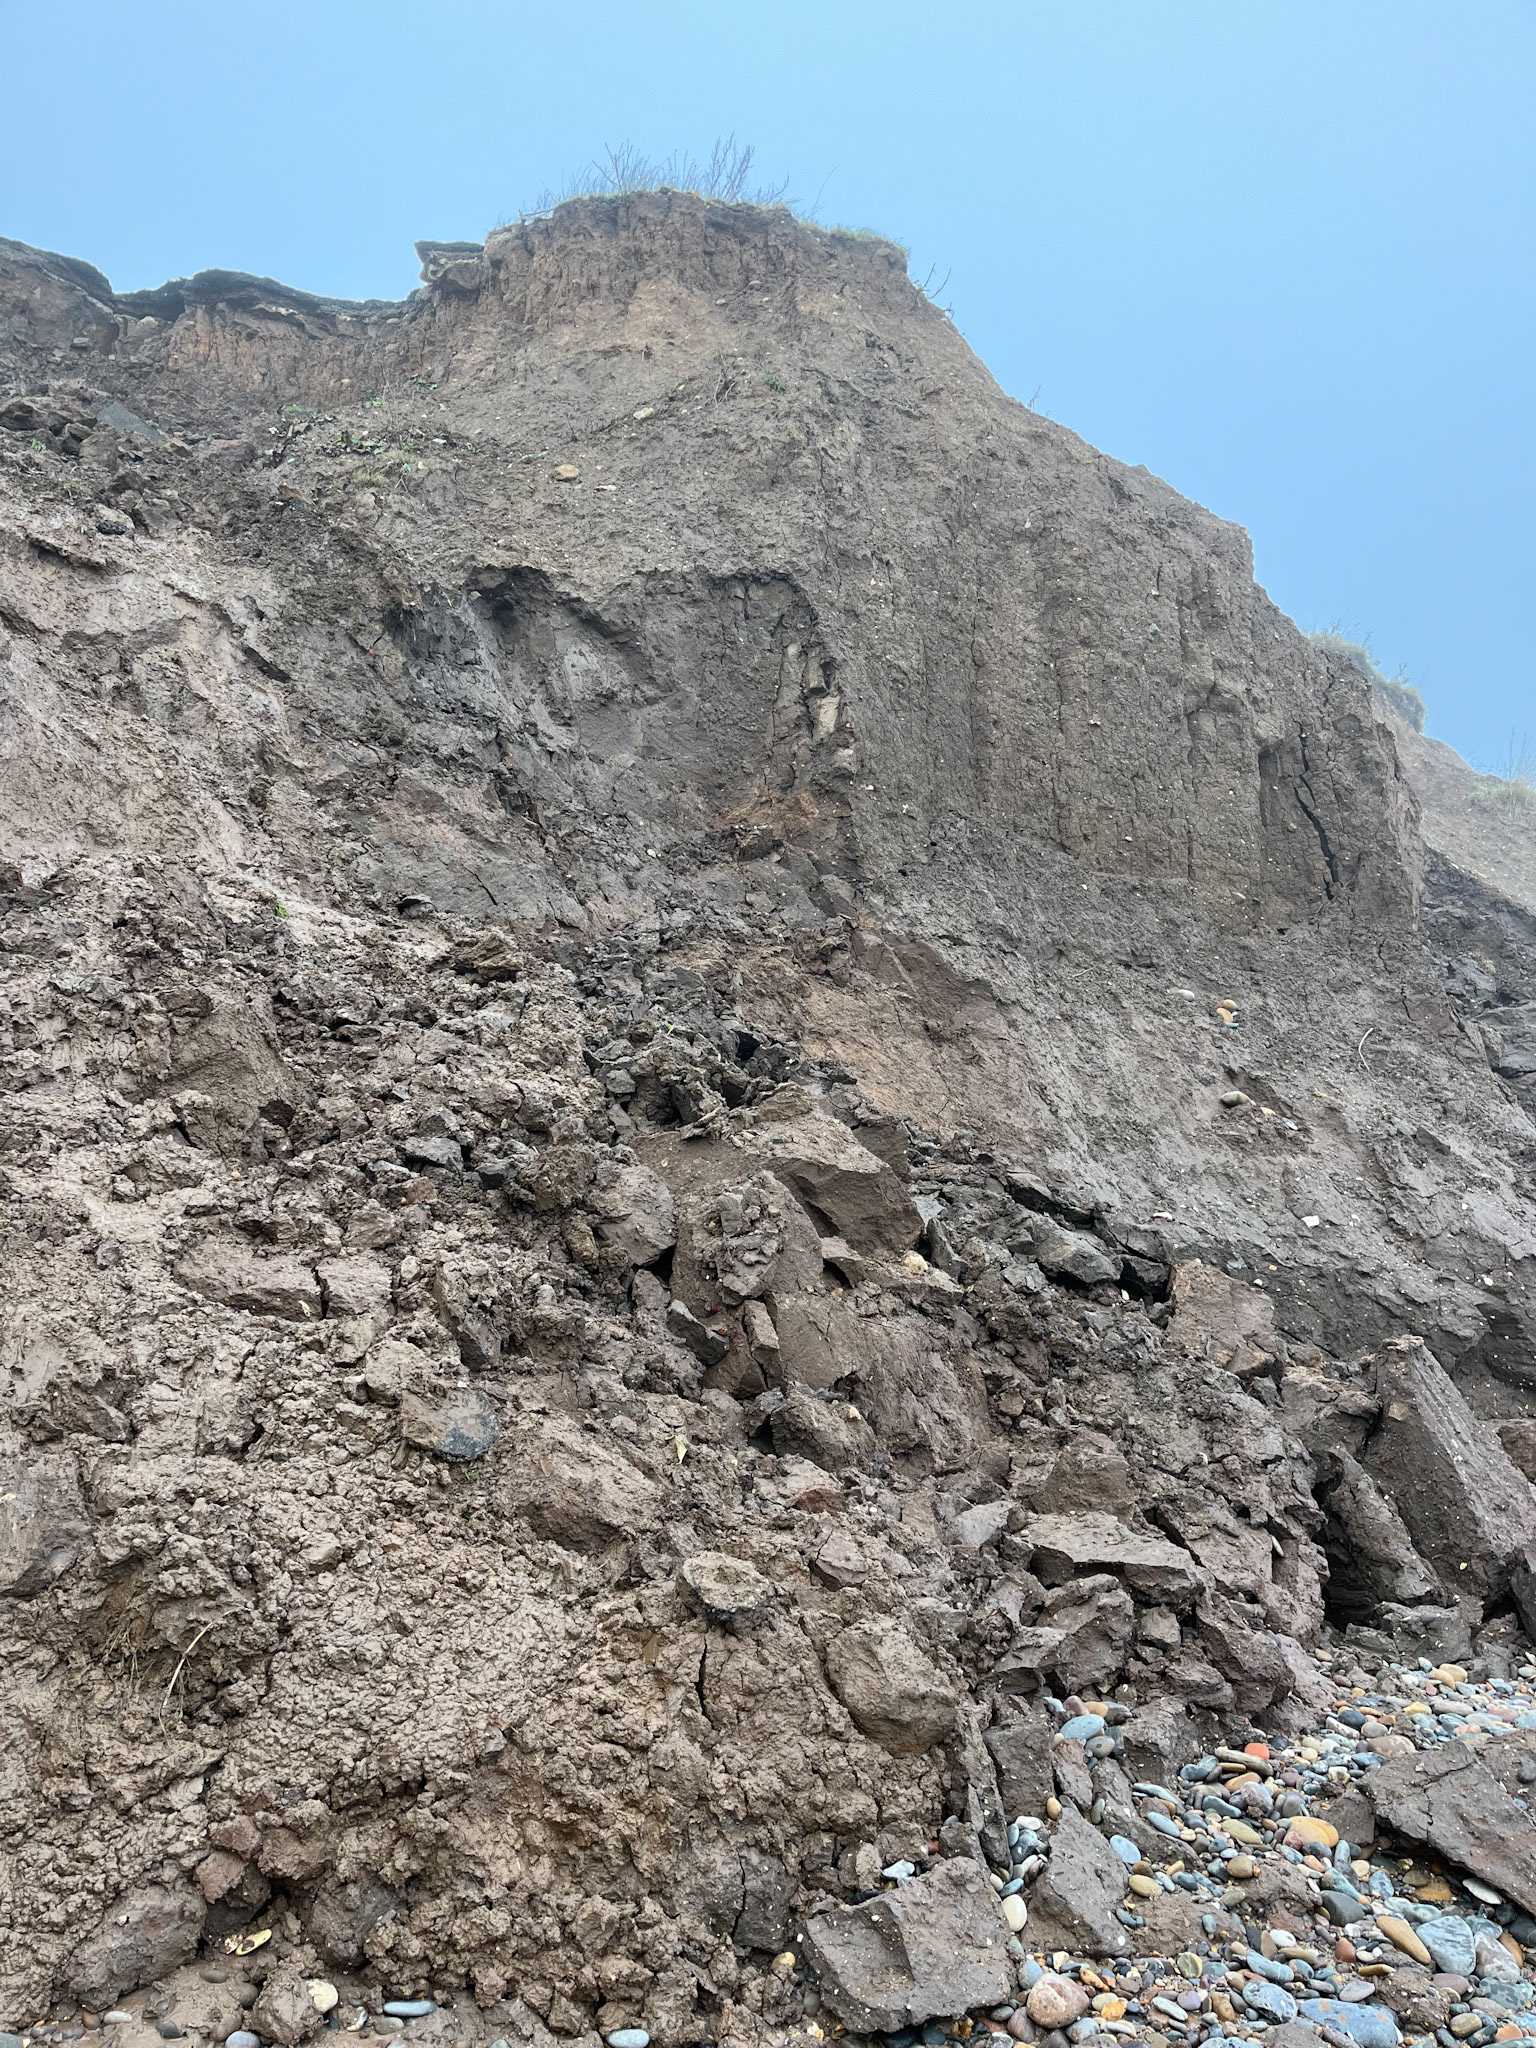
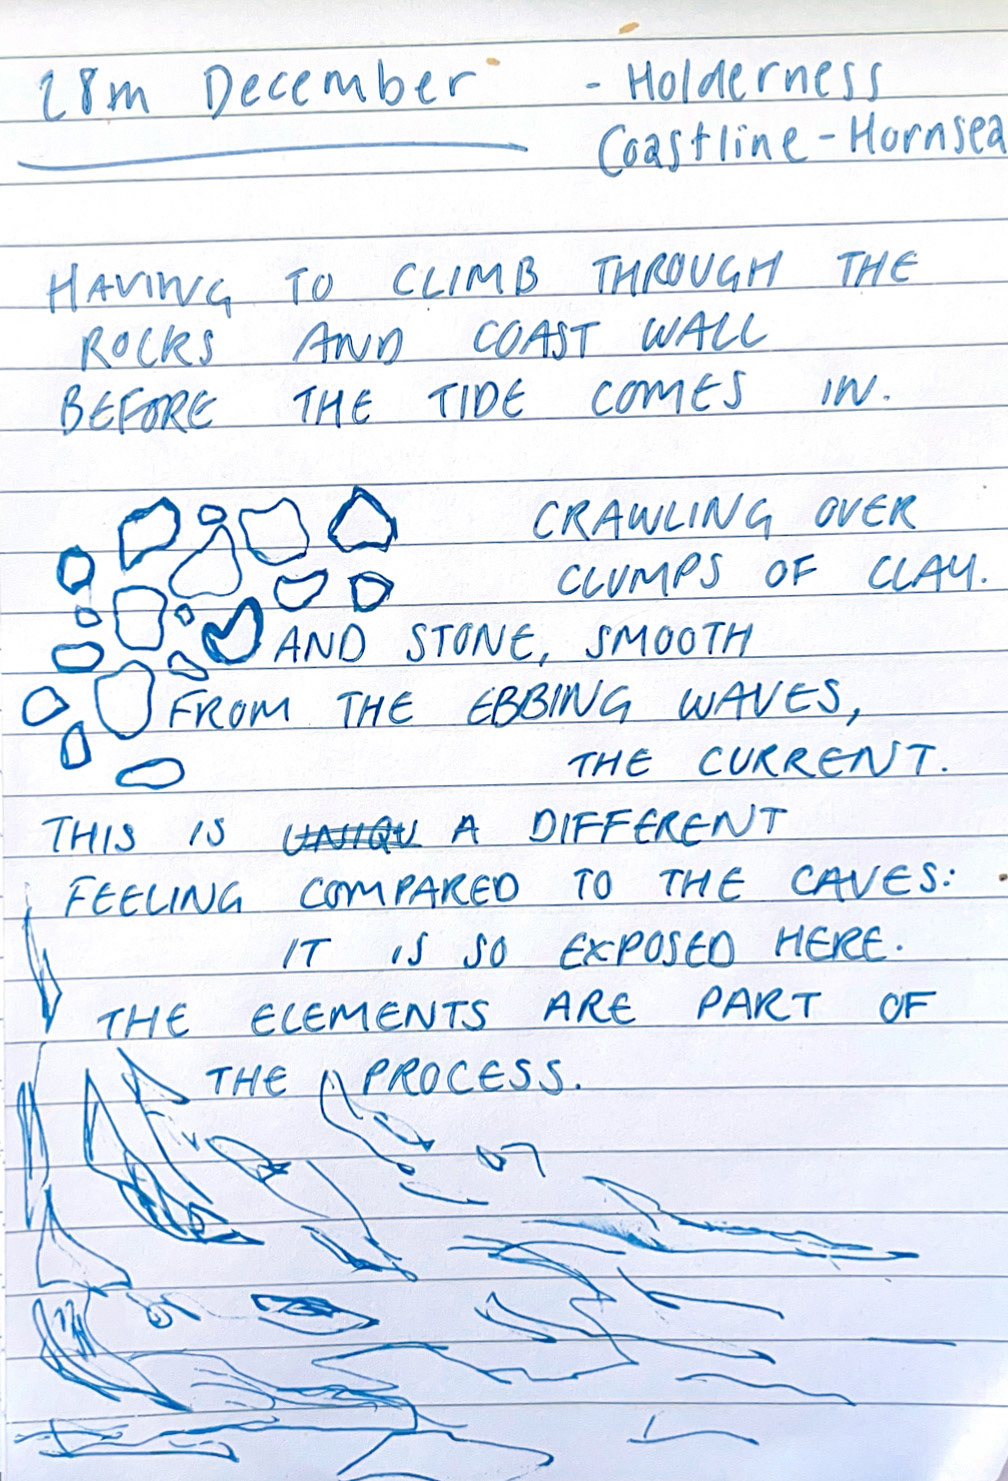
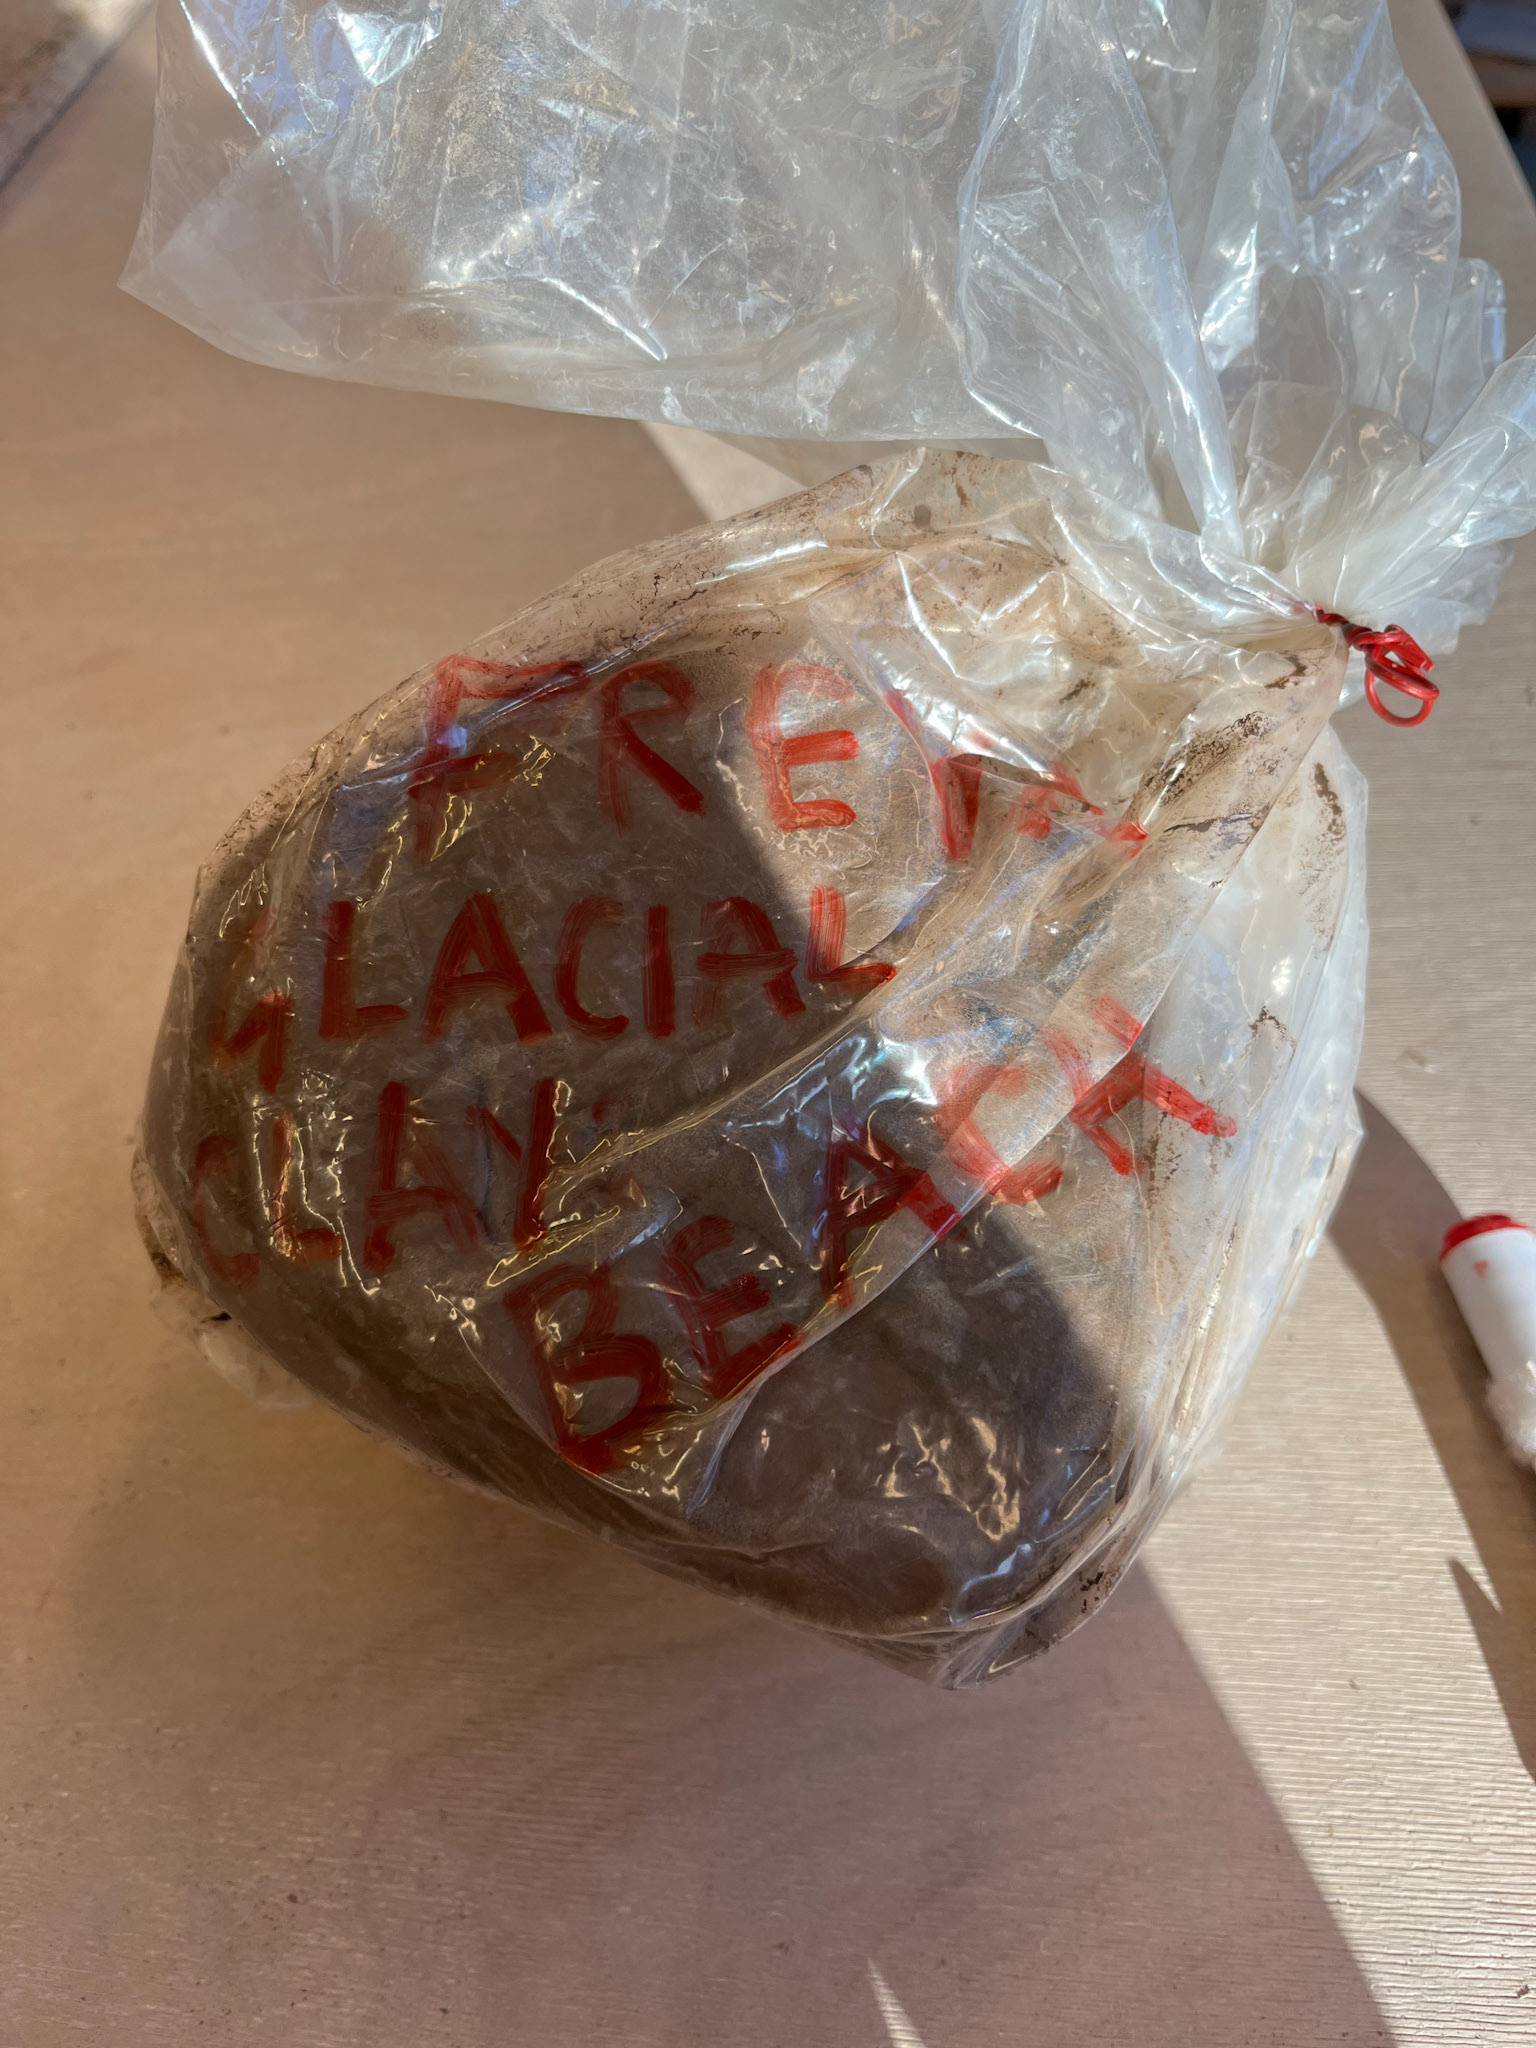
Holderness Coast Clay
Over Christmas, I gathered clay from the Holderness Coastline, as I had read that this clay is easily accessible glacial clay. In my opinion, it is useful to test different clays against each other to discover each of their qualities and differences.
In the Geology section of this portfolio, which is linked opposite, I give more in-depth information about the differences between types of clay and discuss where glacial clay is found, and the reasons why it is important for me to work with these materials.
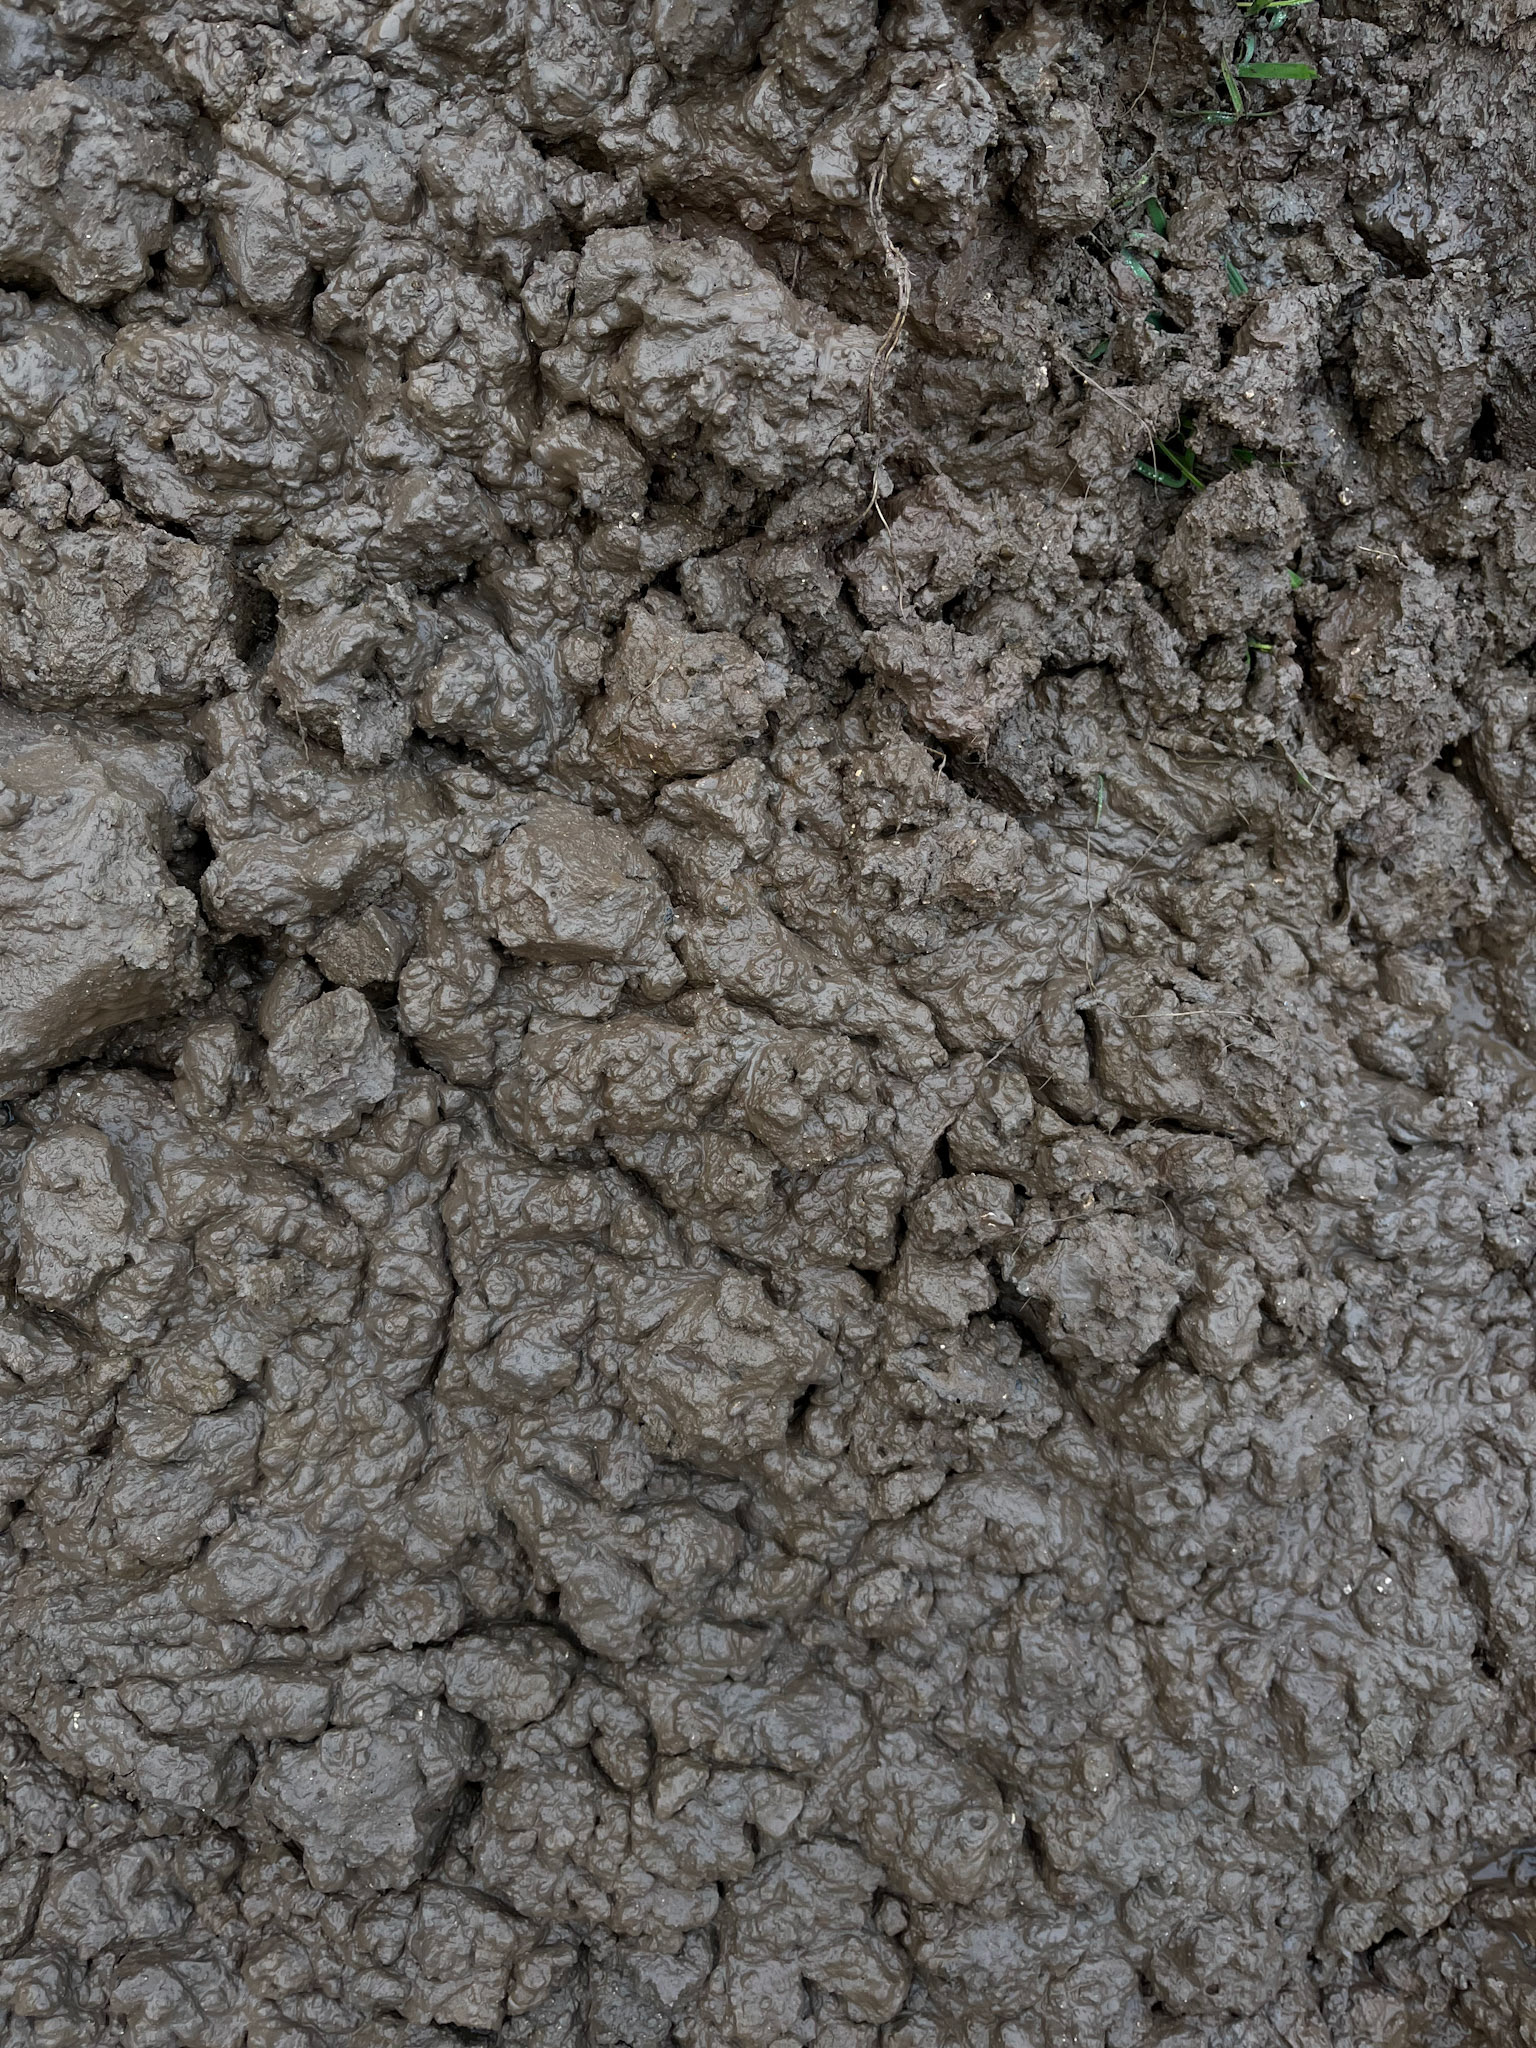
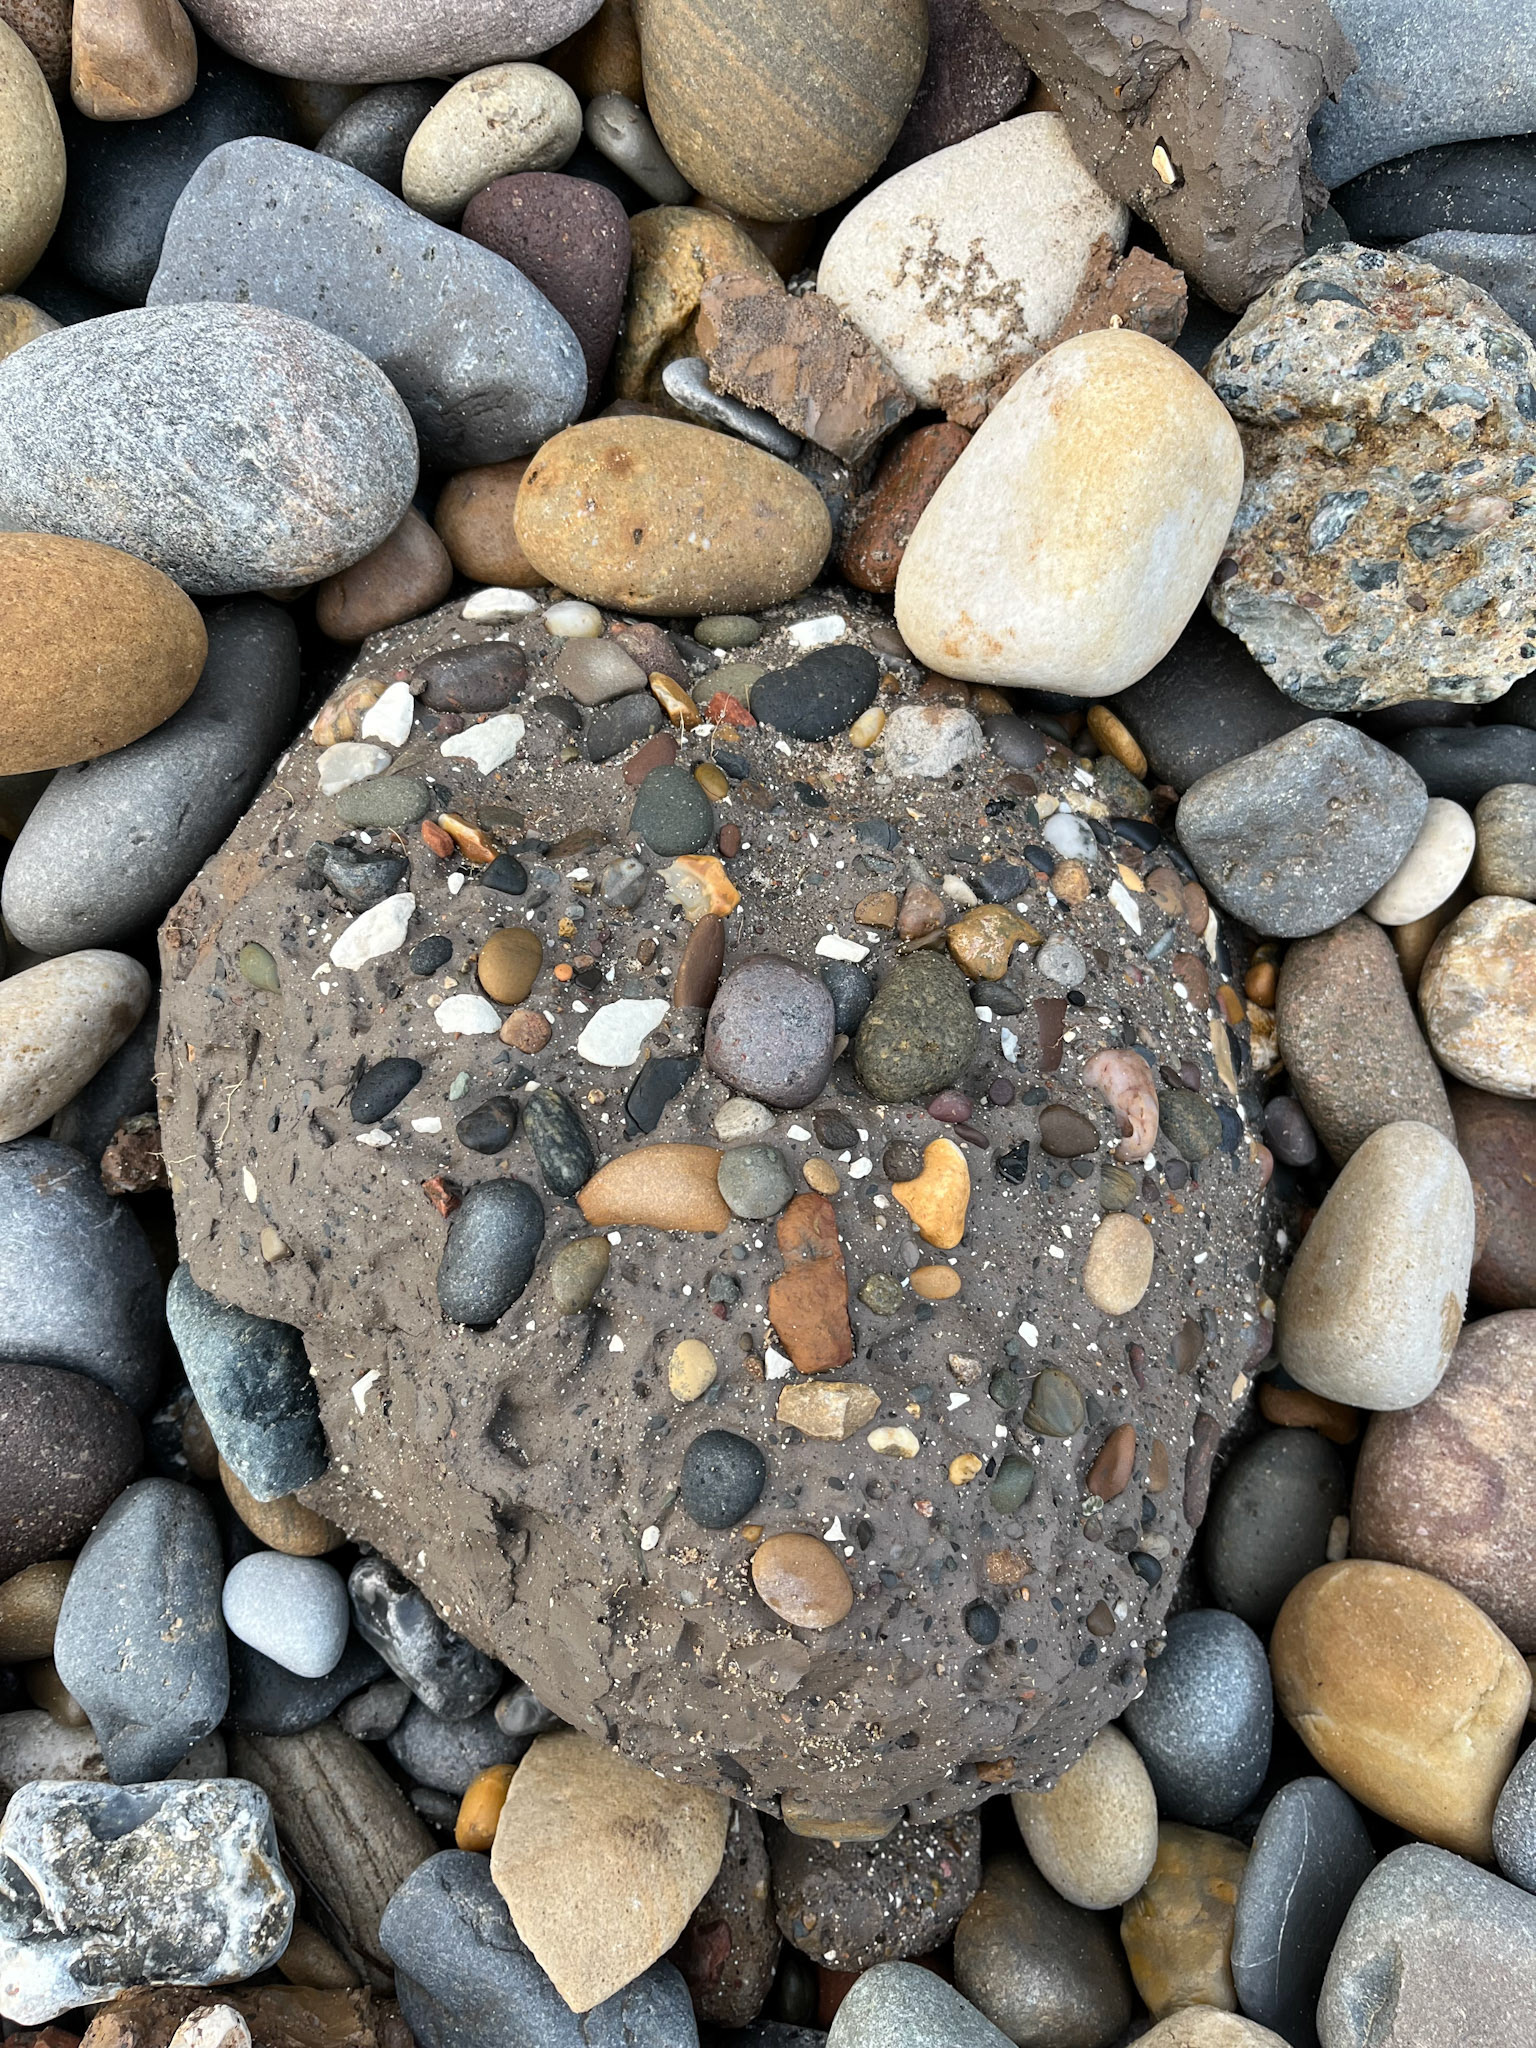
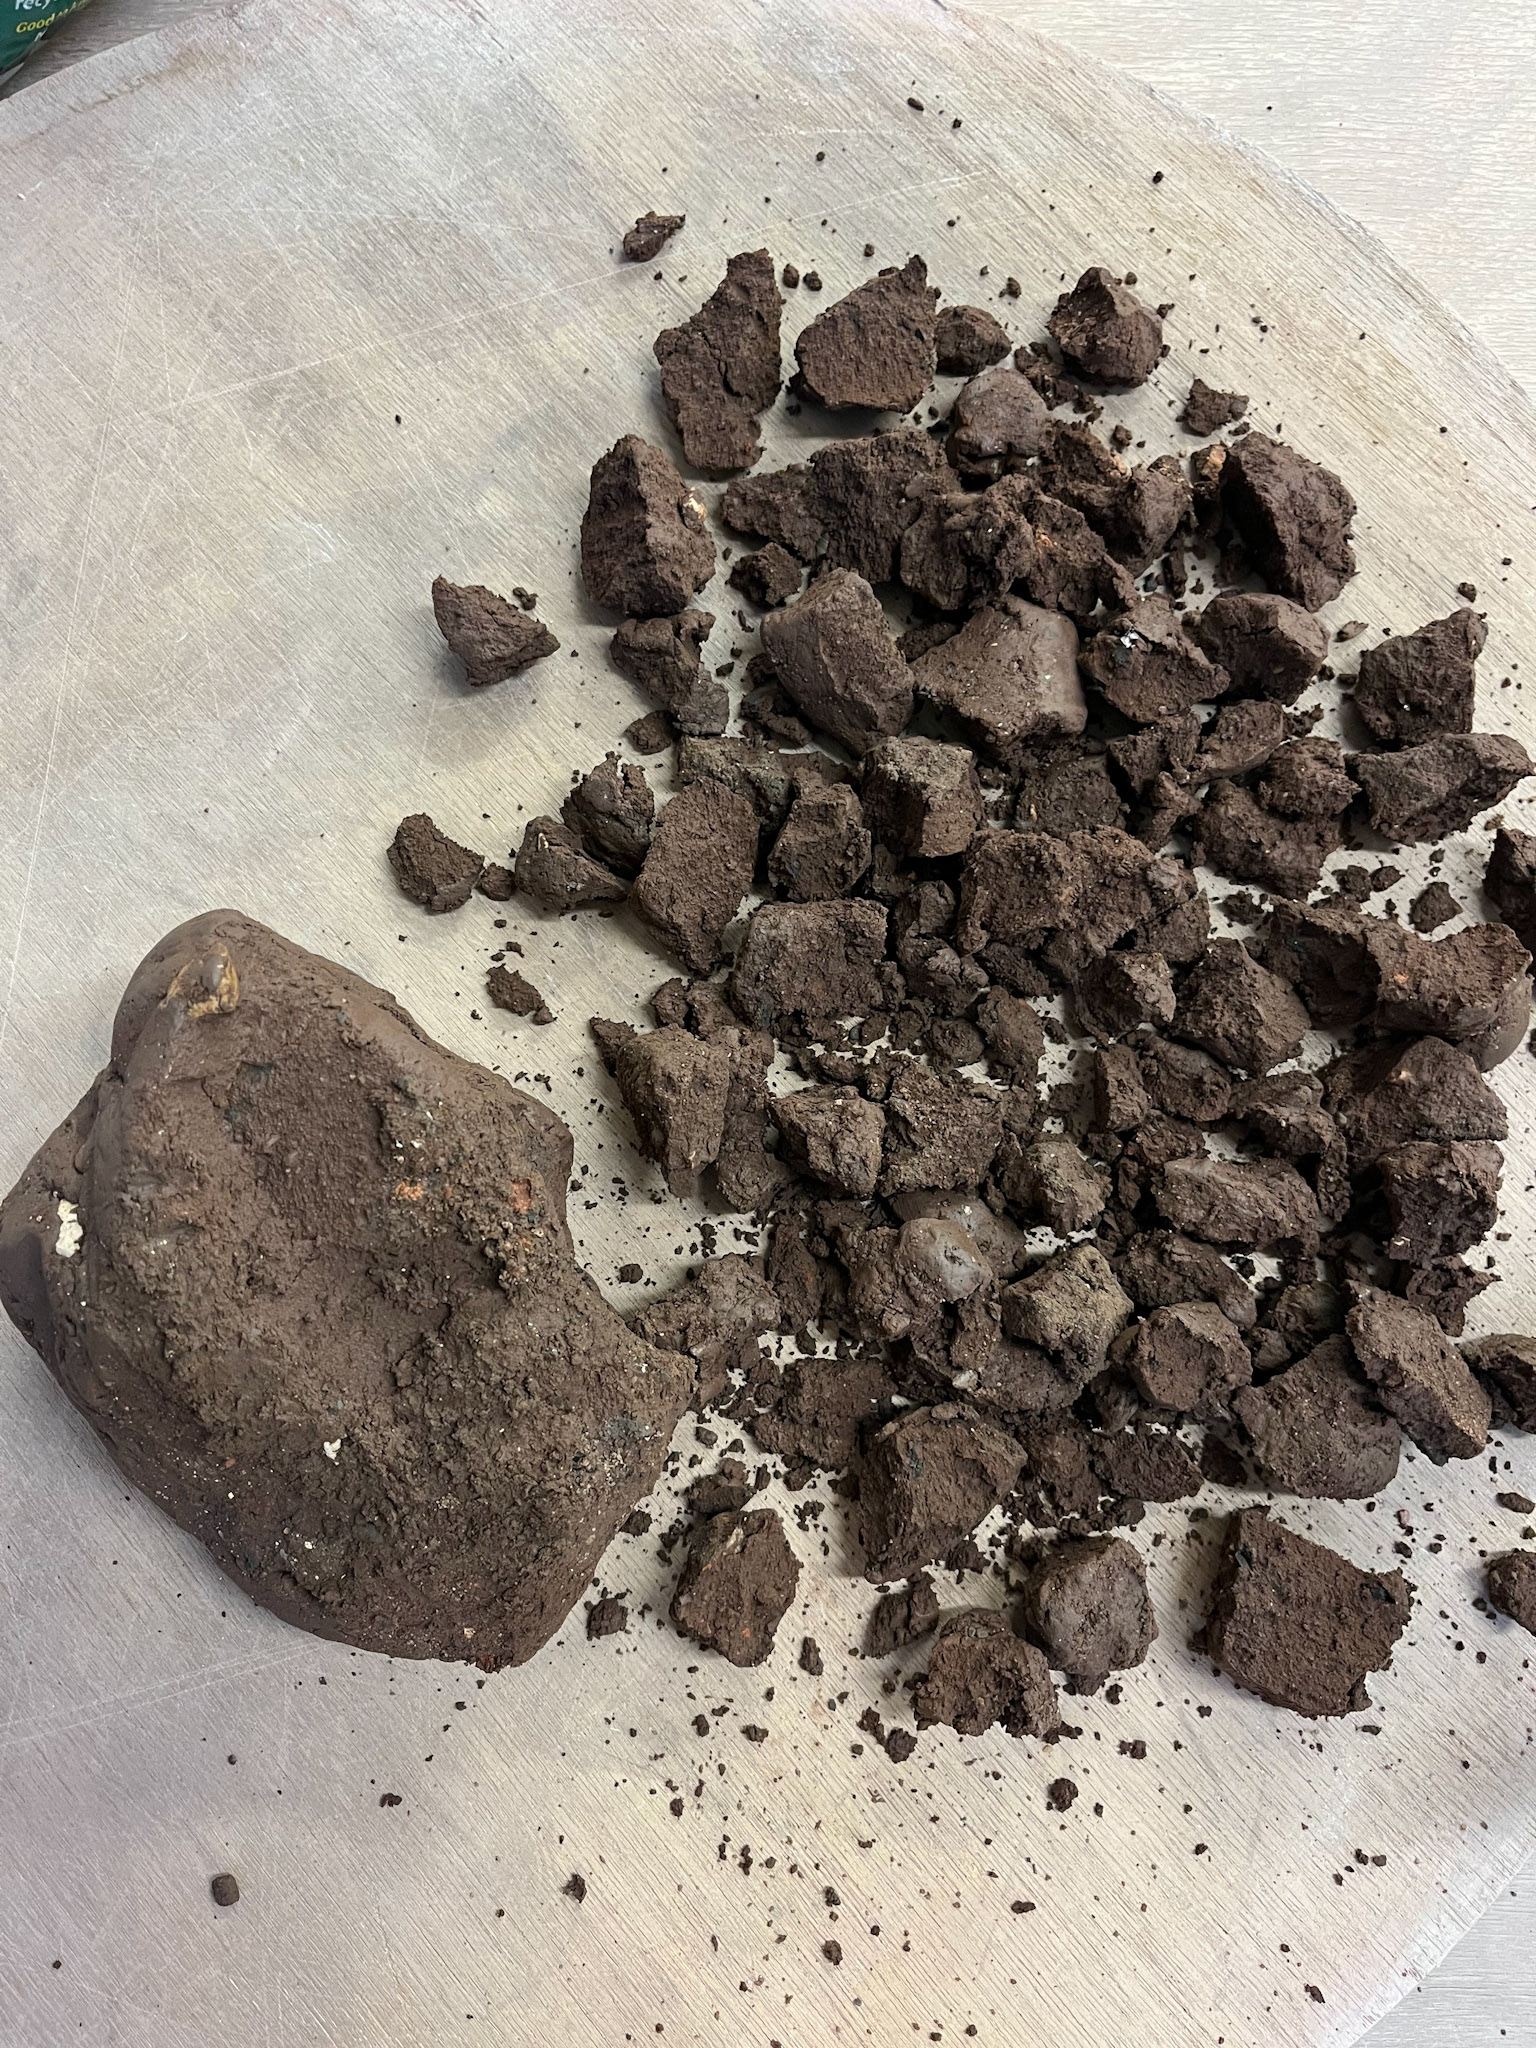
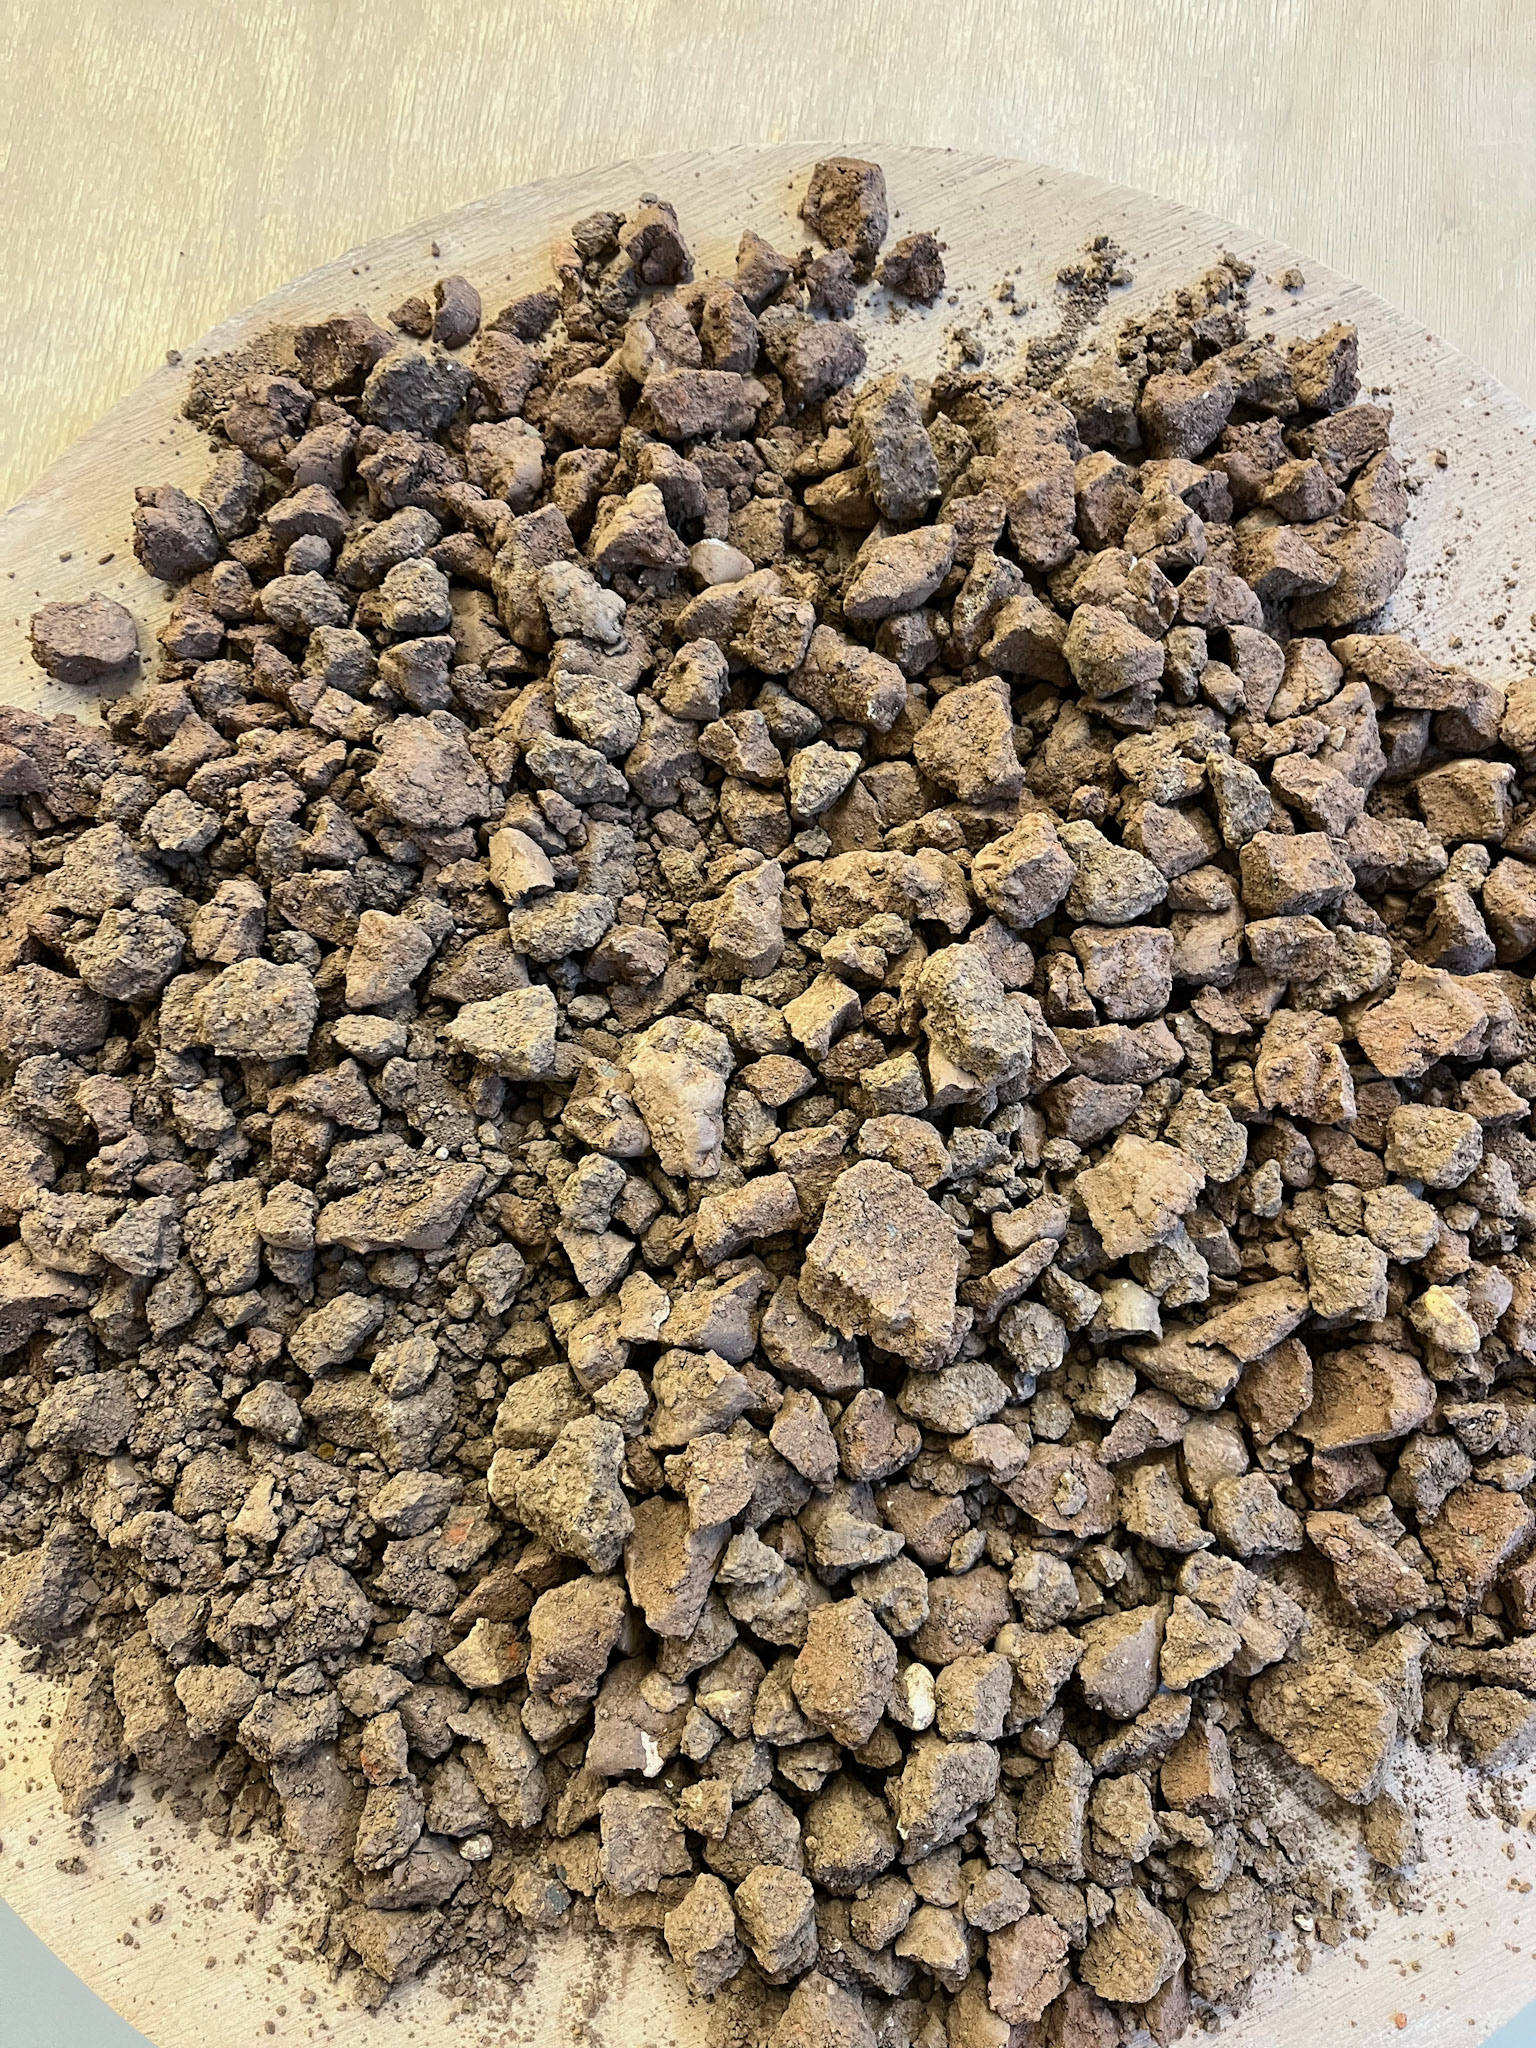
The clay I gathered from the Holderness coastline is distinctive and behaves differently from other clays I've used. I am accustomed to digging clay that is very smooth and free of impurities, as it originates from sedimentary deposits in the caves, away from weathering. However, the clay found on the Holderness Coast is full of large rocks and stones; it is chunkier and considerably drier than what is found in the caves, having been formed from the erosion of the exposed rock face. Extracting this material from the coastline was a unique sensation, and I have included my reflections on gathering the clay below.

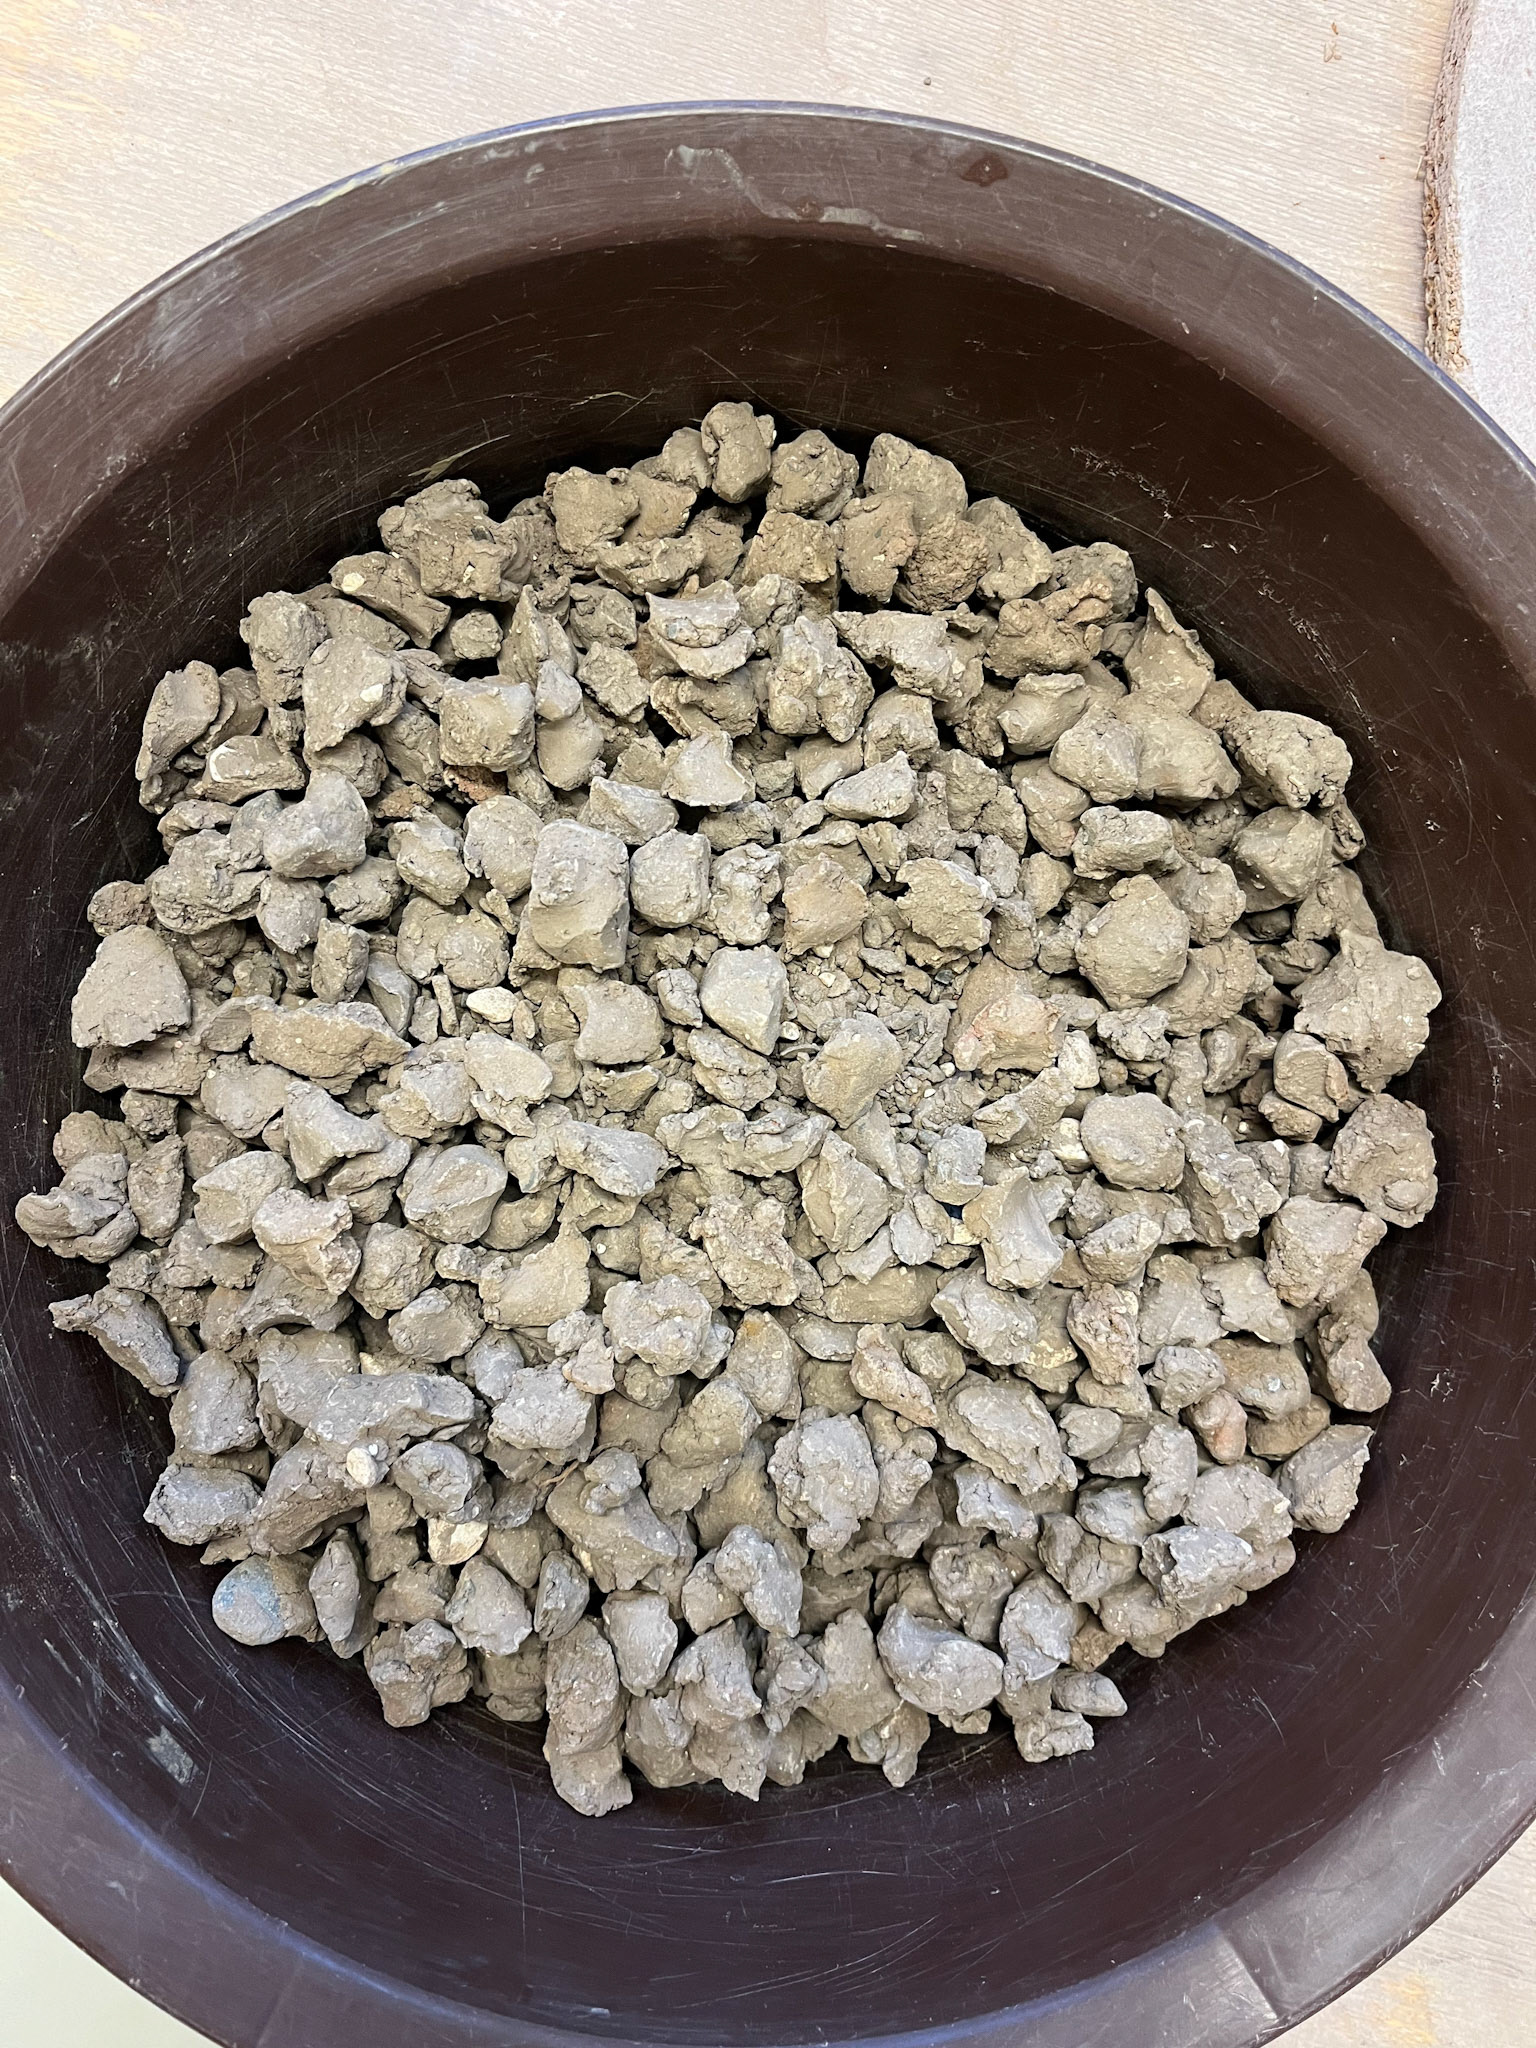
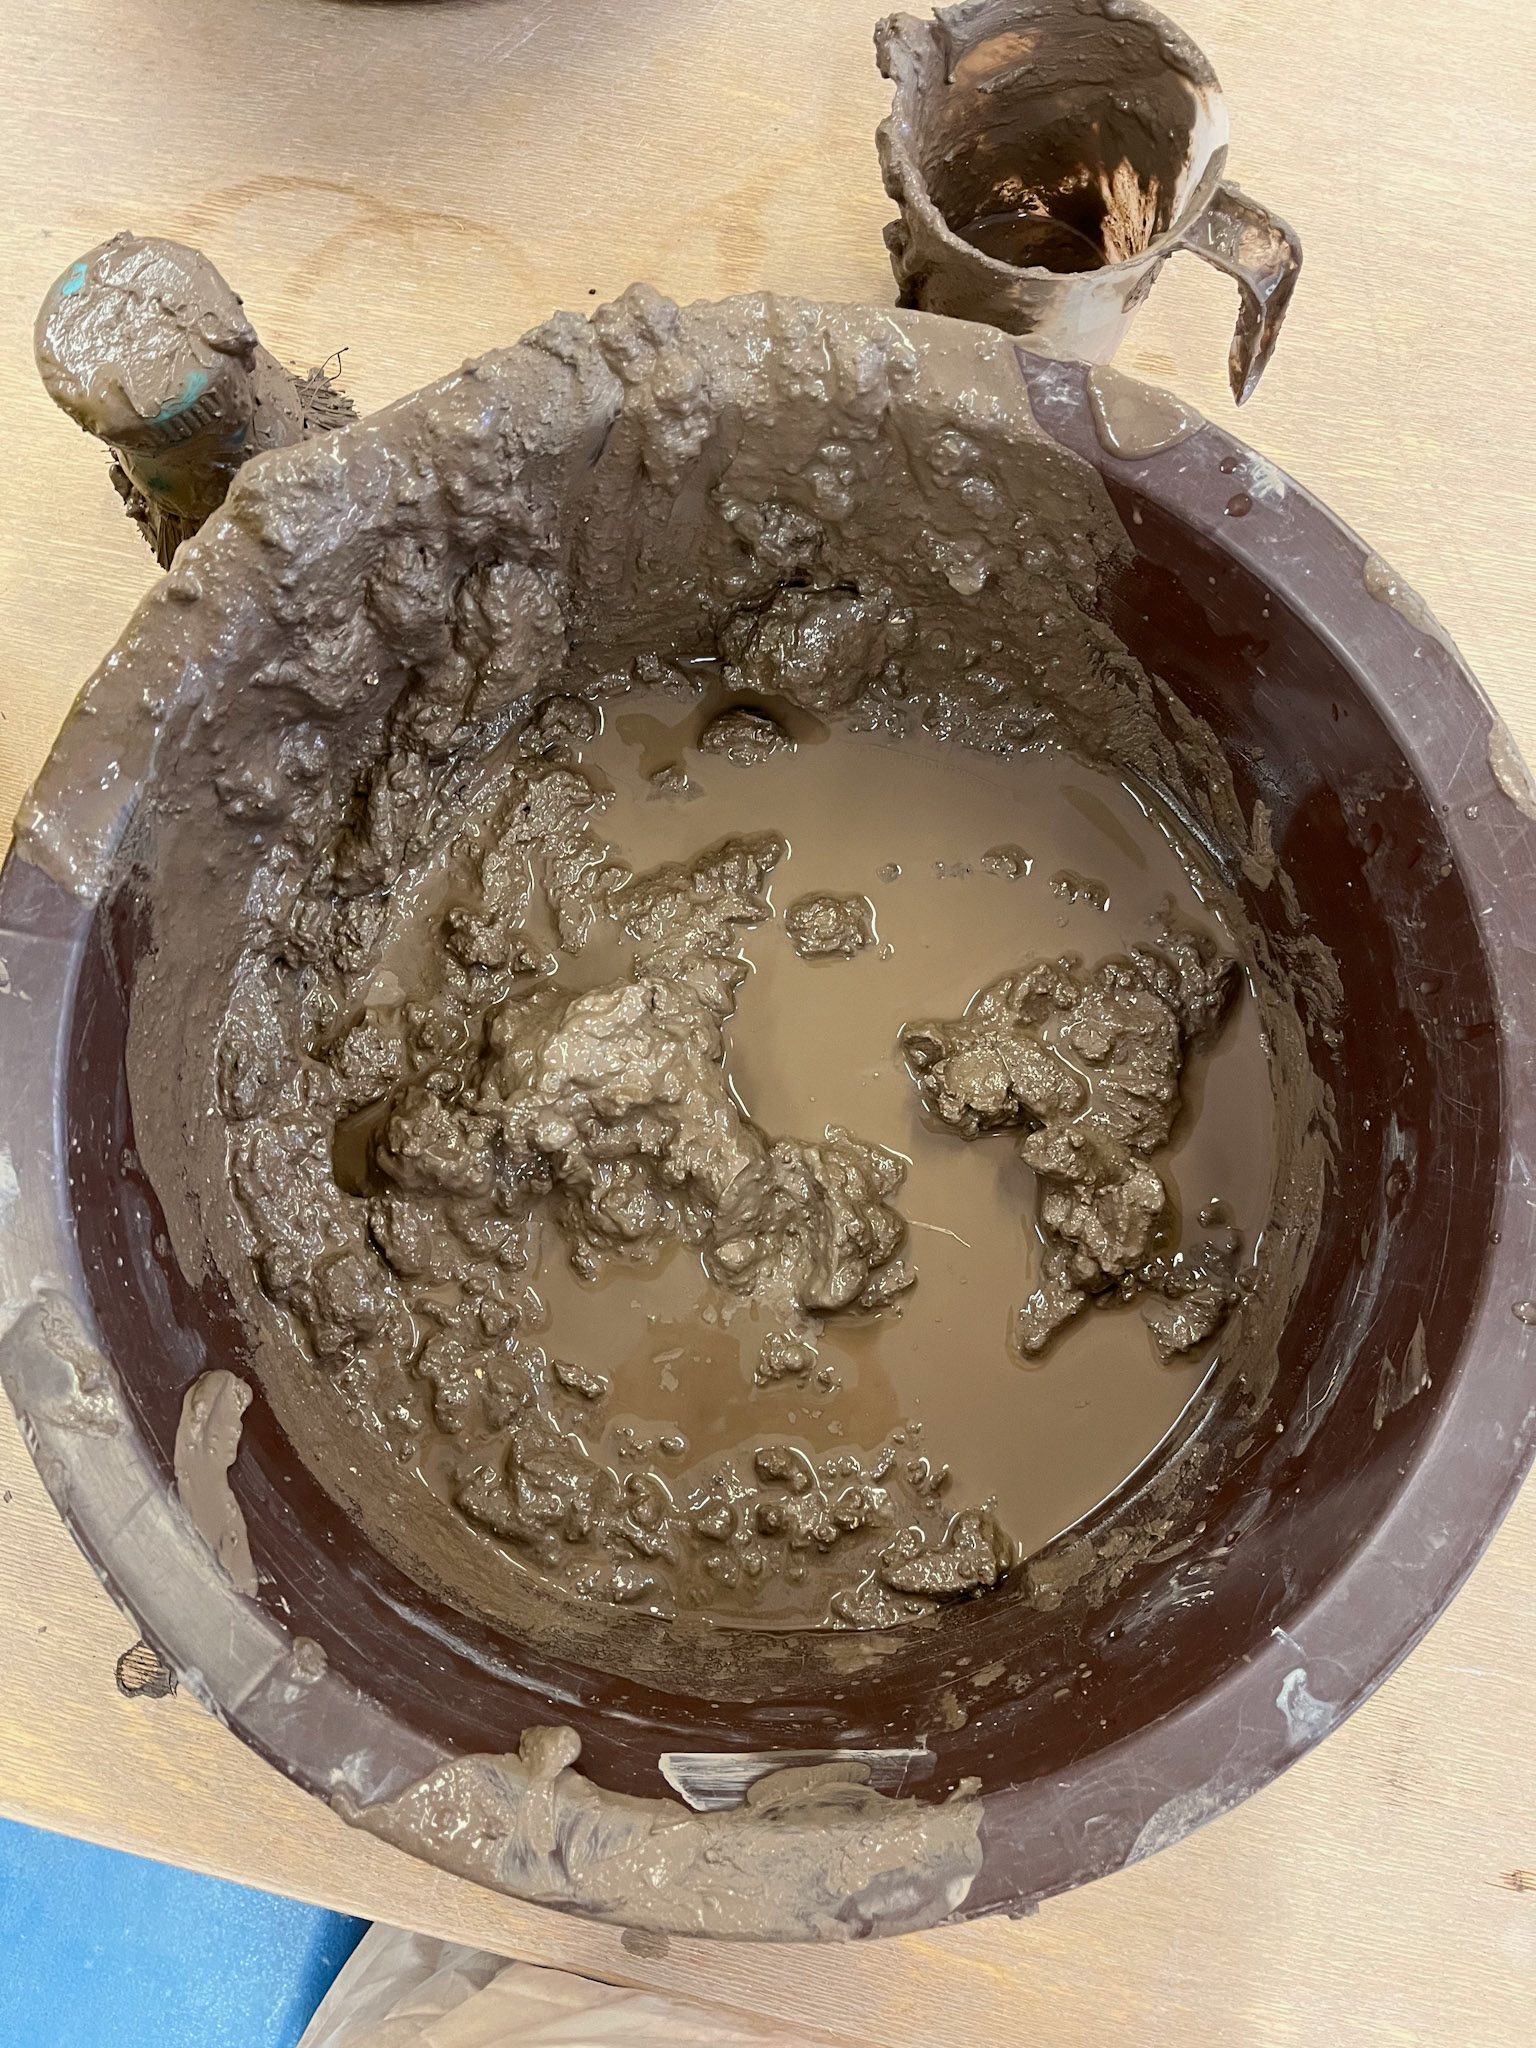
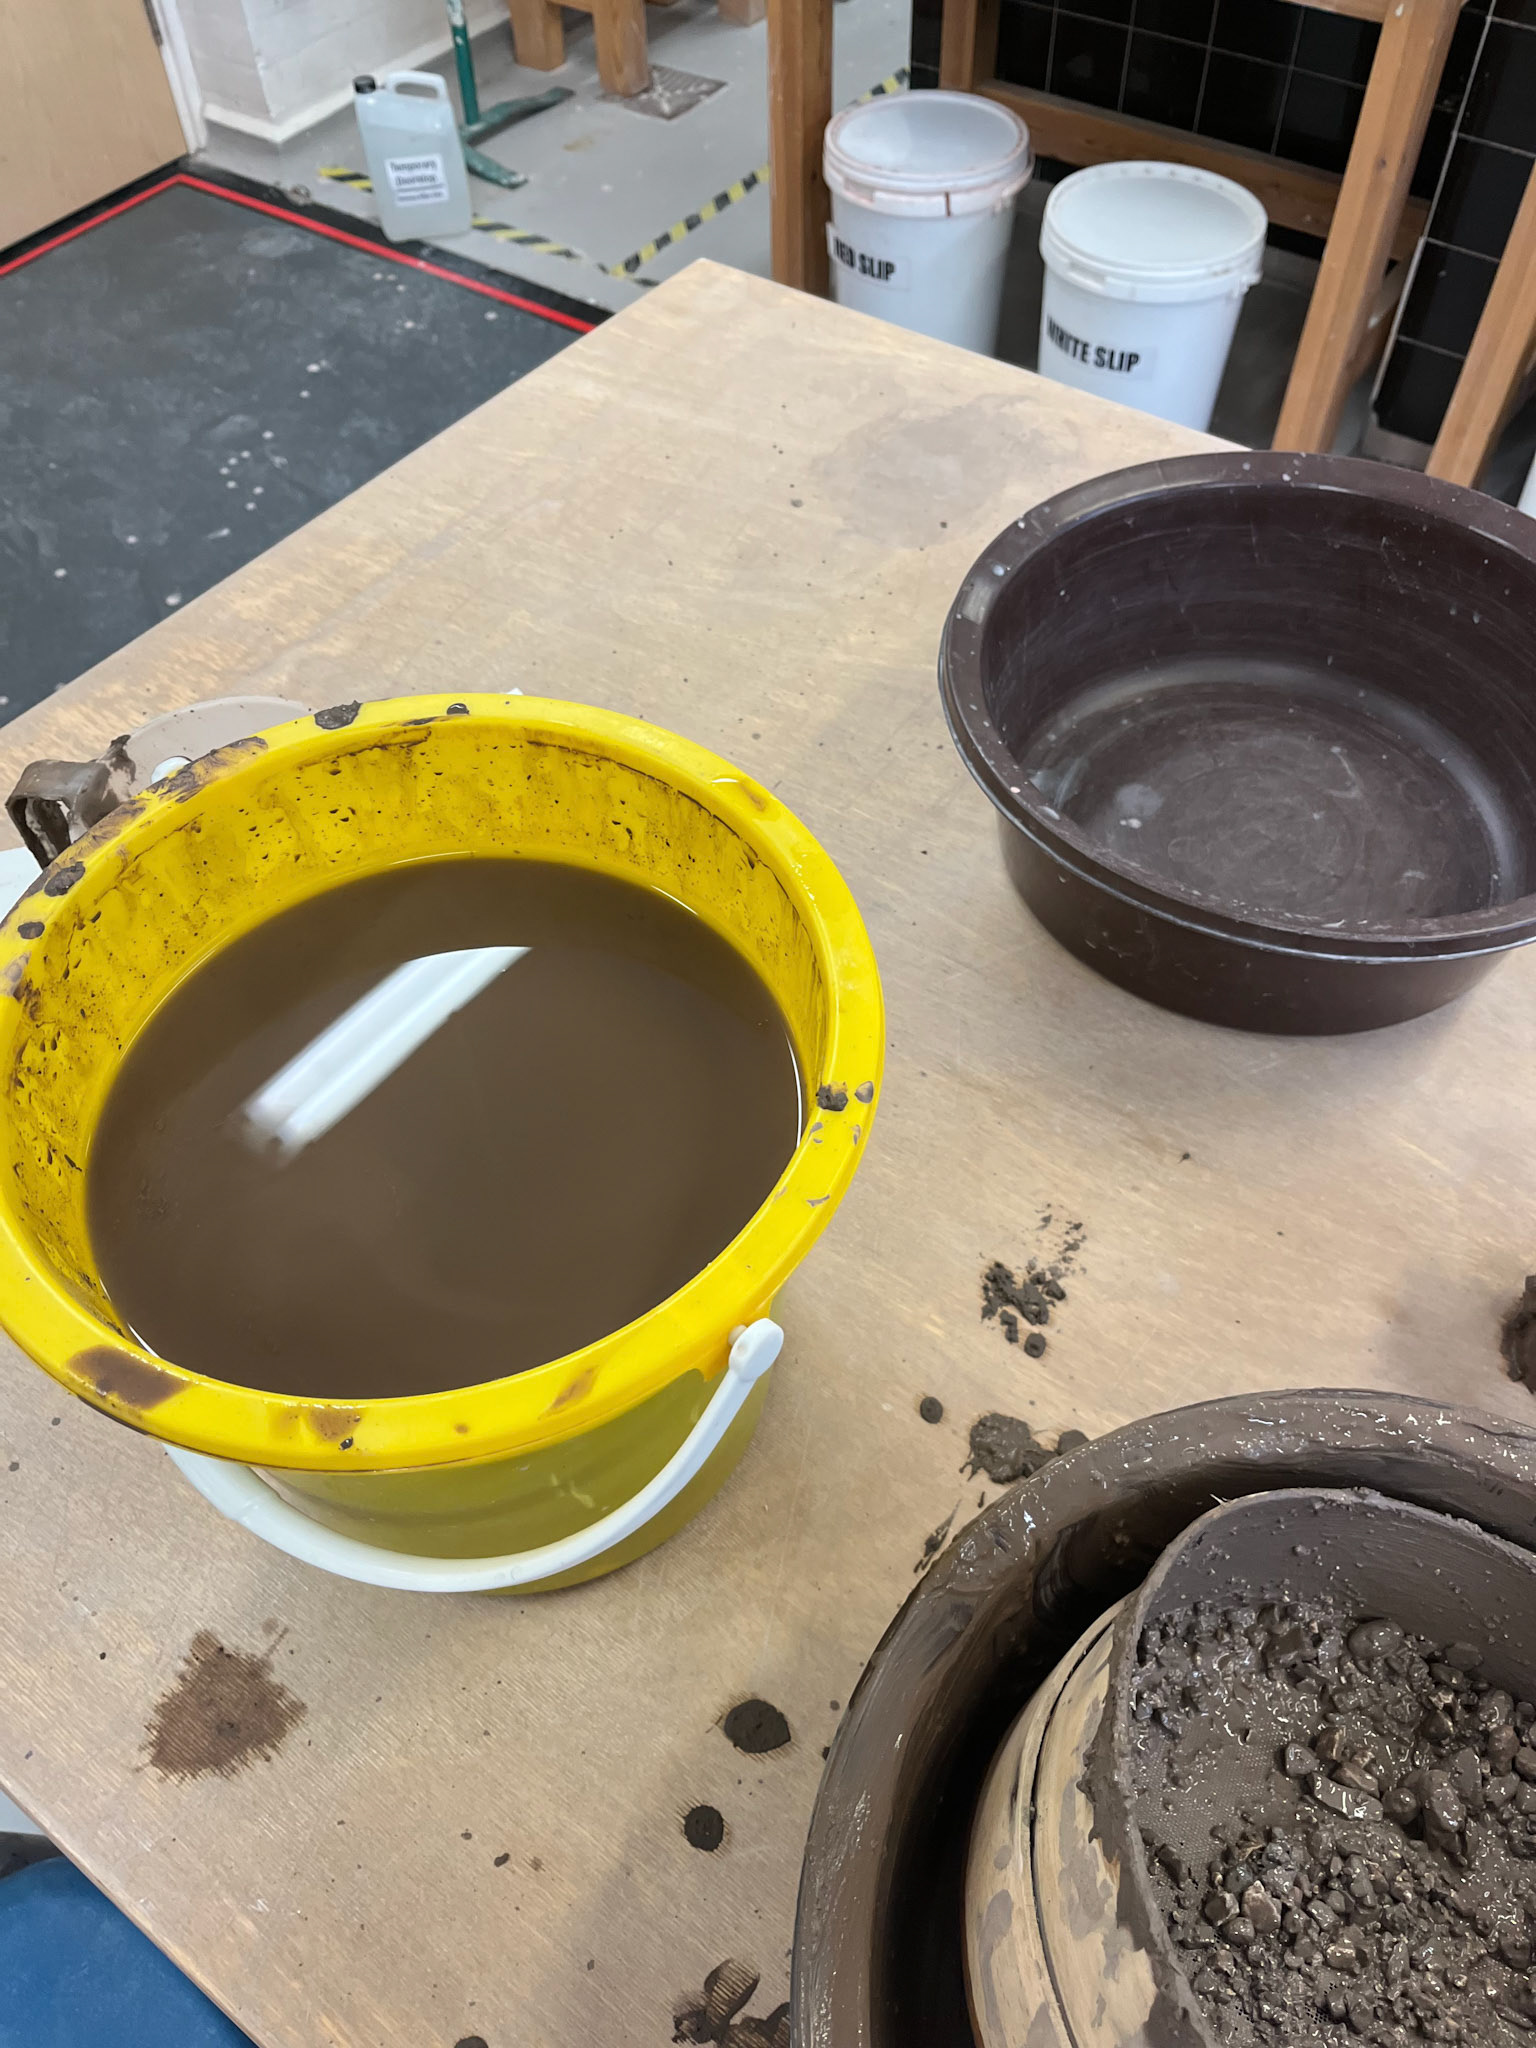
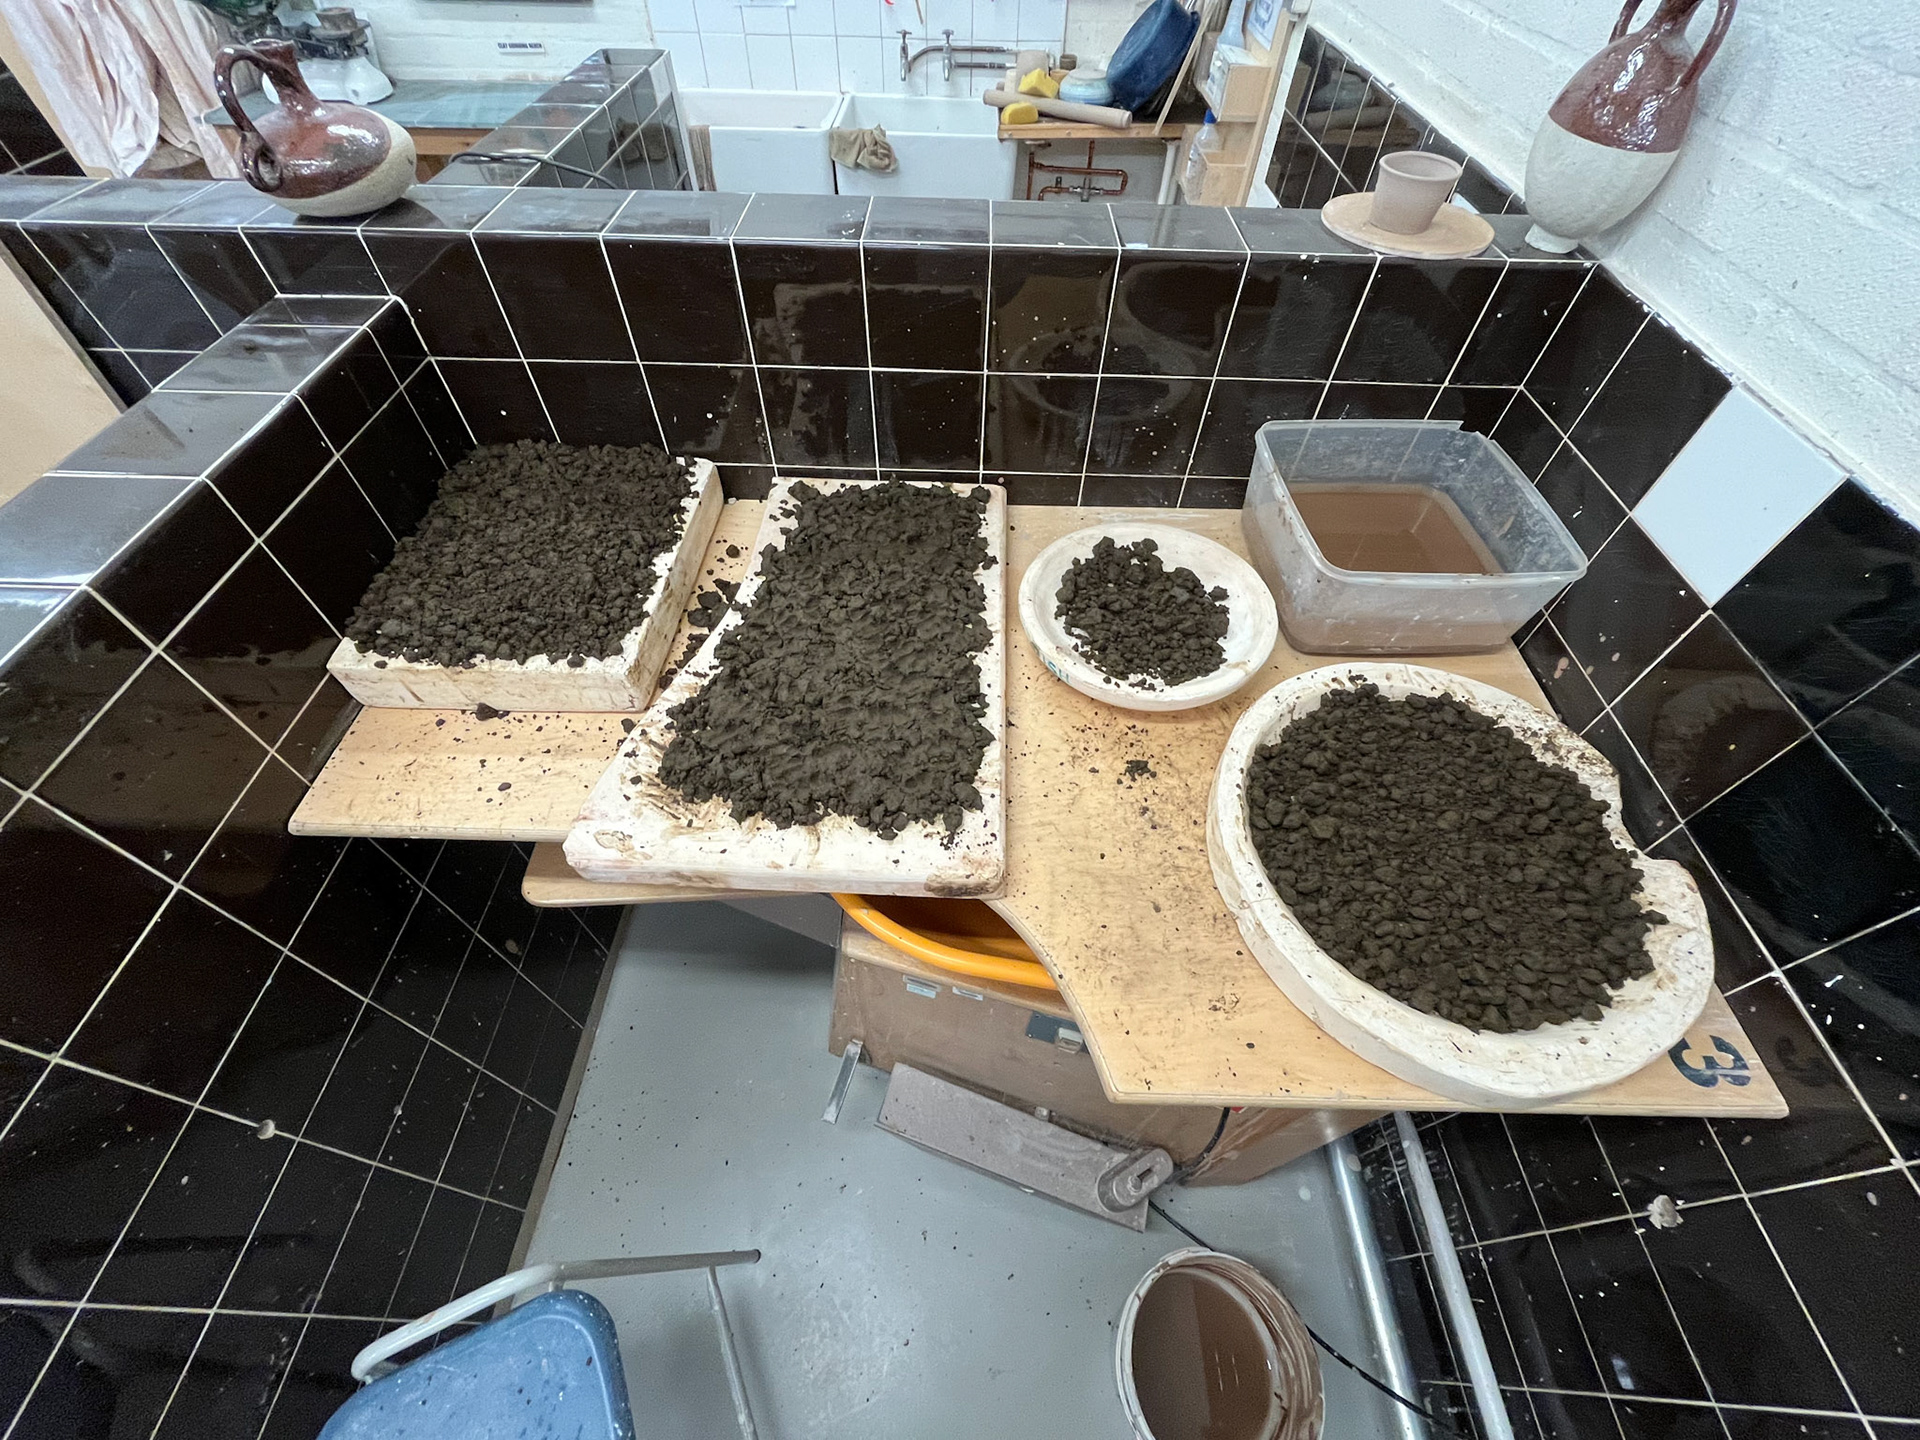
Processing Clay
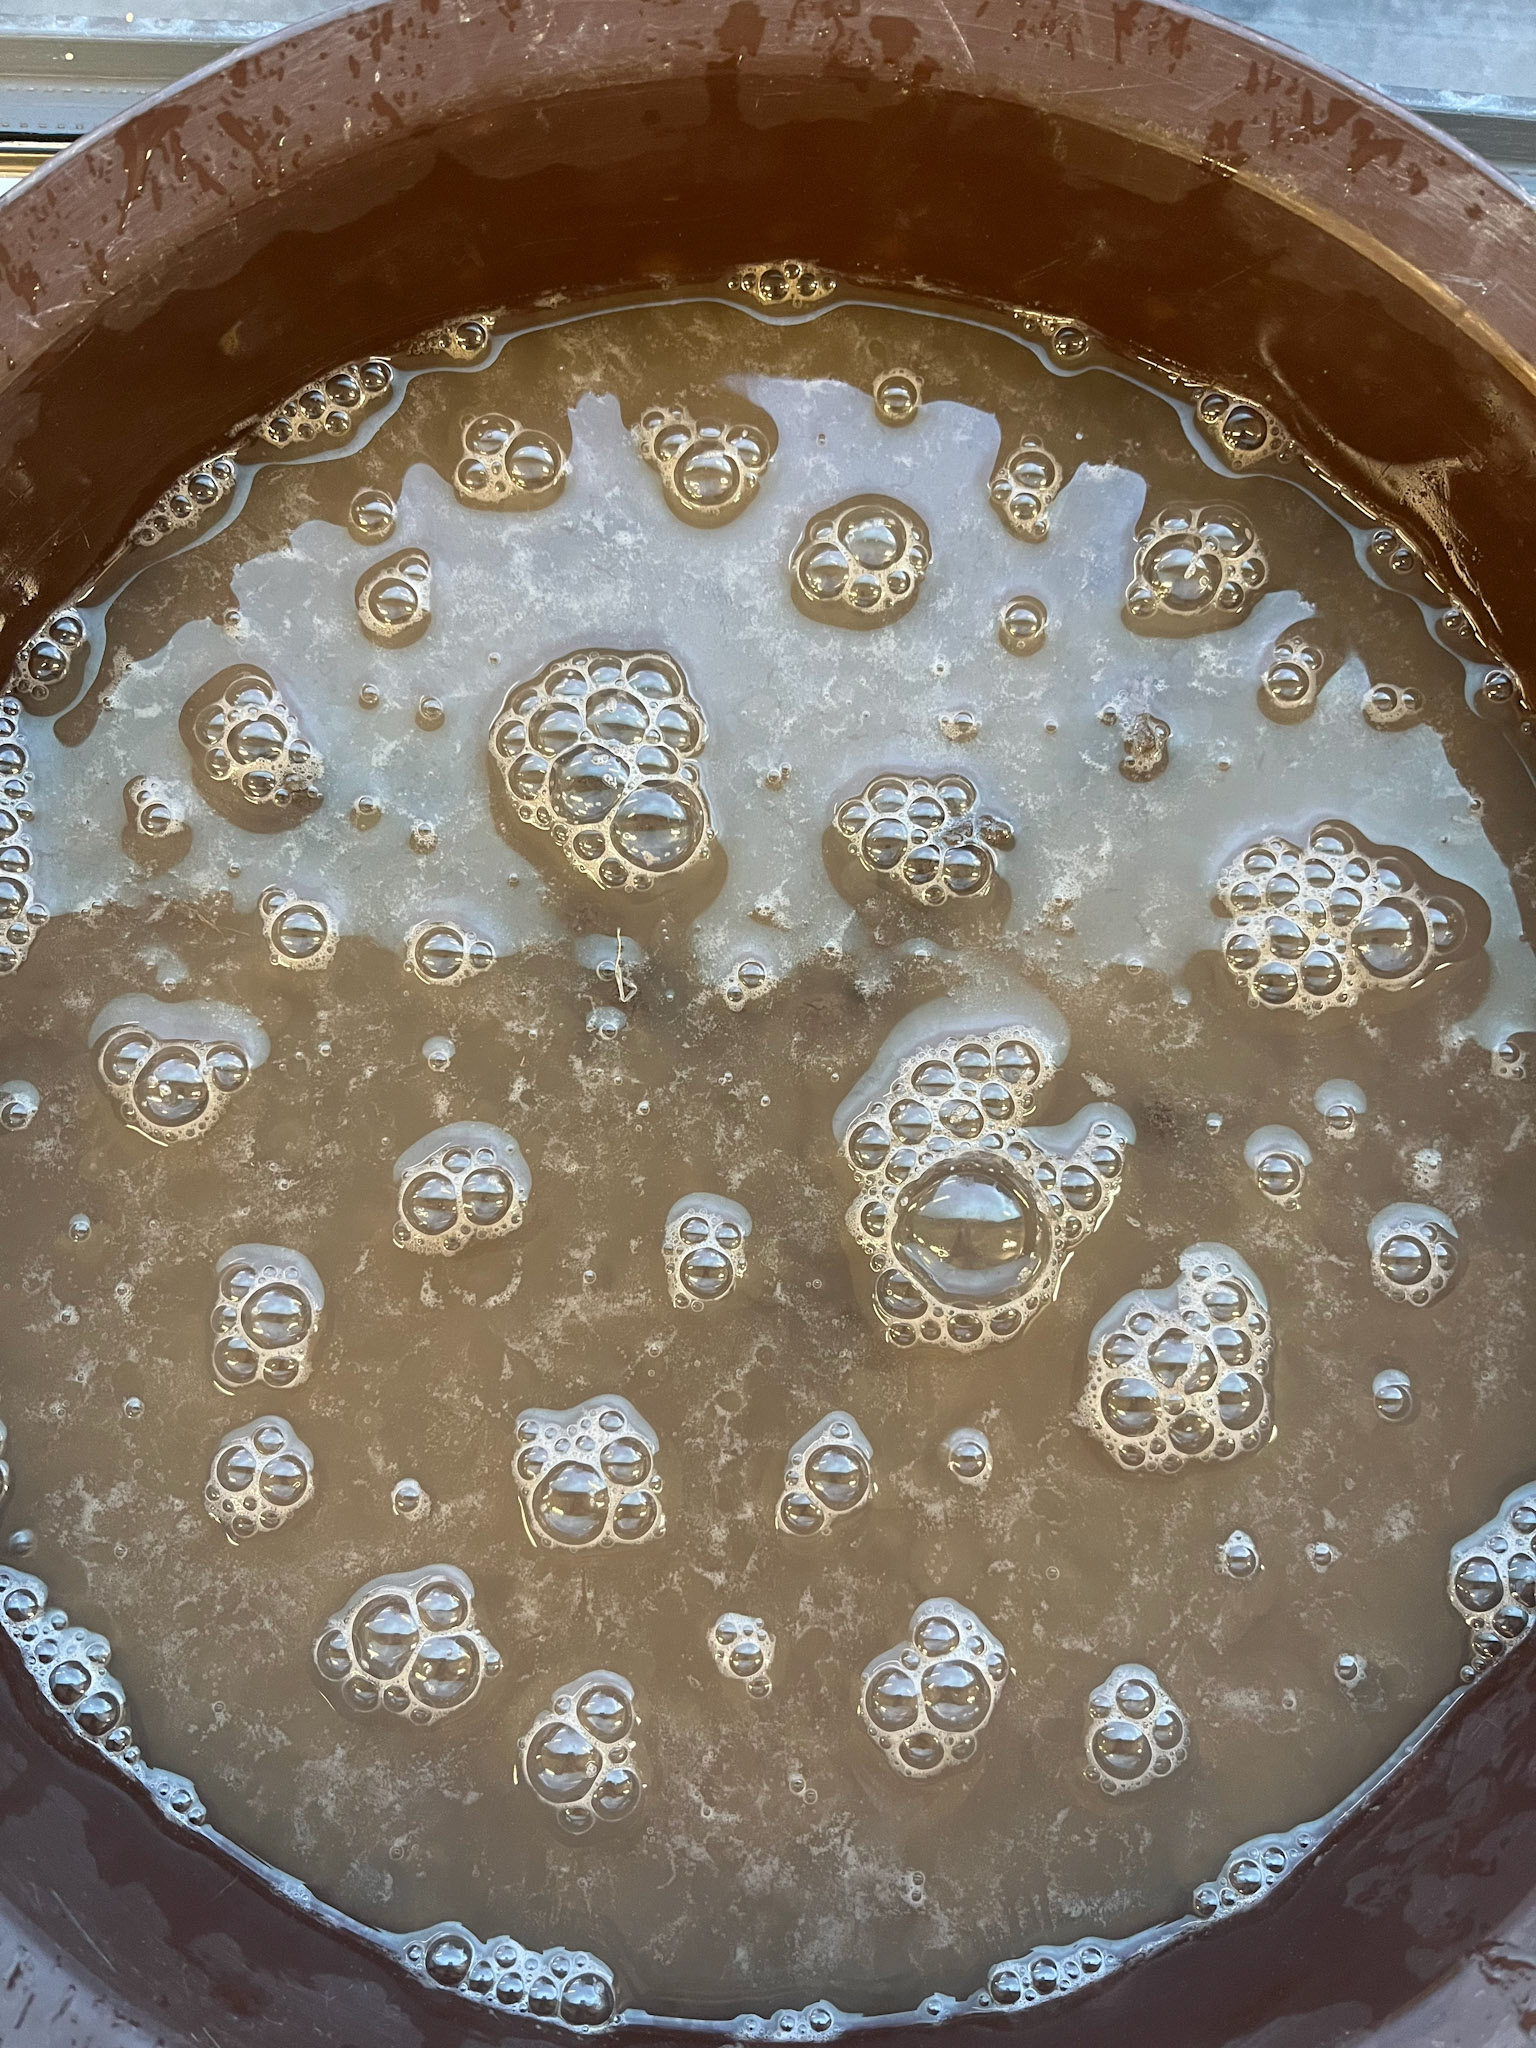
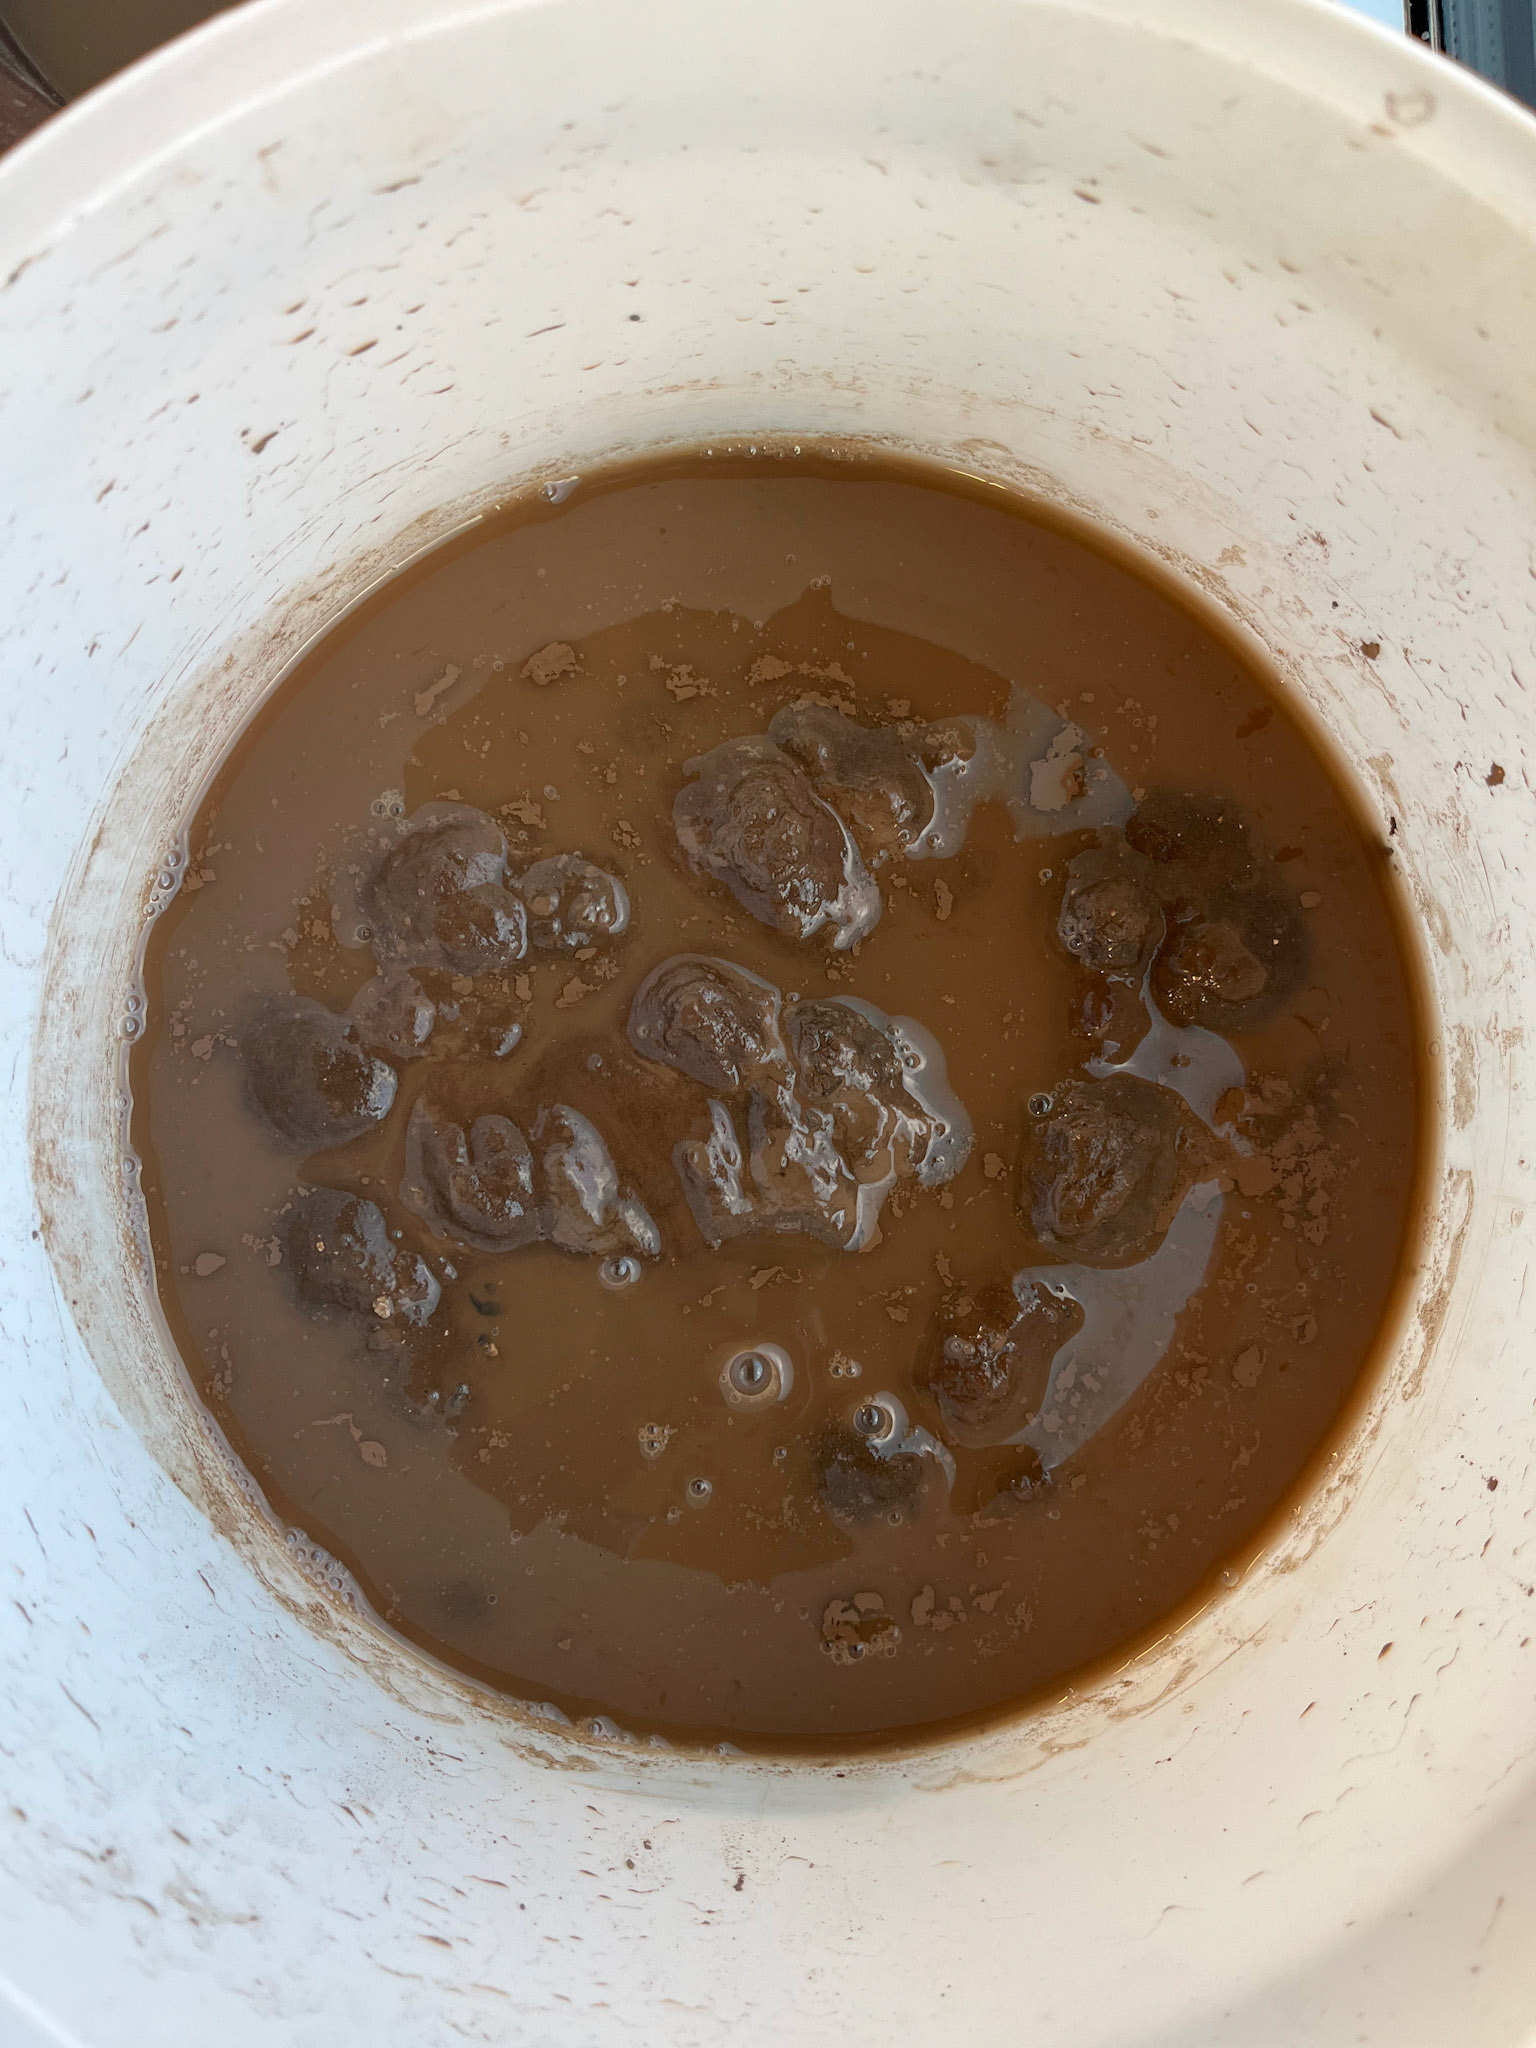
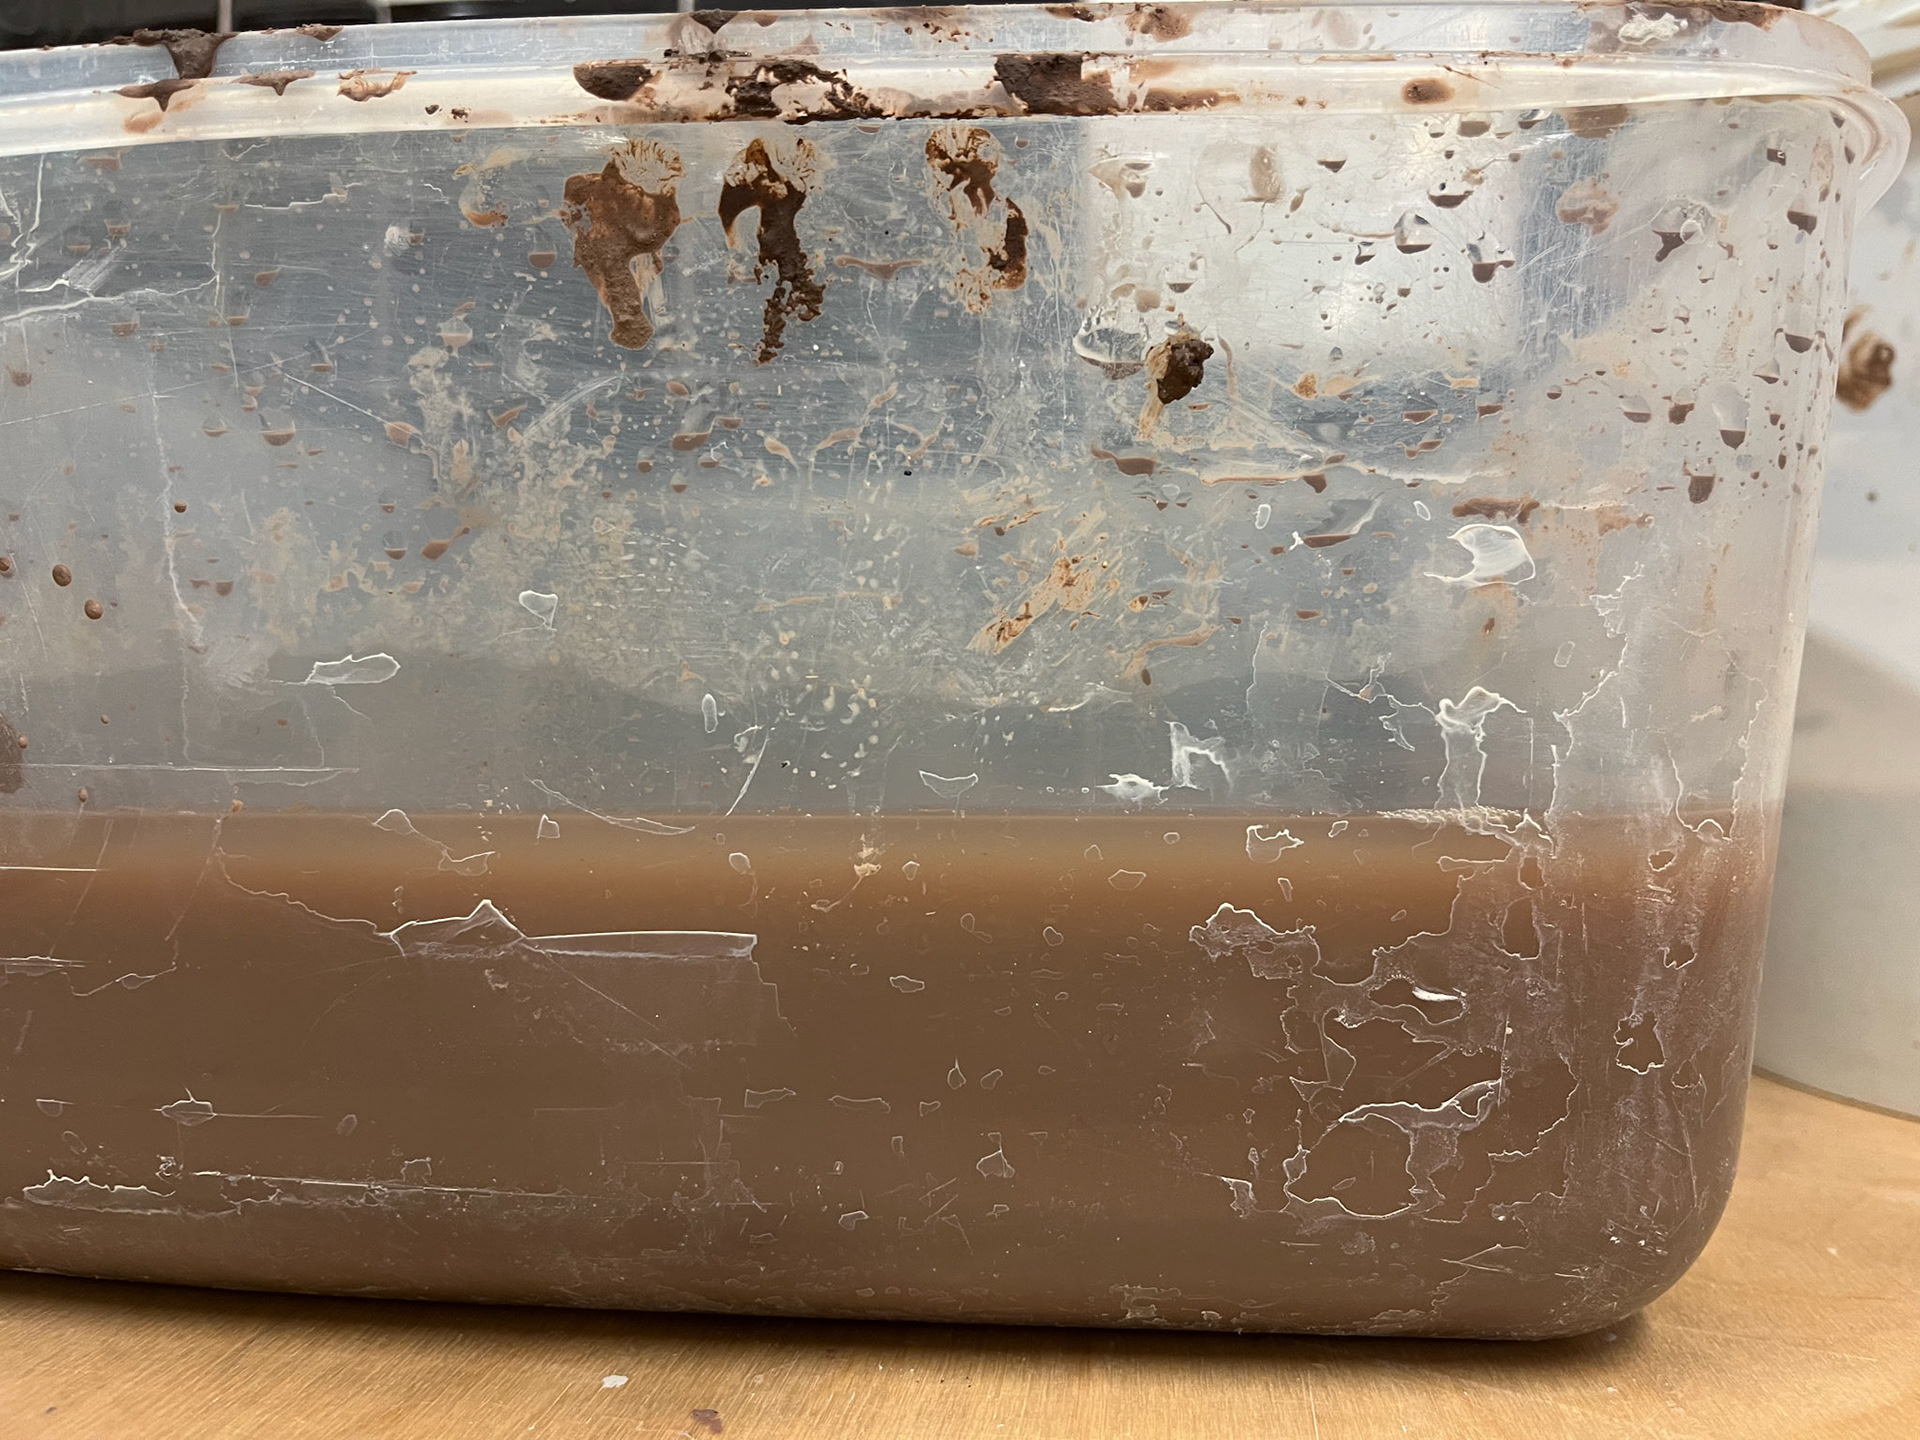
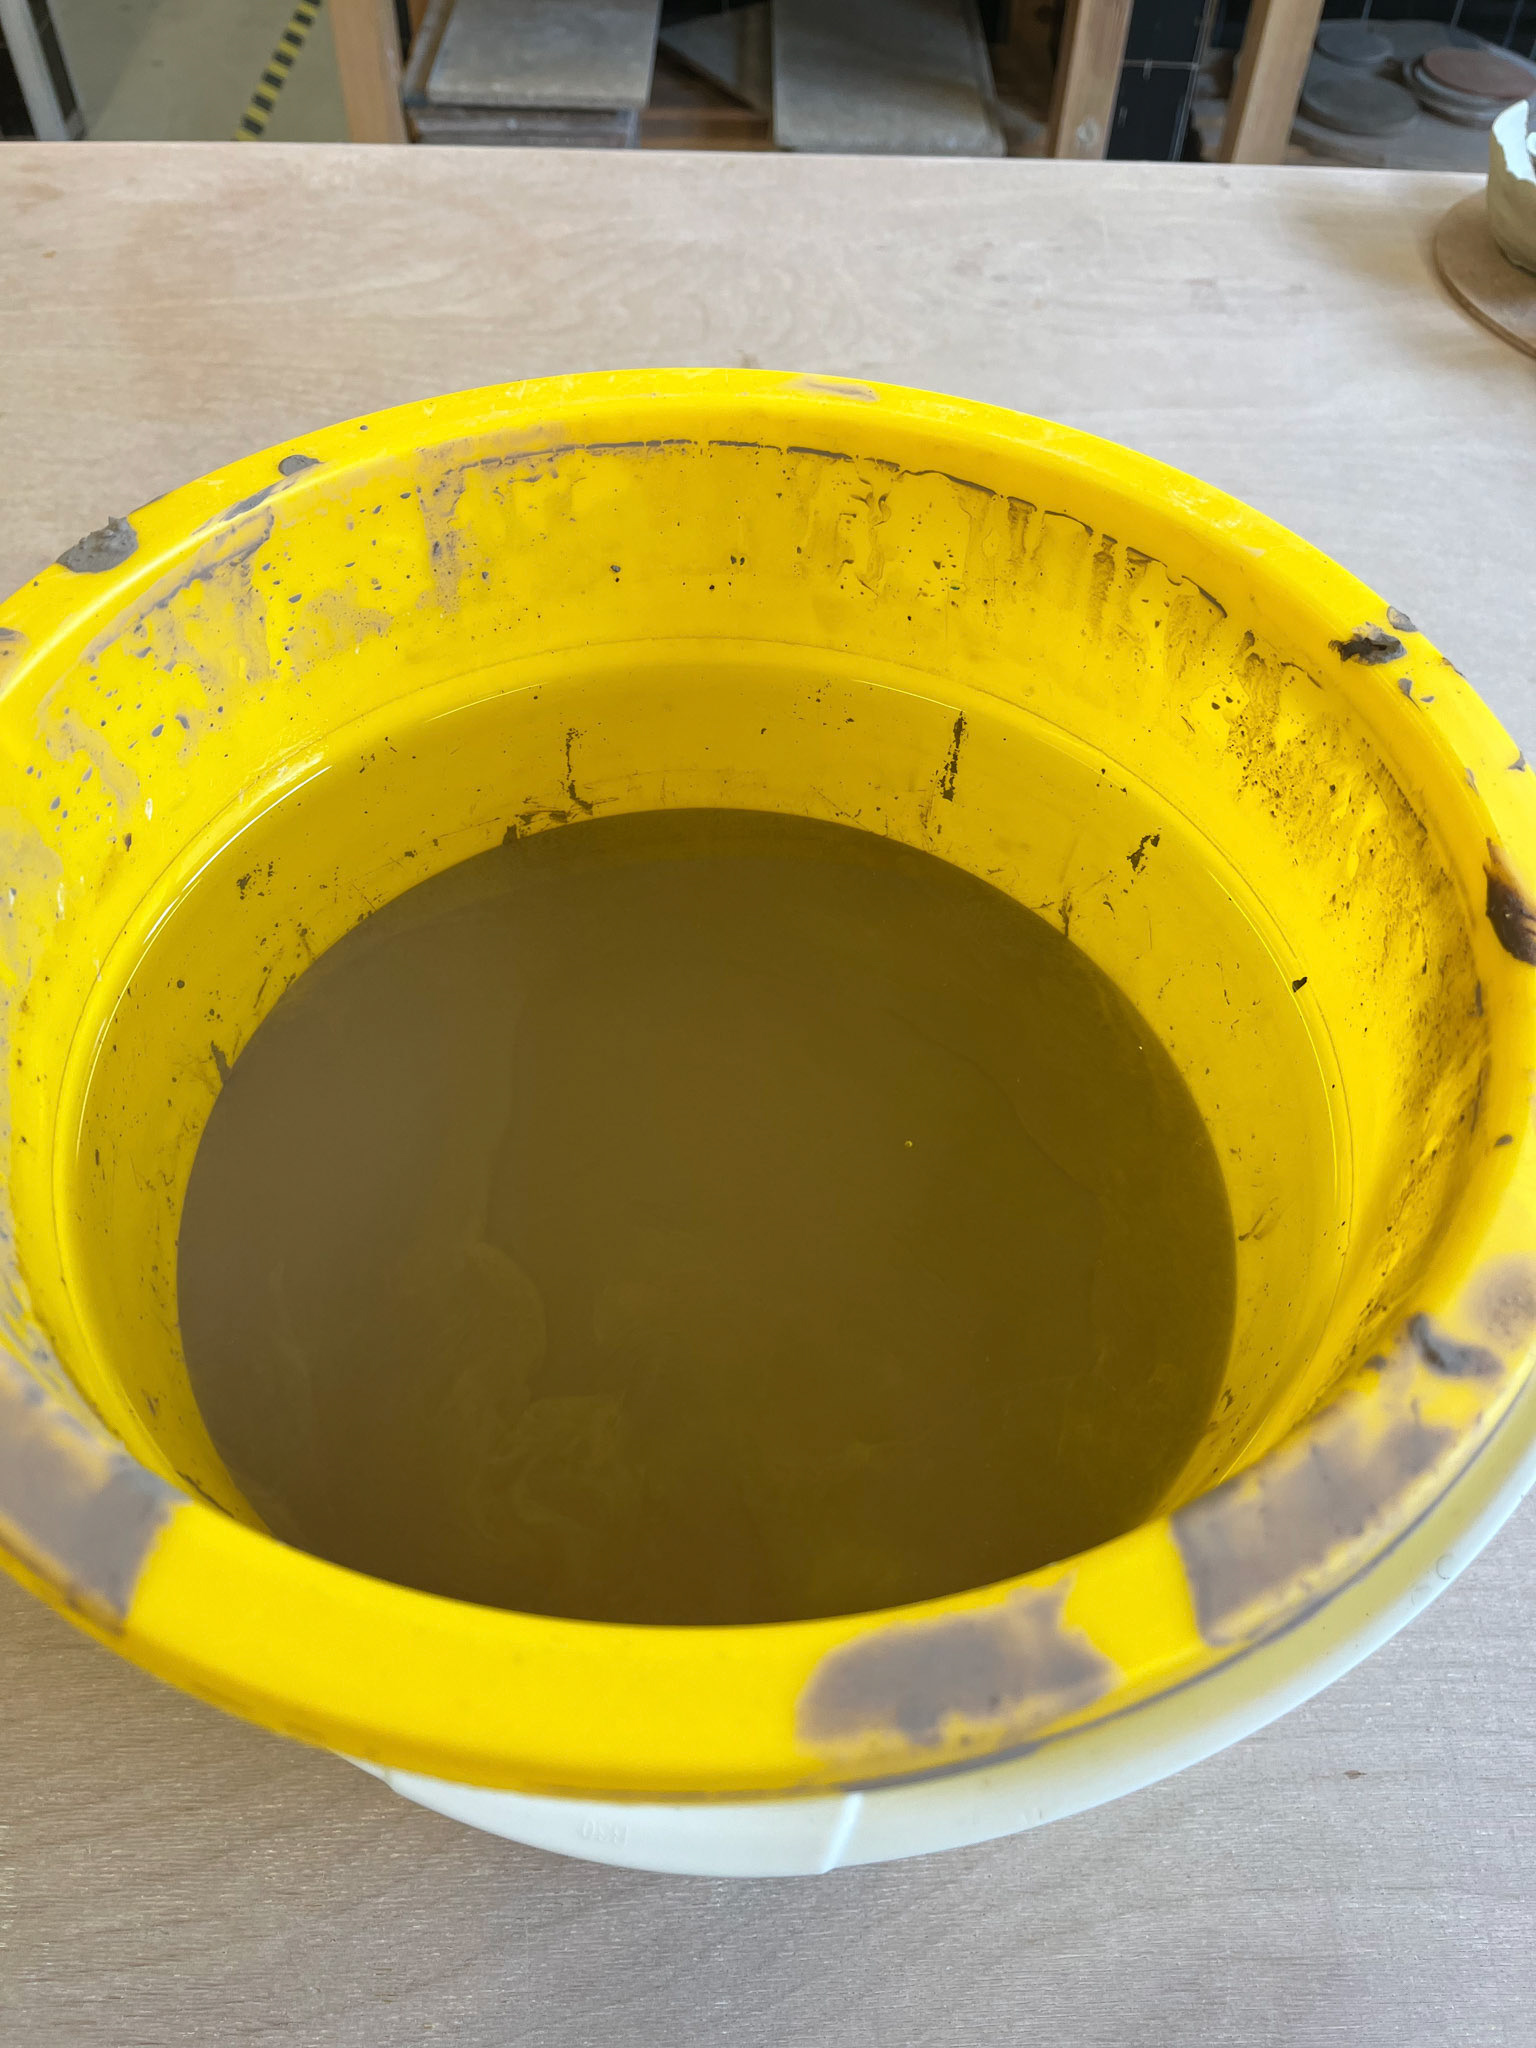
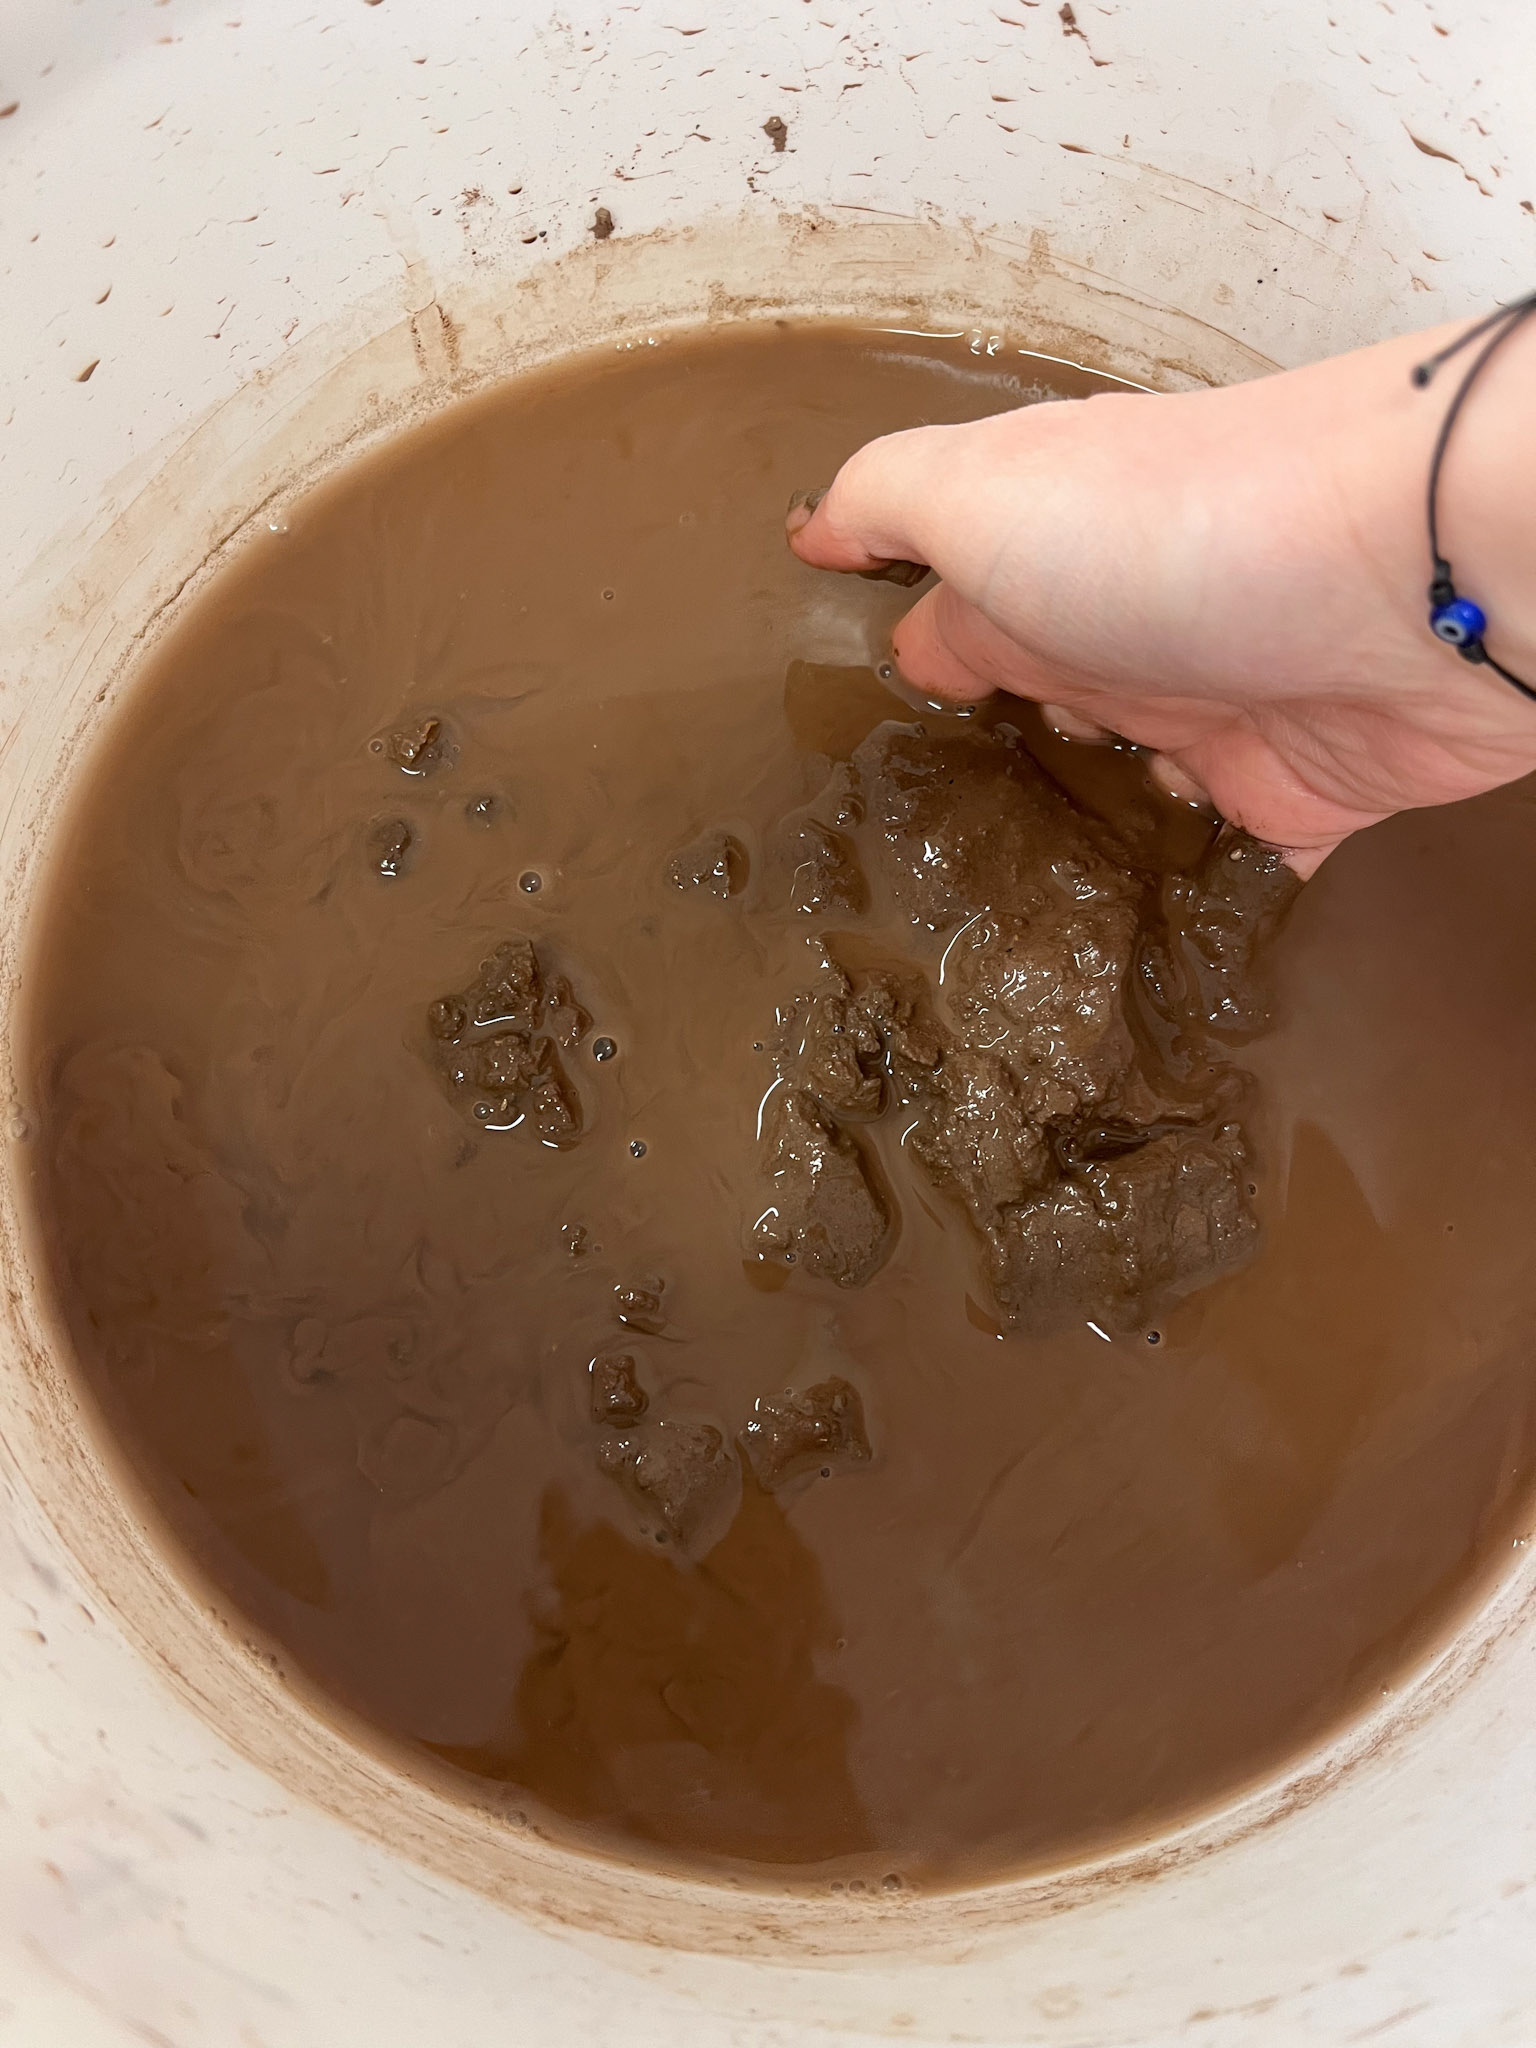
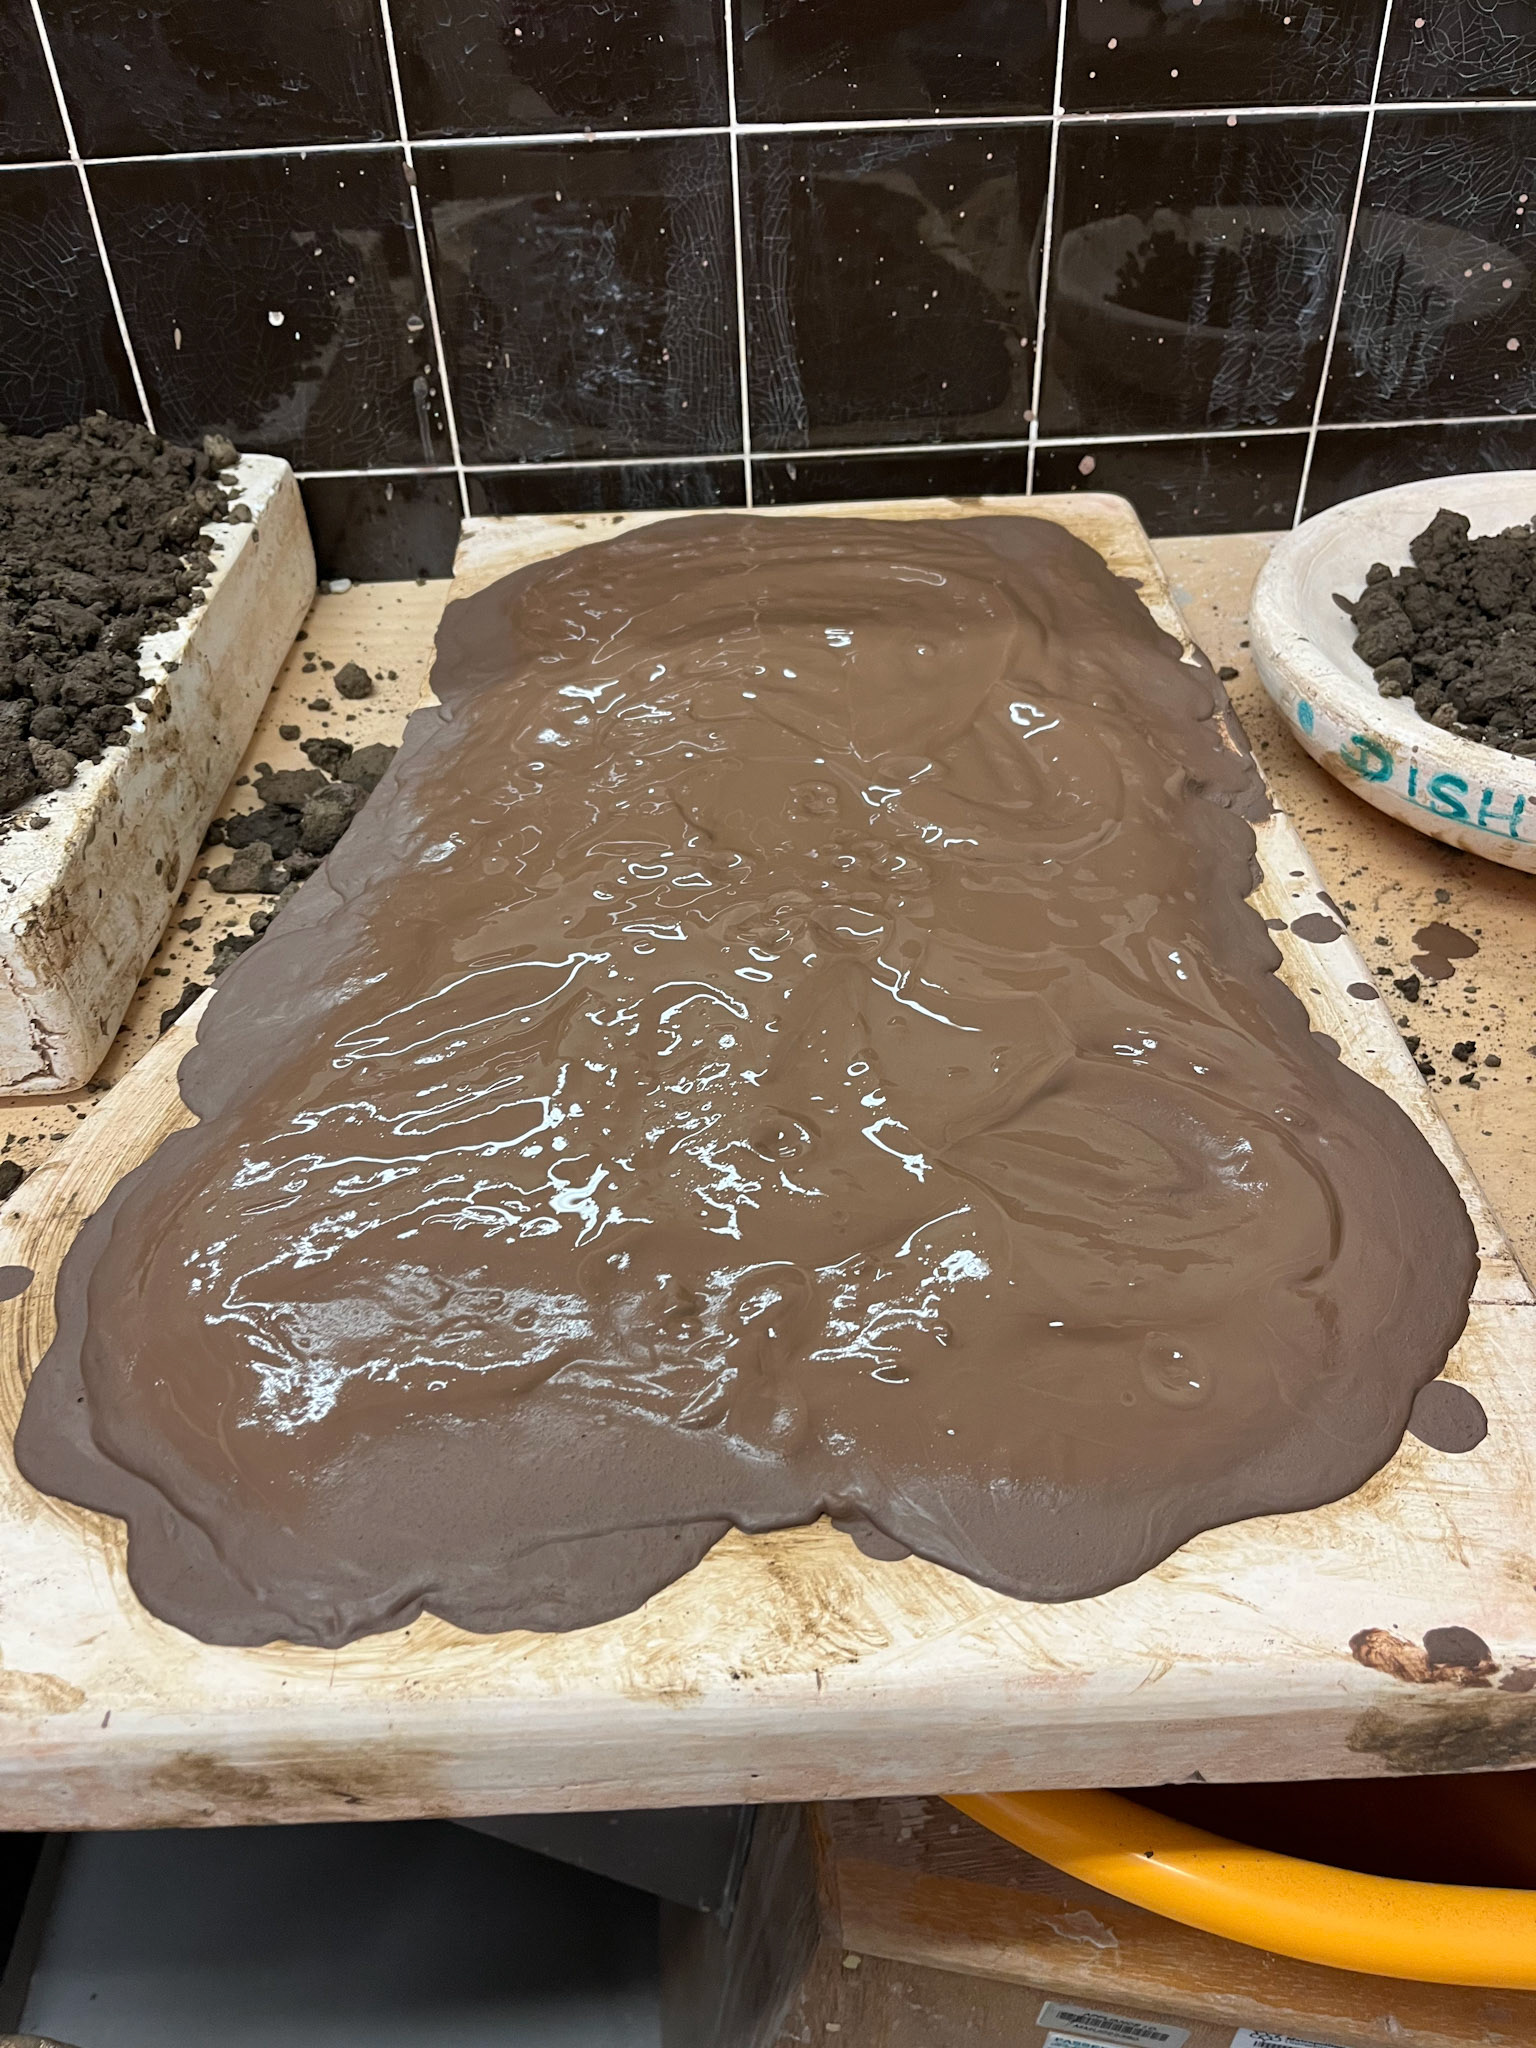
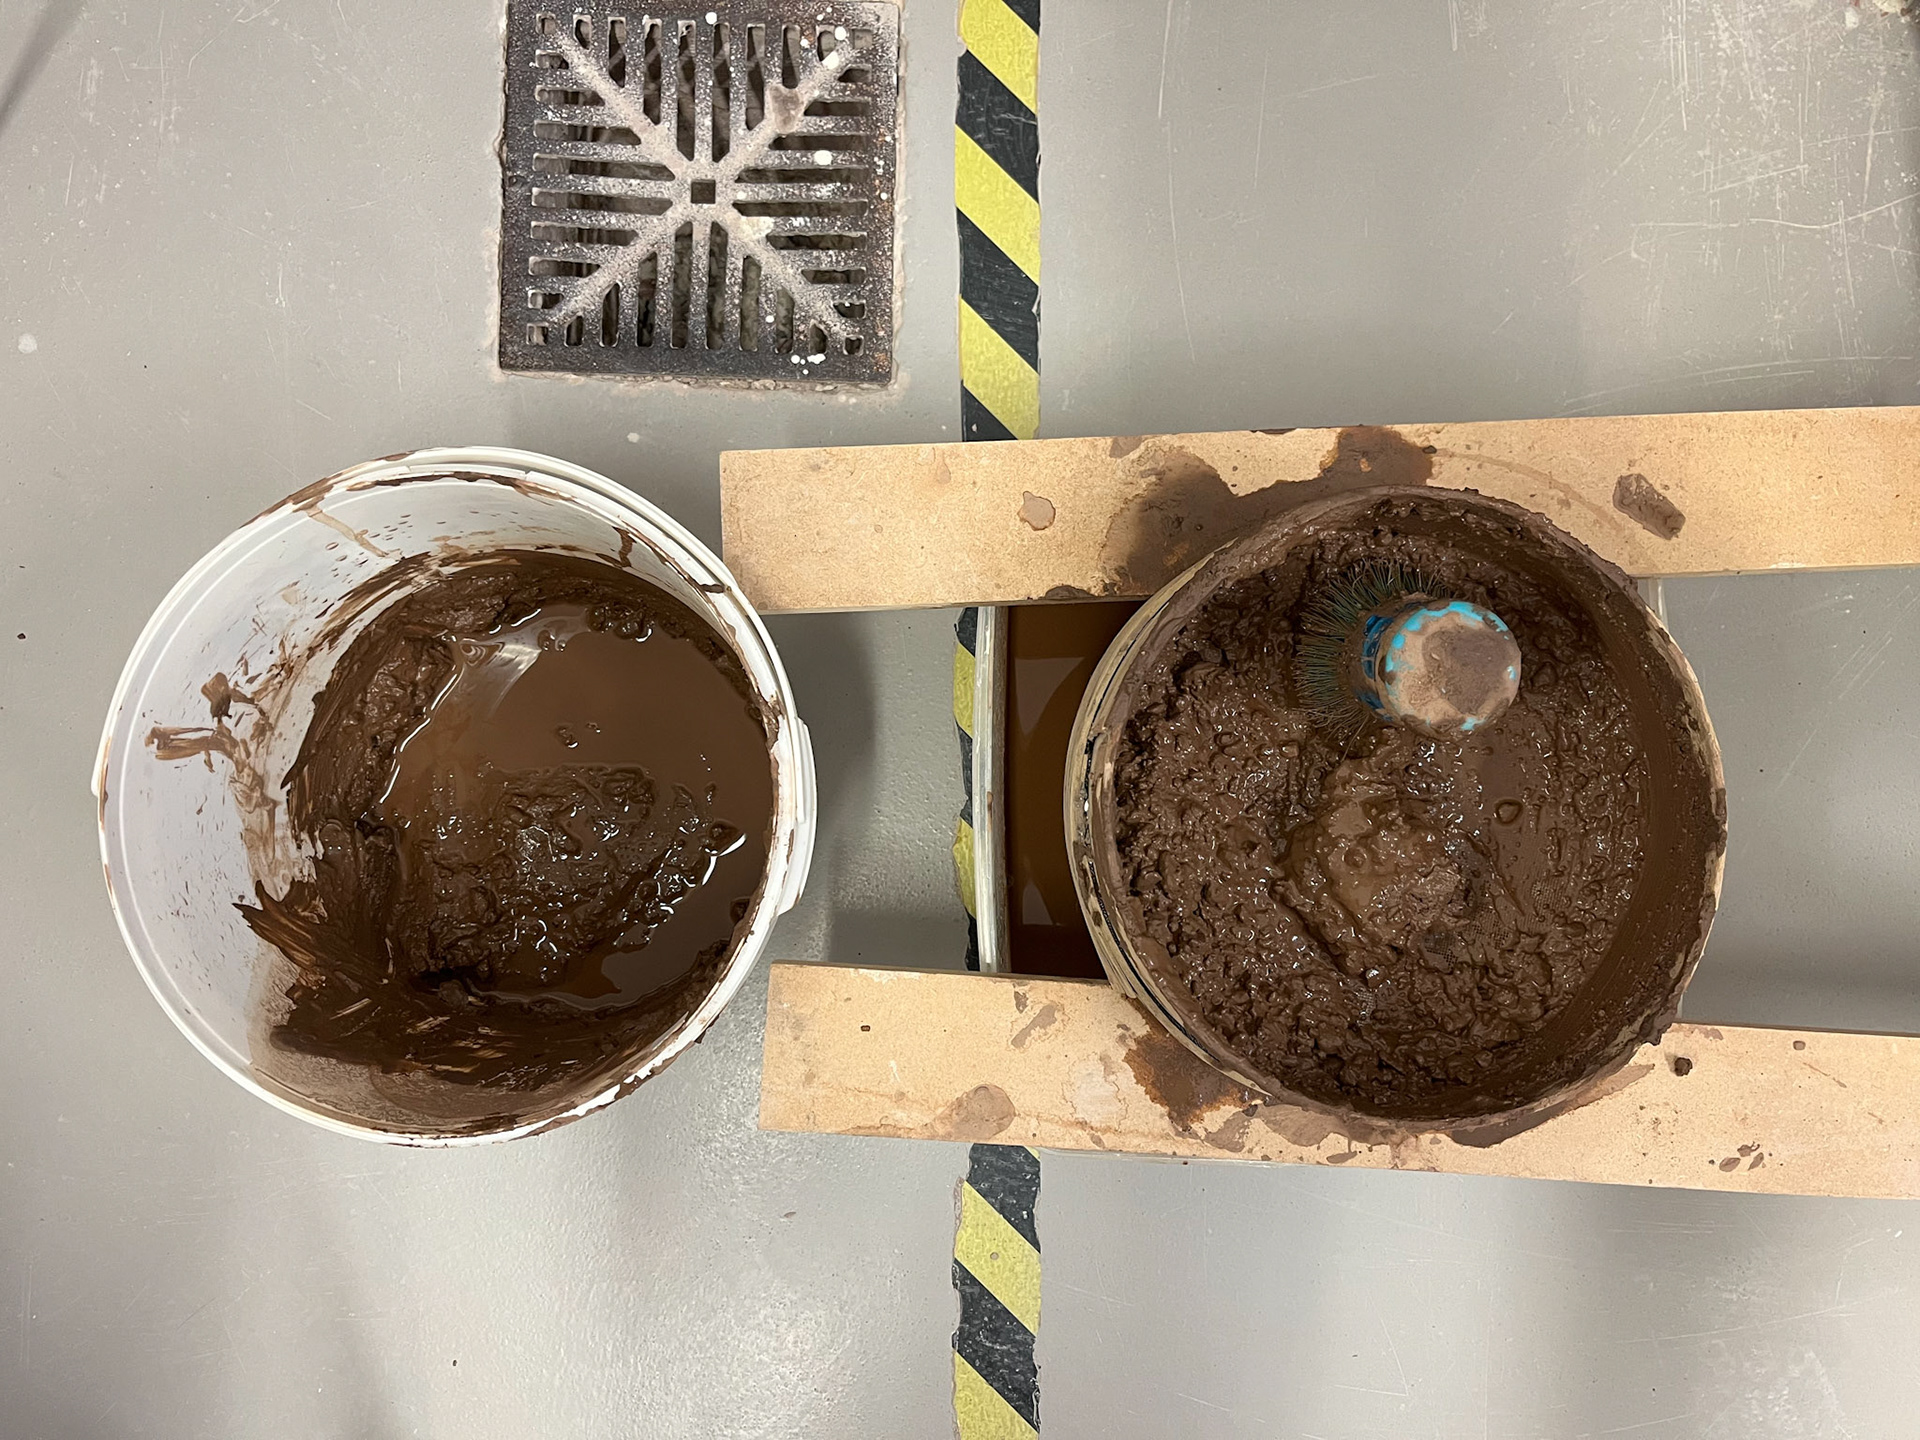
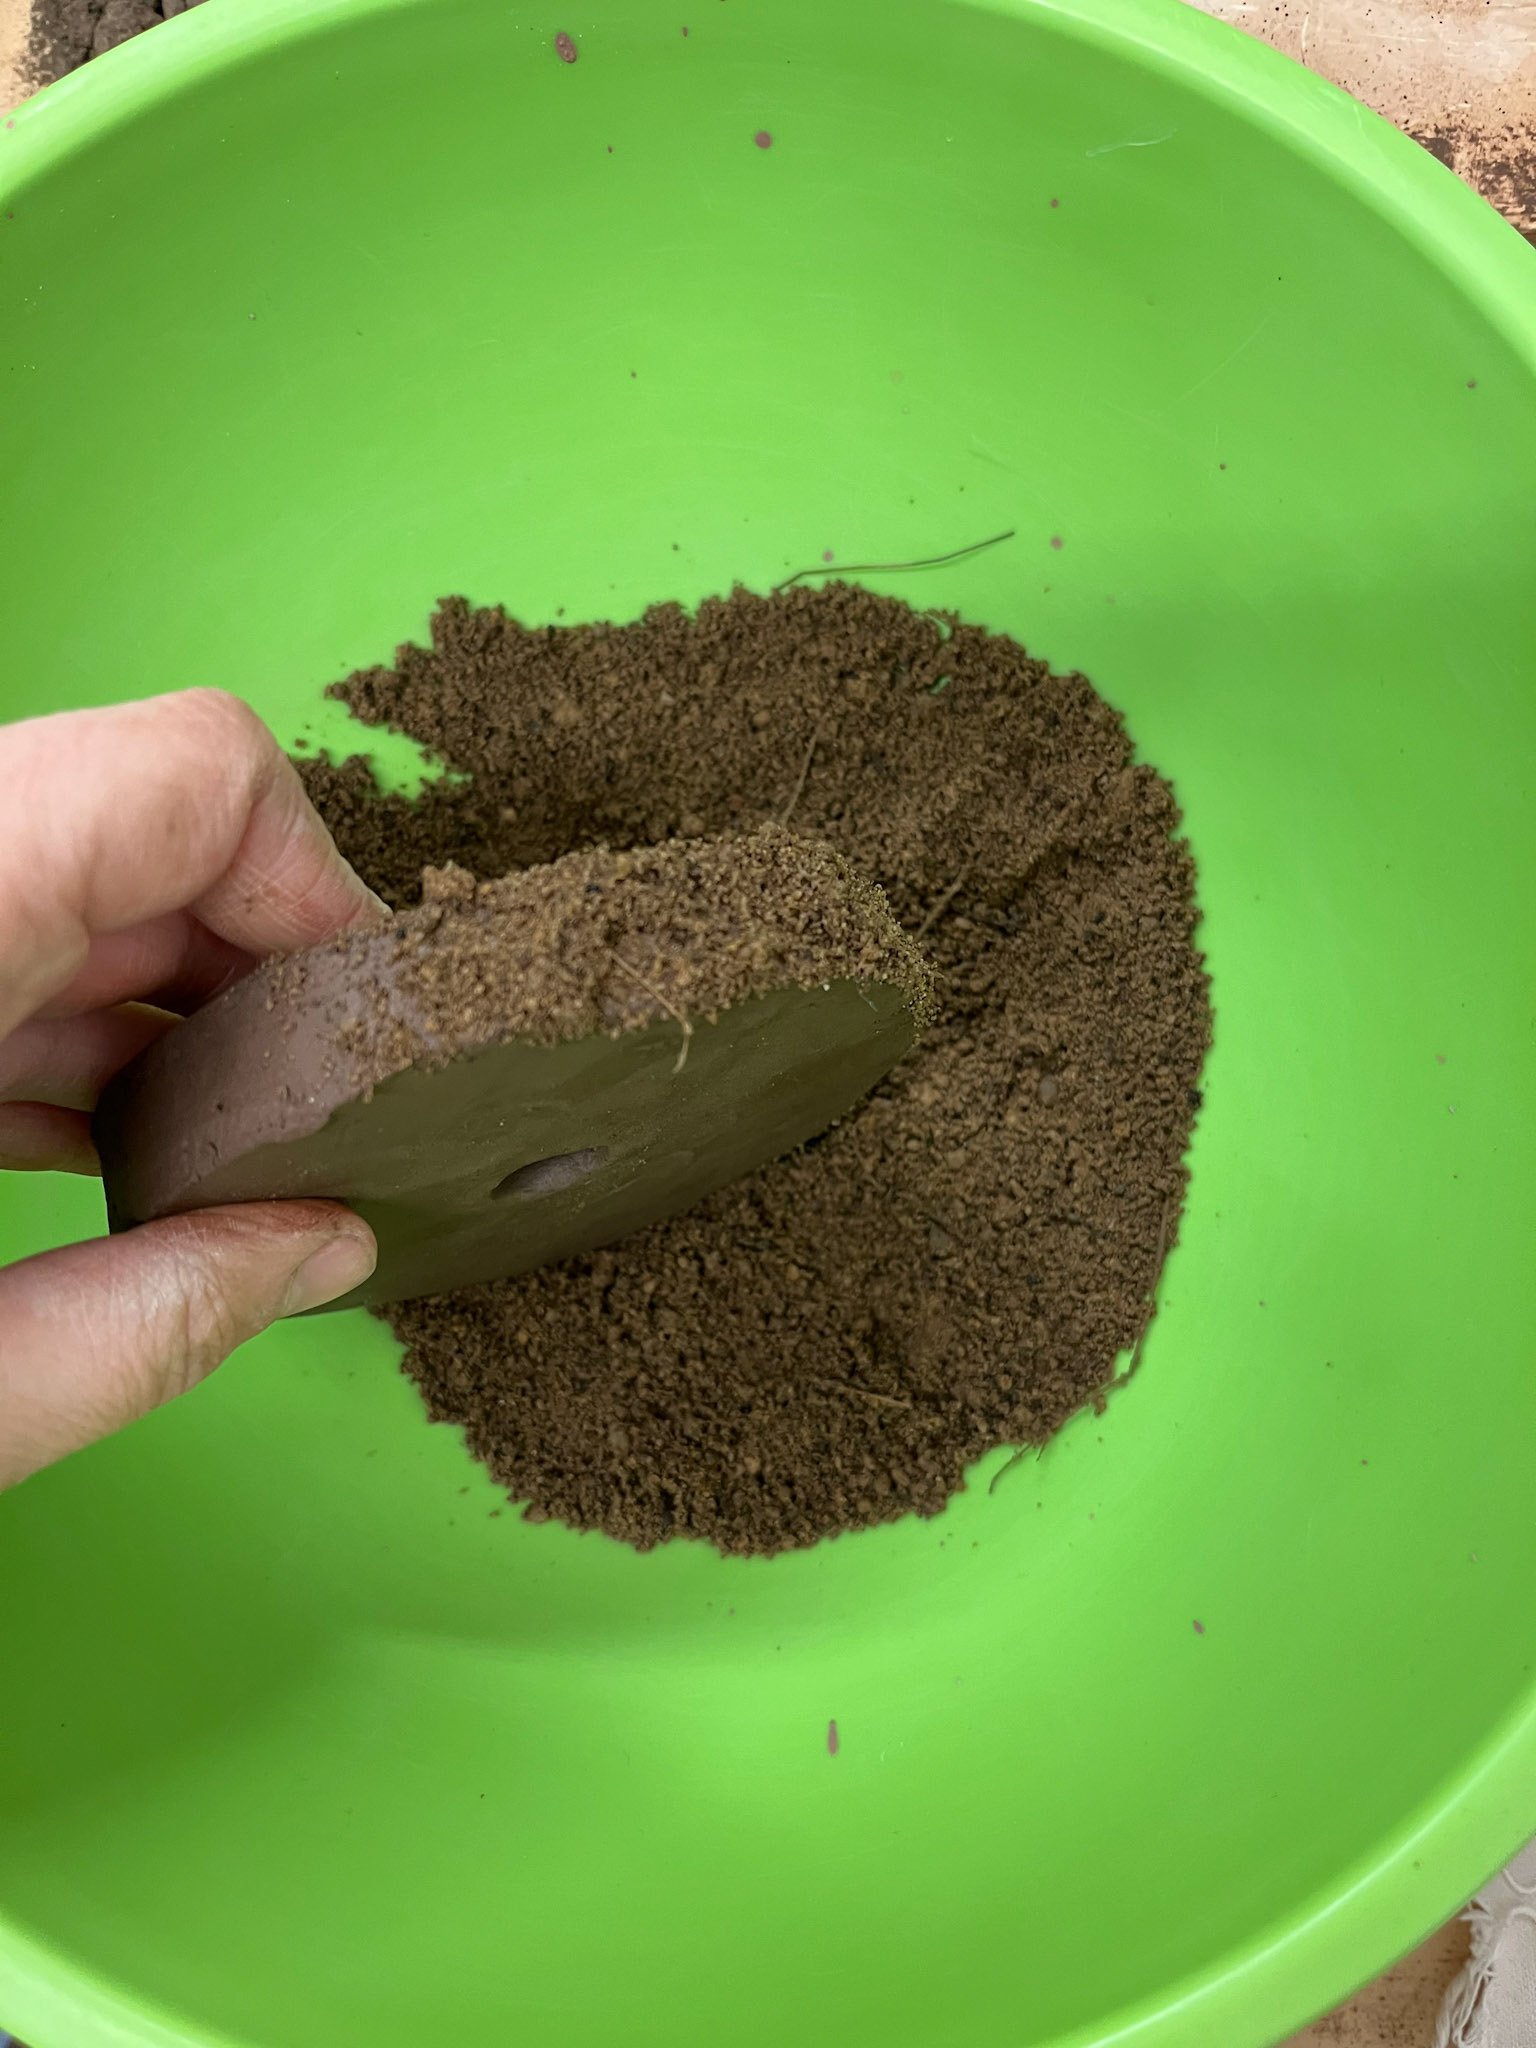
The journey of processing clay is as much a part of my resolution as the work itself. The clay processing is a form of the work I am creating, and I respect and cherish it as much as I do the finalised product. Processing this clay is optional, and in many cases, clay that is dug from the ground is suitable and malleable to work with without having to do lots of processing. However, the clay, especially that which is dug from caves, can have a very high water content due to the water buildup in the caves. Wild clay can also be full of lots of unwanted debris, such as large stones or live organisms, which will need sieving out.
When starting to process wild clay, I read an article by Slovenian ceramicist Anja Slapnicar. This guide was very helpful in learning about the different ways of wild clay processing, and from this, I have been able to develop my own ways of processing wild clay. I consider this part of my practice as important as the final outcomes, and have spent time resolving the different ways of processing clay.
The steps that I follow when processing clay are as follows:
Drying out the clay: Breaking...
Soaking in Water: Absorbing...
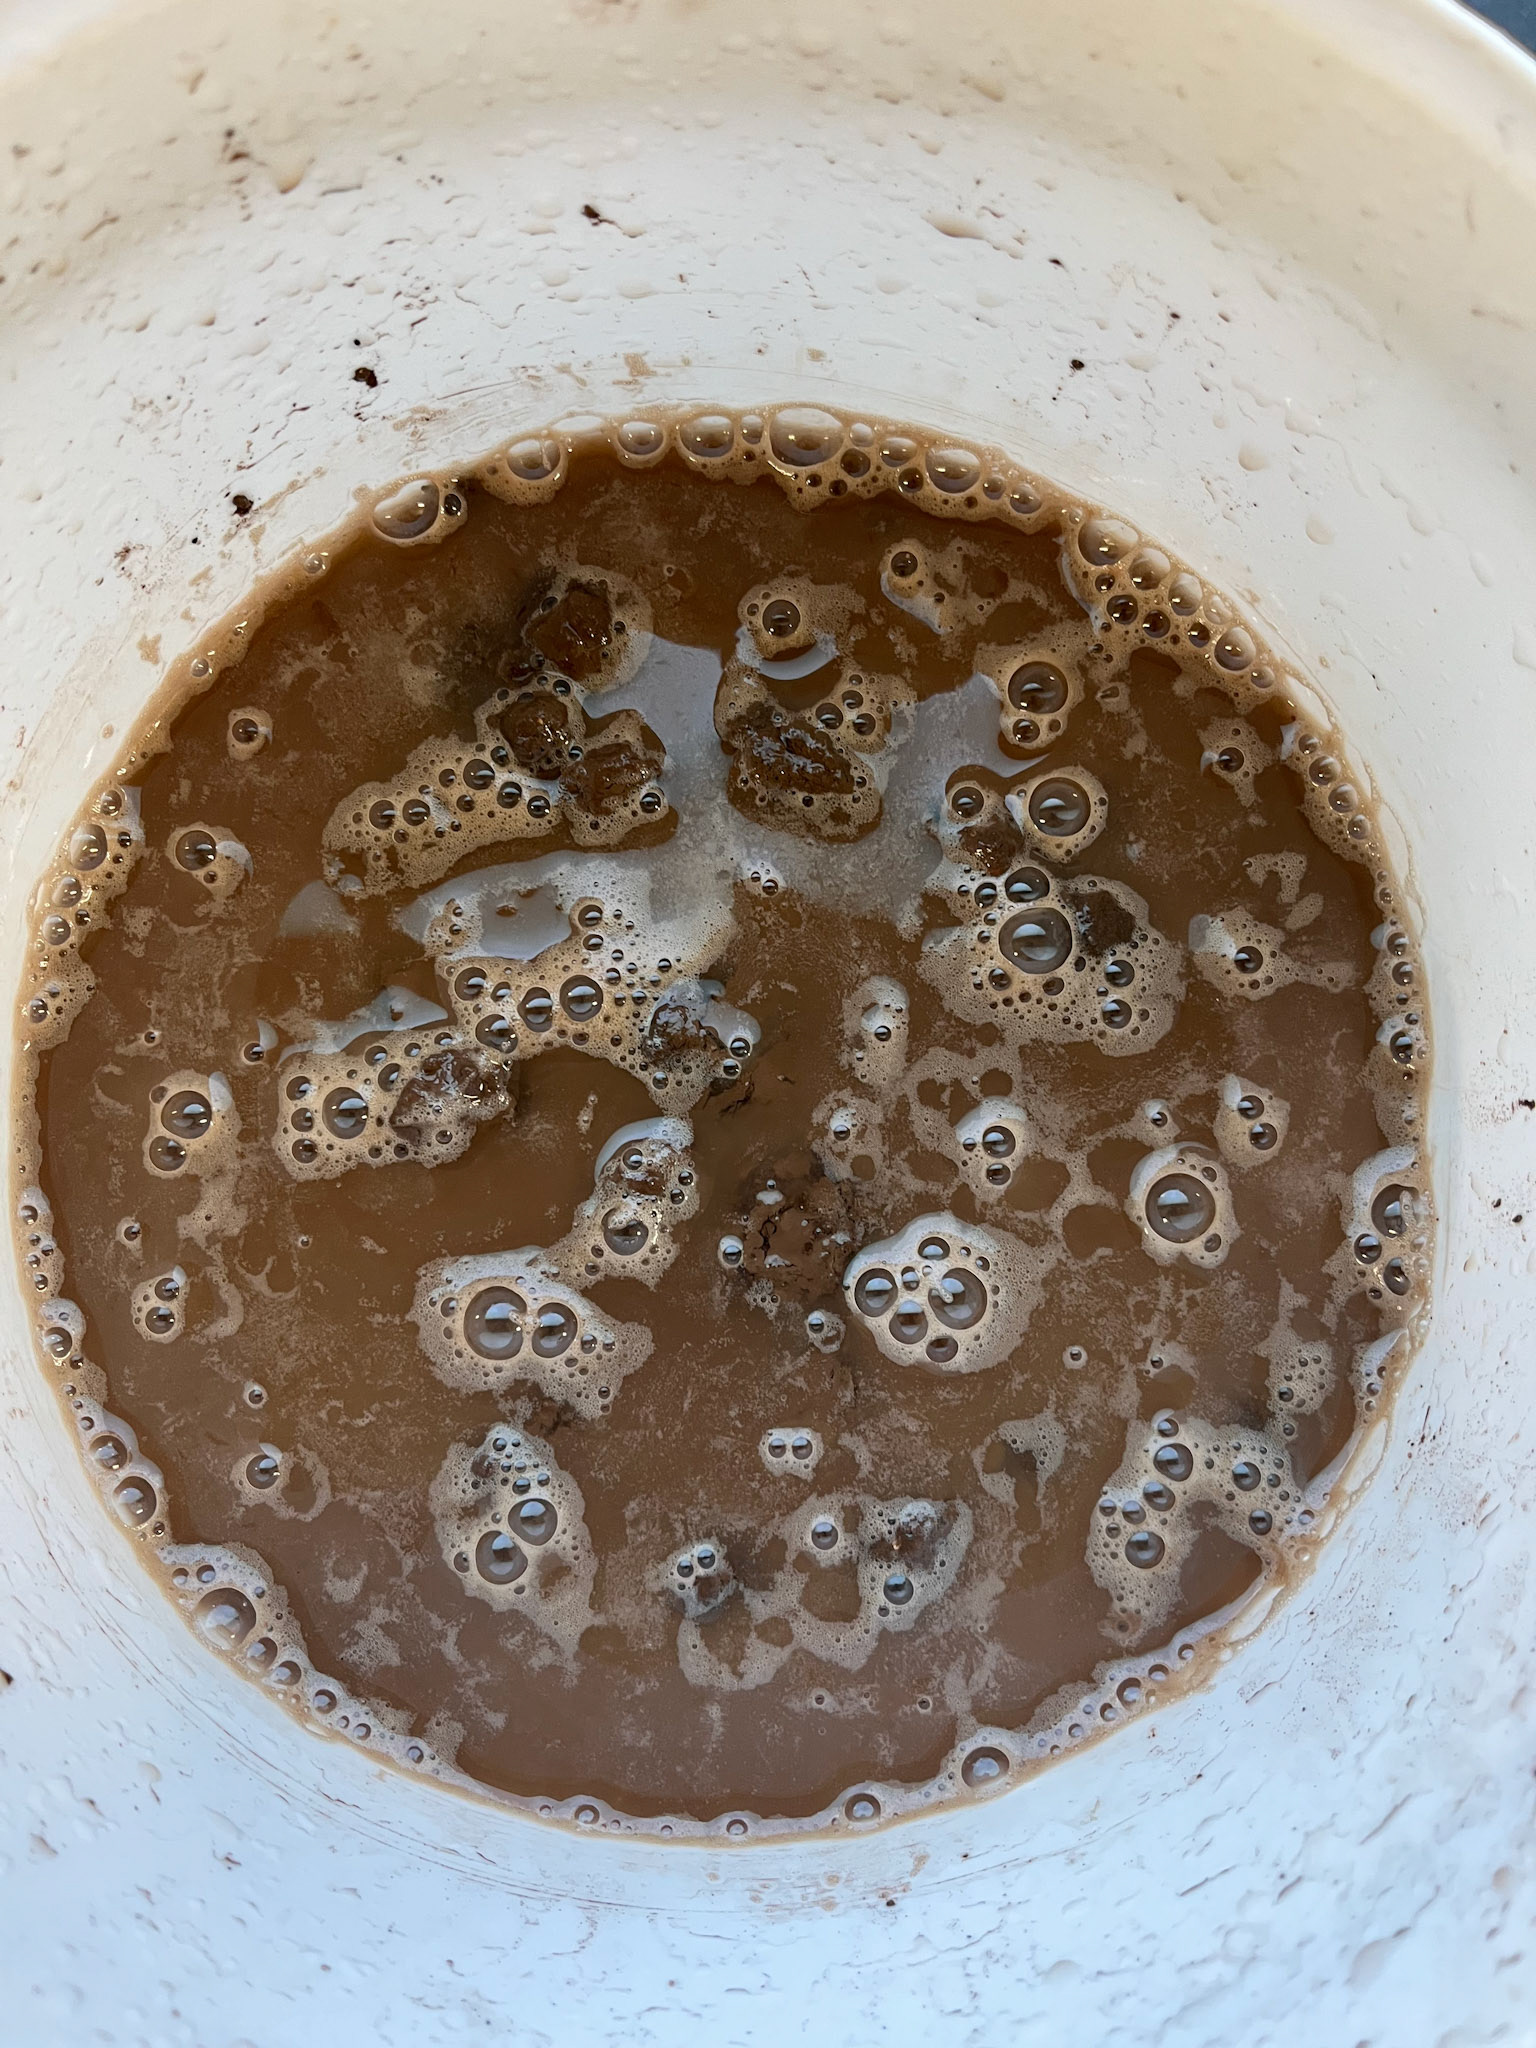
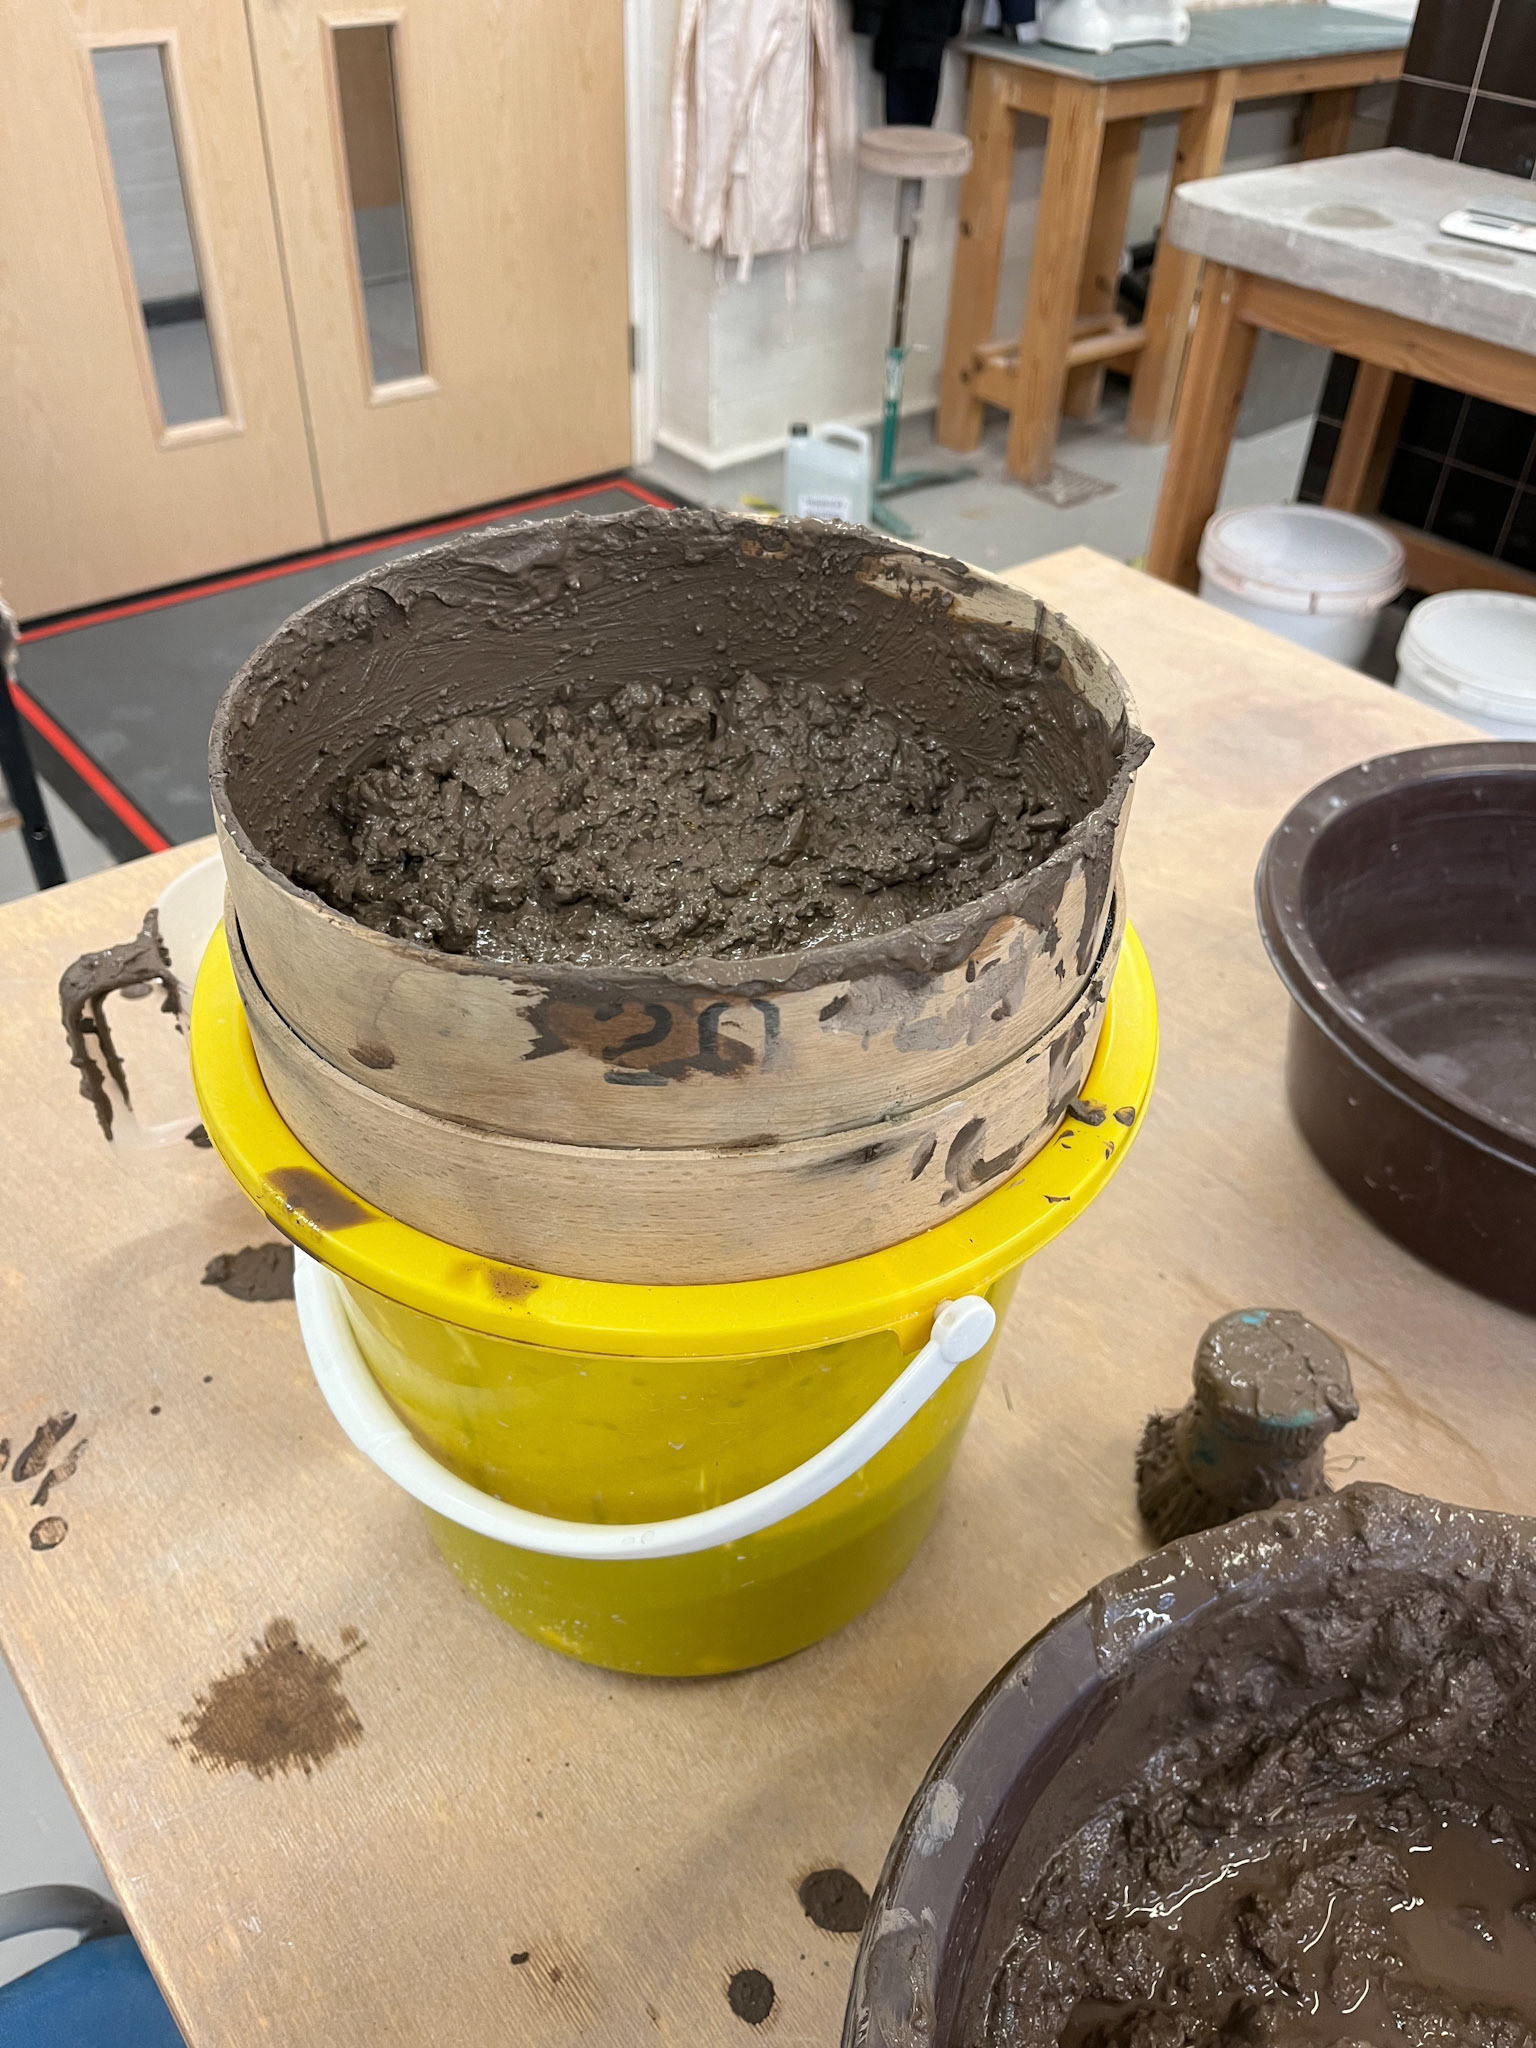
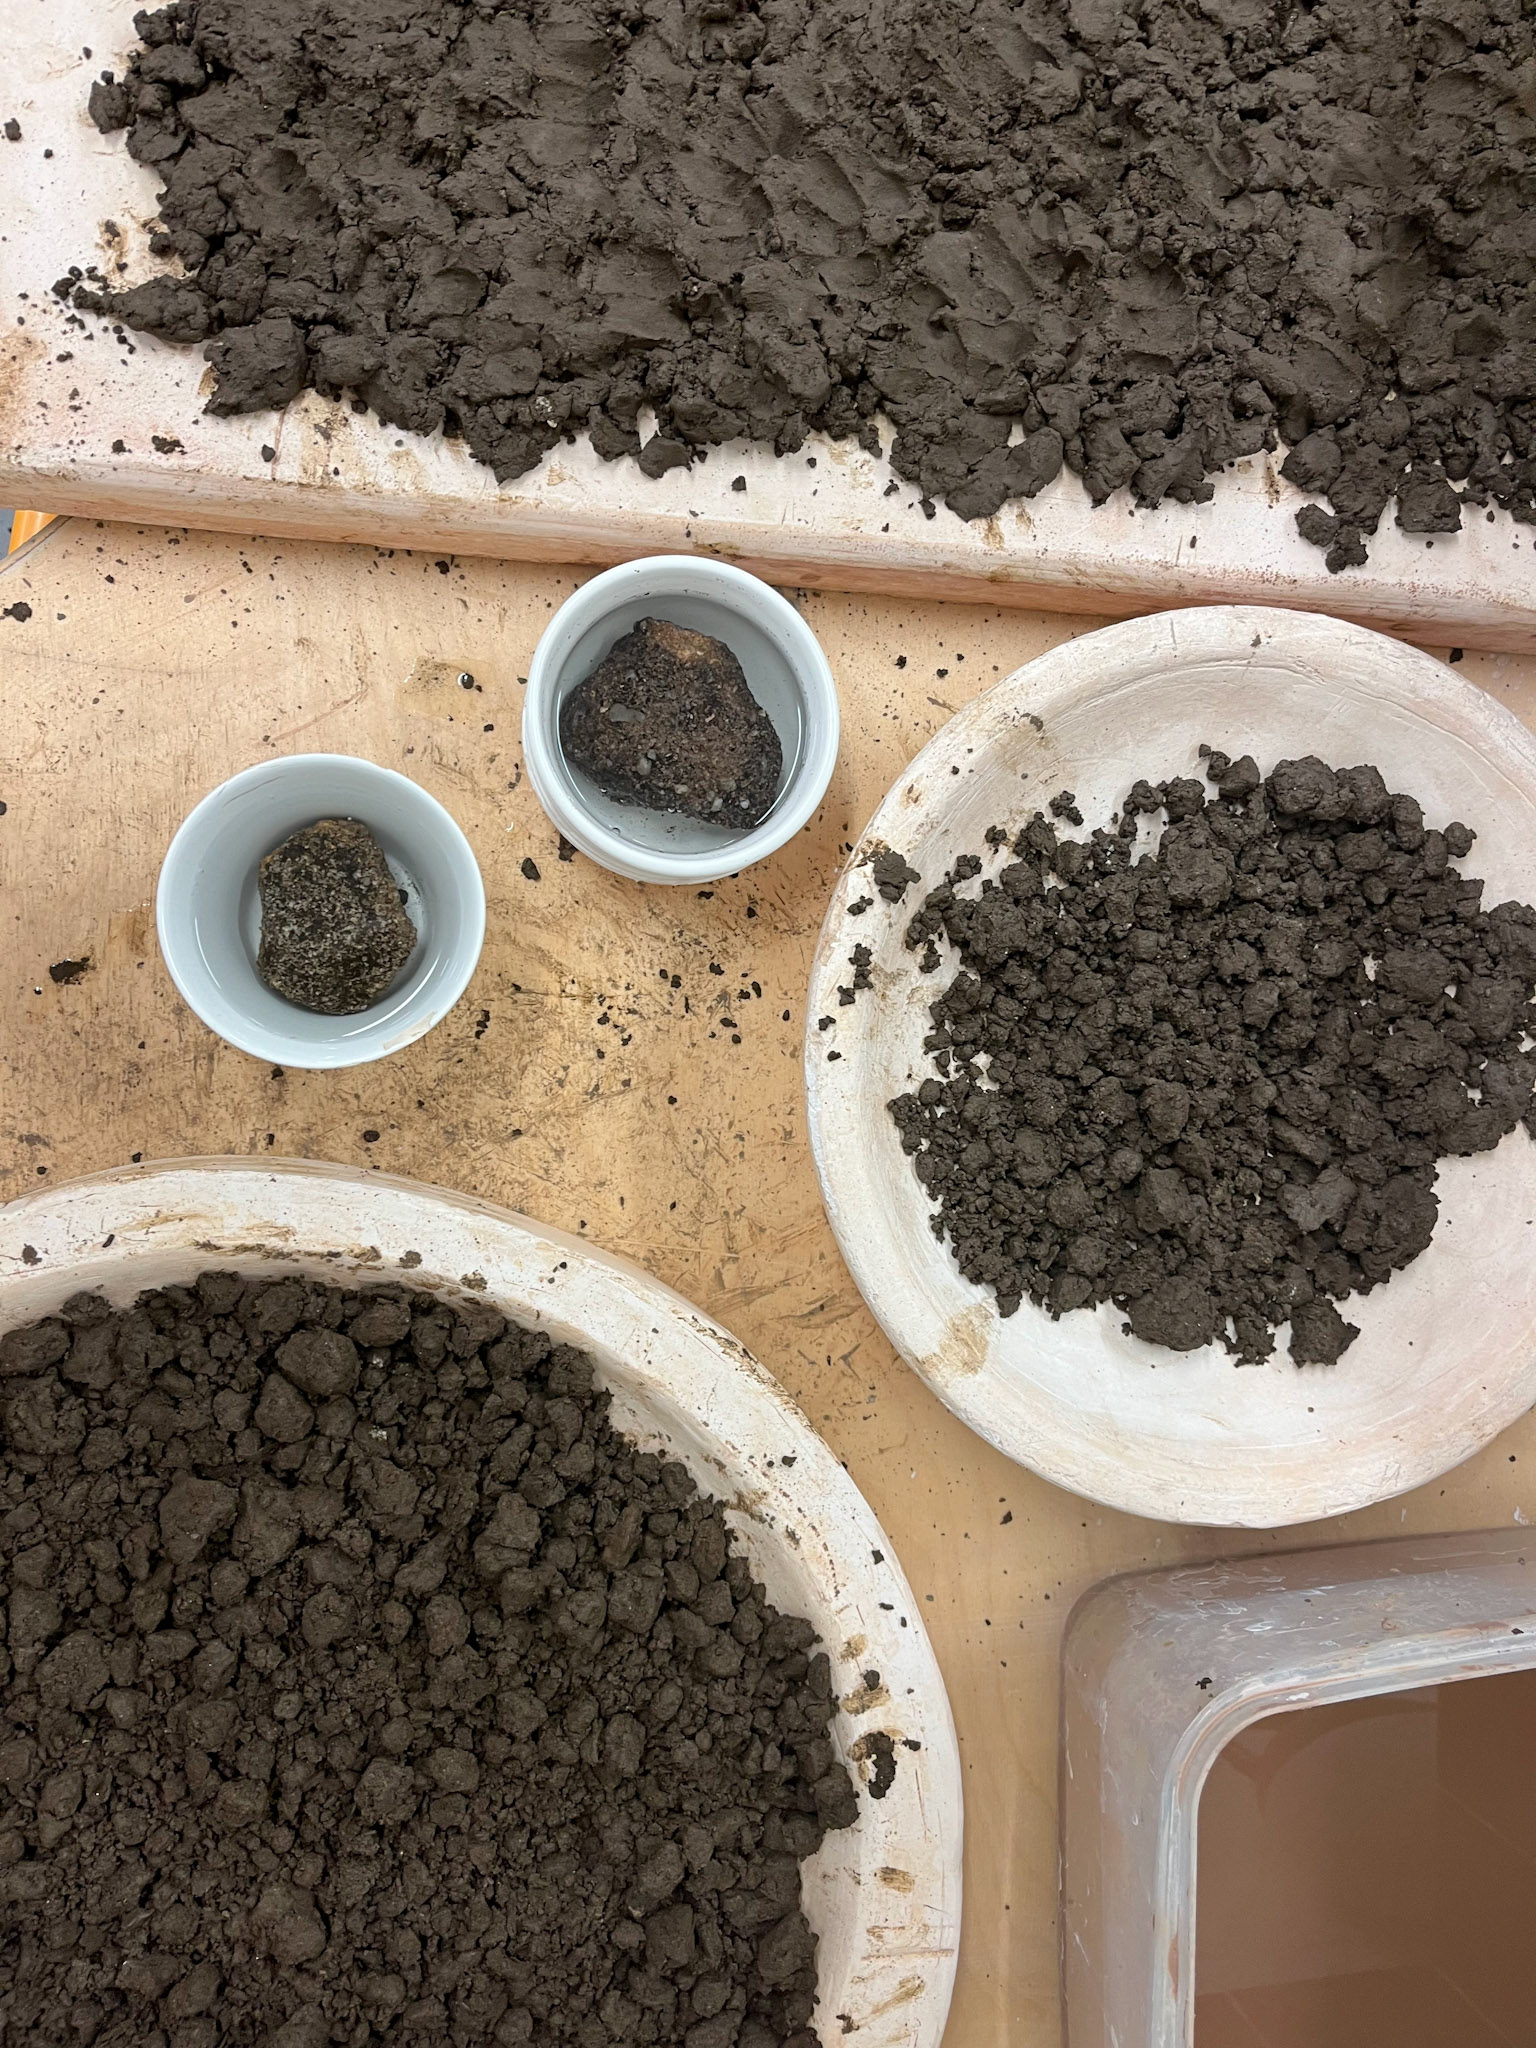
Sieving Clay: Removing stones...
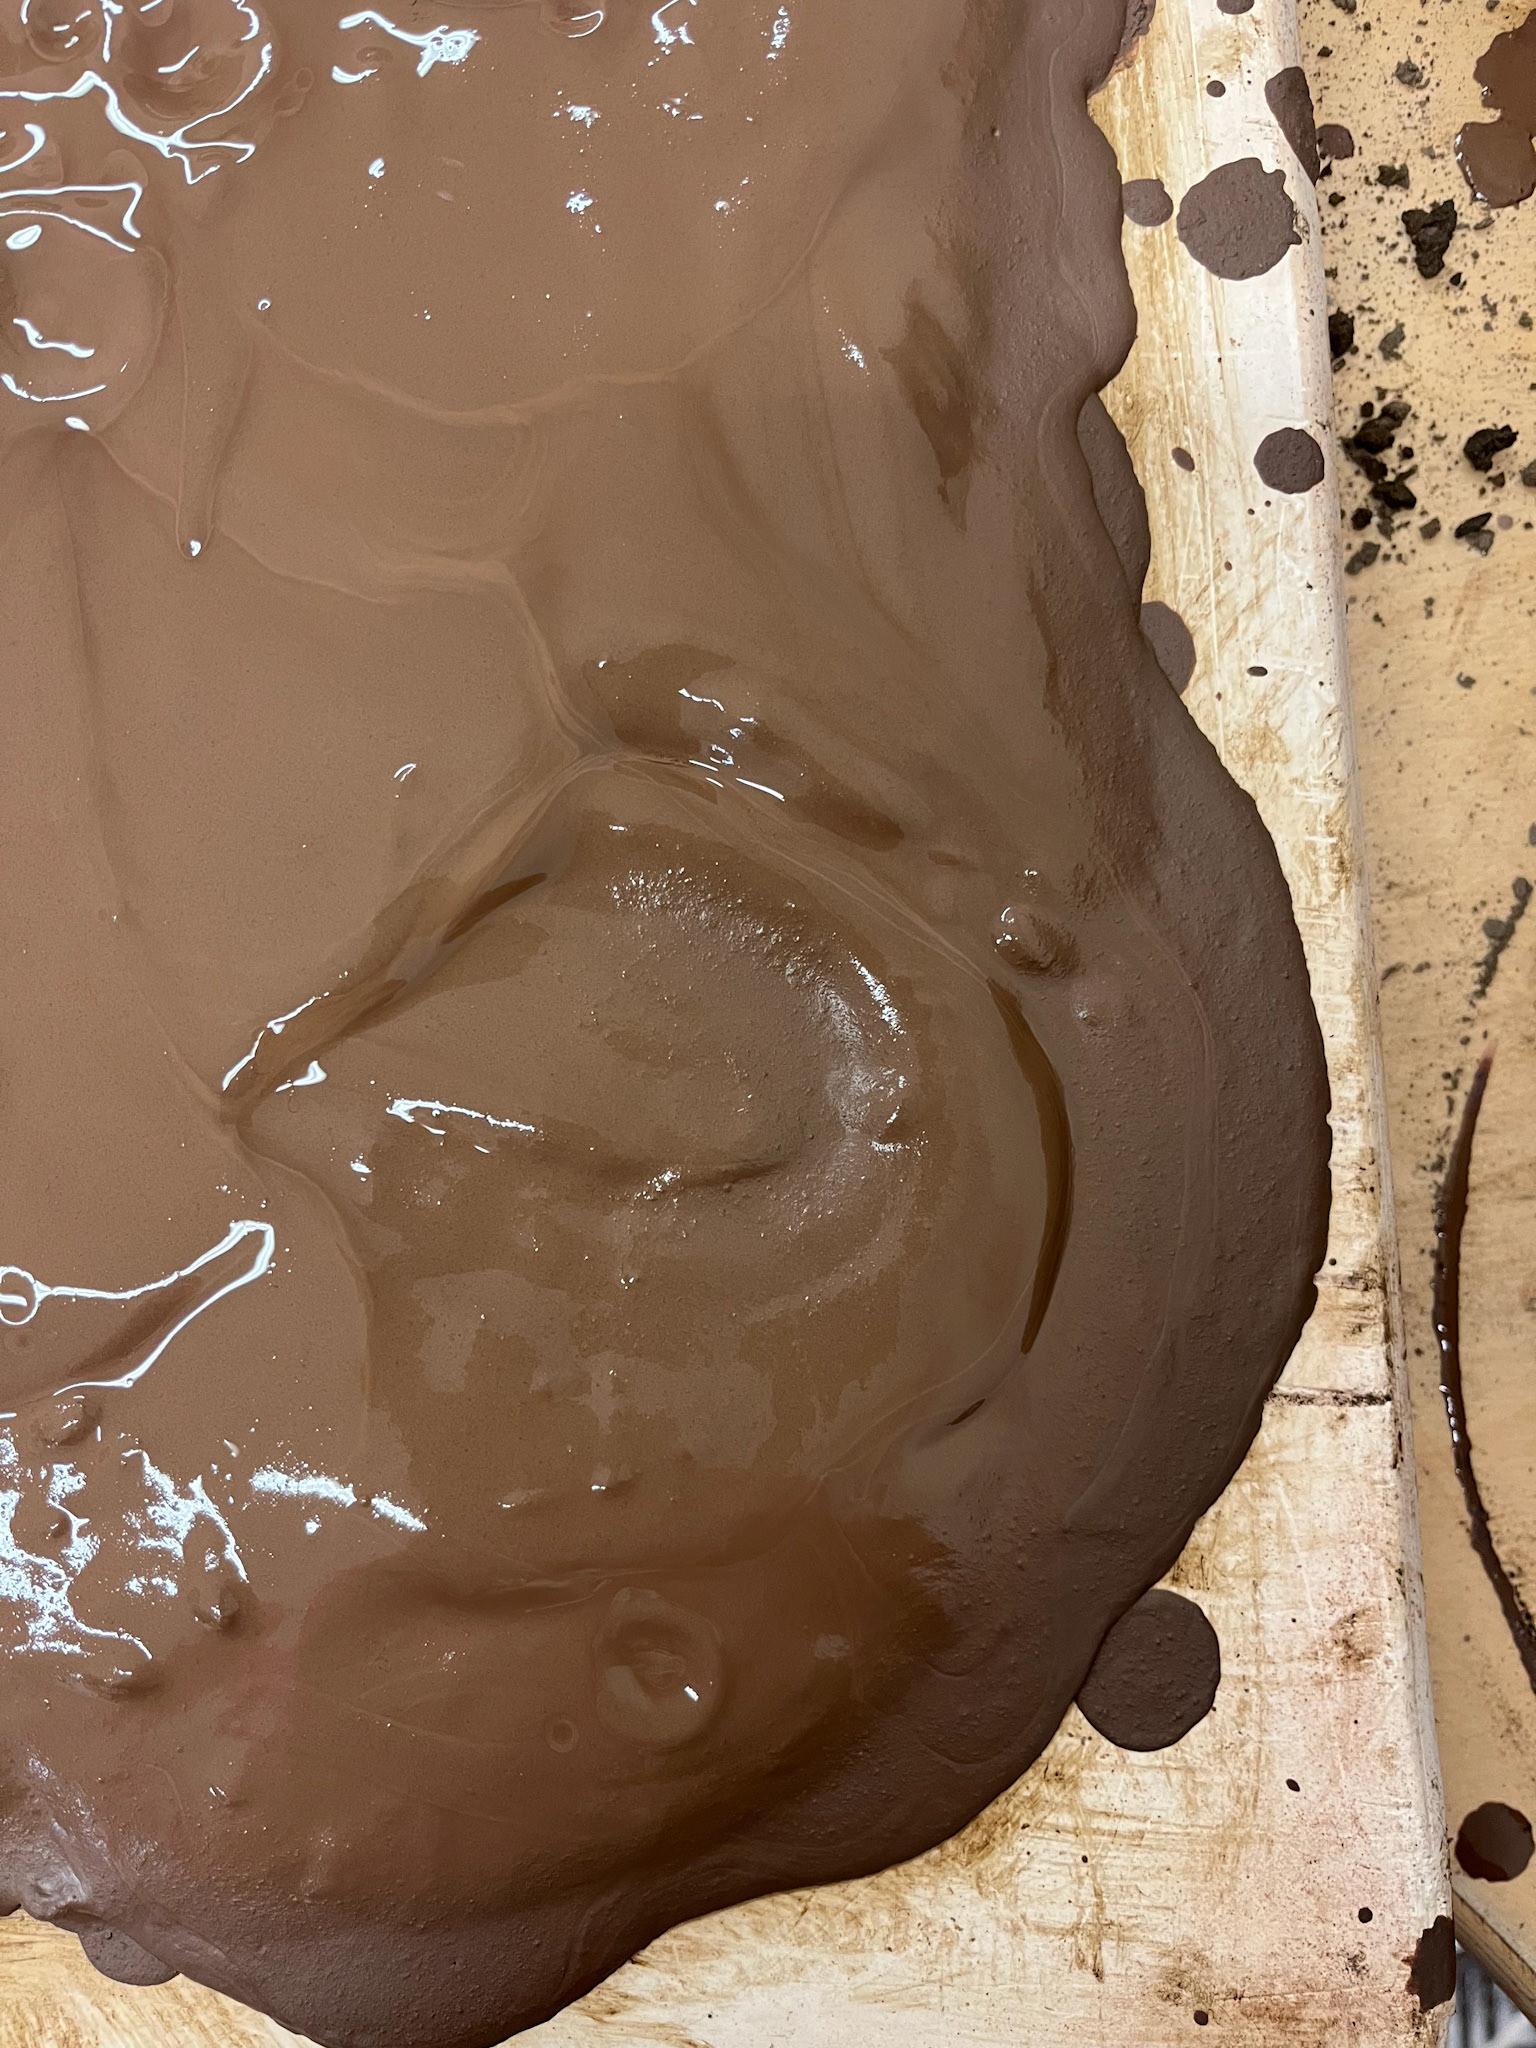
Leaving the clay to settle...
Drying the clay: absorbing...
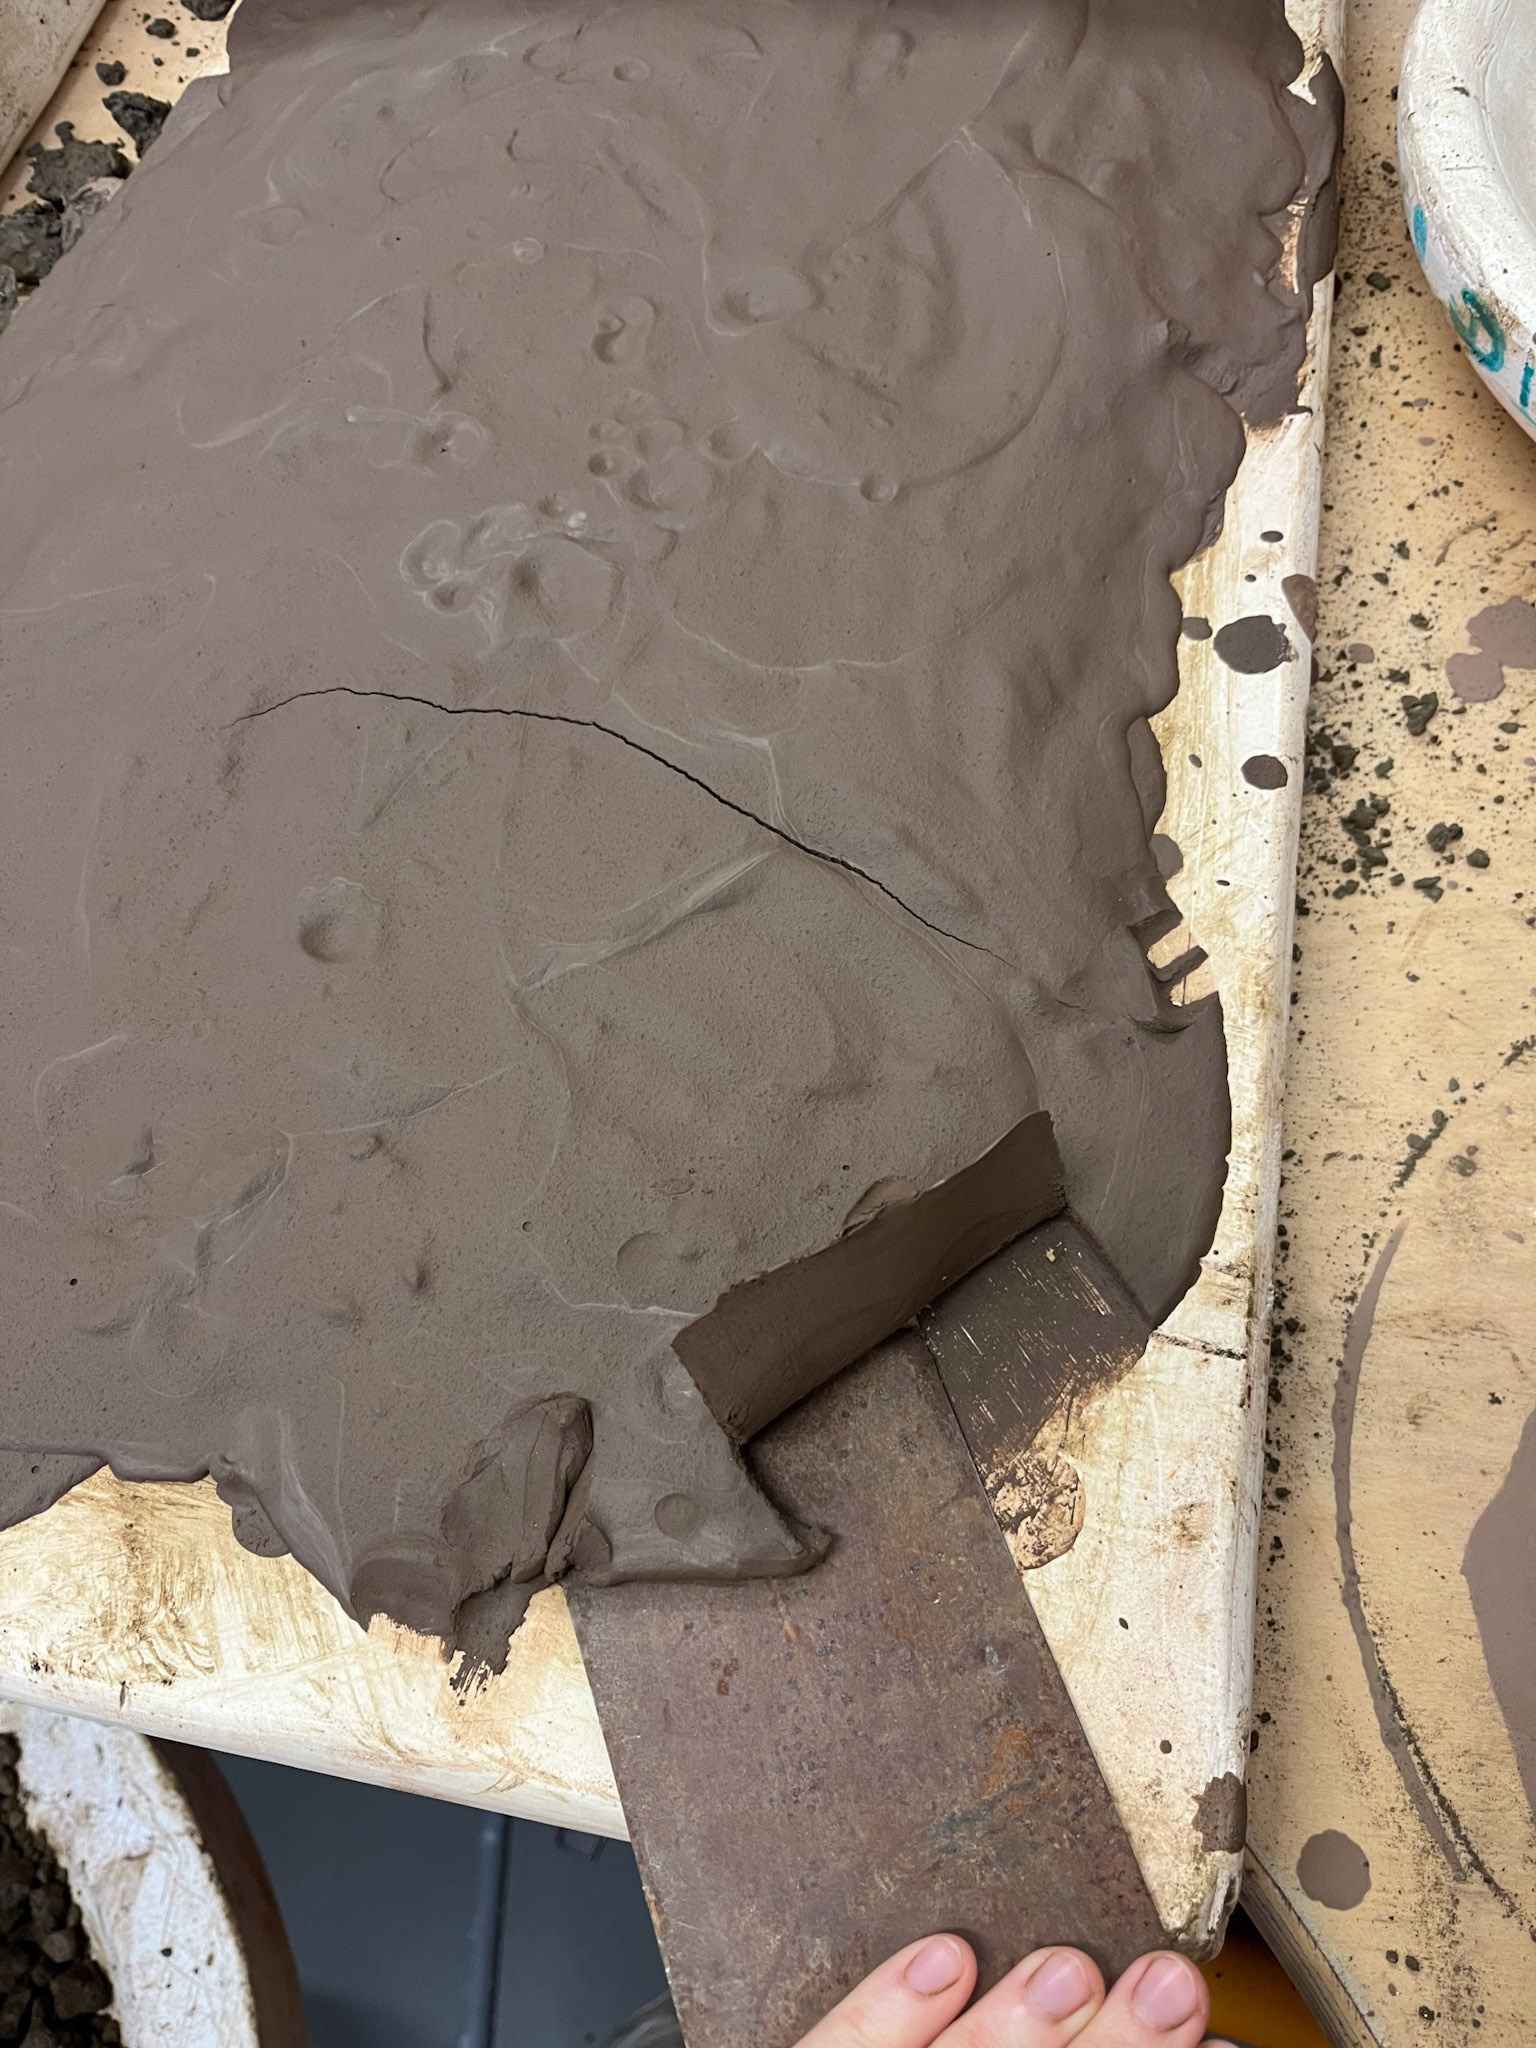
Ready to bag
The clay I processed here was gathered from the Holderness coast. While sieving it, I found numerous stones of varying sizes. I began contemplating what I could do with these, as I am keen on utilising as much of the material as possible in my work.

Processing cave clay
As well as processing the clay from the coast, I have also been gathering more clay from the caves in the Peak District. Bringing this clay back to Manchester to process, I am interested to see how each clay compares.
Harvesting clay to bring back to Manchester

Bags that the clay was carried back to Manchester in
Laying out clay to settle
Finding large rocks- soaking to remove clay
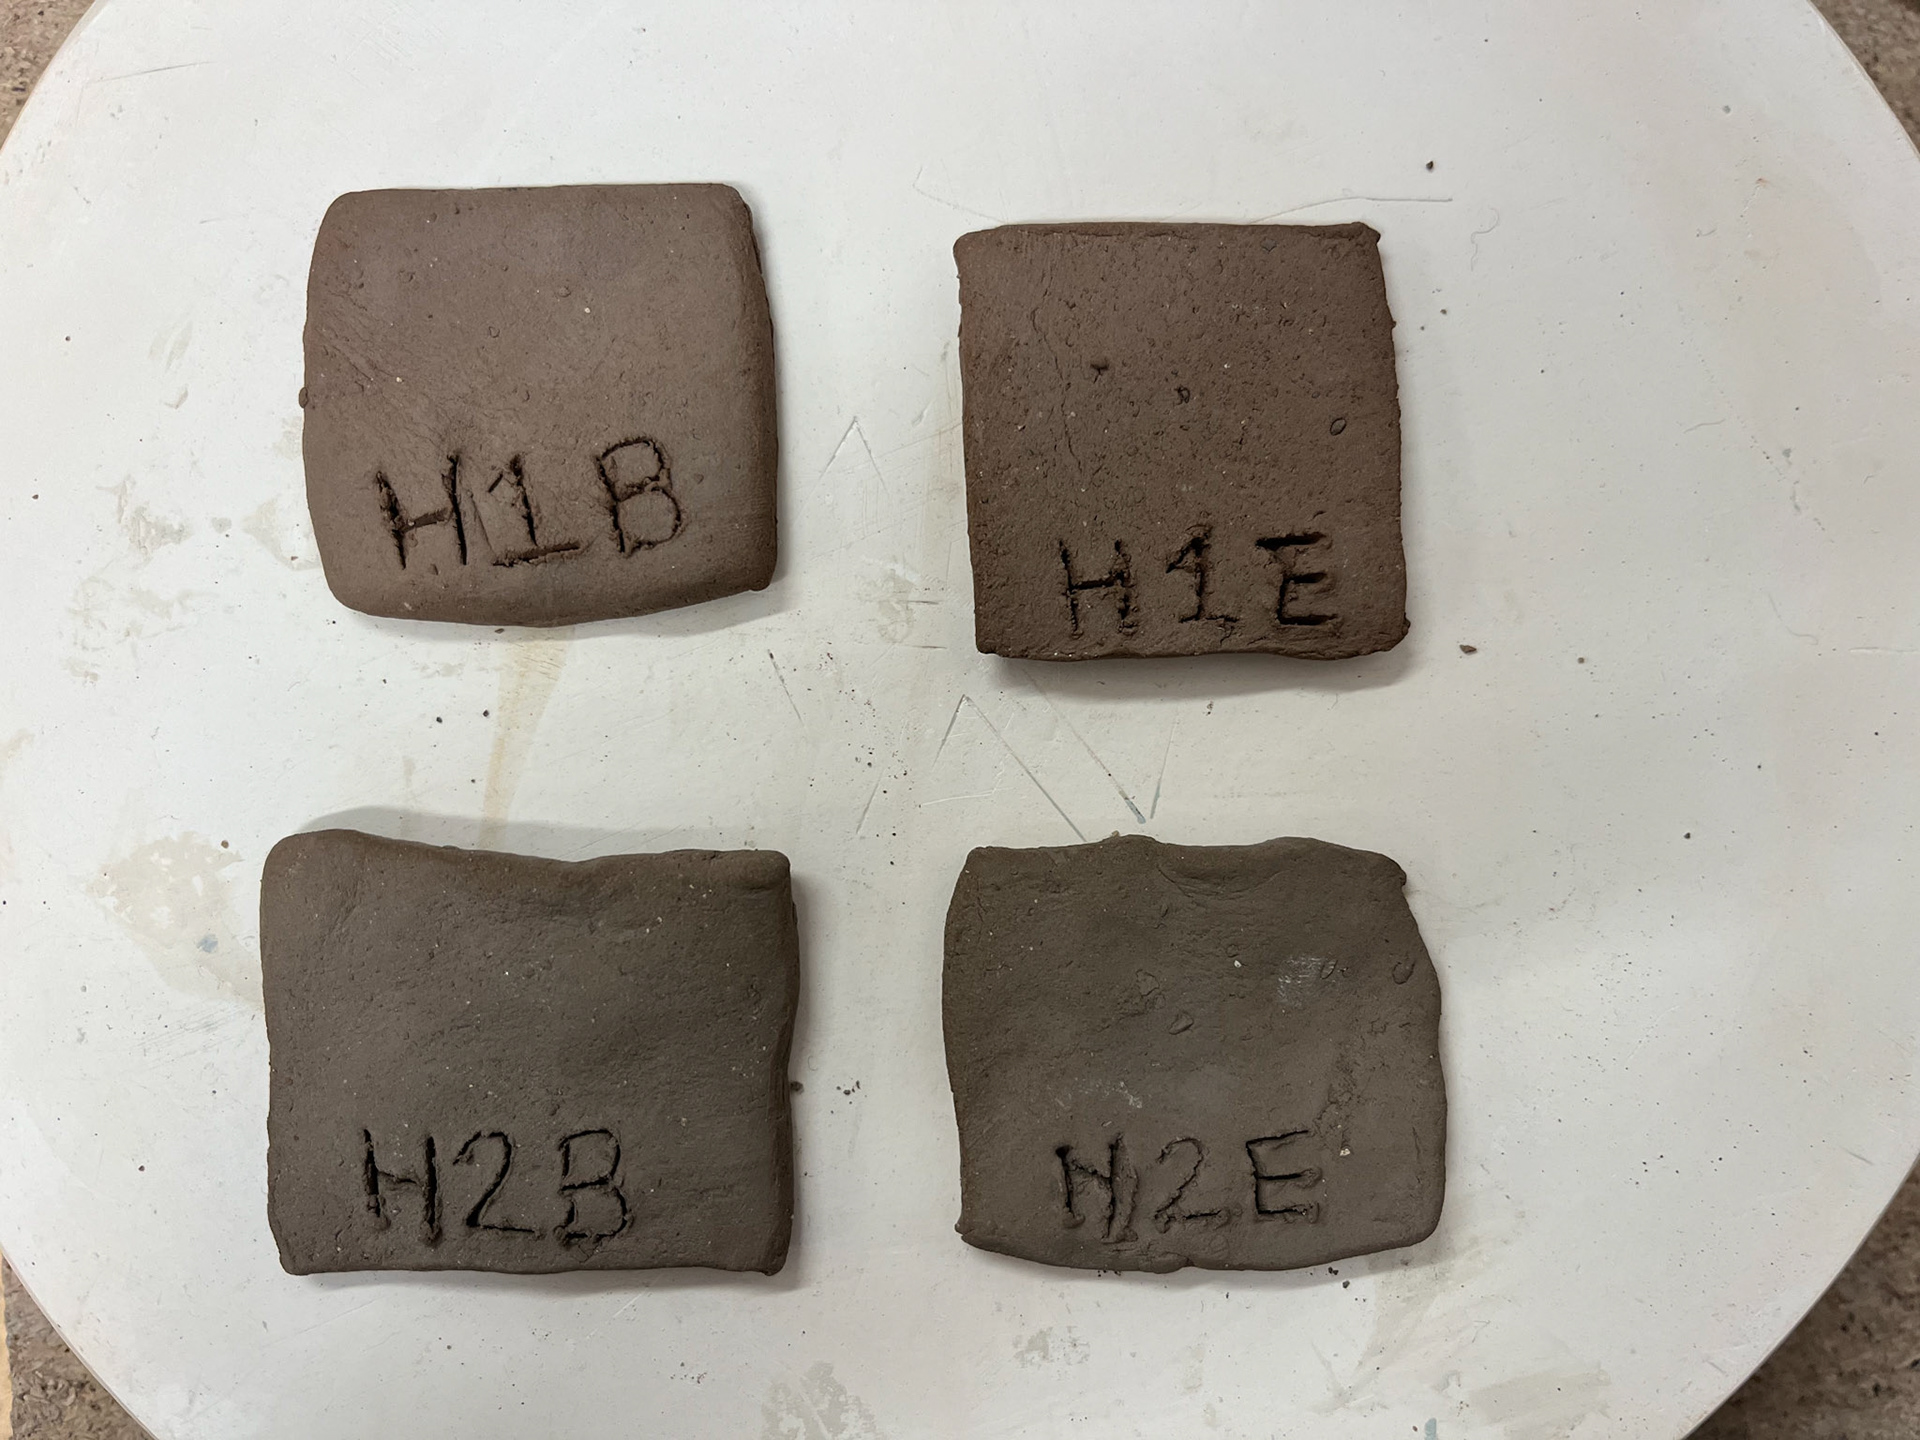
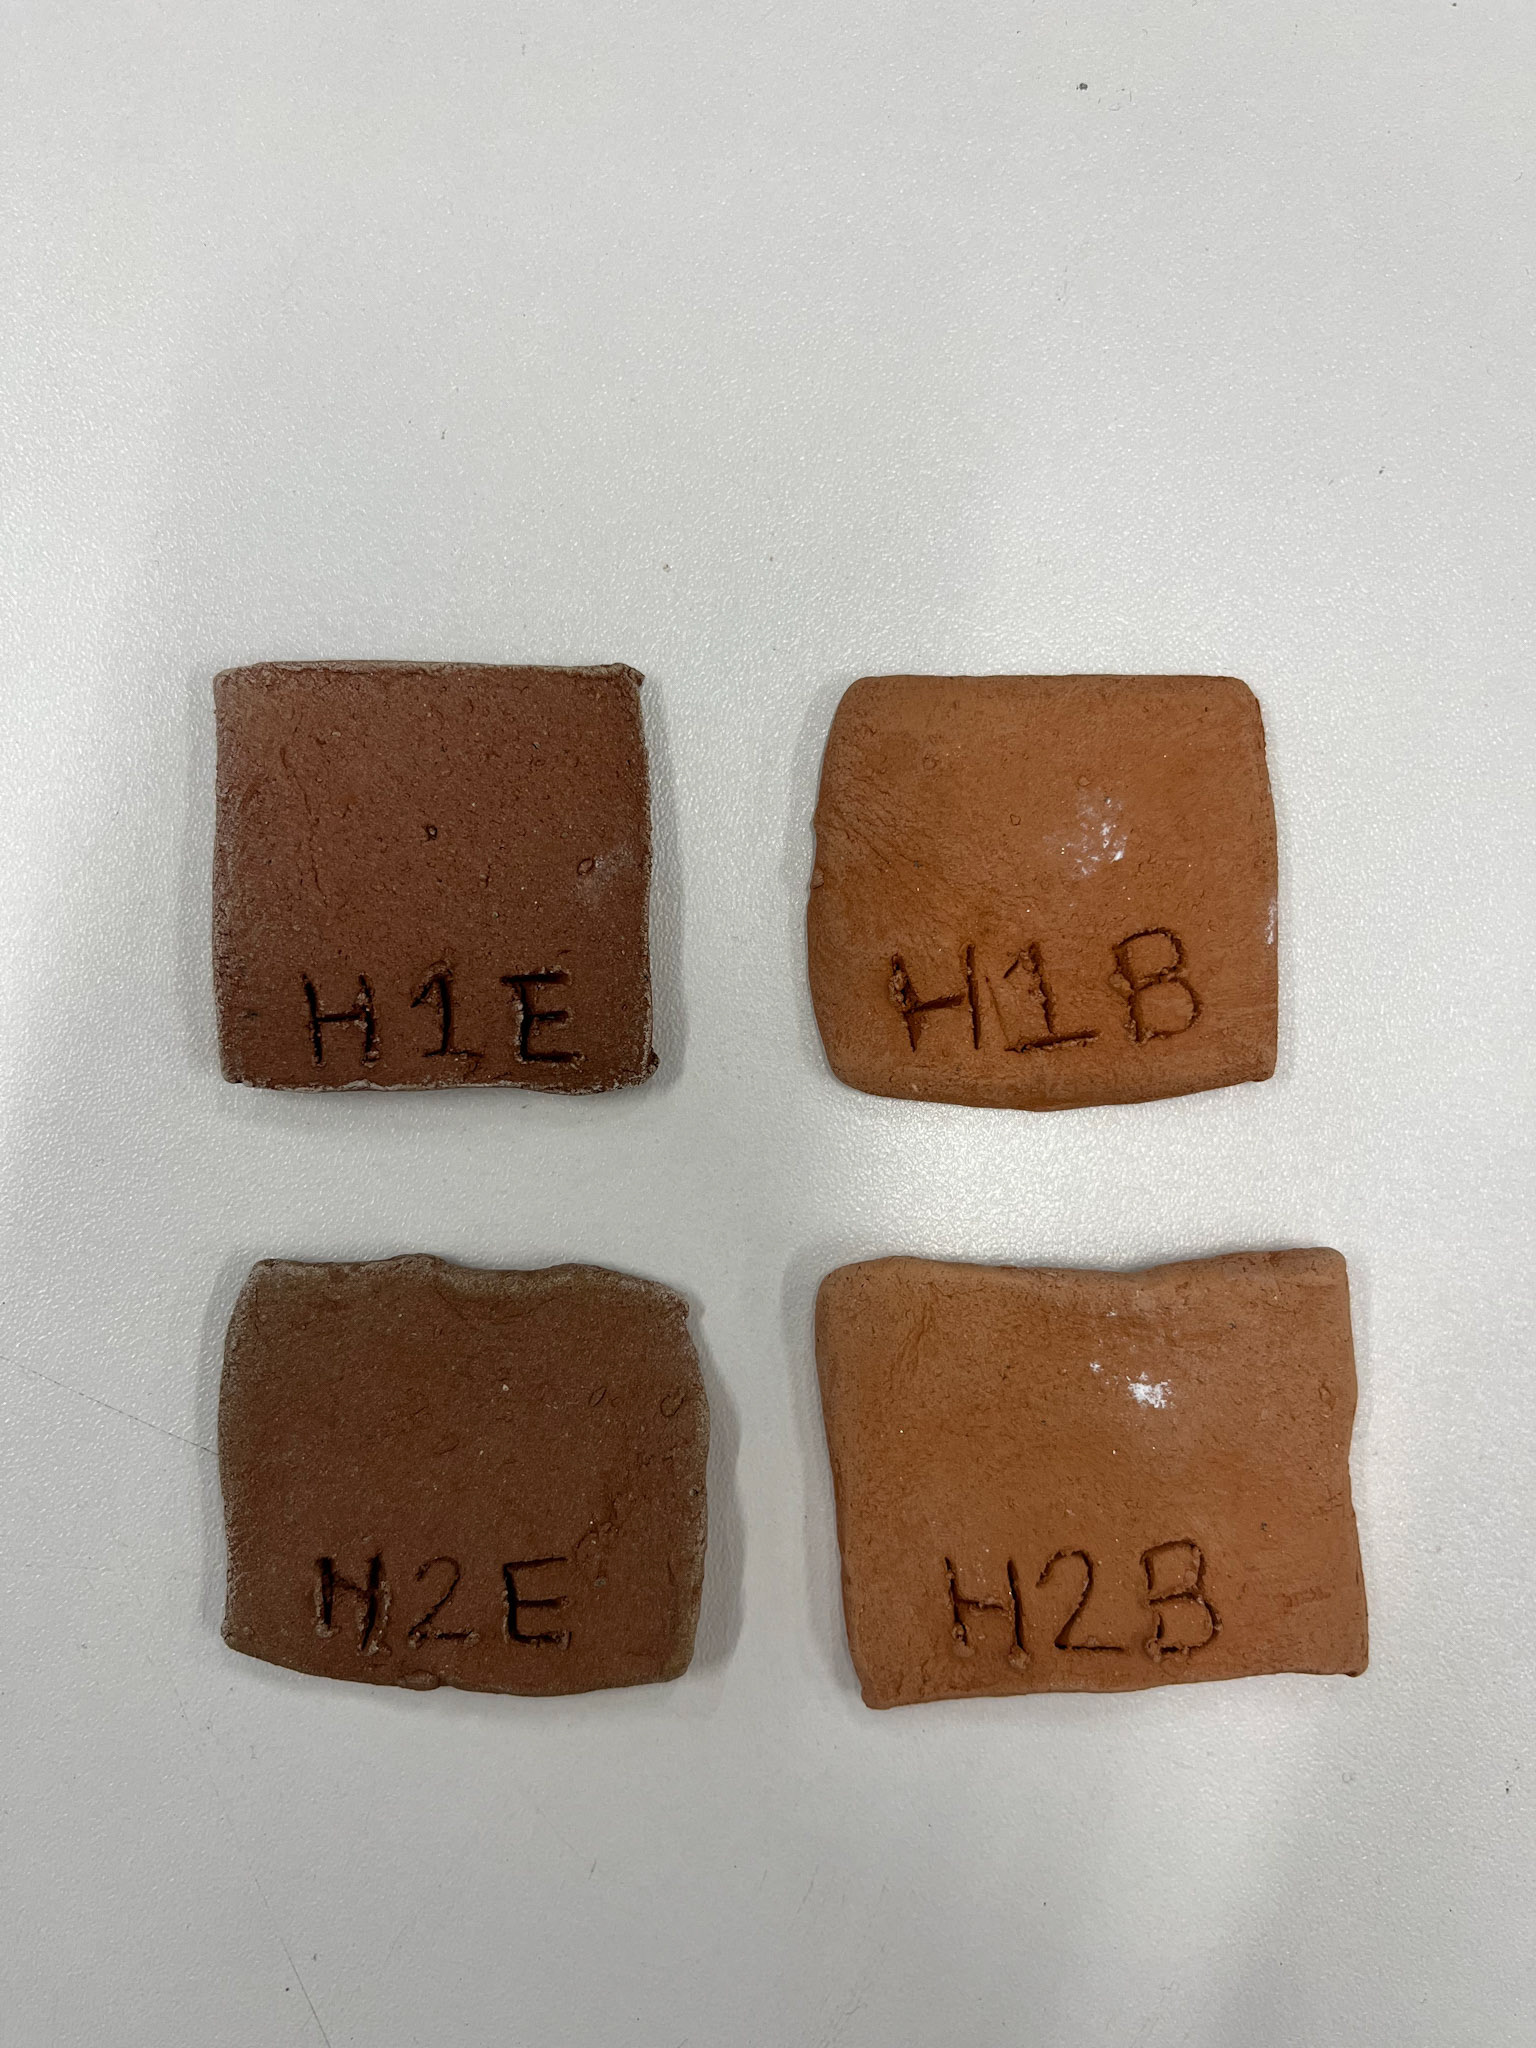
TESTING CLAY
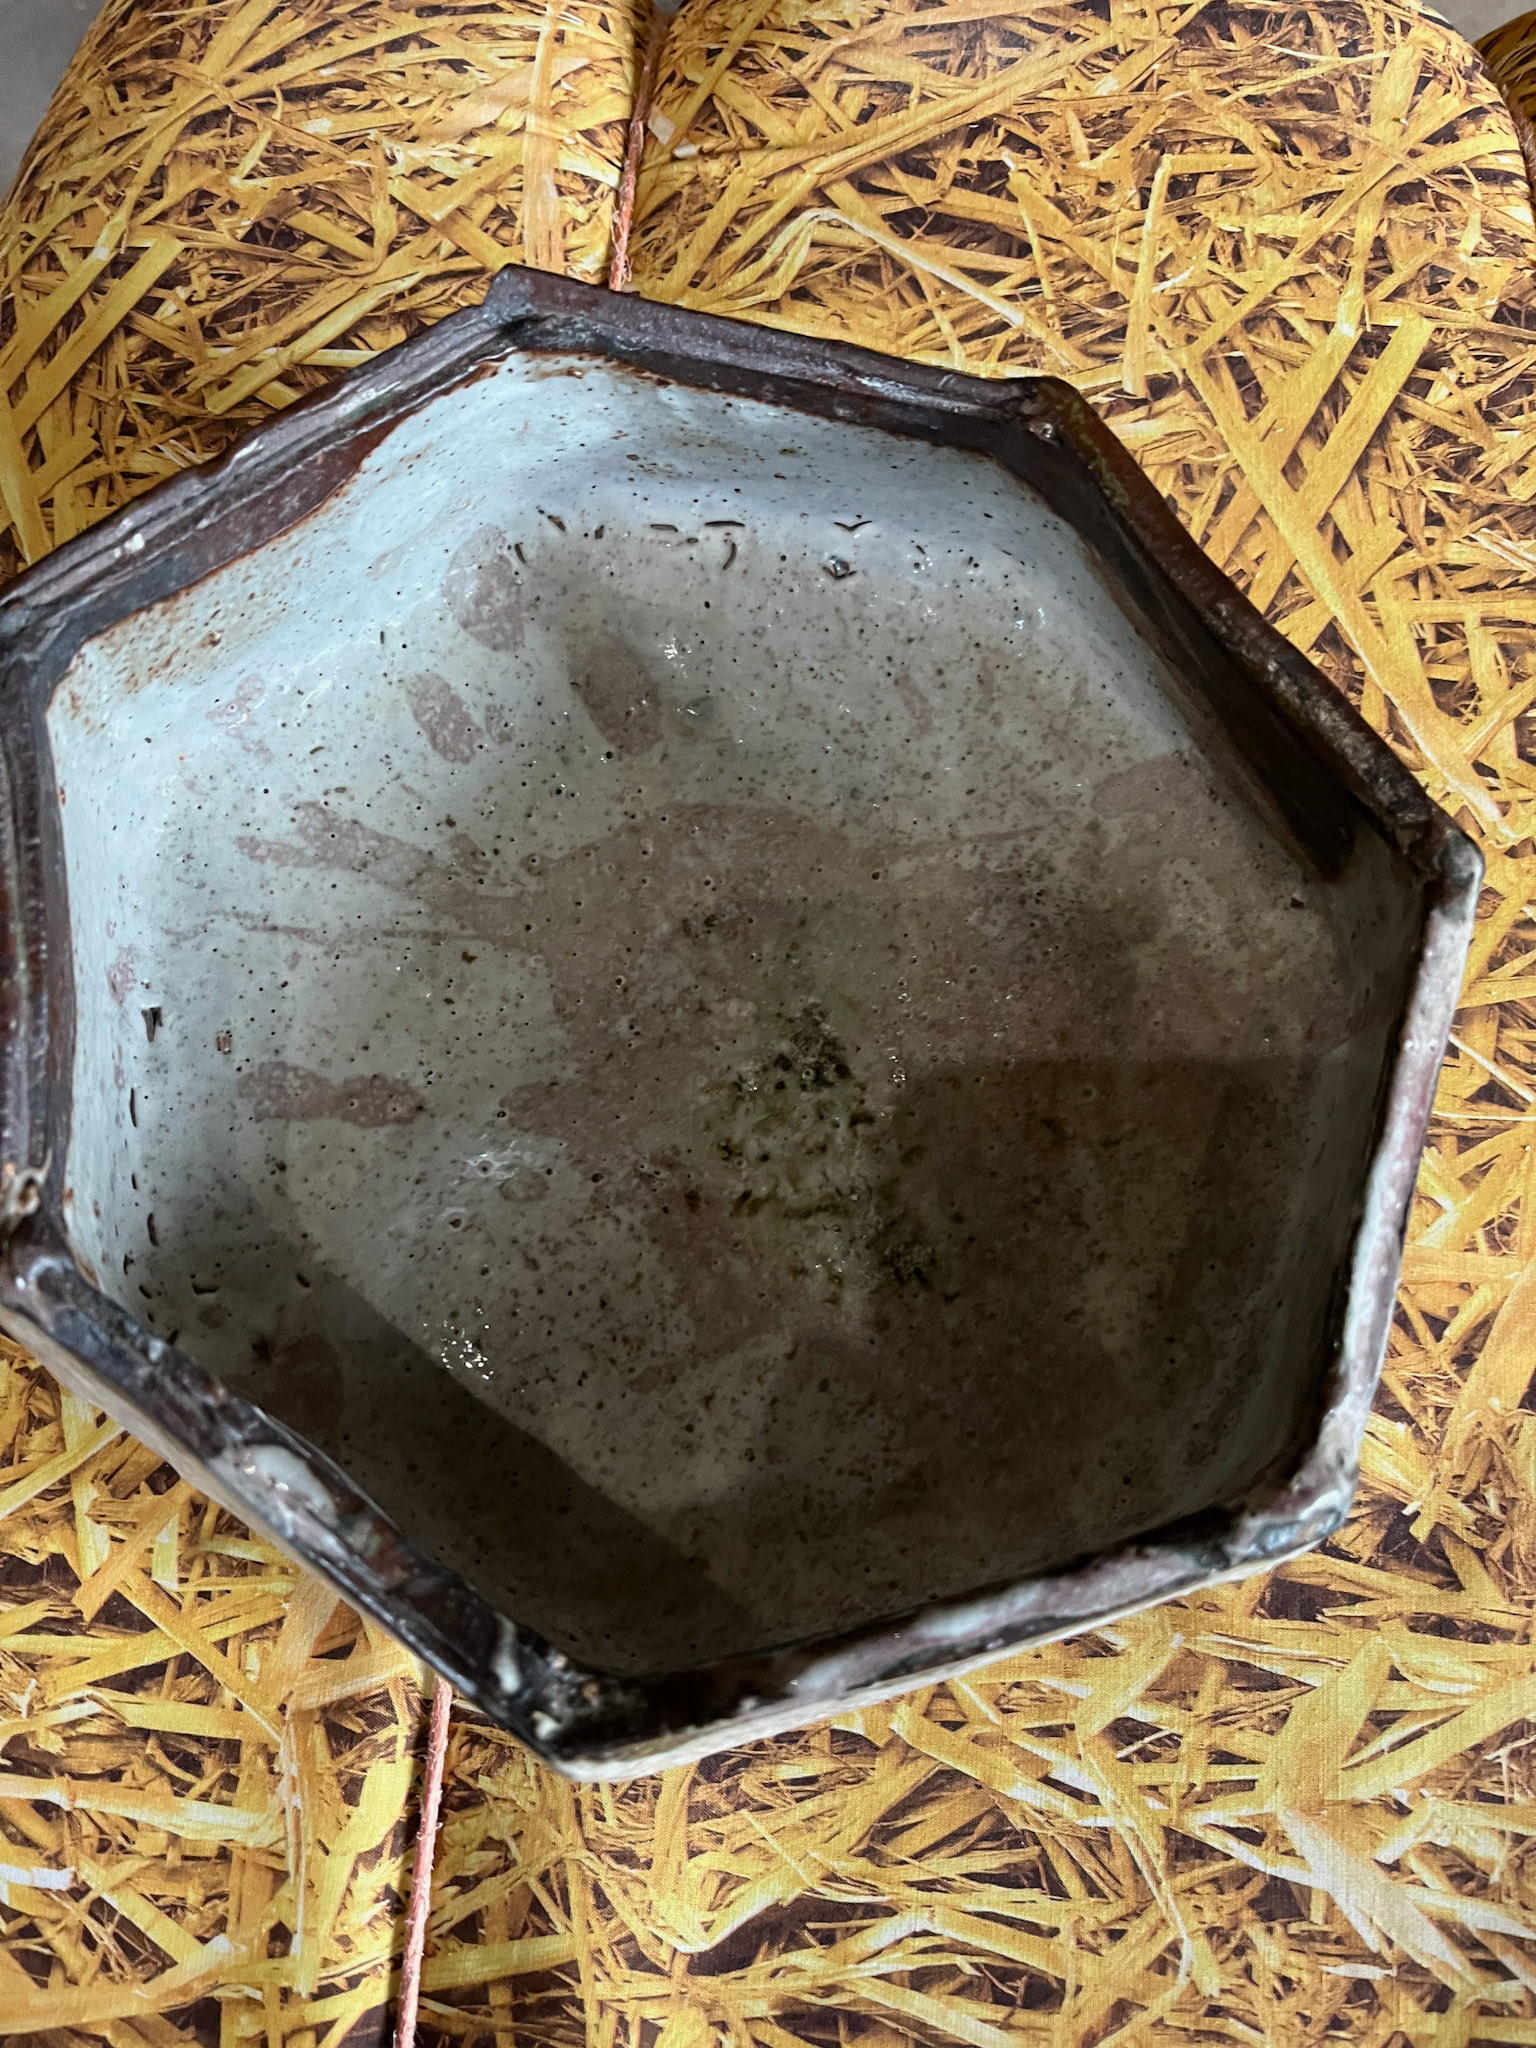
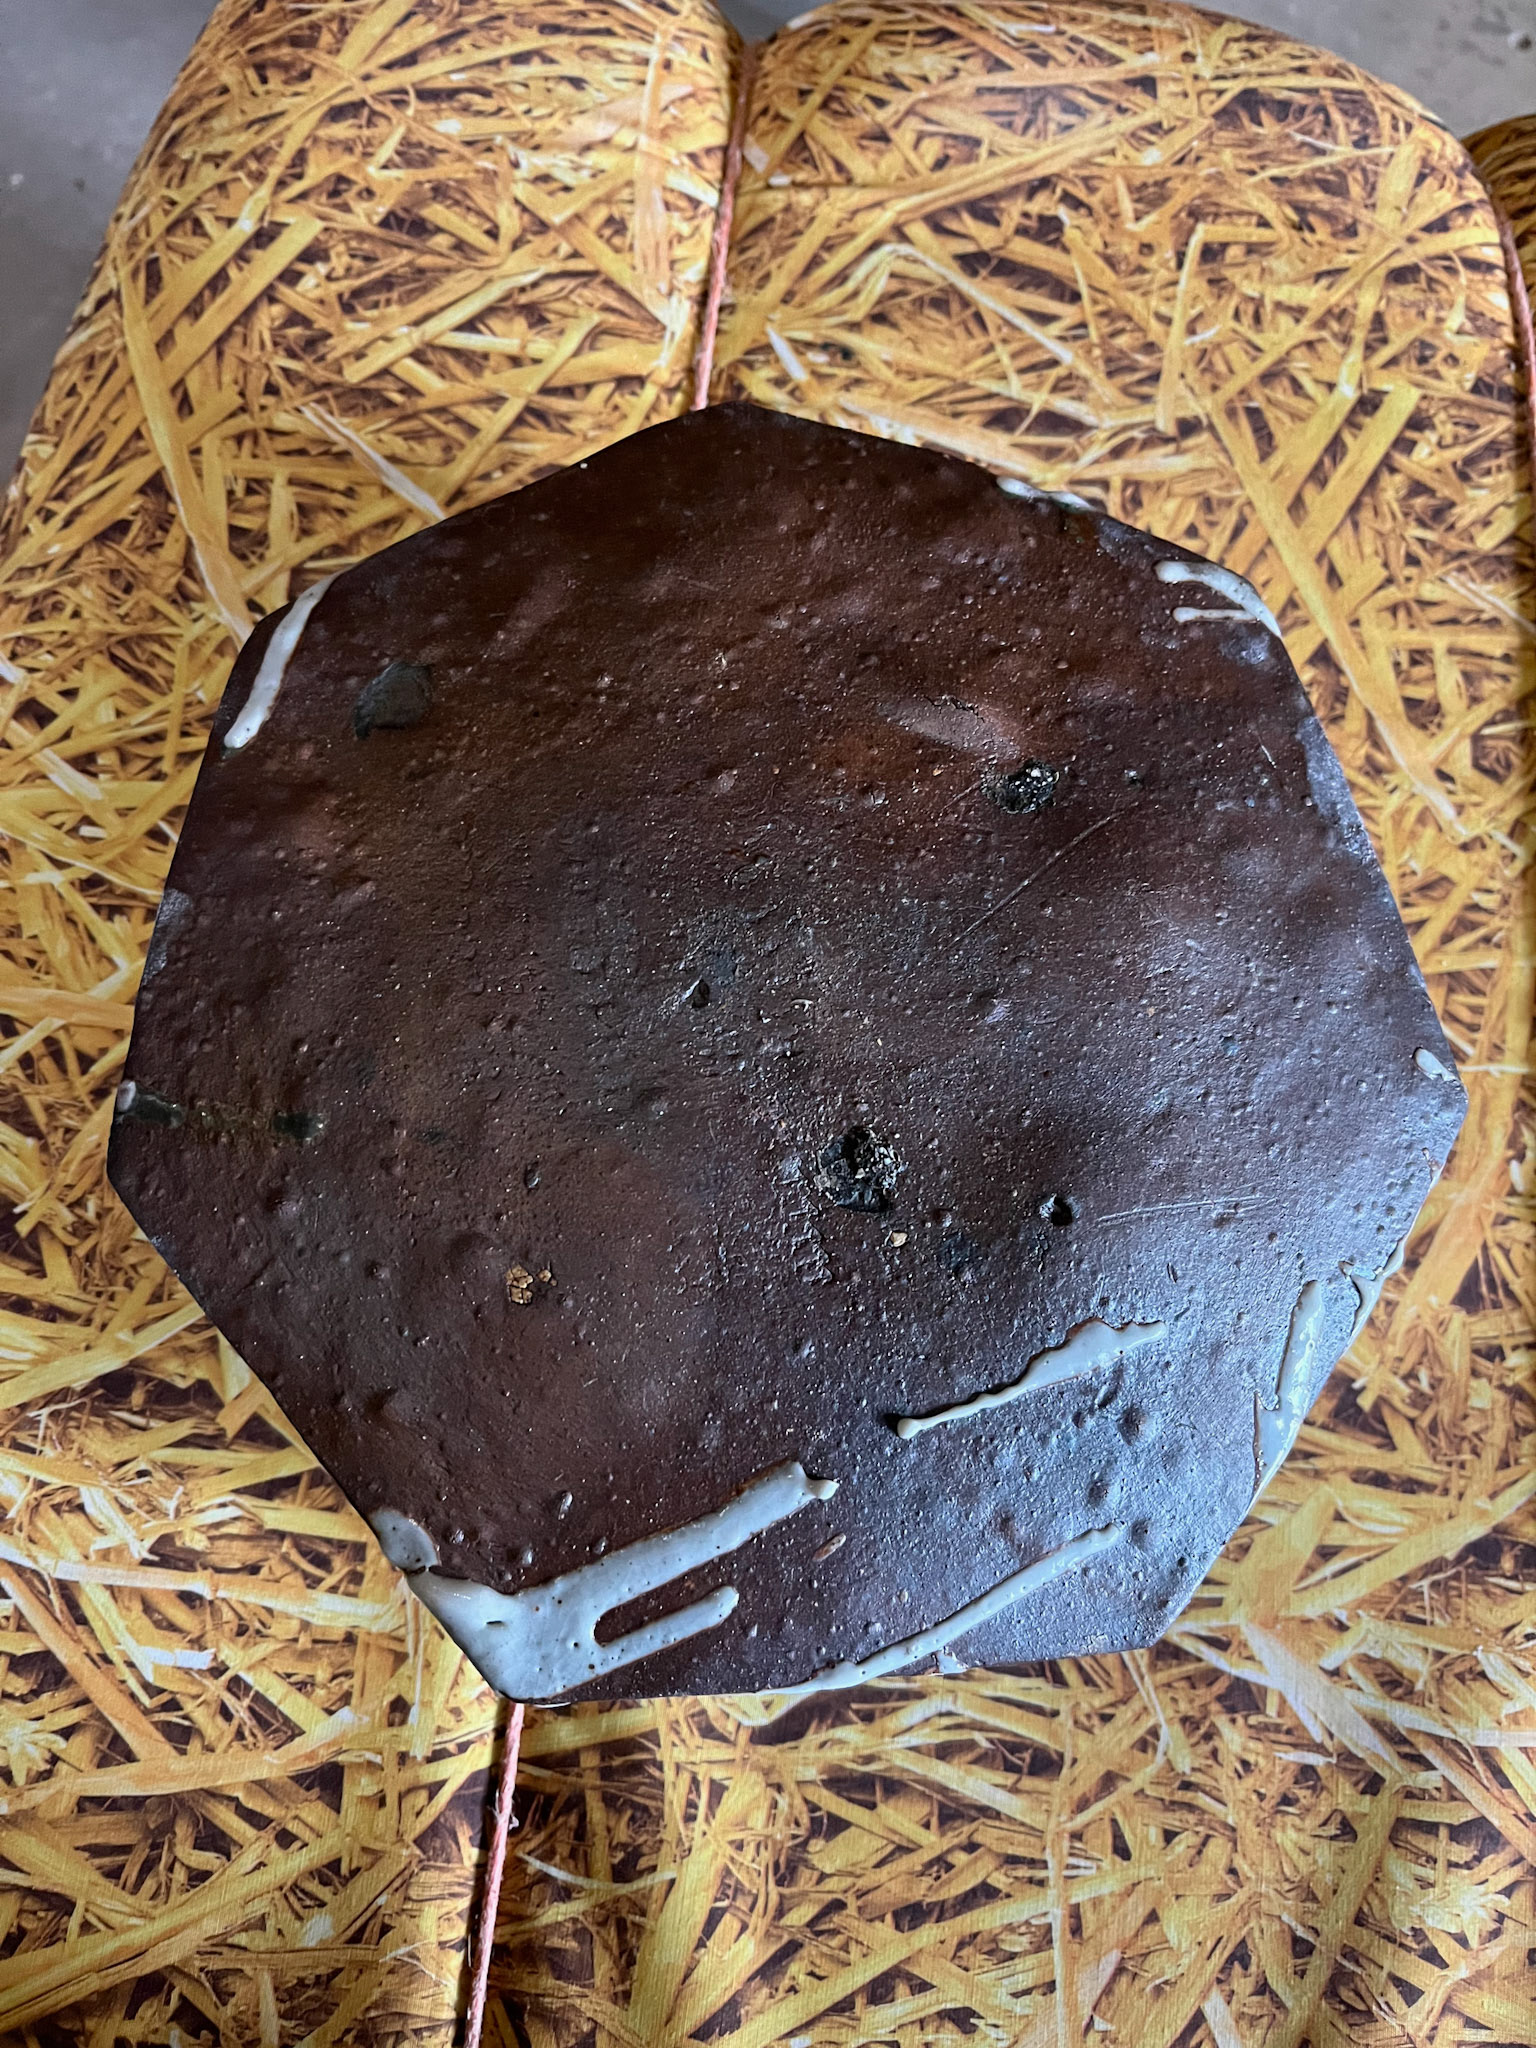
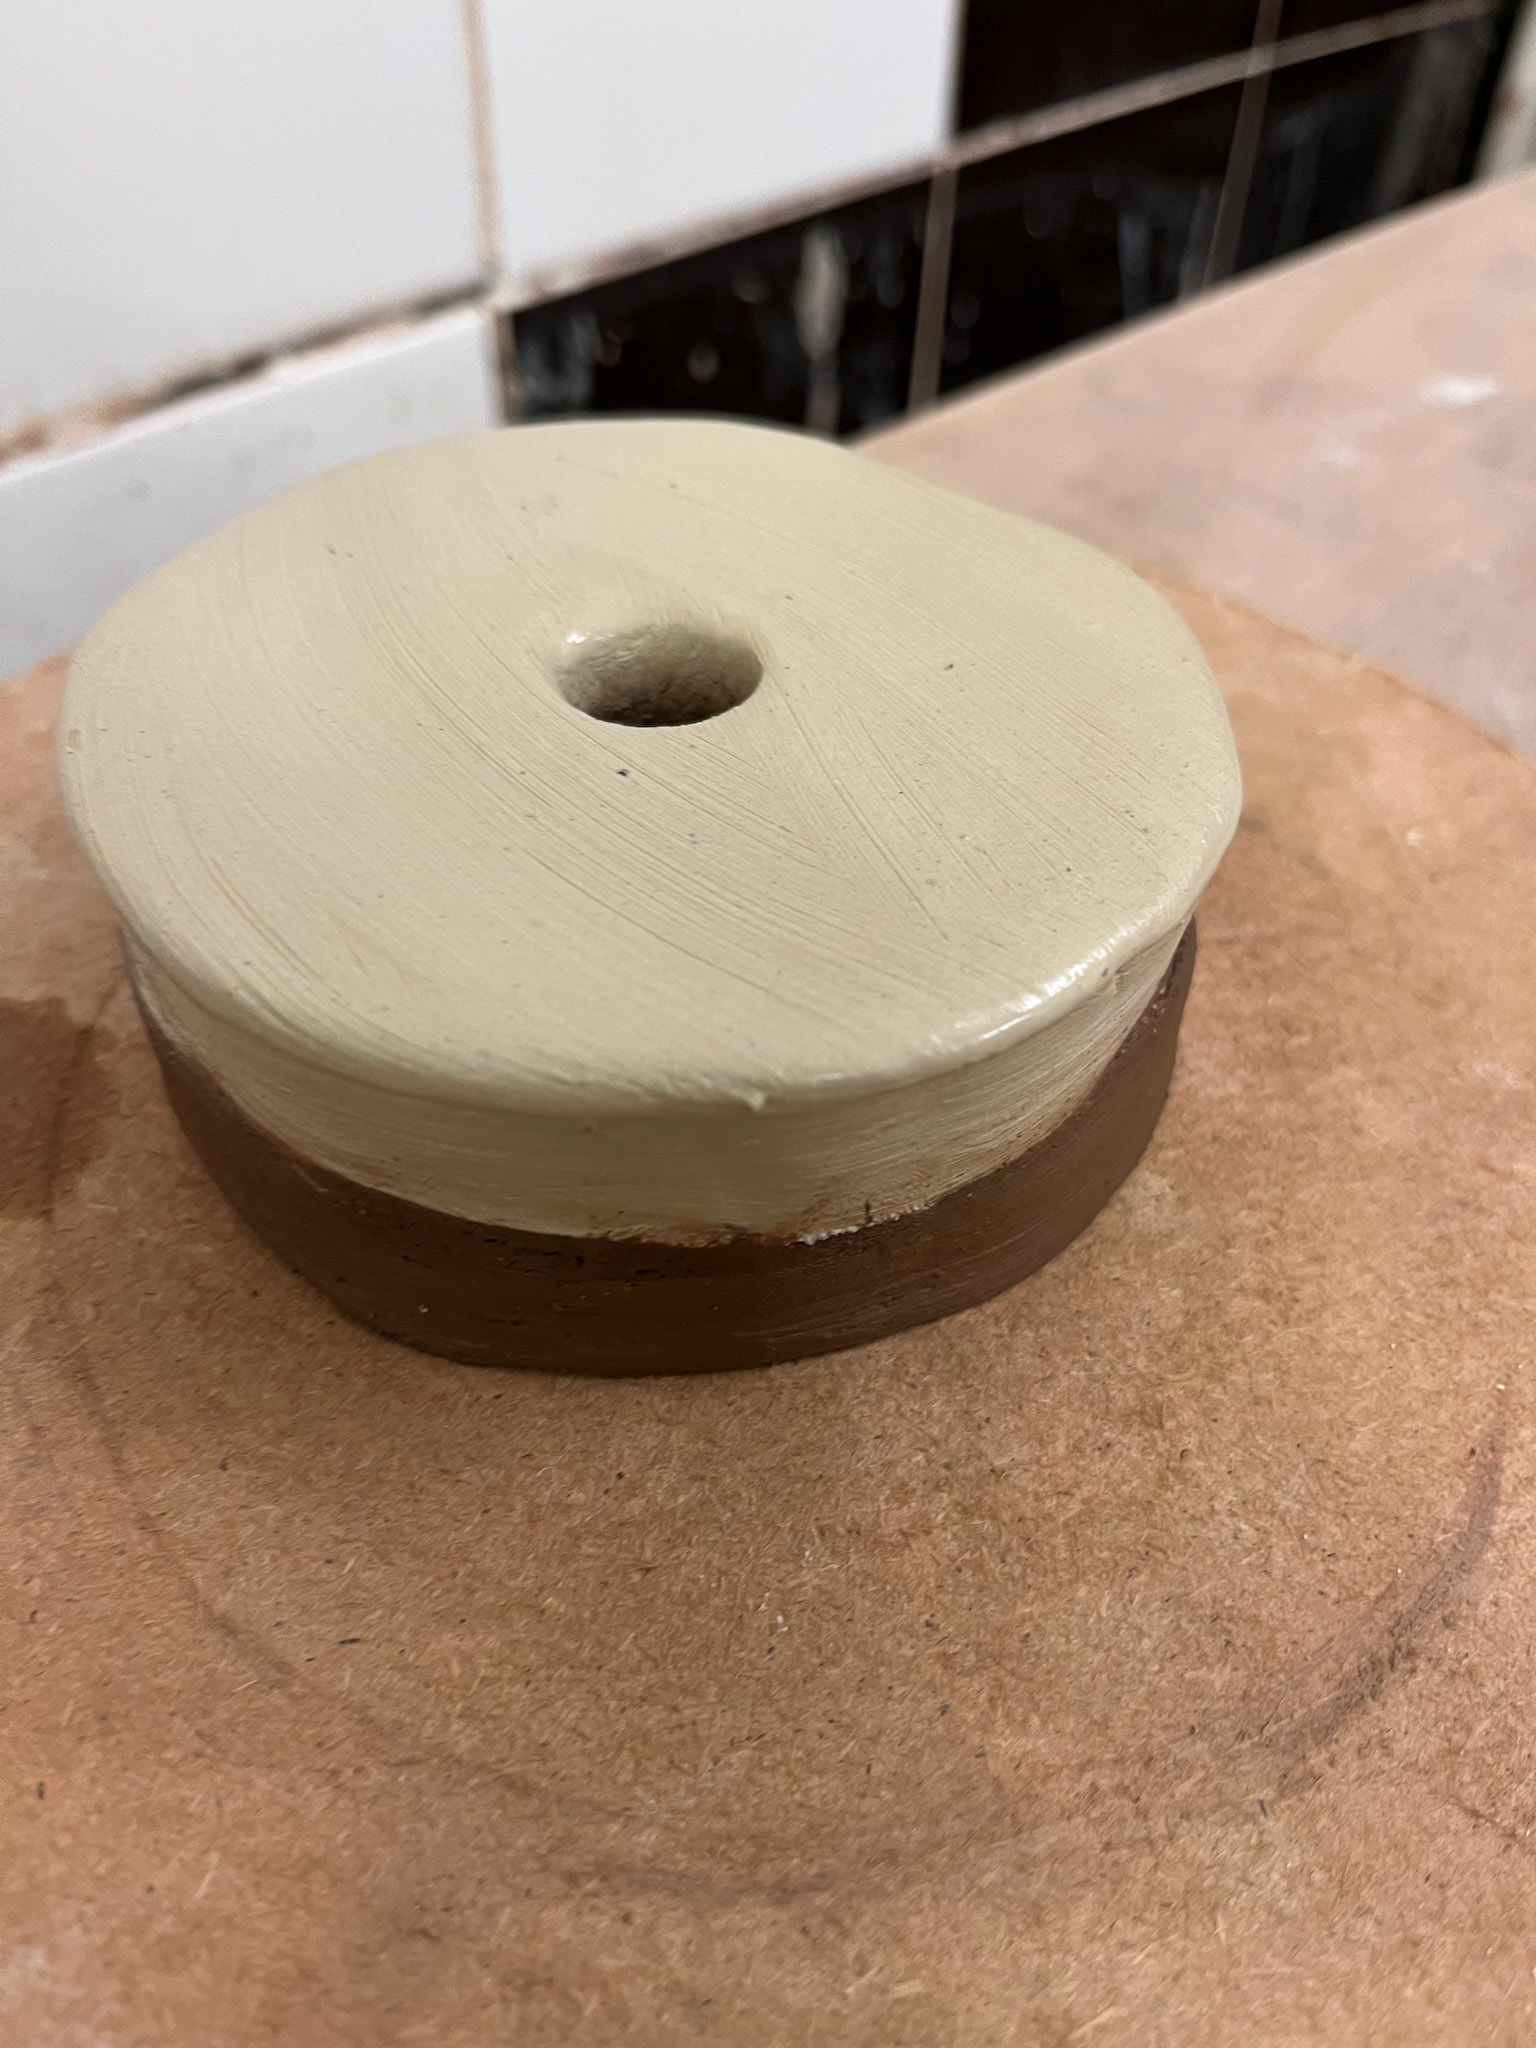
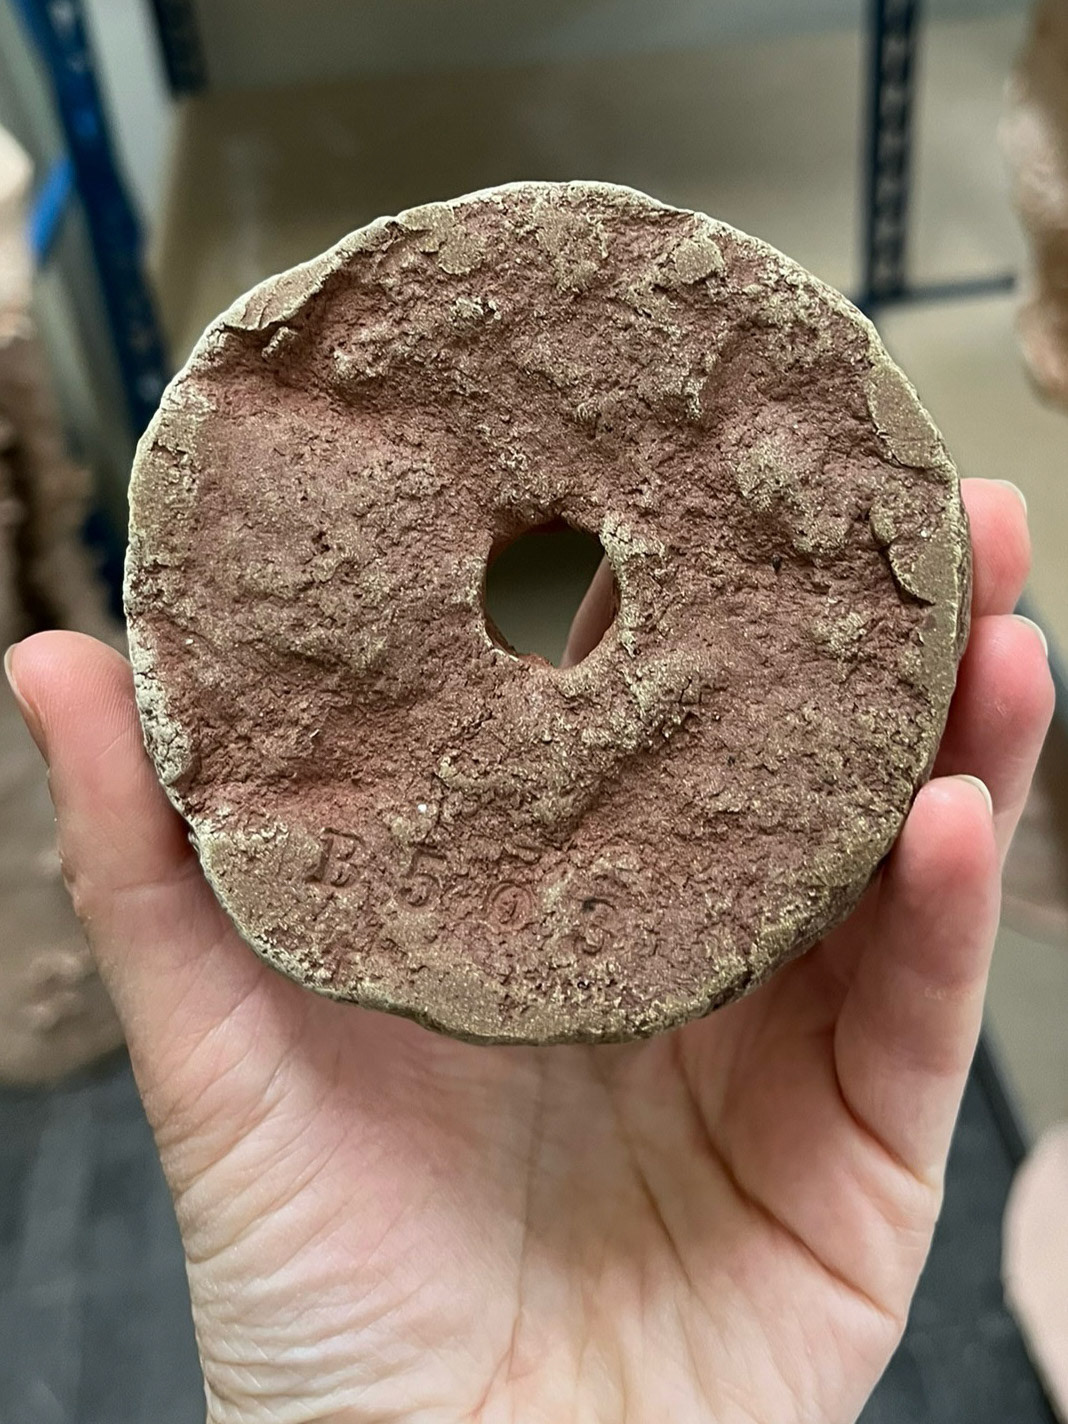
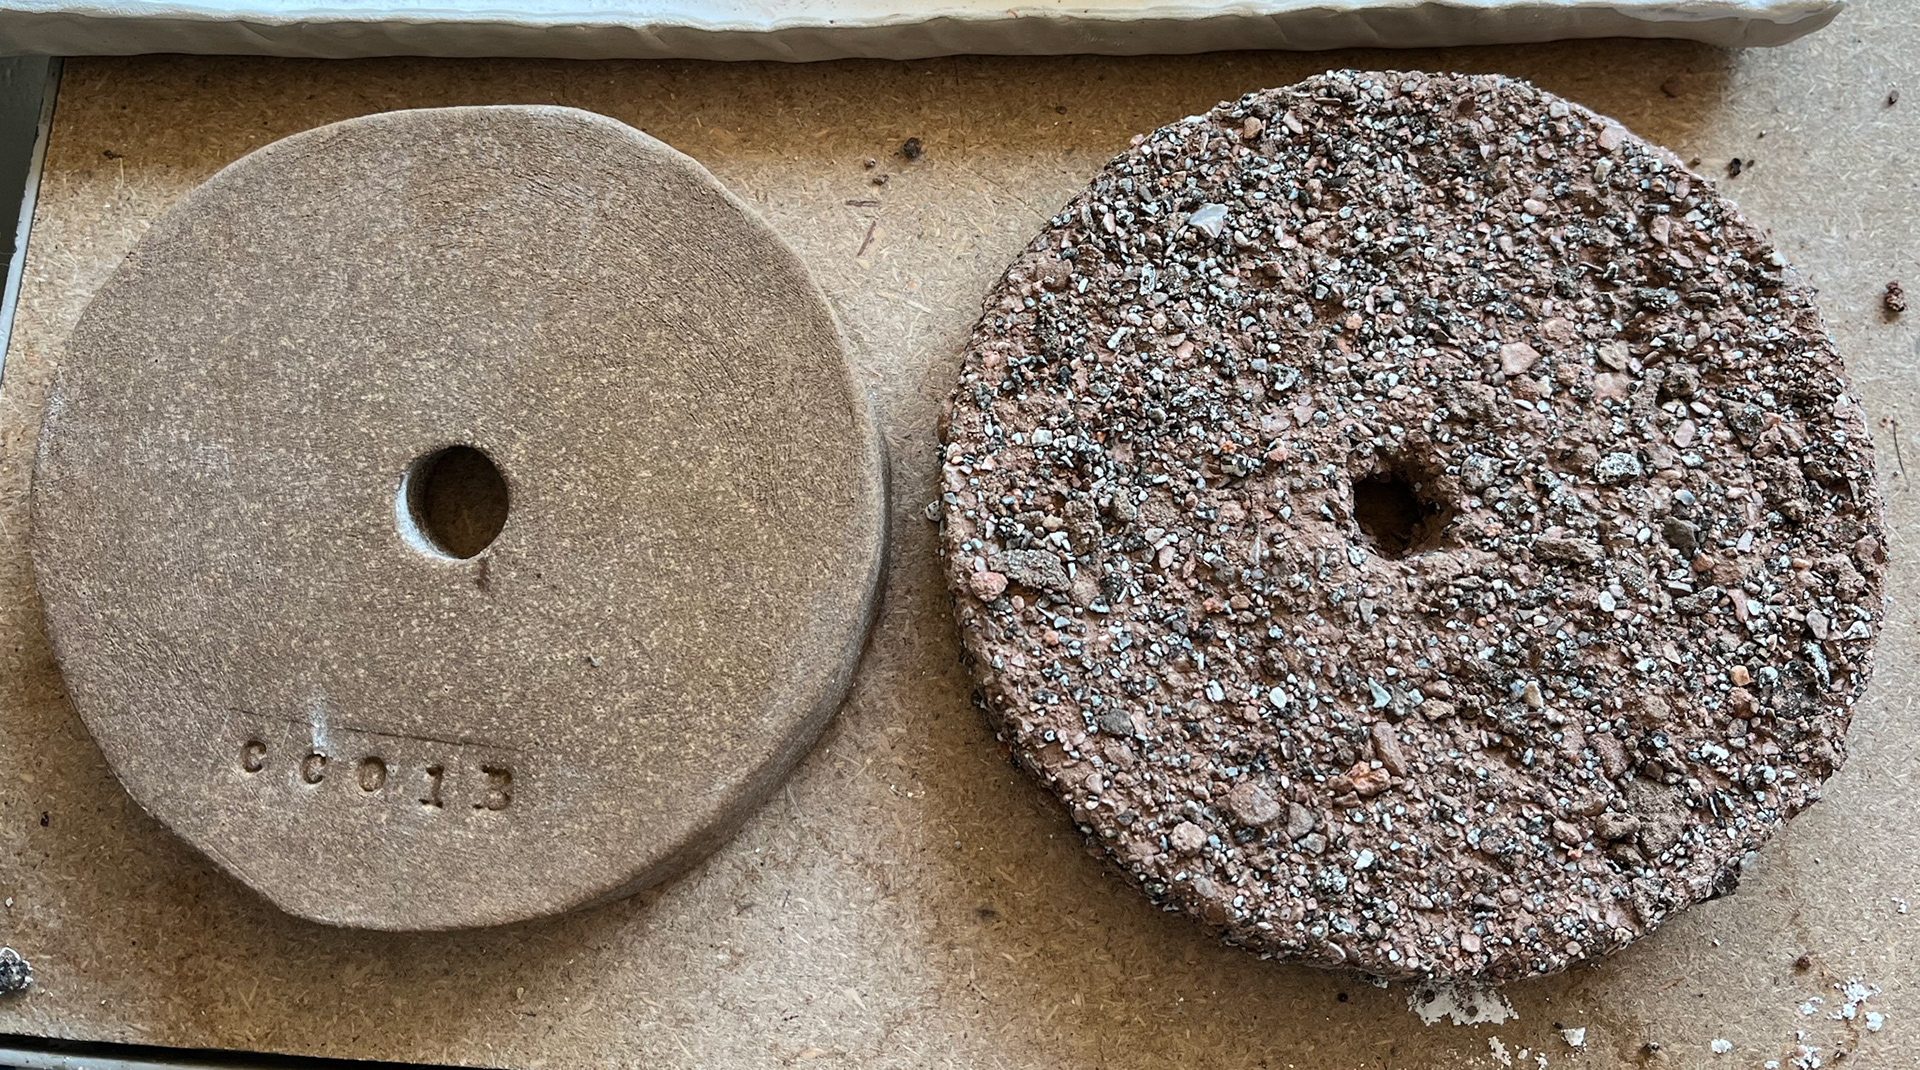
I have made some test samples of the Holderness Coast clay to fire at both bisque and 1140 degrees. It is important to fire test samples of any new wild clay to assess its compatibility and observe its qualities, such as its shrinkage, cracking and melting.
Unlike the clay from the caves, this clay is more durable and capable of firing at higher temperatures. I have included photos below to compare both the cave clay and the coastal clay. It is remarkable to observe the differences between the two clays, illustrating the potential of working with the coastal clay when using it to build with.
Coastal clay Pre-fire
Coastal clay post-fire
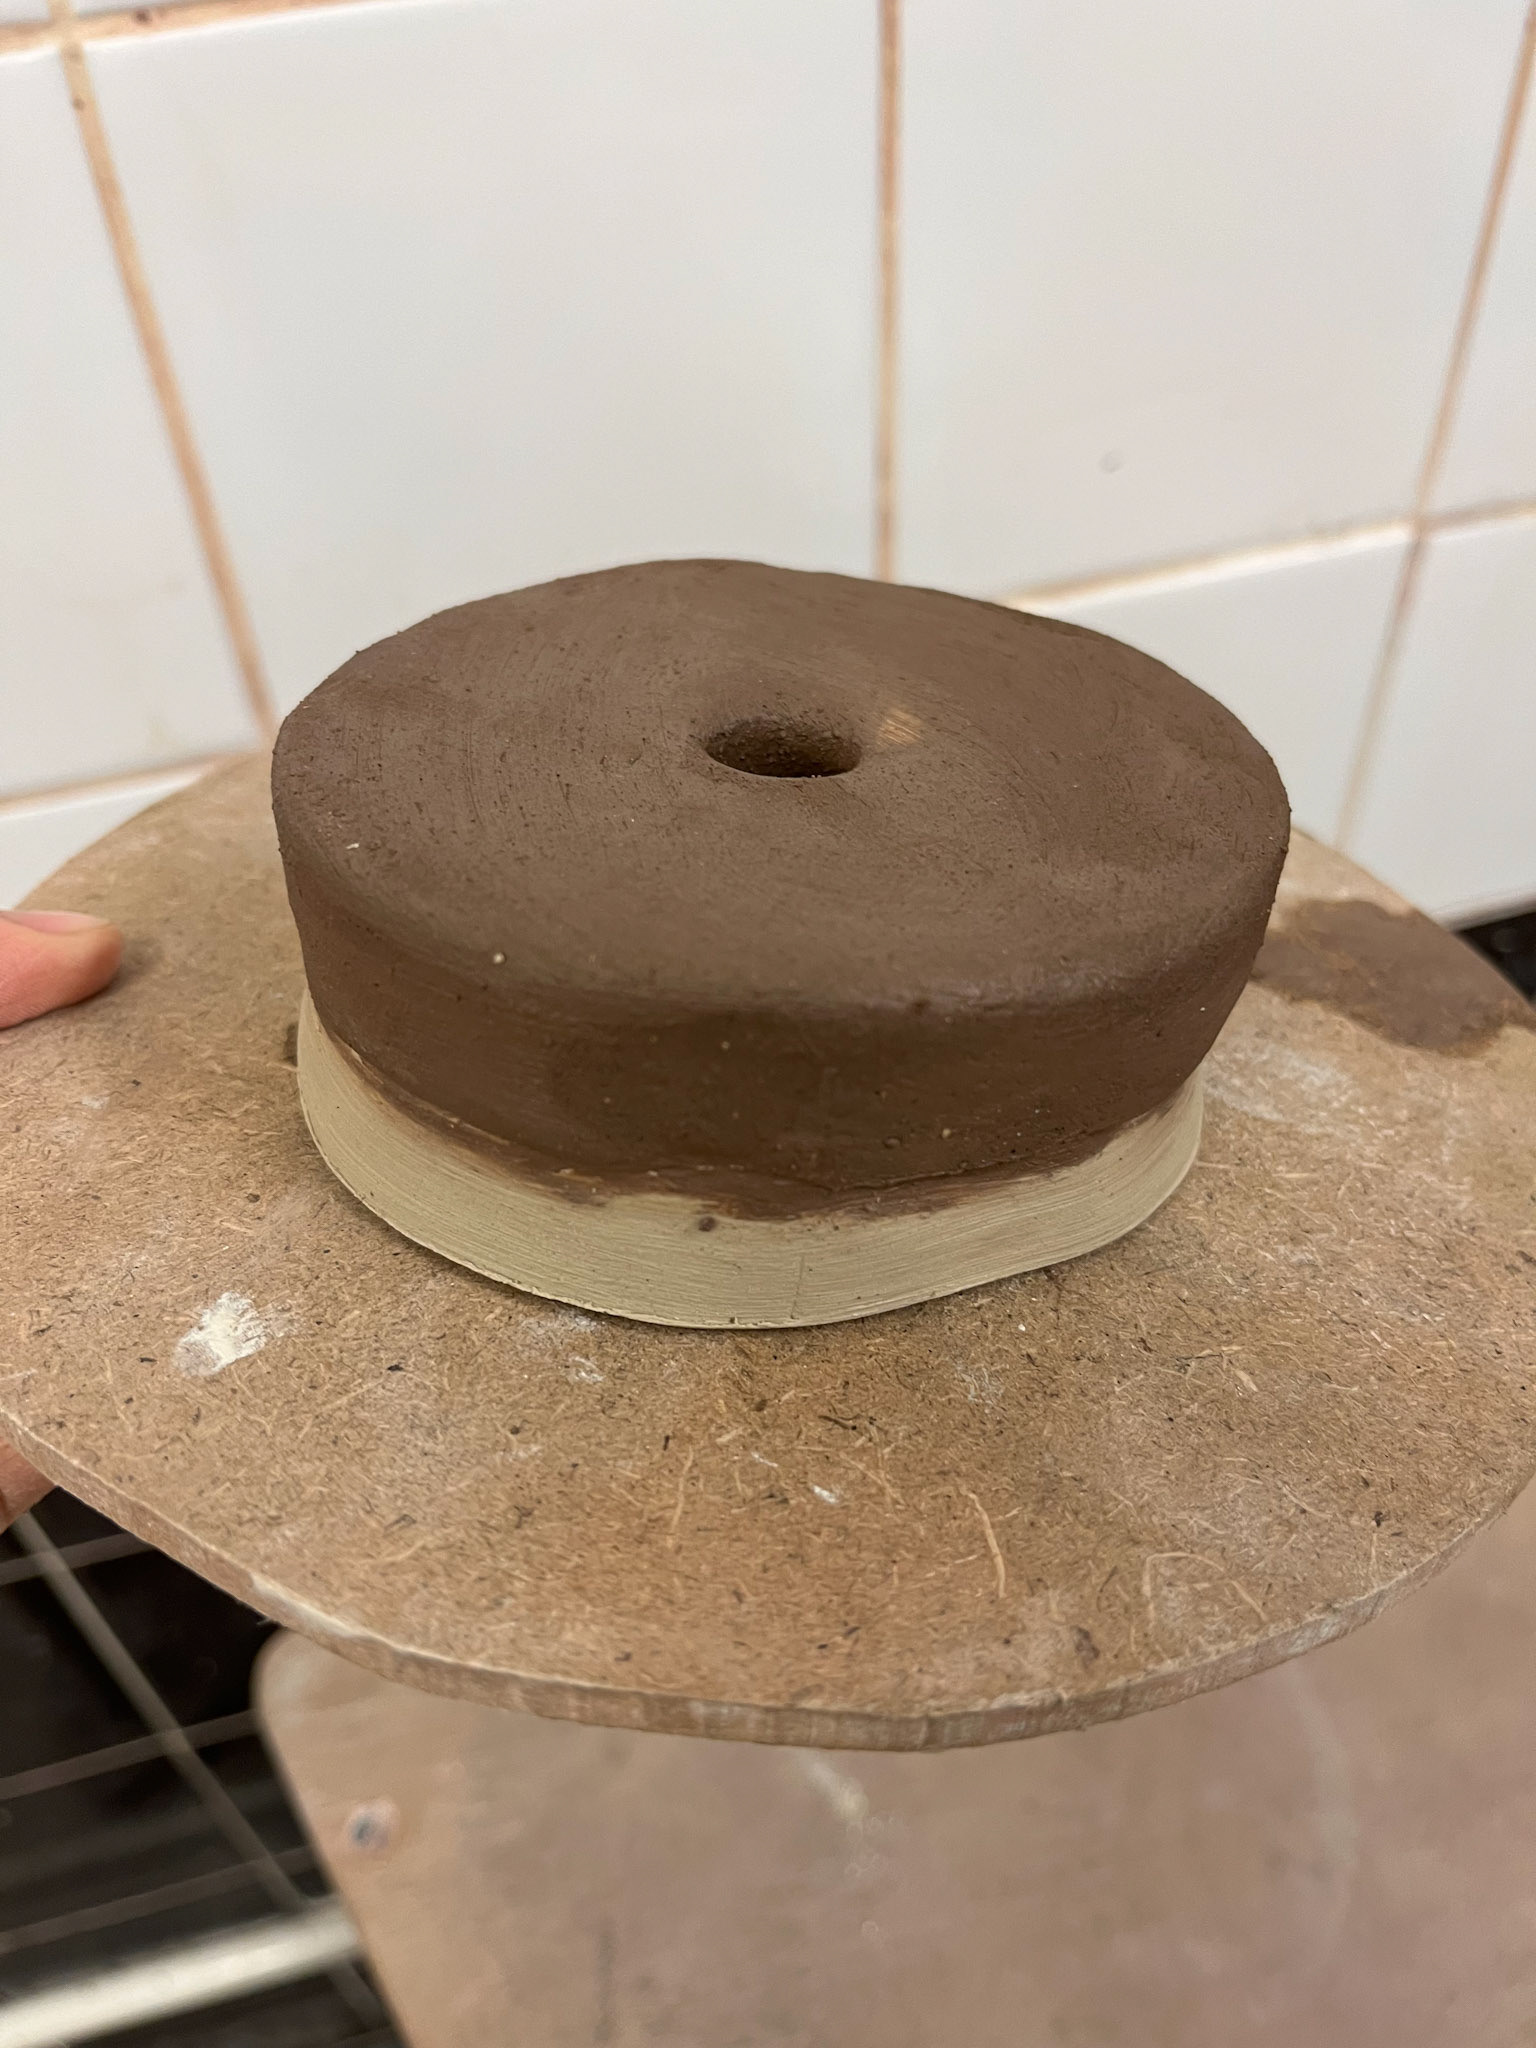
Cave clay samples fired to Bisque
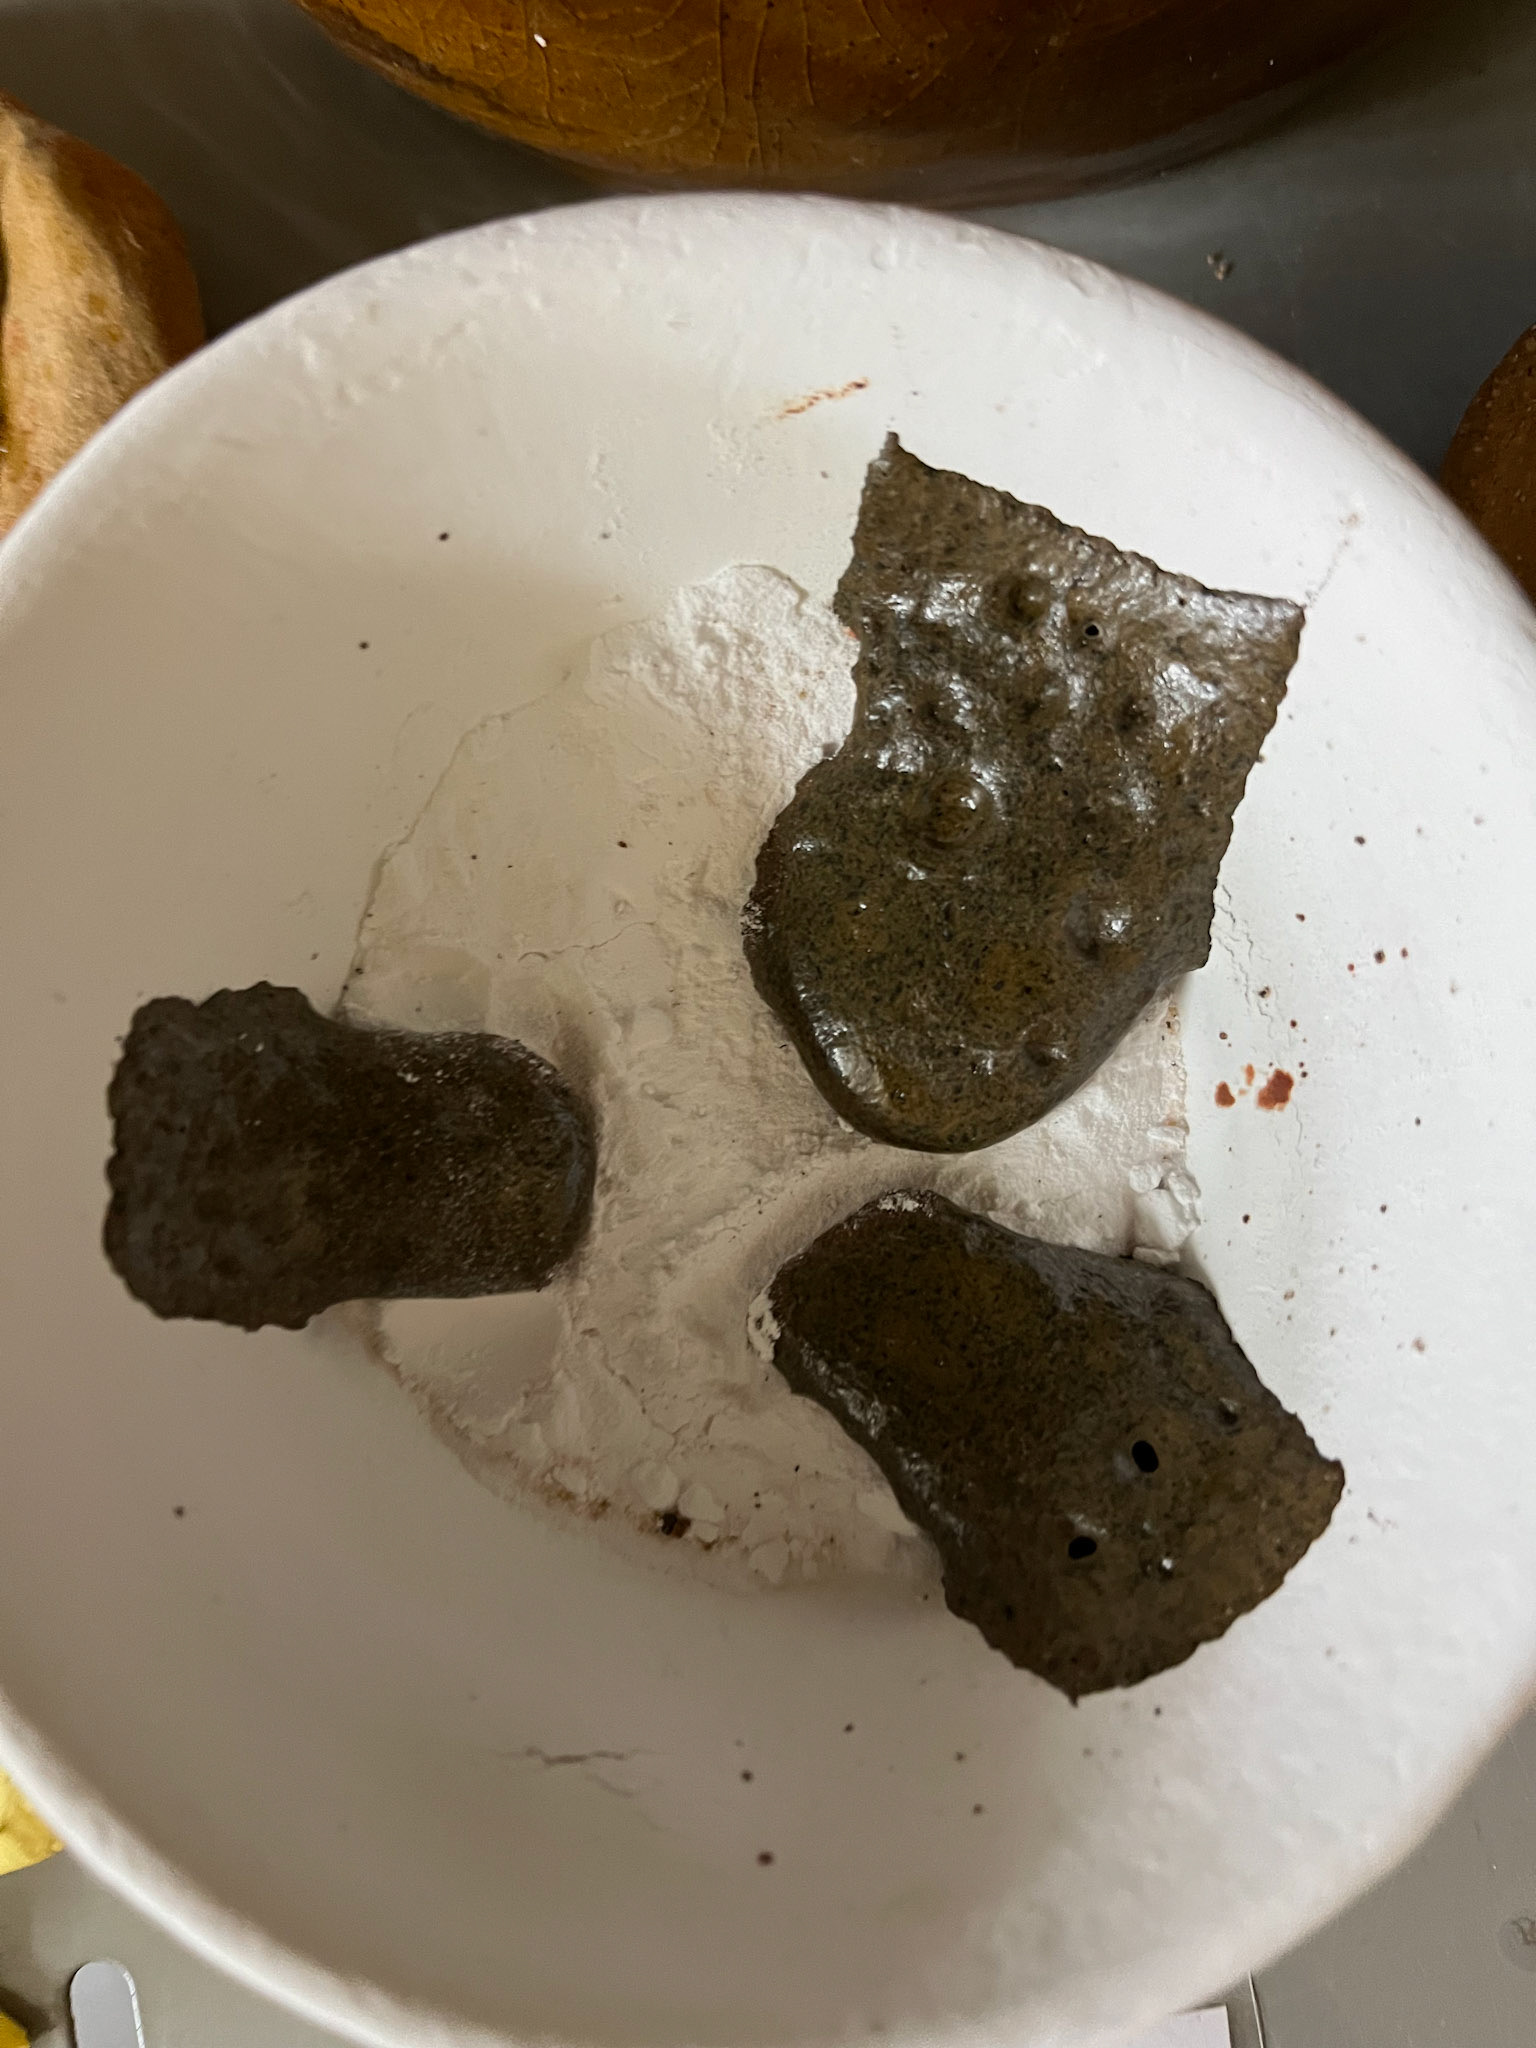
Cave clay samples fired to 1140 degrees
Firing with cave clay is unpredictable. I have found that with each batch of cave clay that I fire, it does not survive firing above 1000 degrees, as it melts in the kiln. This will most likely be due to the clay's high flux content. As the clay is rich in iron, when fired to high temperatures and organic content, the clay turns to a glaze.
Tim Copsey studio meeting
On the 2nd February, I met again with Tim Copsey, whom I had also visited at his studio over Christmas. Speaking to Tim has really inspired me in the work that I am making and the techniques that I am using. When visiting his studio and workshop, I was able to hear more about the glazes he uses for the ceramics he makes, the types of clay he uses, and why.
It was interesting to hear that he often uses gritstone as a glaze when firing ceramics, as he told me that this gives the clay more texture and interesting, unpredictable changes to the ceramics. Gritstone is coarse sandstone which has high strength and durability. It also has a high silica content, making it good for glazing. Tim recommended that I work with gritstone, or even adding rocks, which he also does, to clay work before firing, as the combination of rock and ceramic can have successful outcomes.
When visiting Tim, he very generously suggested that I collaborate with him in using his wood-fired kiln. Built in the garden of his workshop, Tim uses a wood kiln to fire his ceramics, which is a natural, more ecologically friendly way of firing clay. I was very excited about this opportunity, as finding alternative ways of firing is important in my practice, and one which suits my working style well.
Through discussions with Tim, we said that I would make a series of small samples with different wild clays- some from the caves, some from the Holderness Coast- and that these would be placed in the wood kiln to test their compatibility with the 1200-degree heat of the kiln.
Update: Unfortunately, at the end of February, Tim decided not to continue with our collaboration for reasons unknown to me. However, it was great to have the experience of talking to a professional ceramicist and have the opportunity to learn about his studio practice.
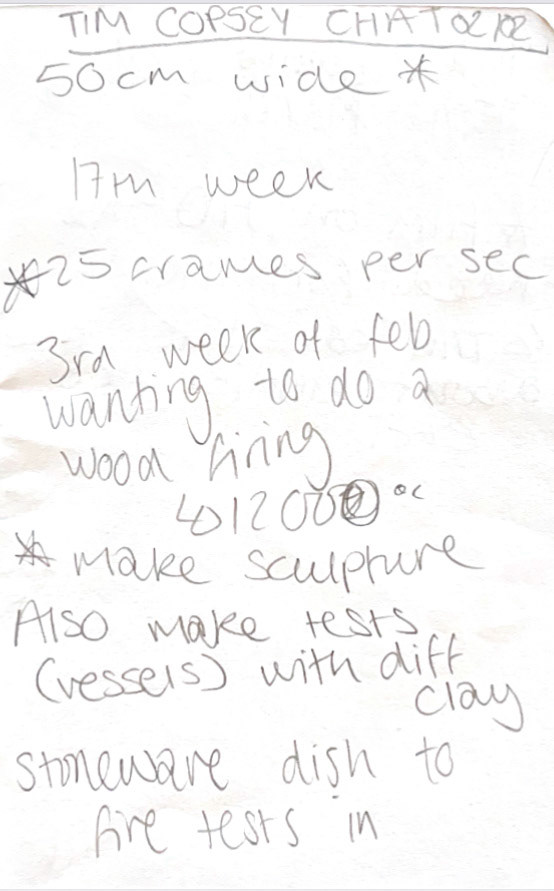
Notes from meeting 02/02
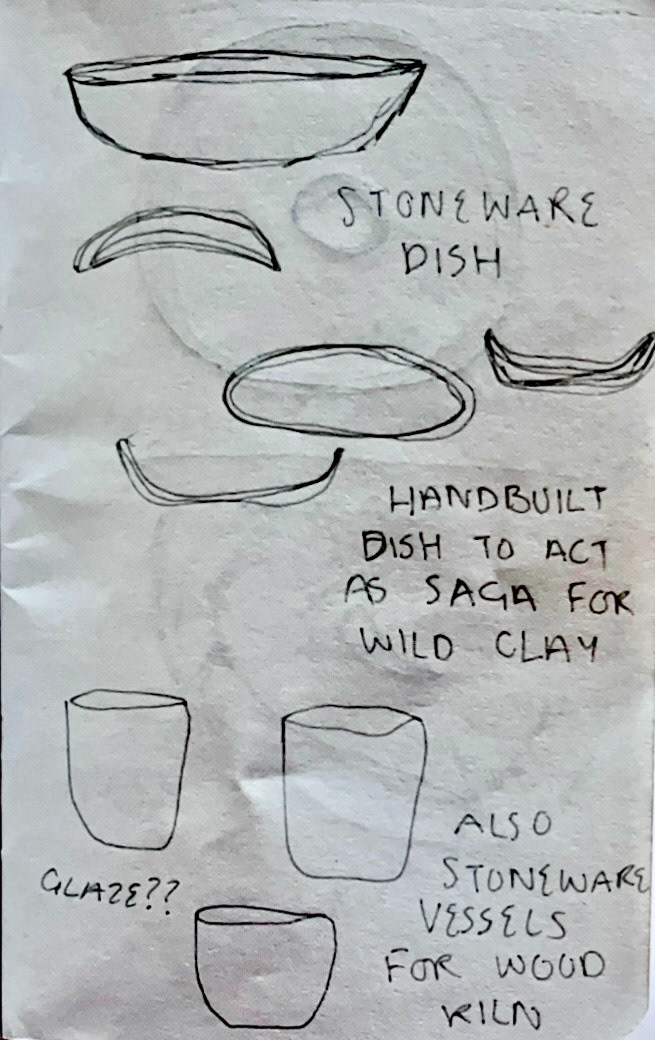
Sketches of test vessels
Gritstone added to glaze
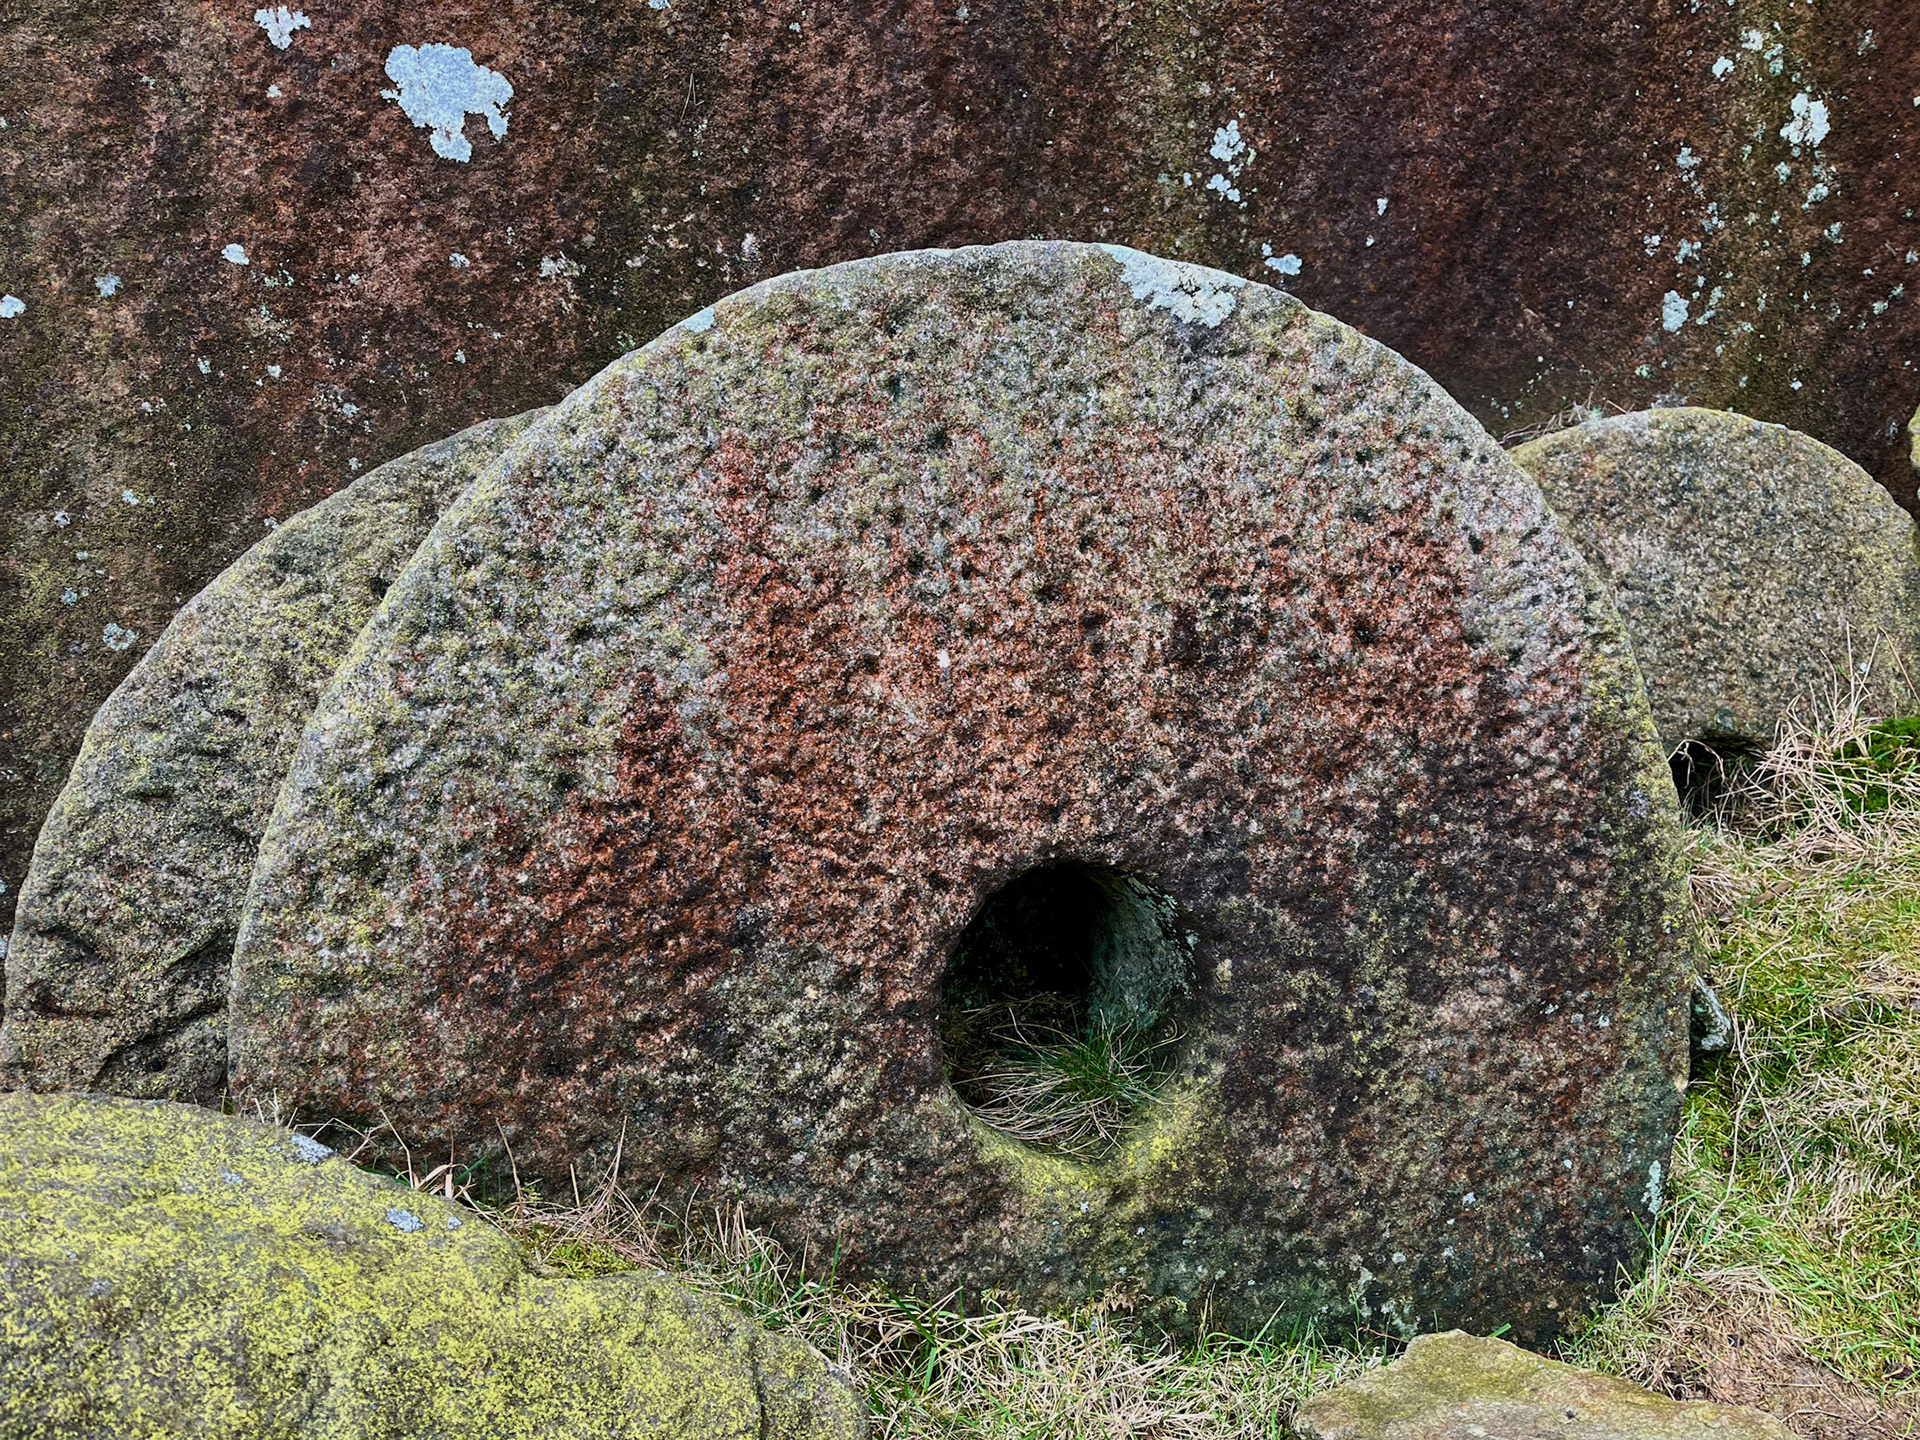
Millstones in the Peak District
I have decided to focus the theme of making for this unit on millstones in the Peak District. Millstones are the most iconic feature of the national park, and I want to connect the locality of my making with my materials.
To find out more about why I am focusing on Millstones, their history and geographies in the landscape, view the dedicated page below.

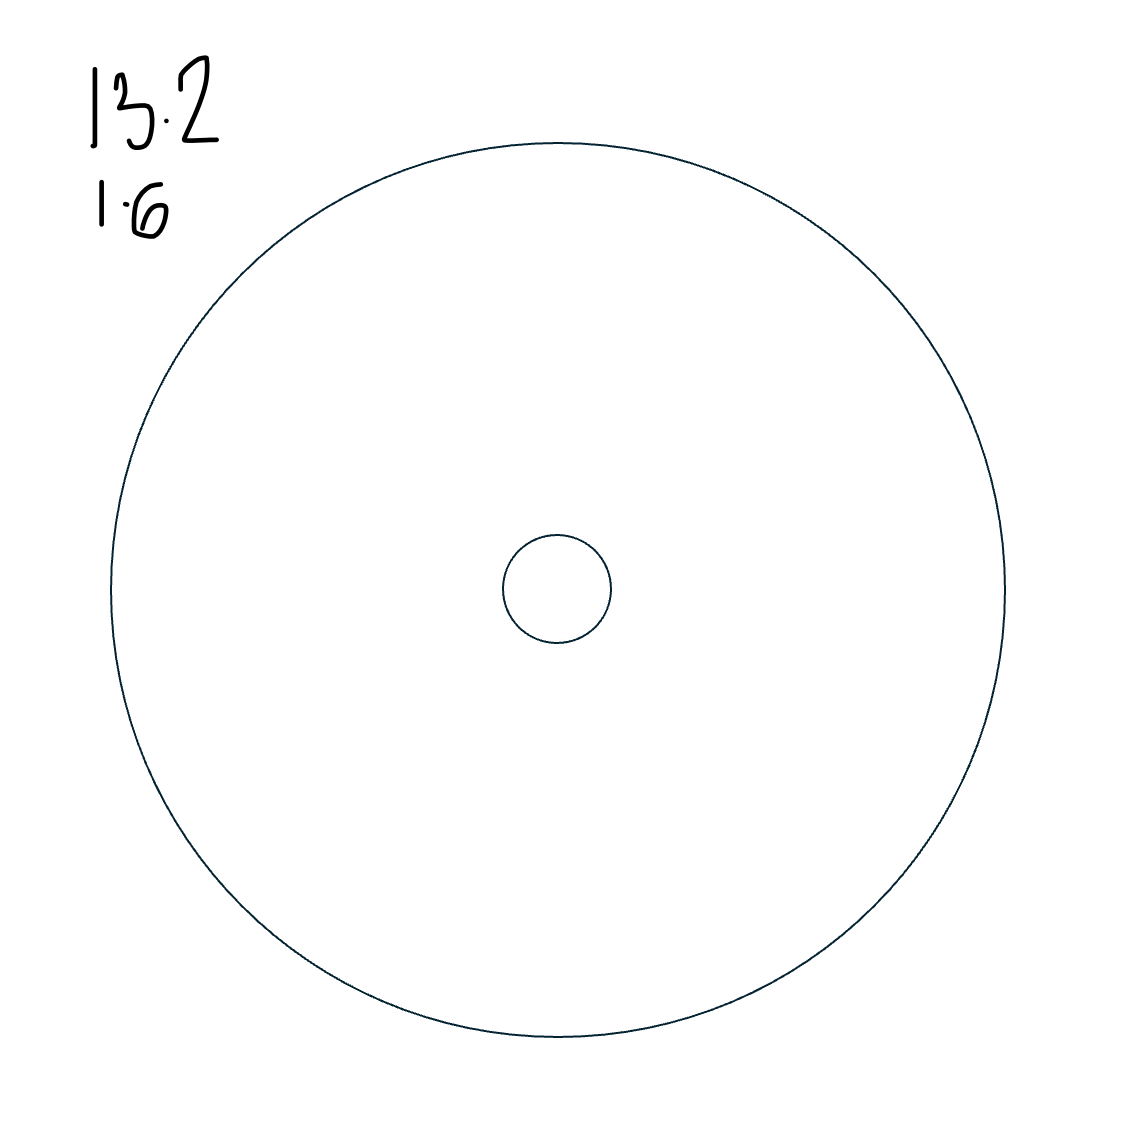
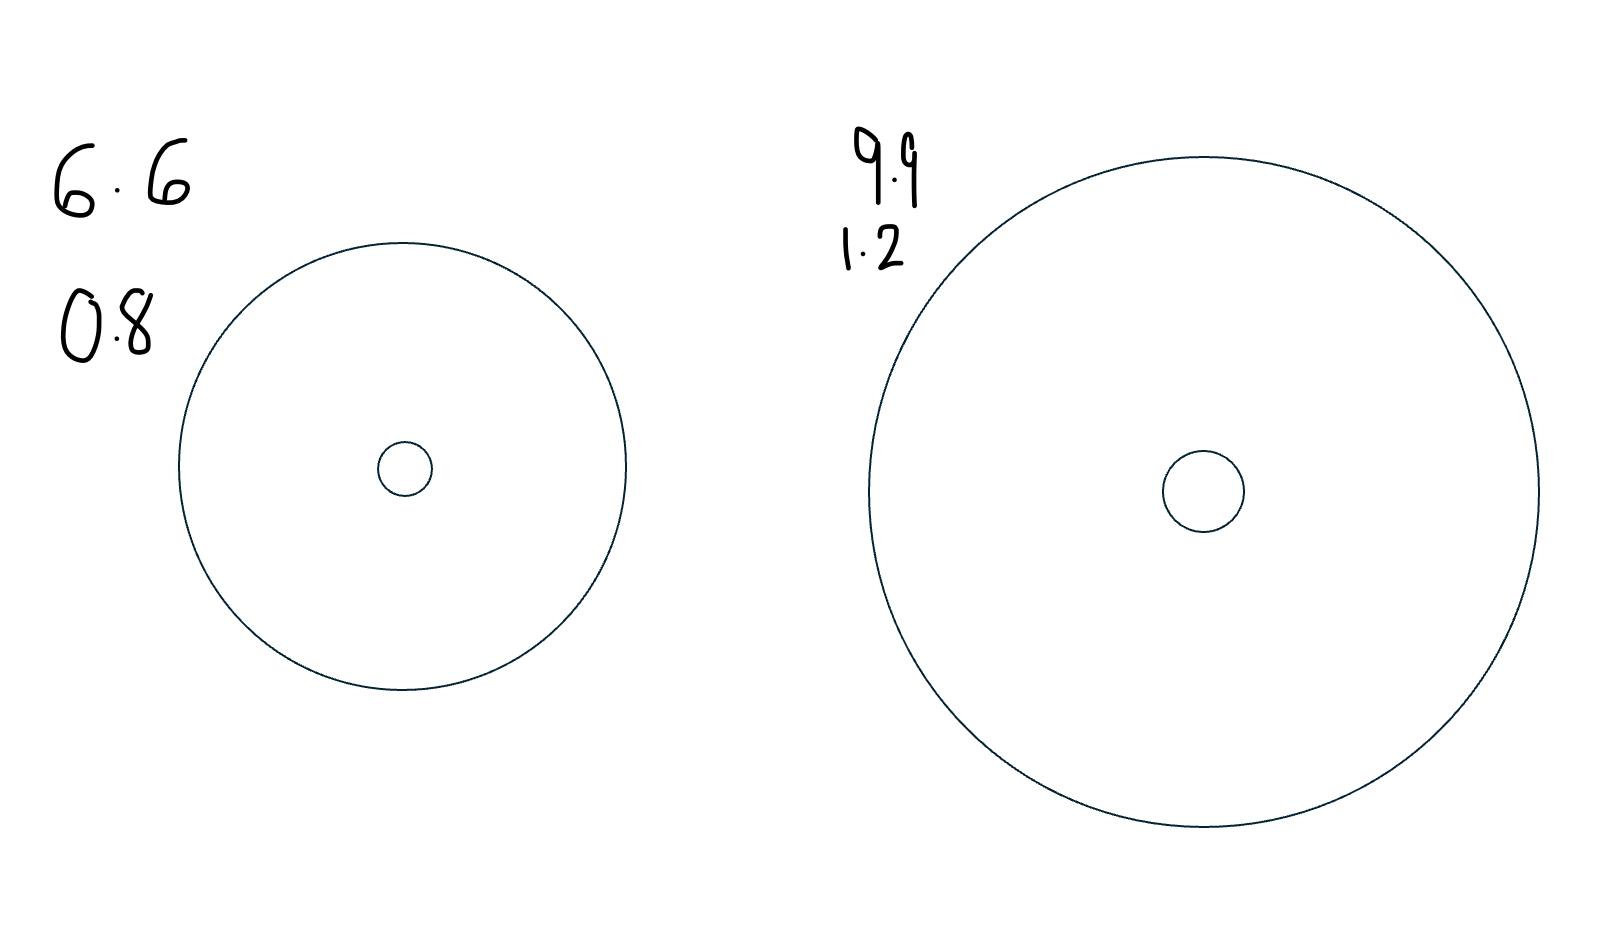
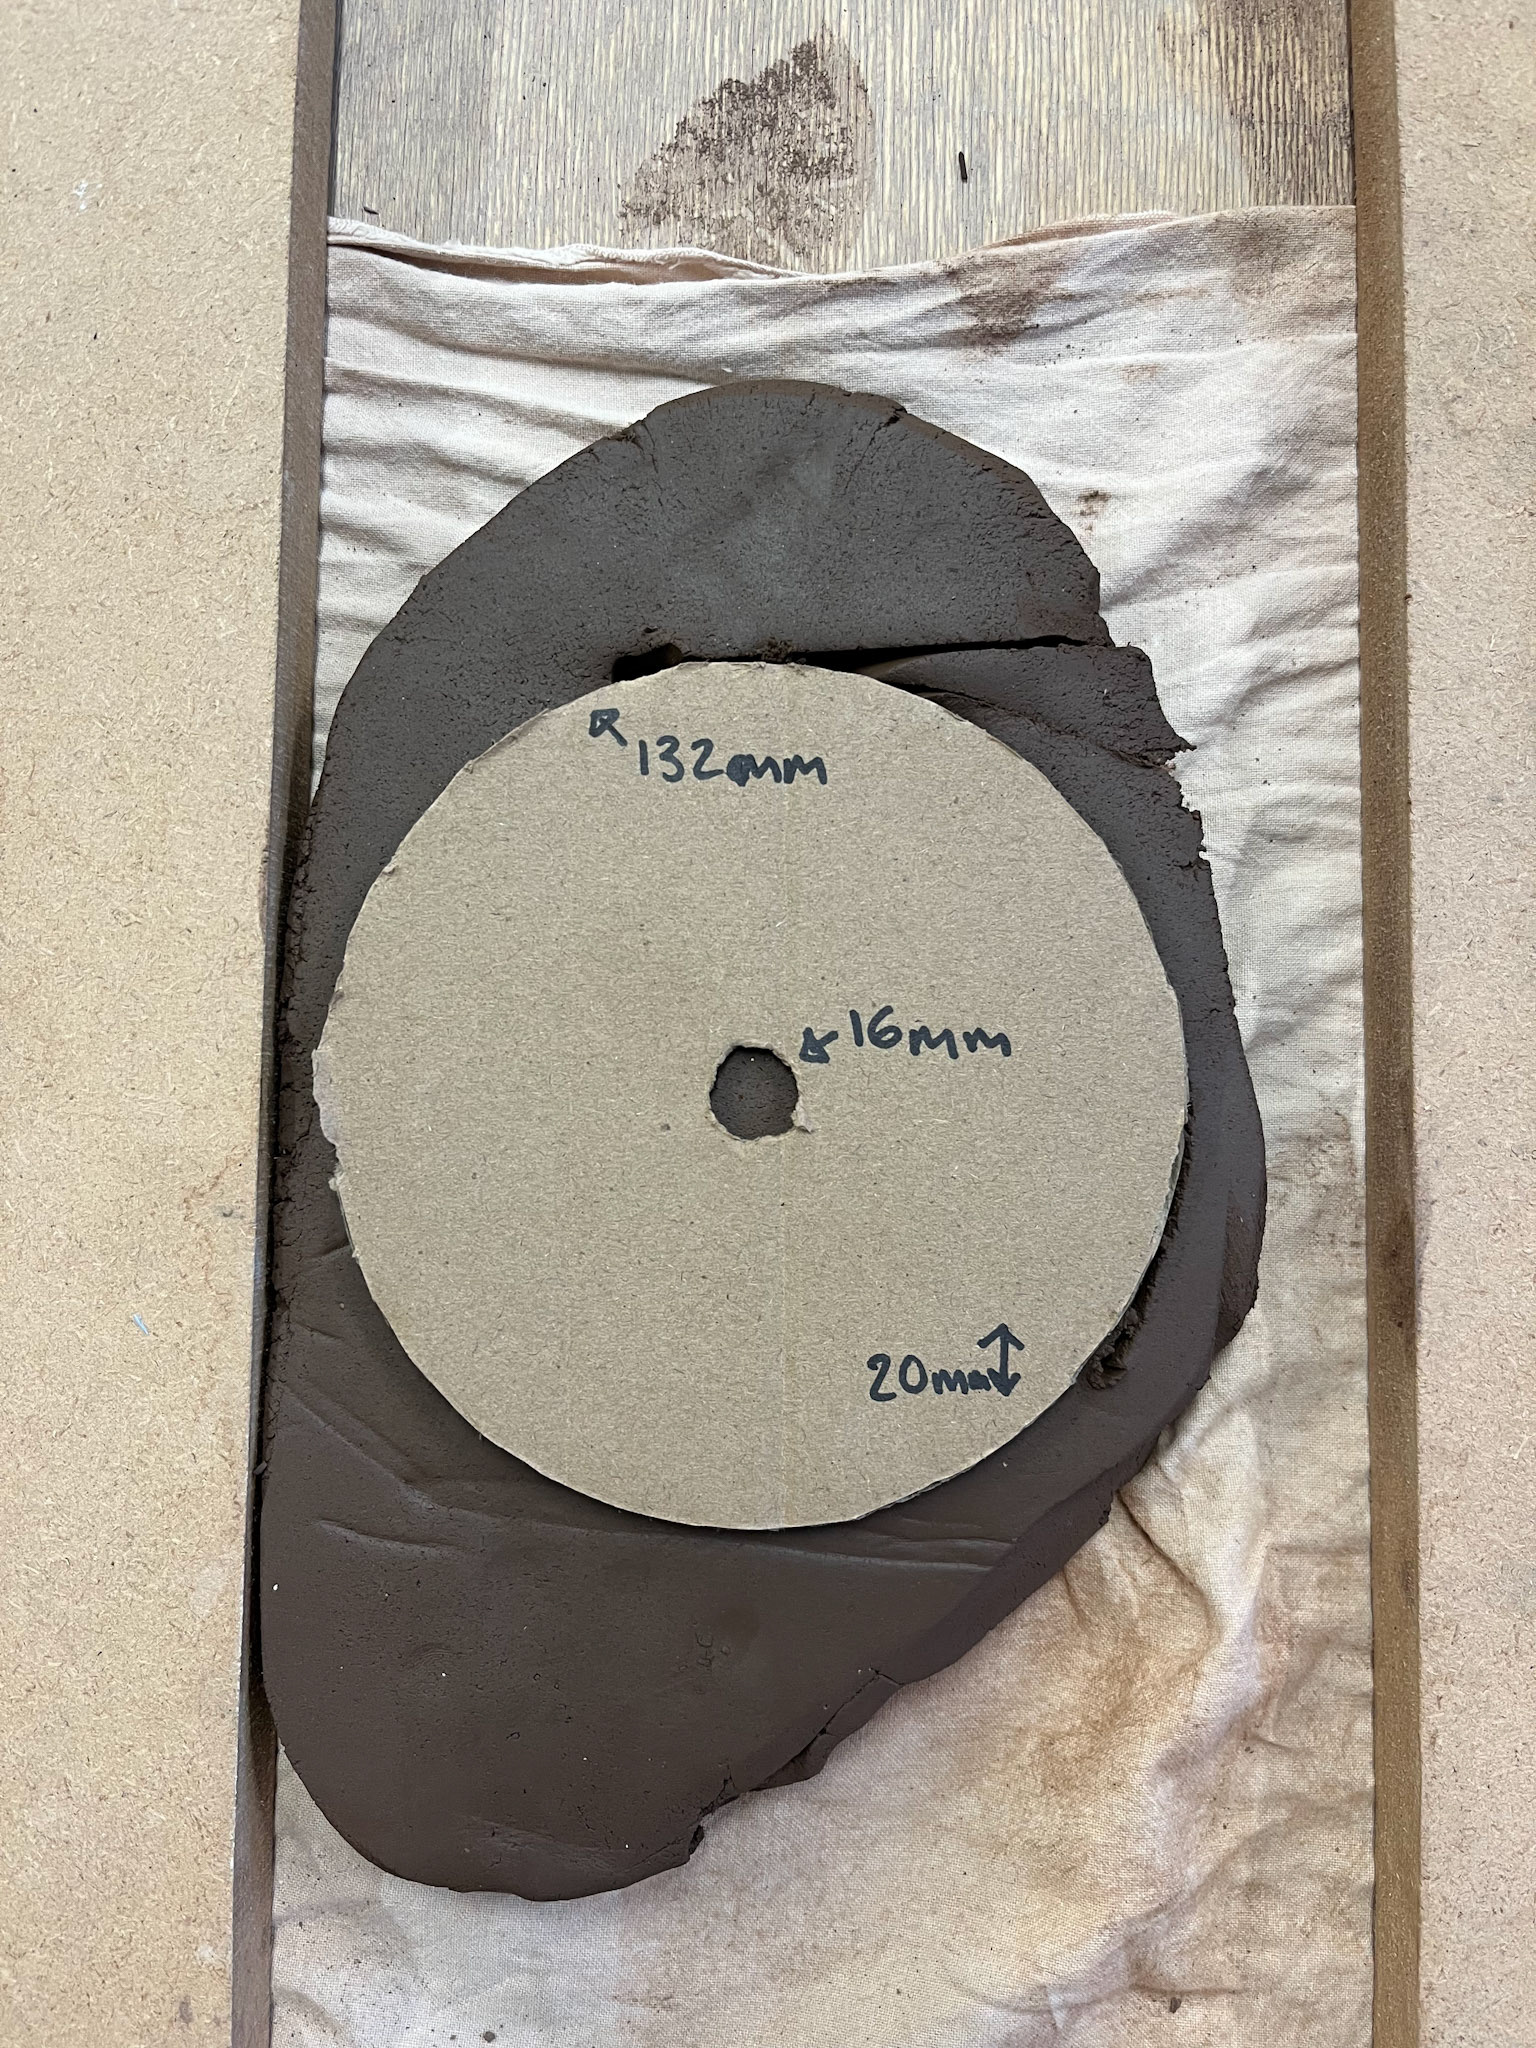
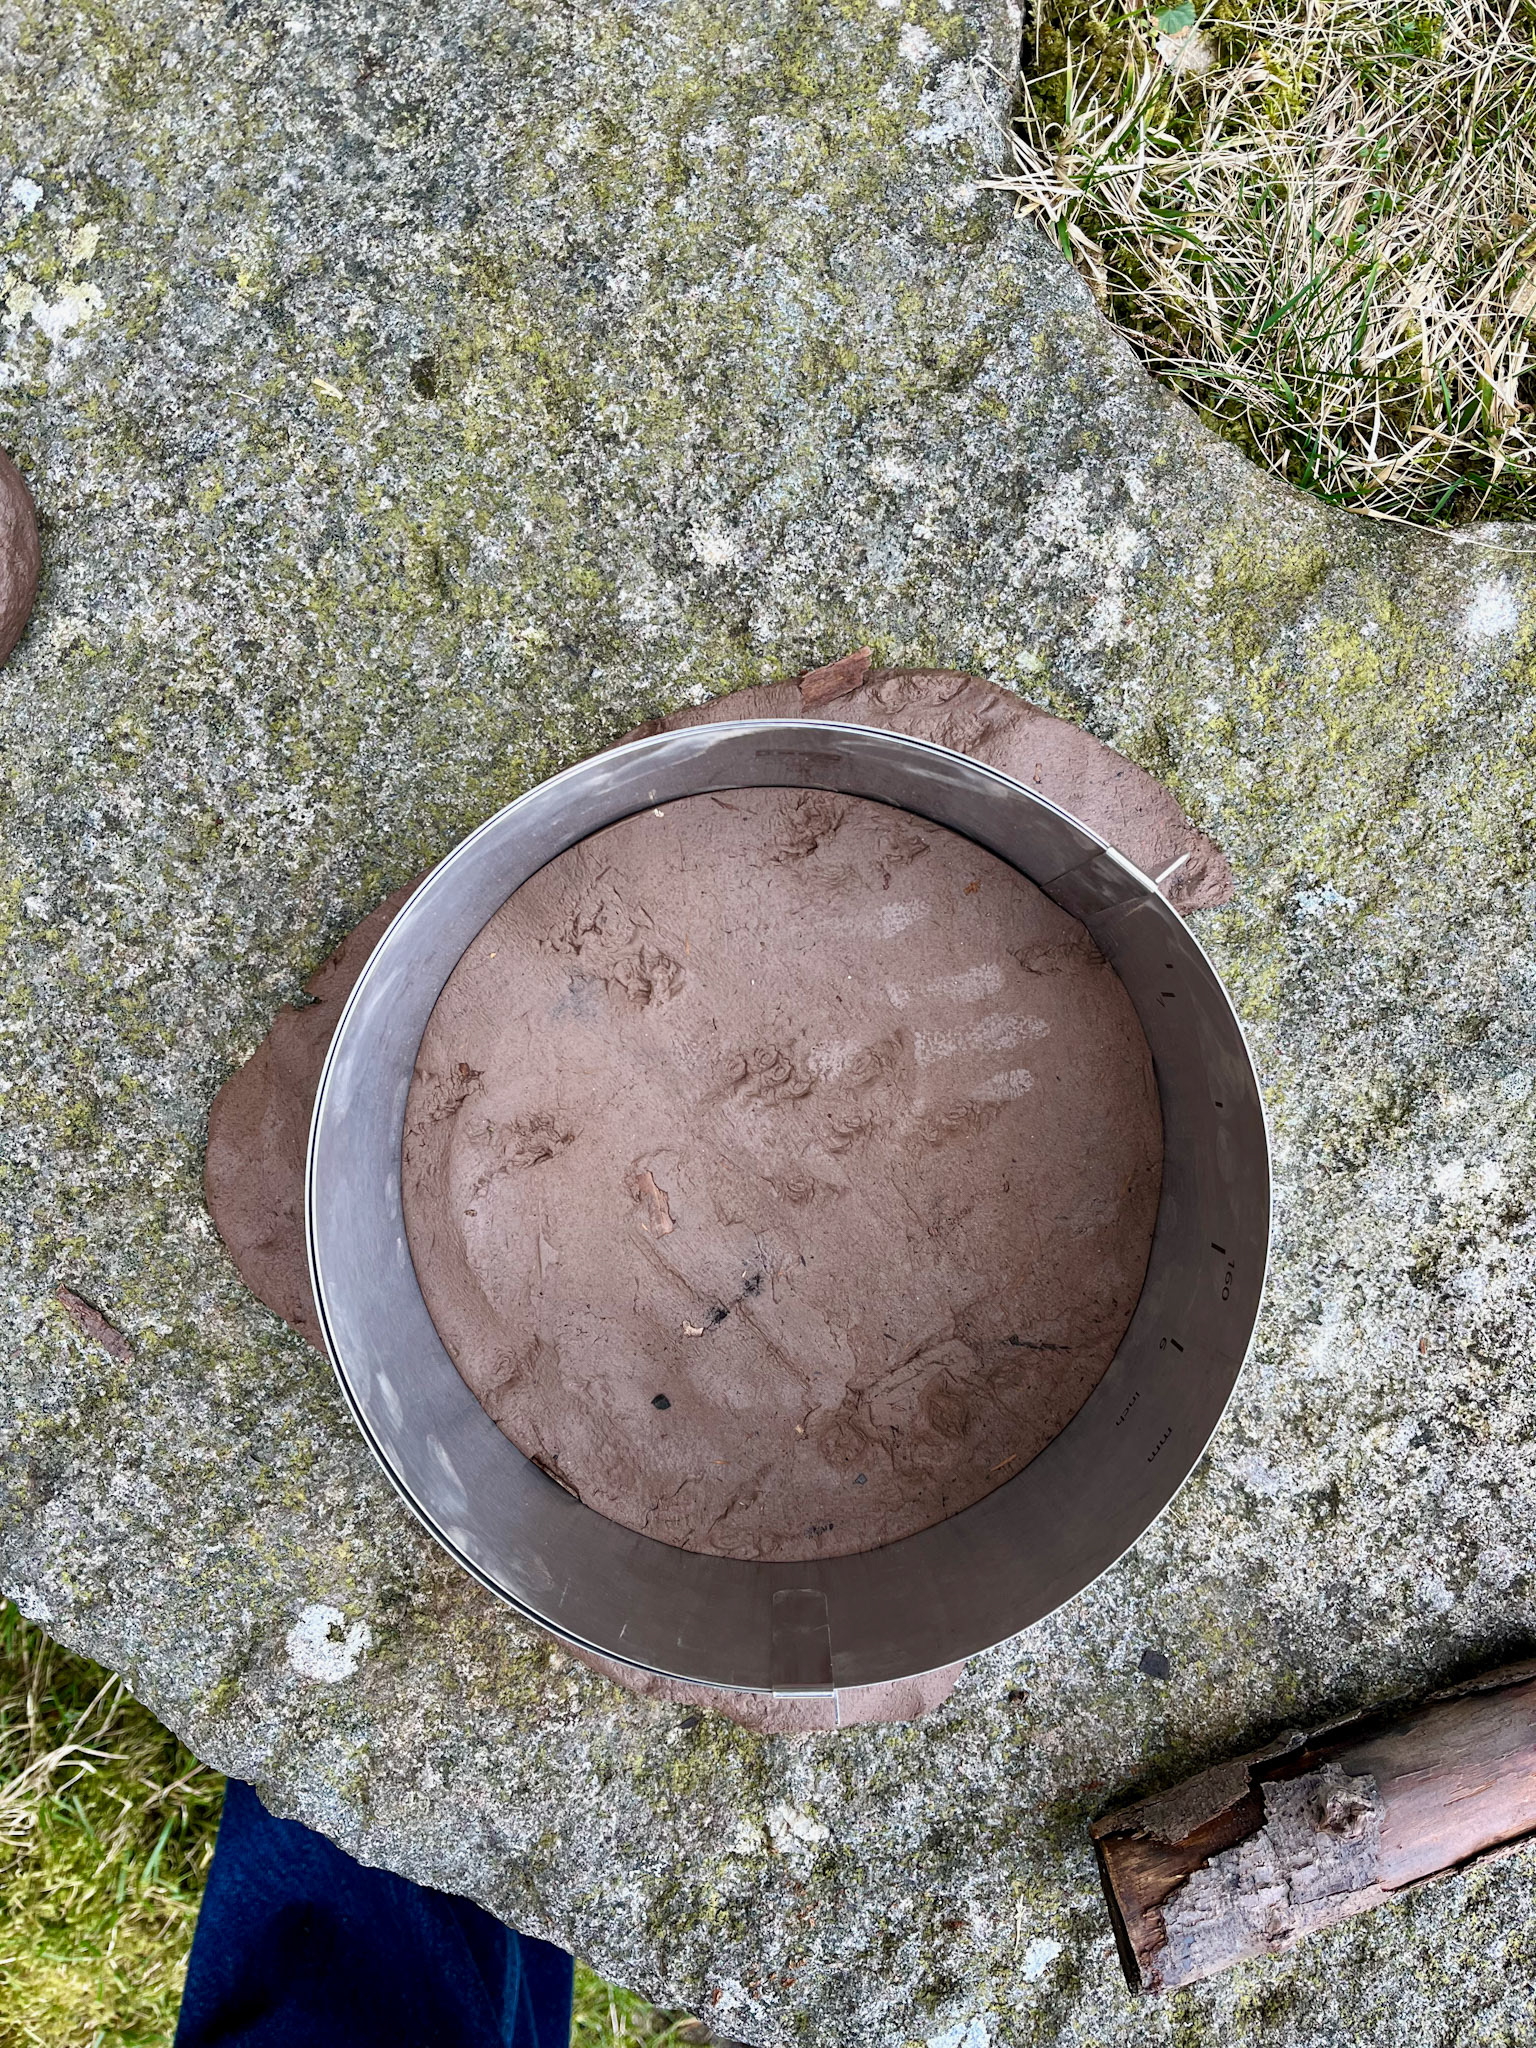
Measuring Millstones
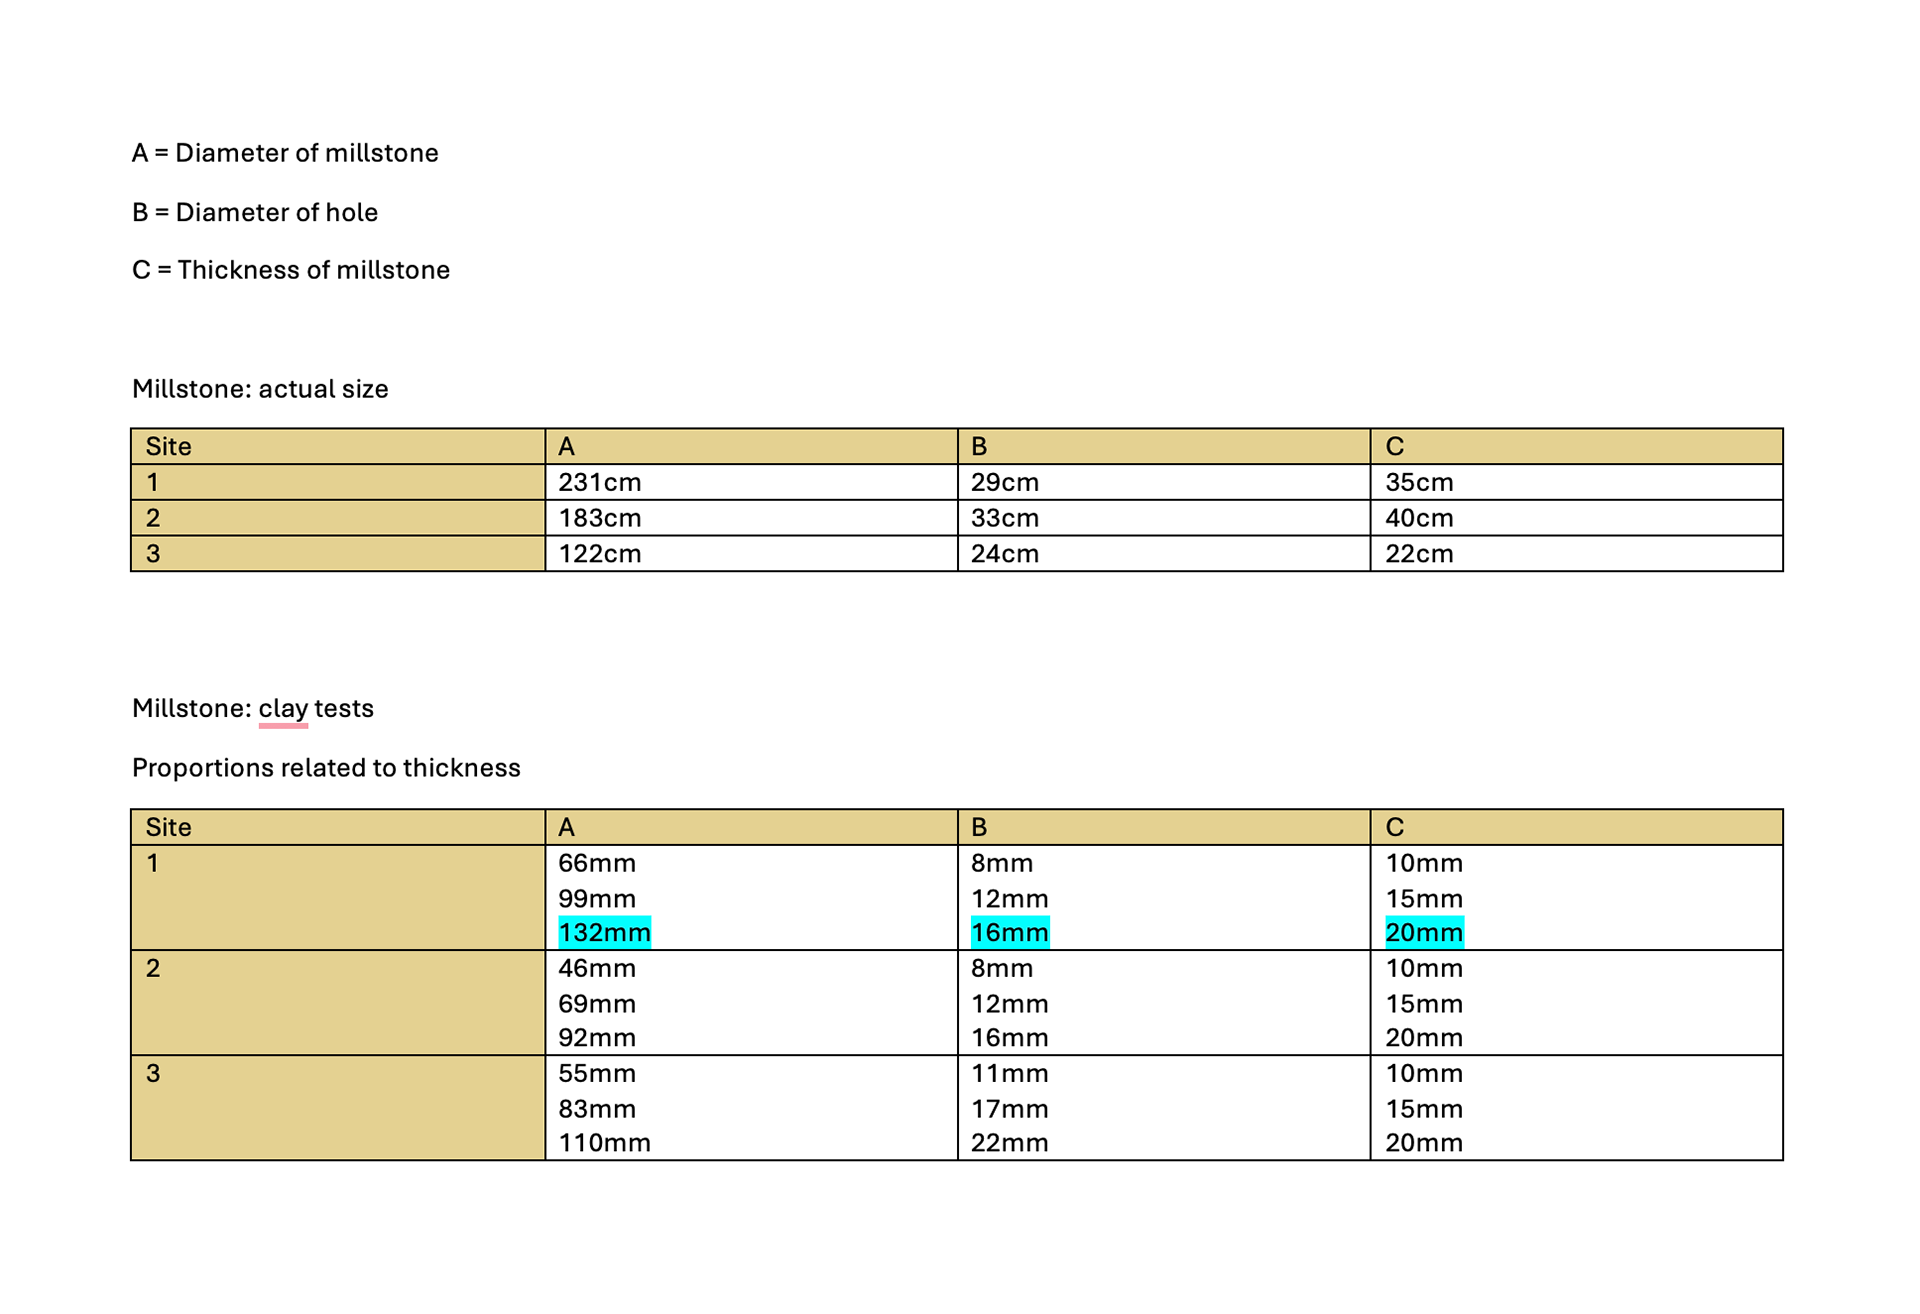
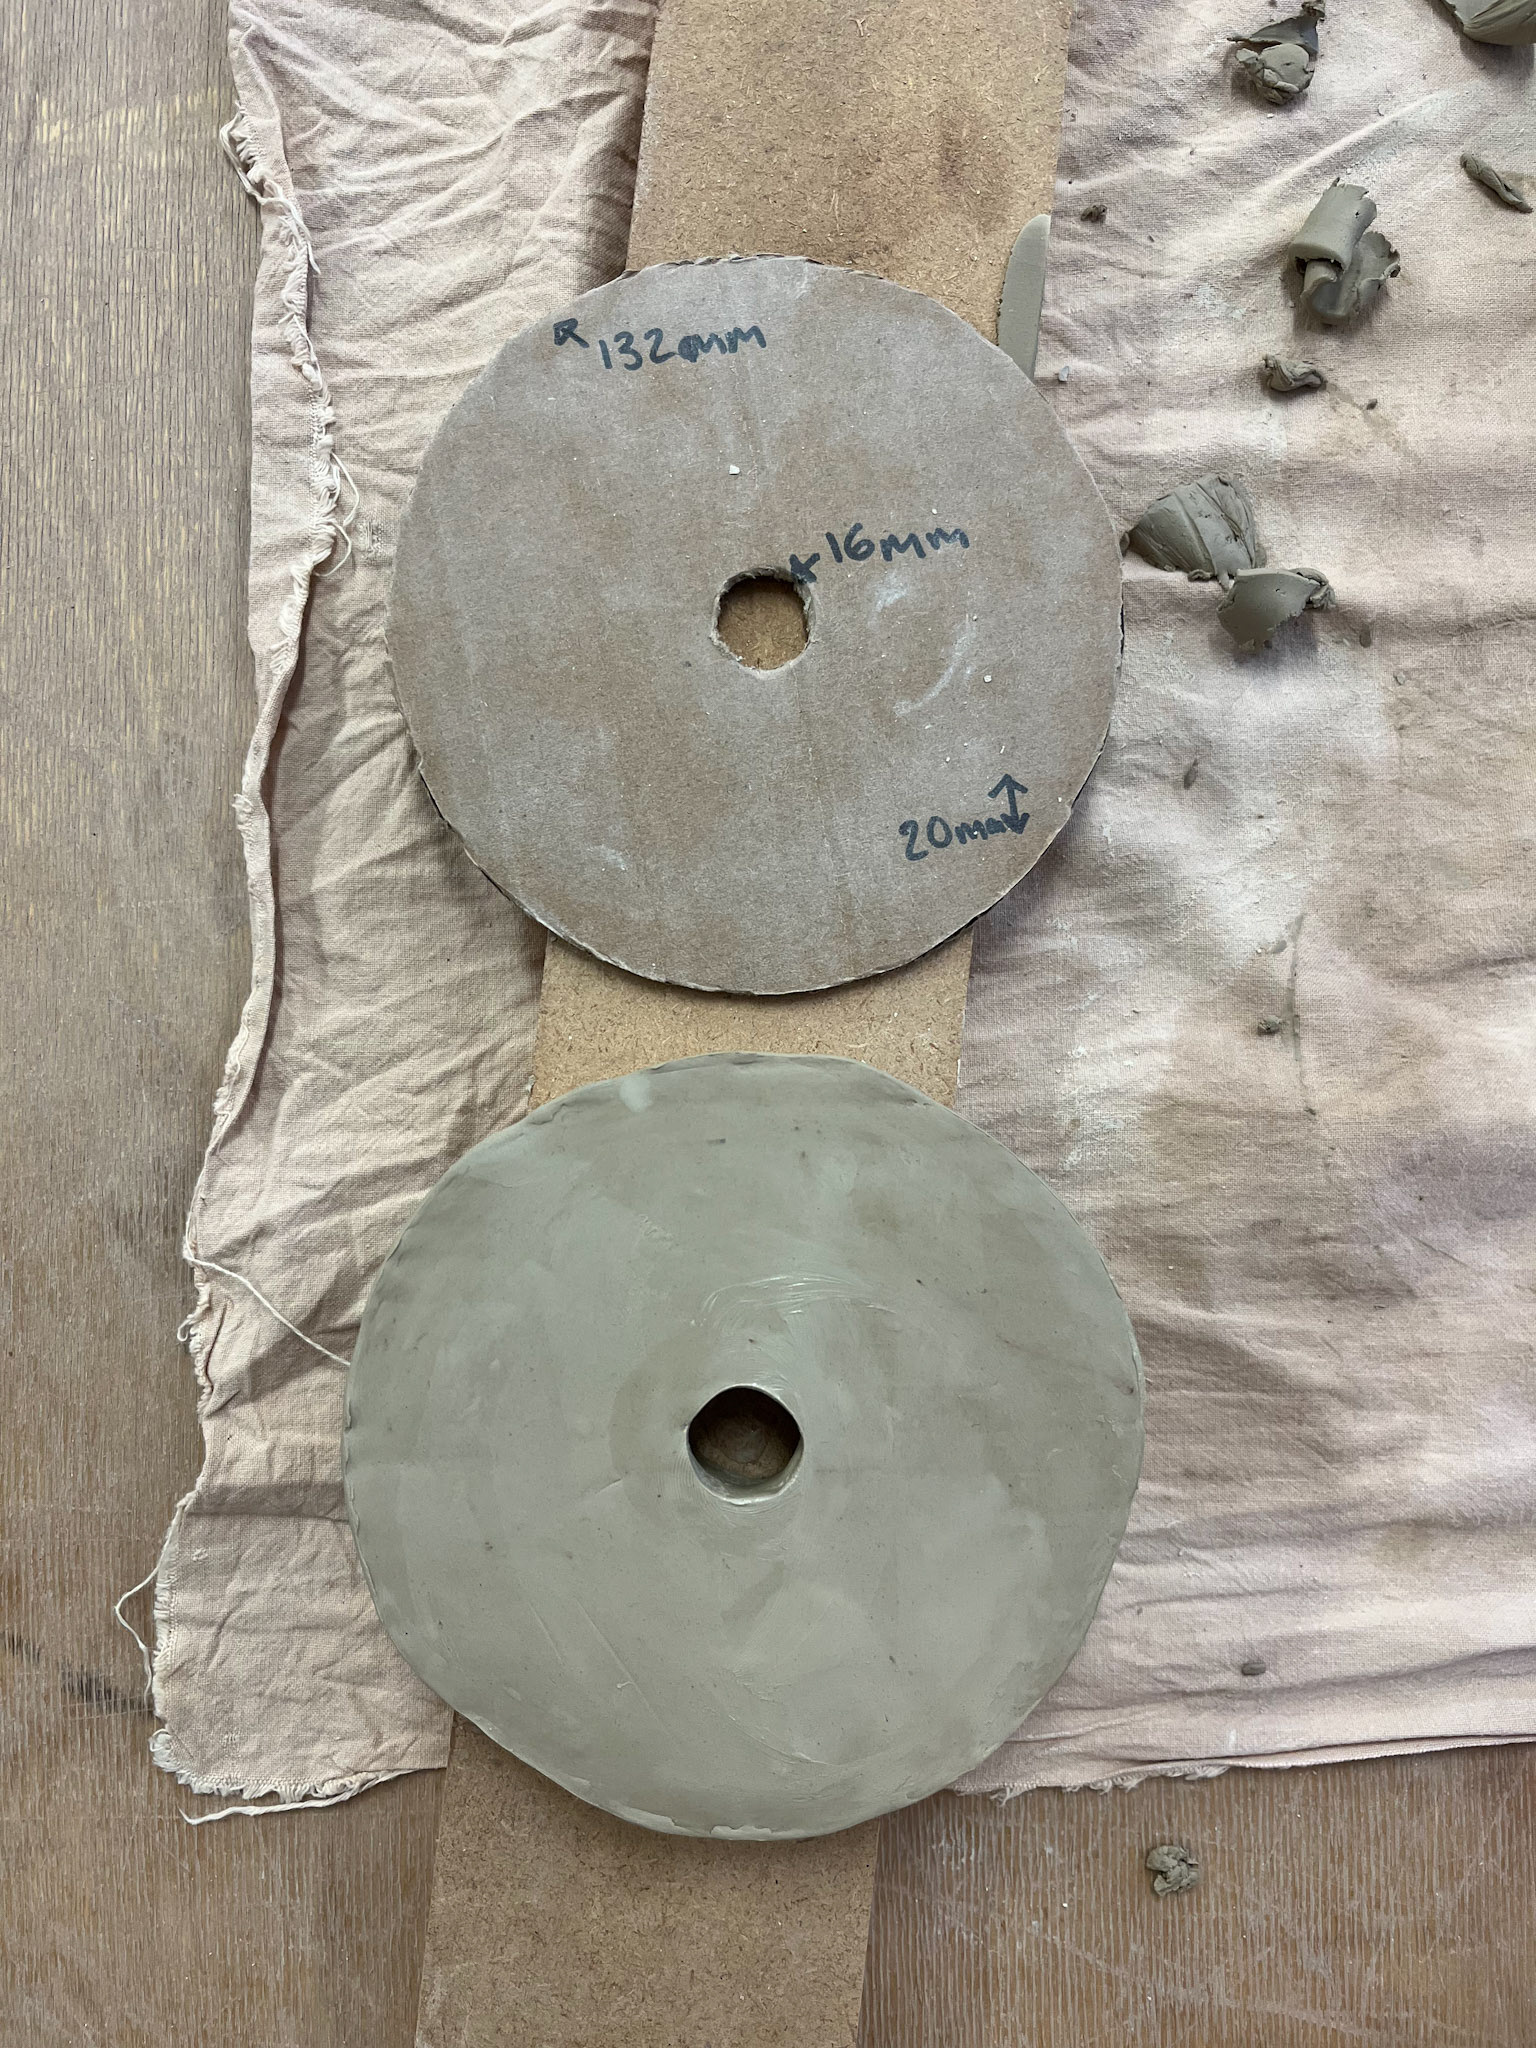
With my dad, we went to the site of Burbage to measure the millstones that we found there. Burbage has the largest millstone in the whole of the Peak District, making the area have a very impressive landscape. We measured the diameter of the millstone, the diameter of the hole and the thickness. I am doing this to take these measurements back to the studio, scale them down, and then convert them to create a template.
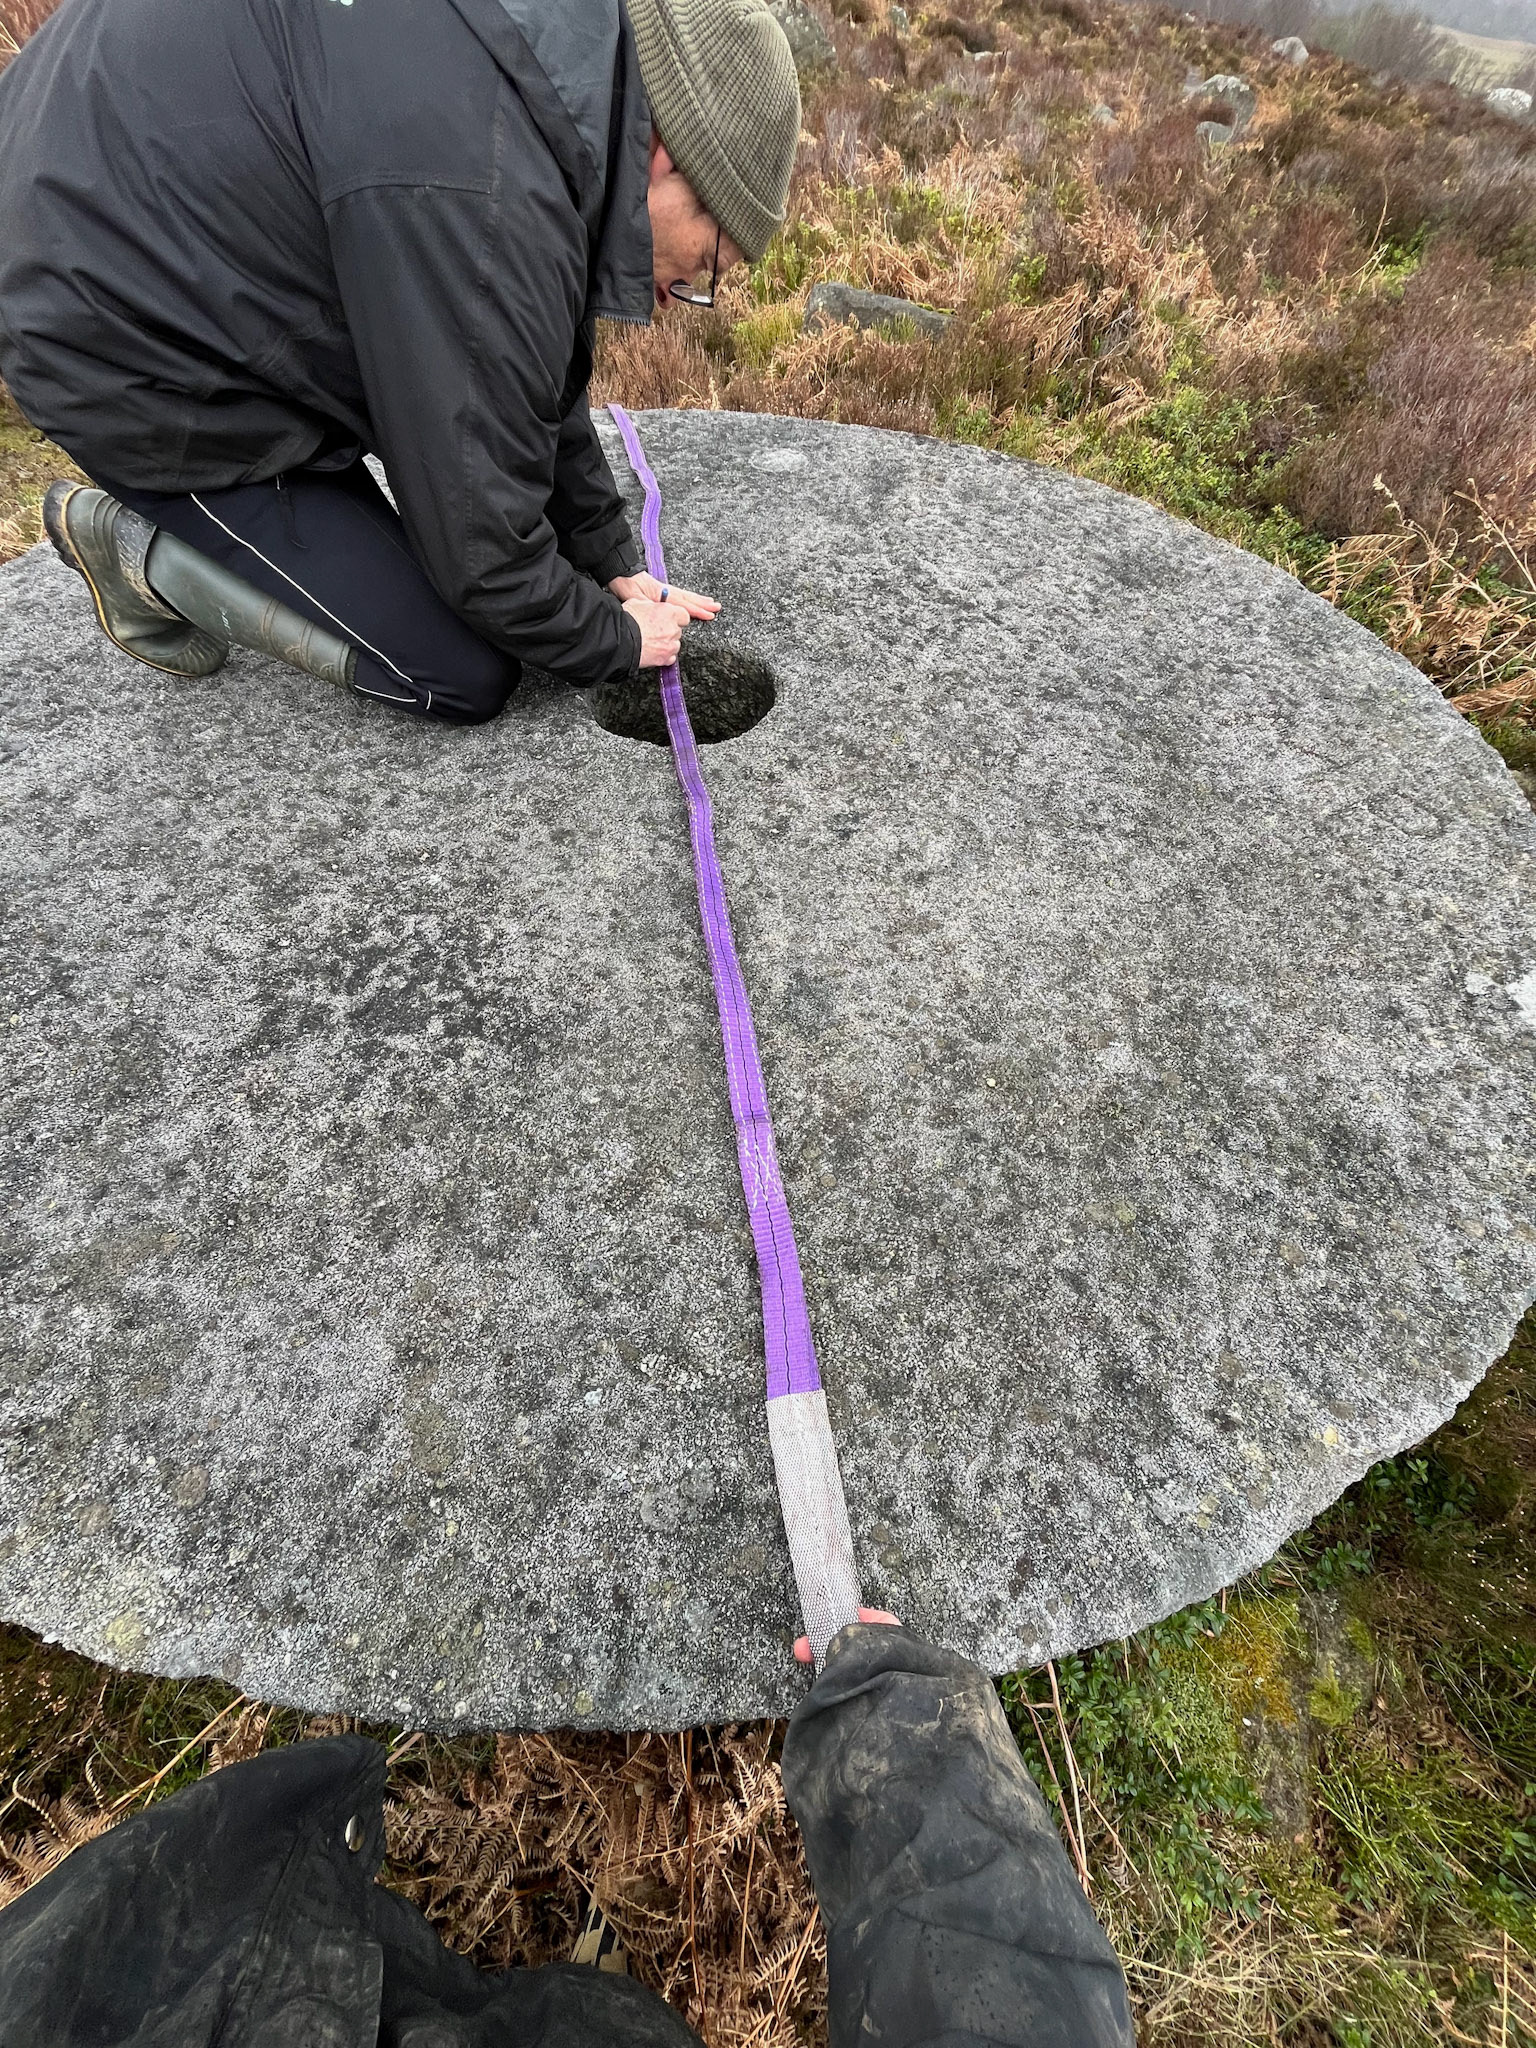
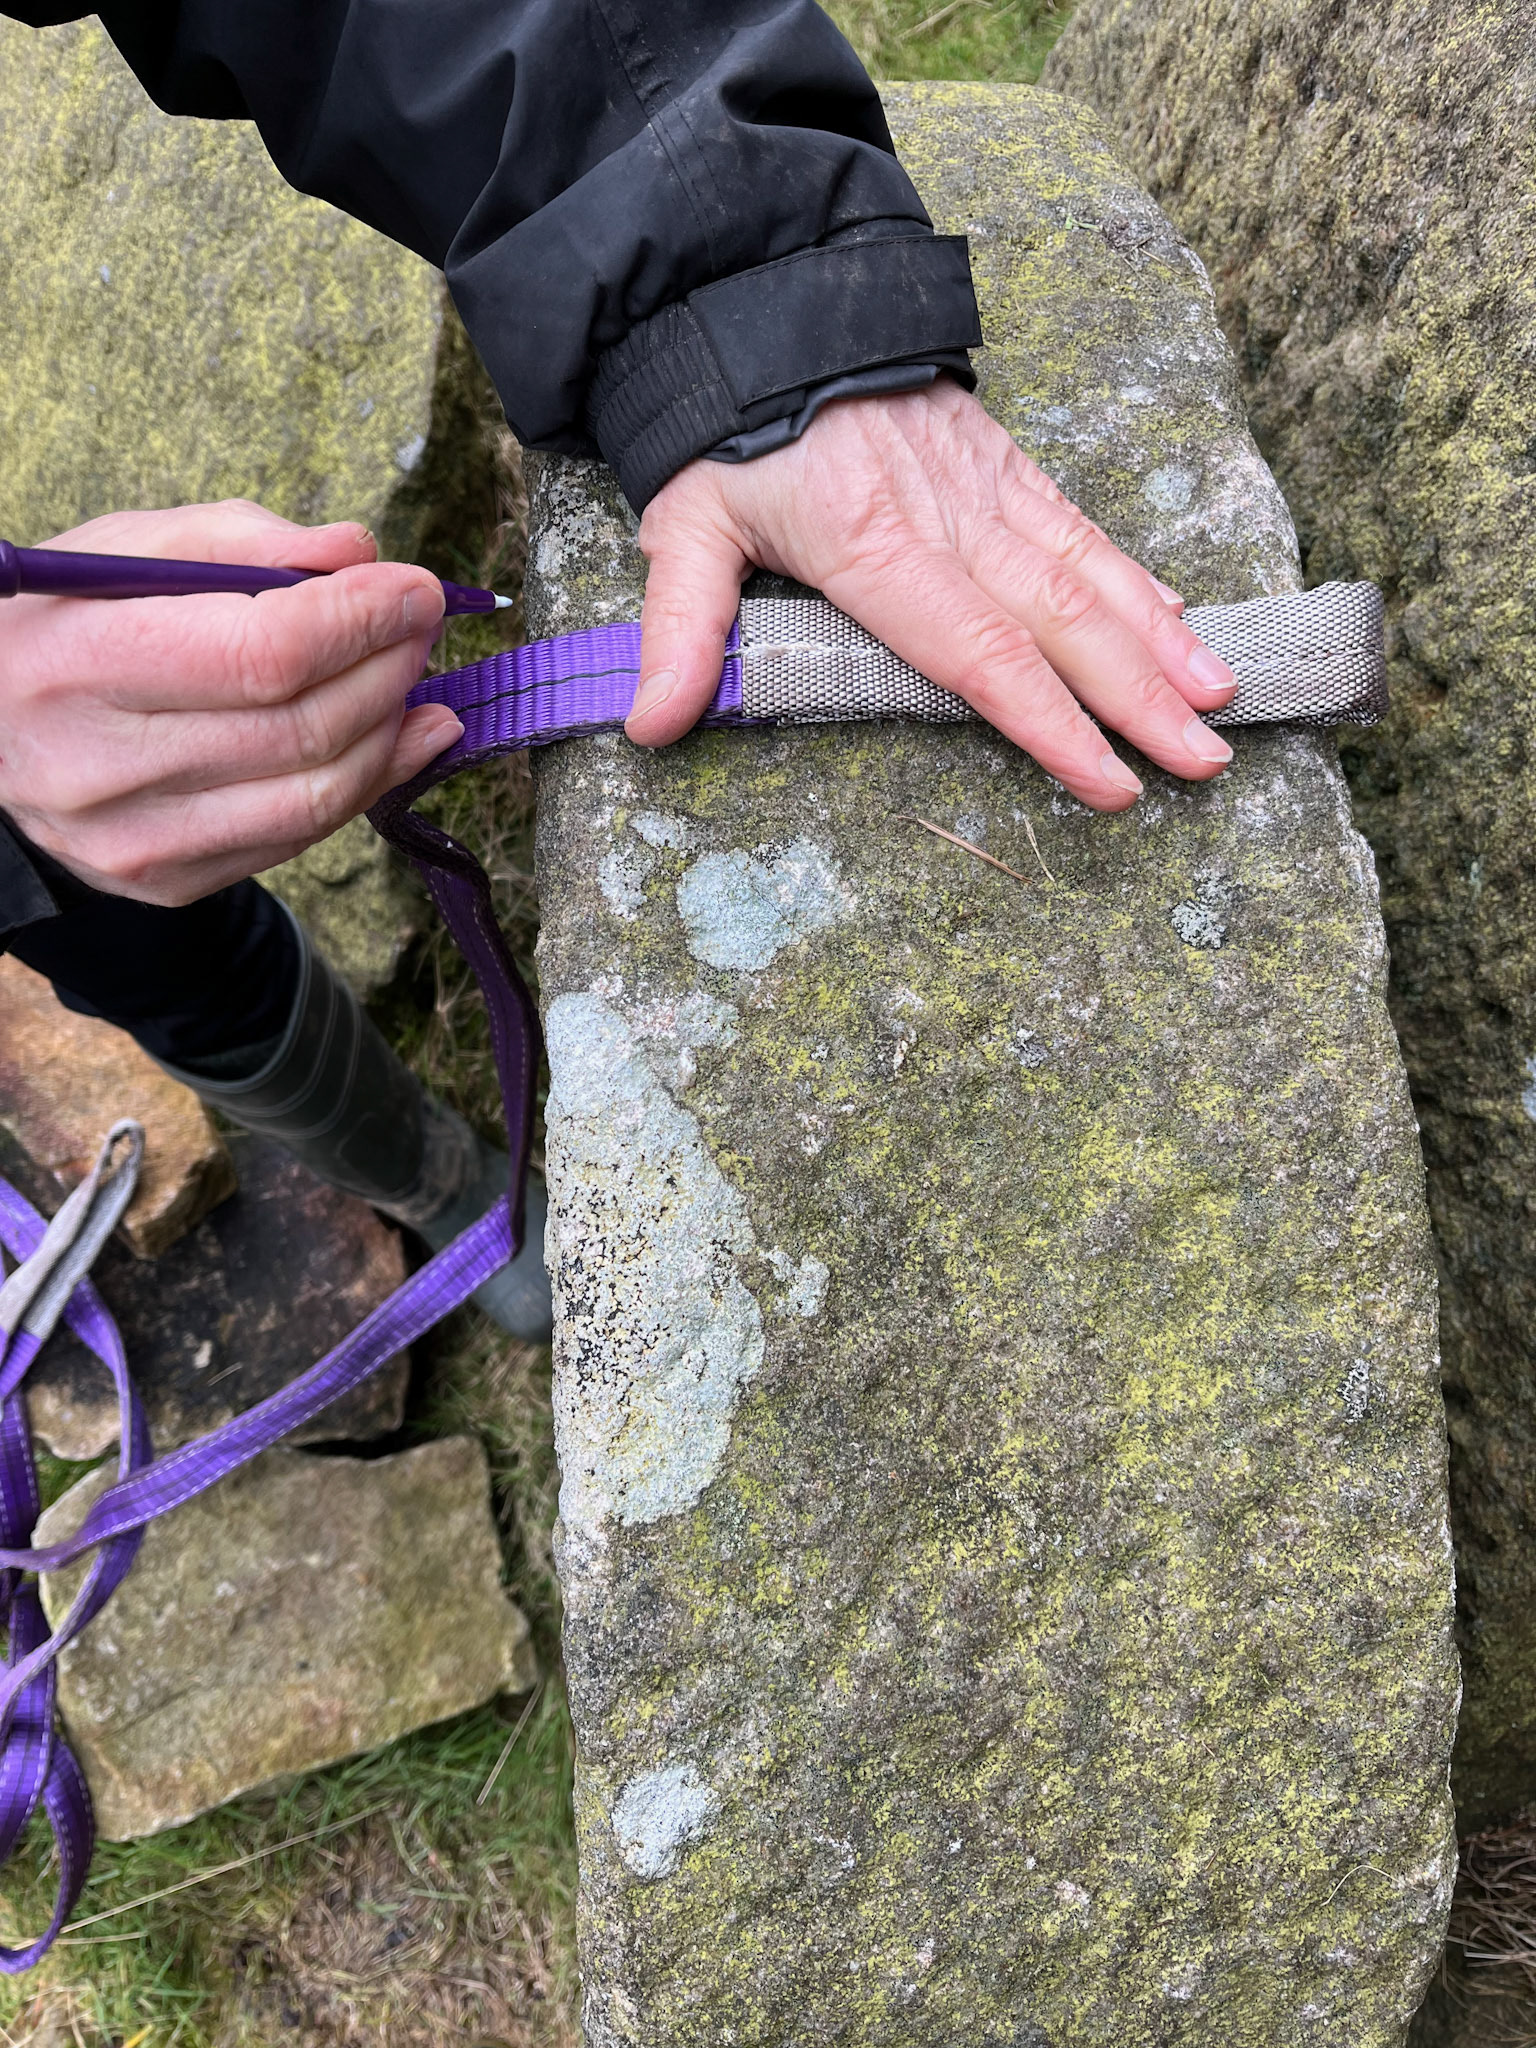
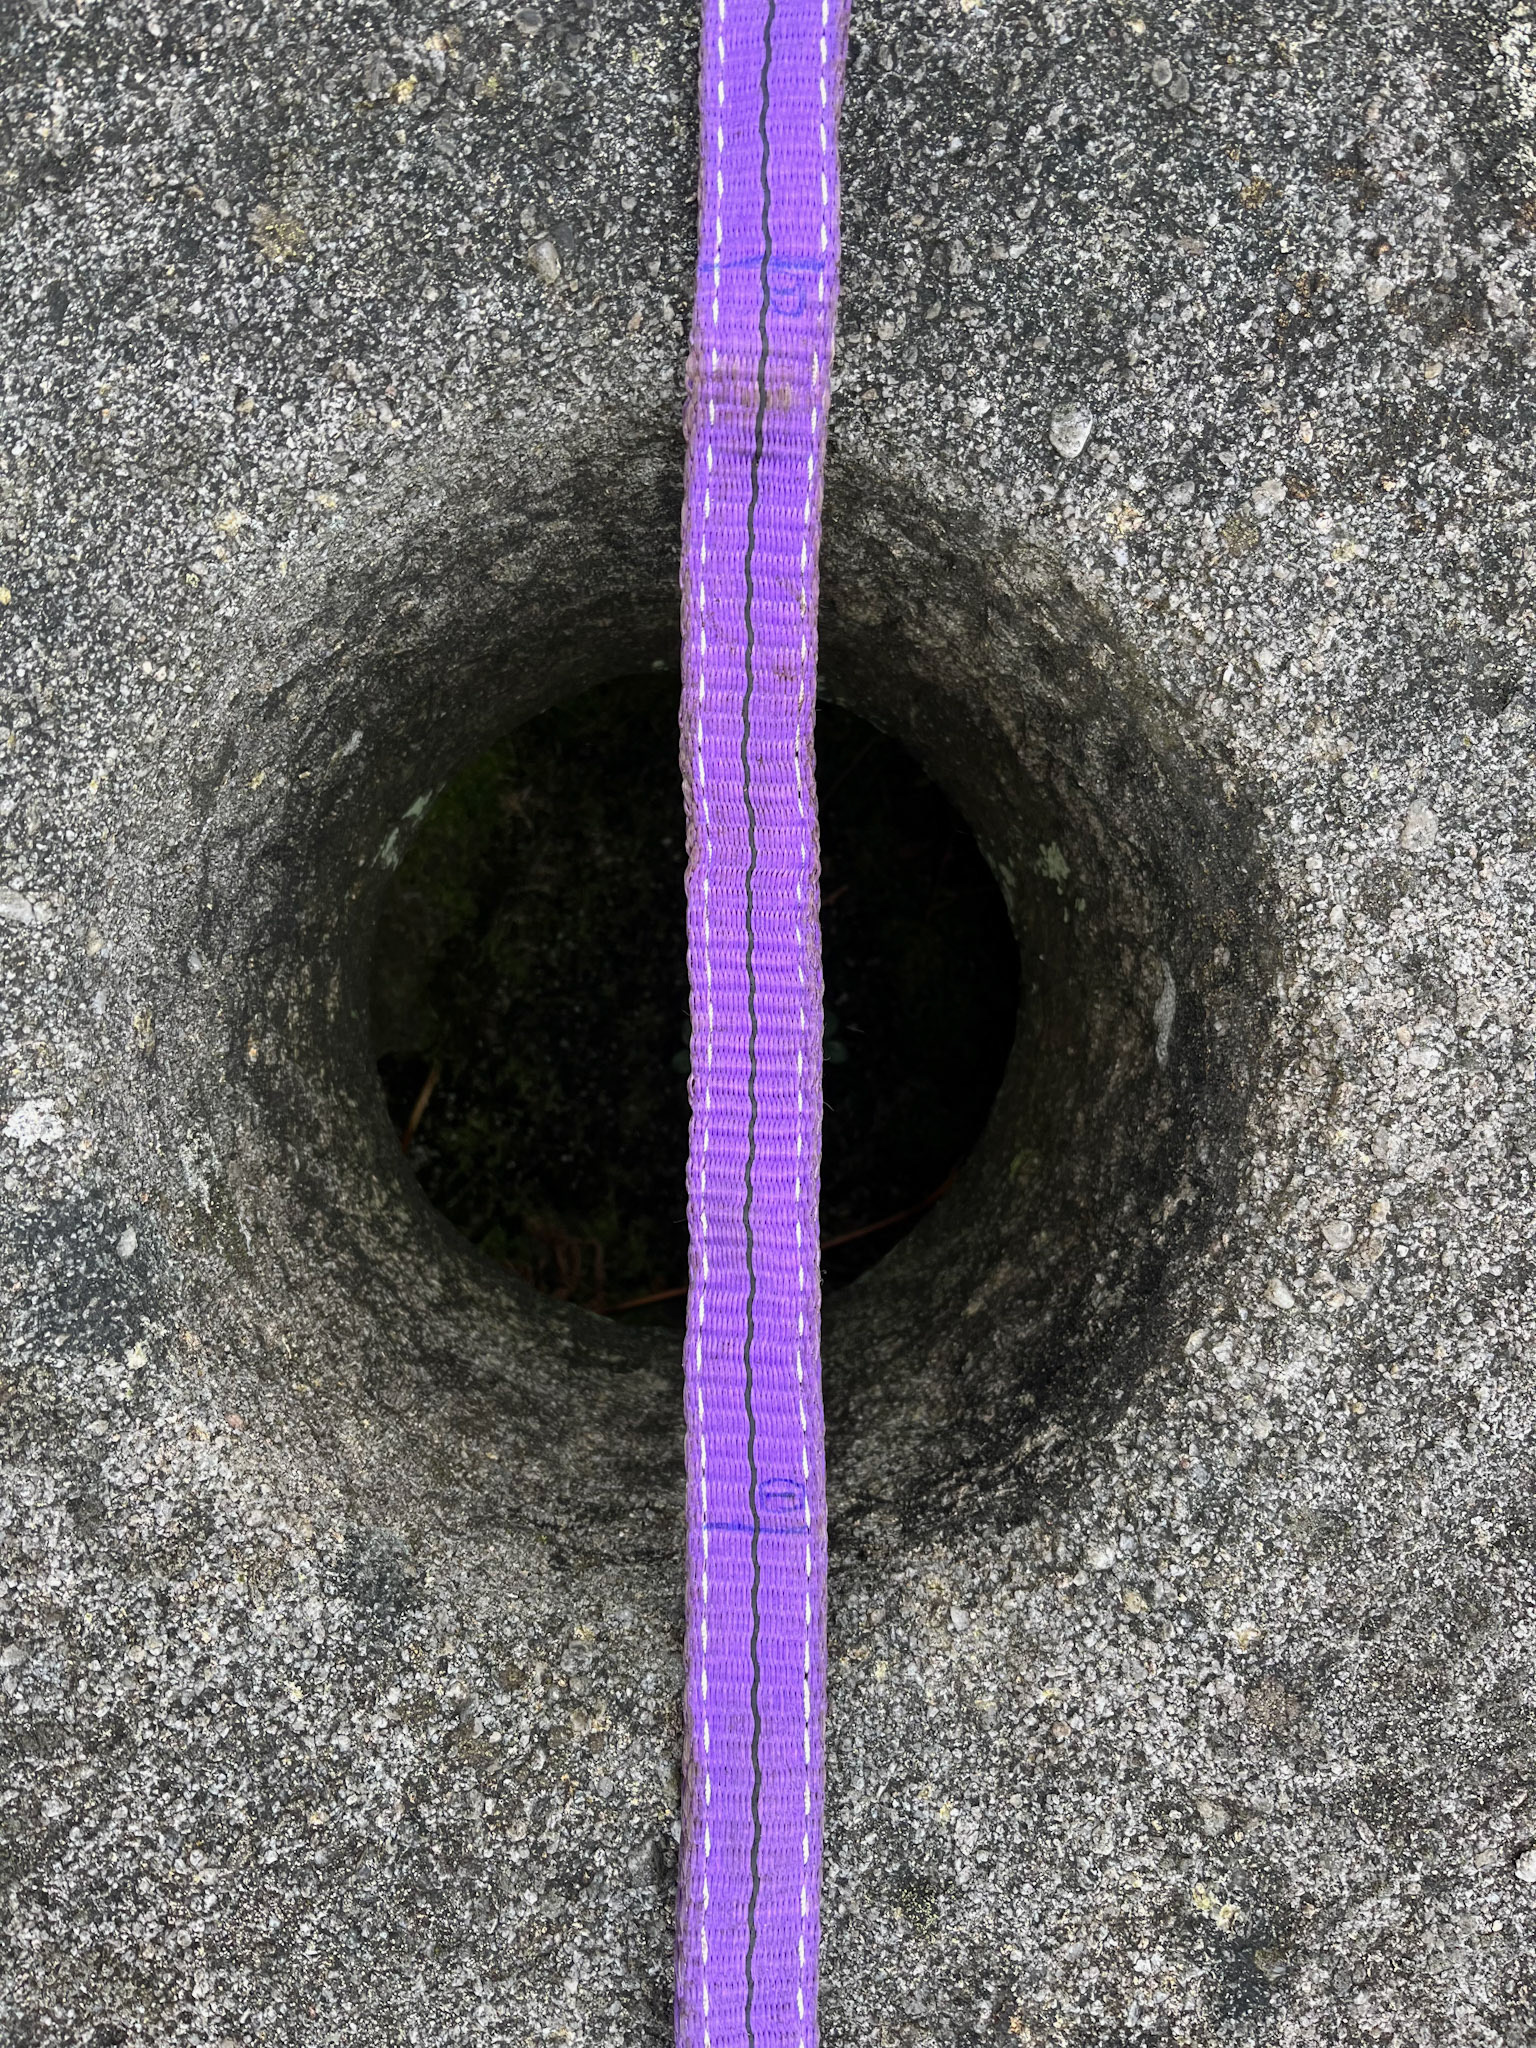
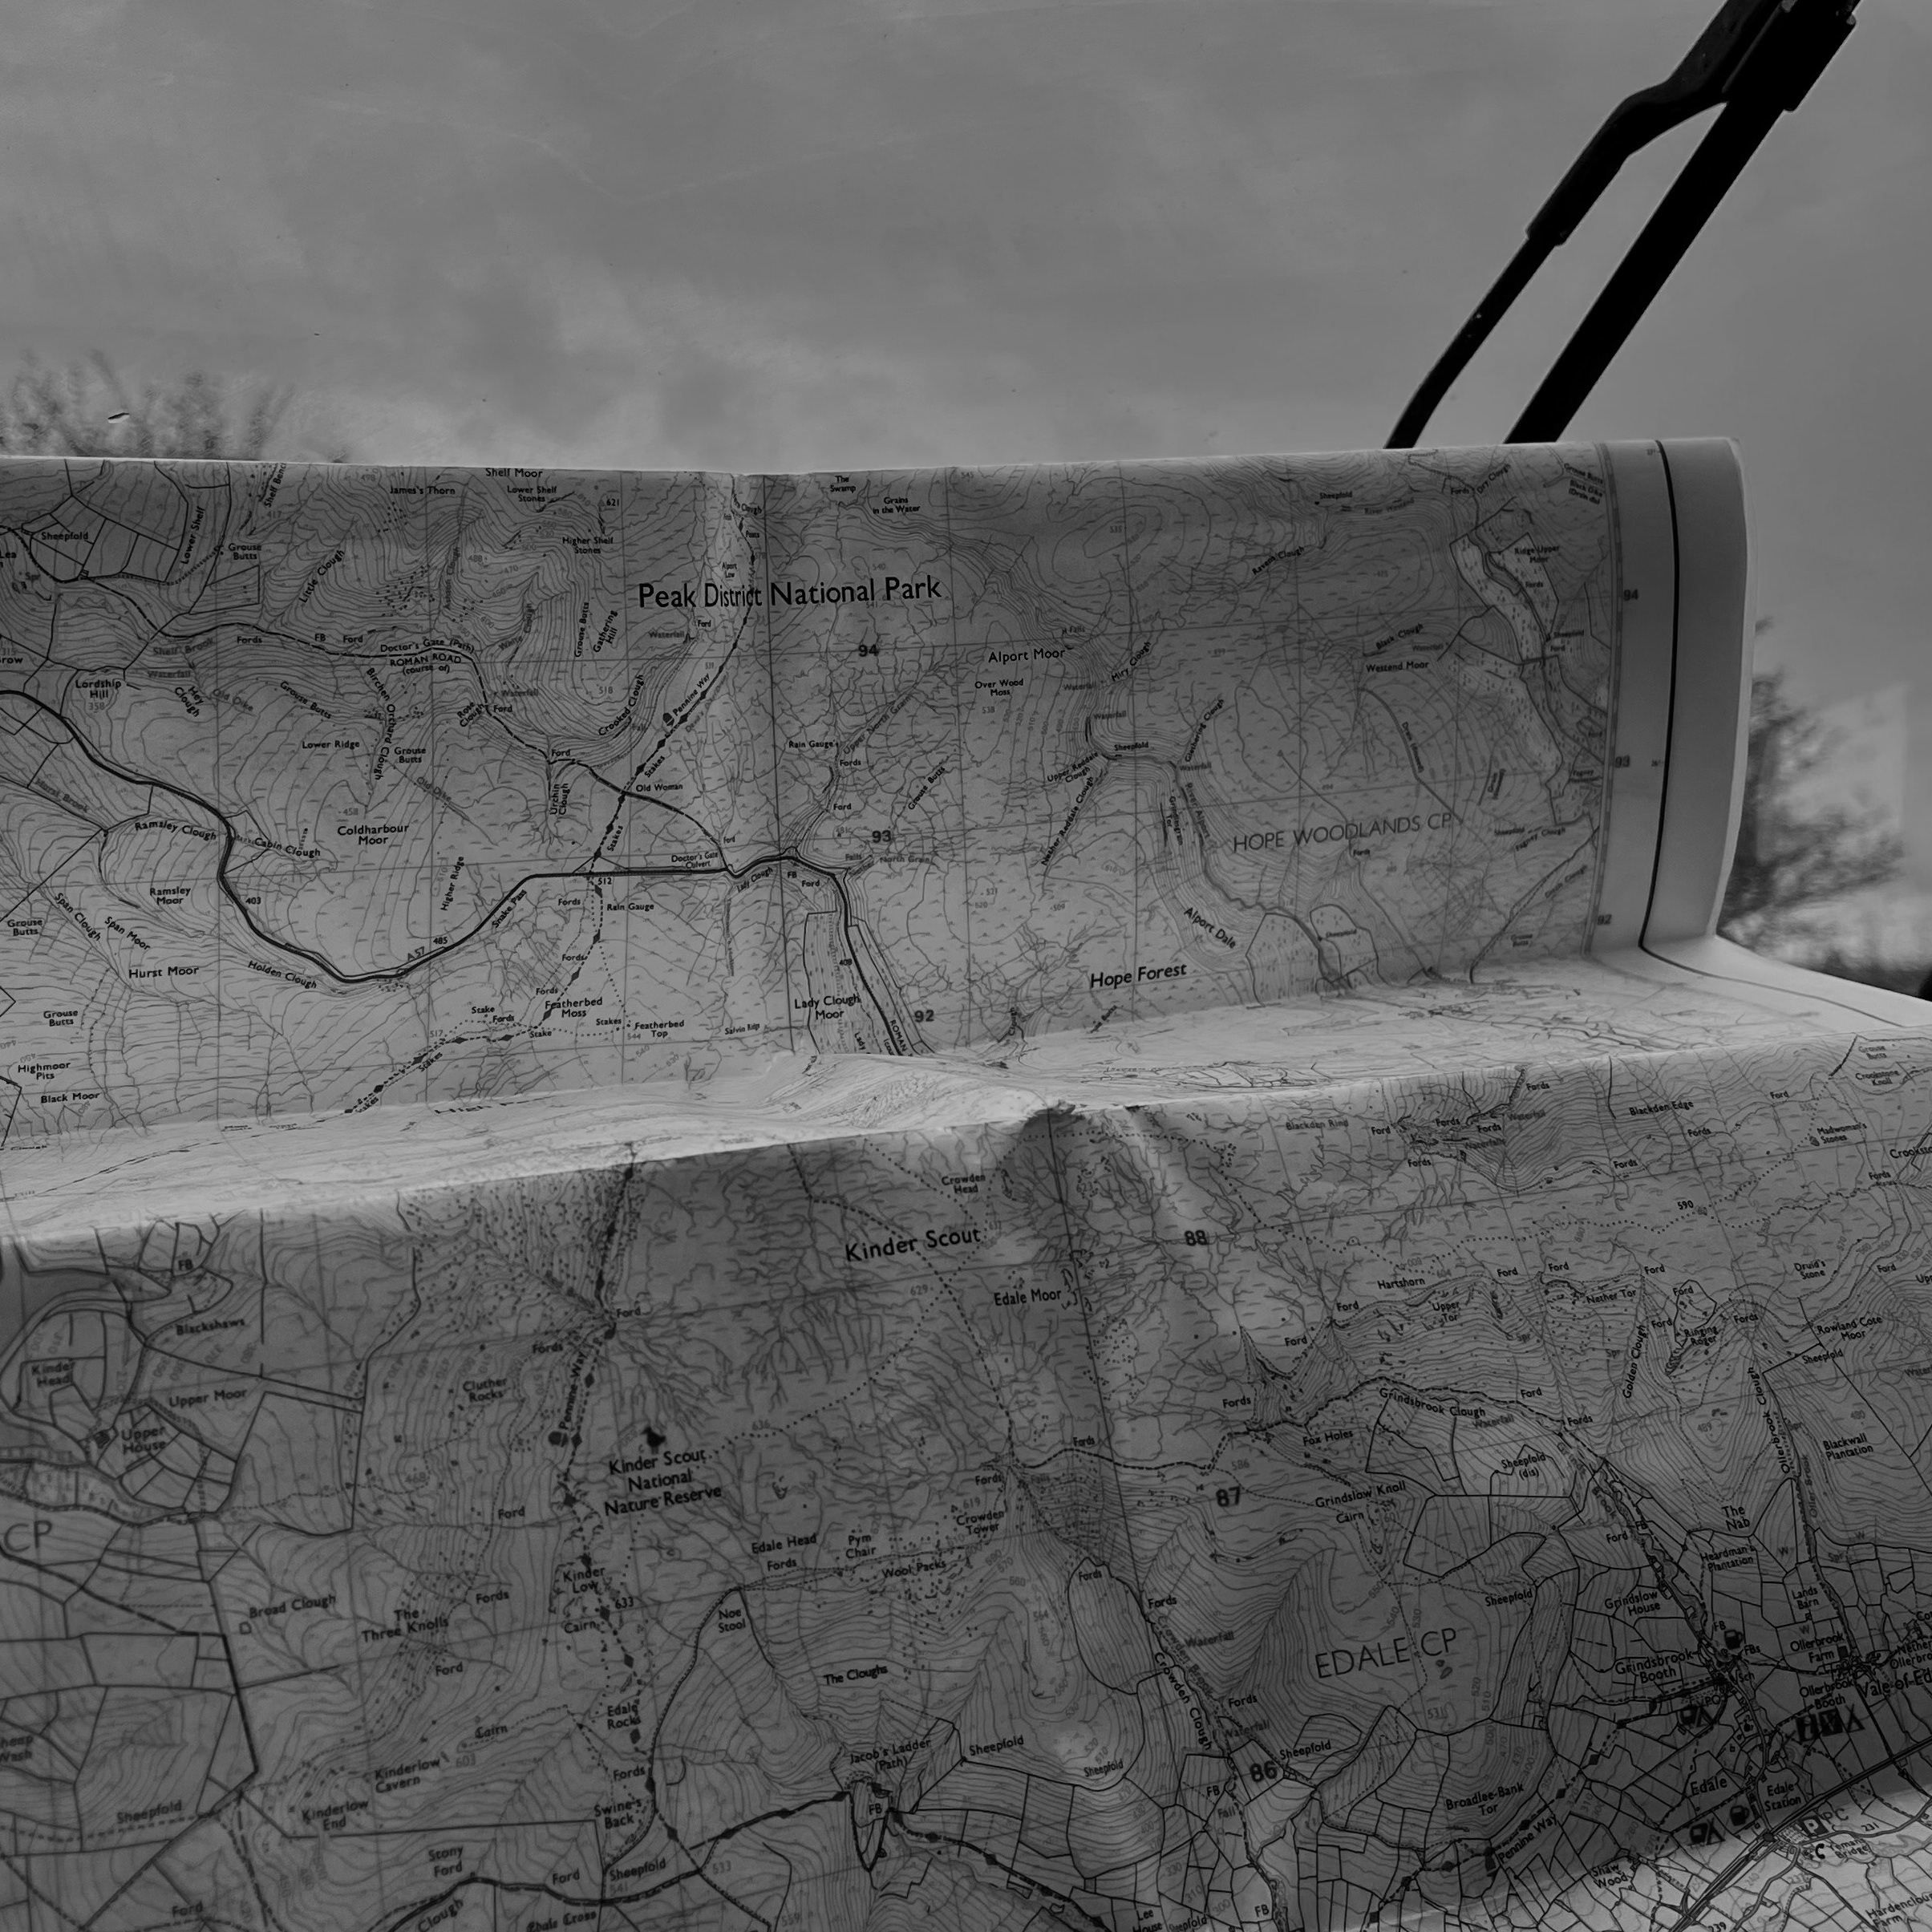
To mark the location of each millstone that I am measuring, I pinned them on what3words so I could then convert them to find the coordinates of each millstone. Doing this gives me a clearer idea of the locality of my work and allows me to connect better to the precise landscape I am working with.
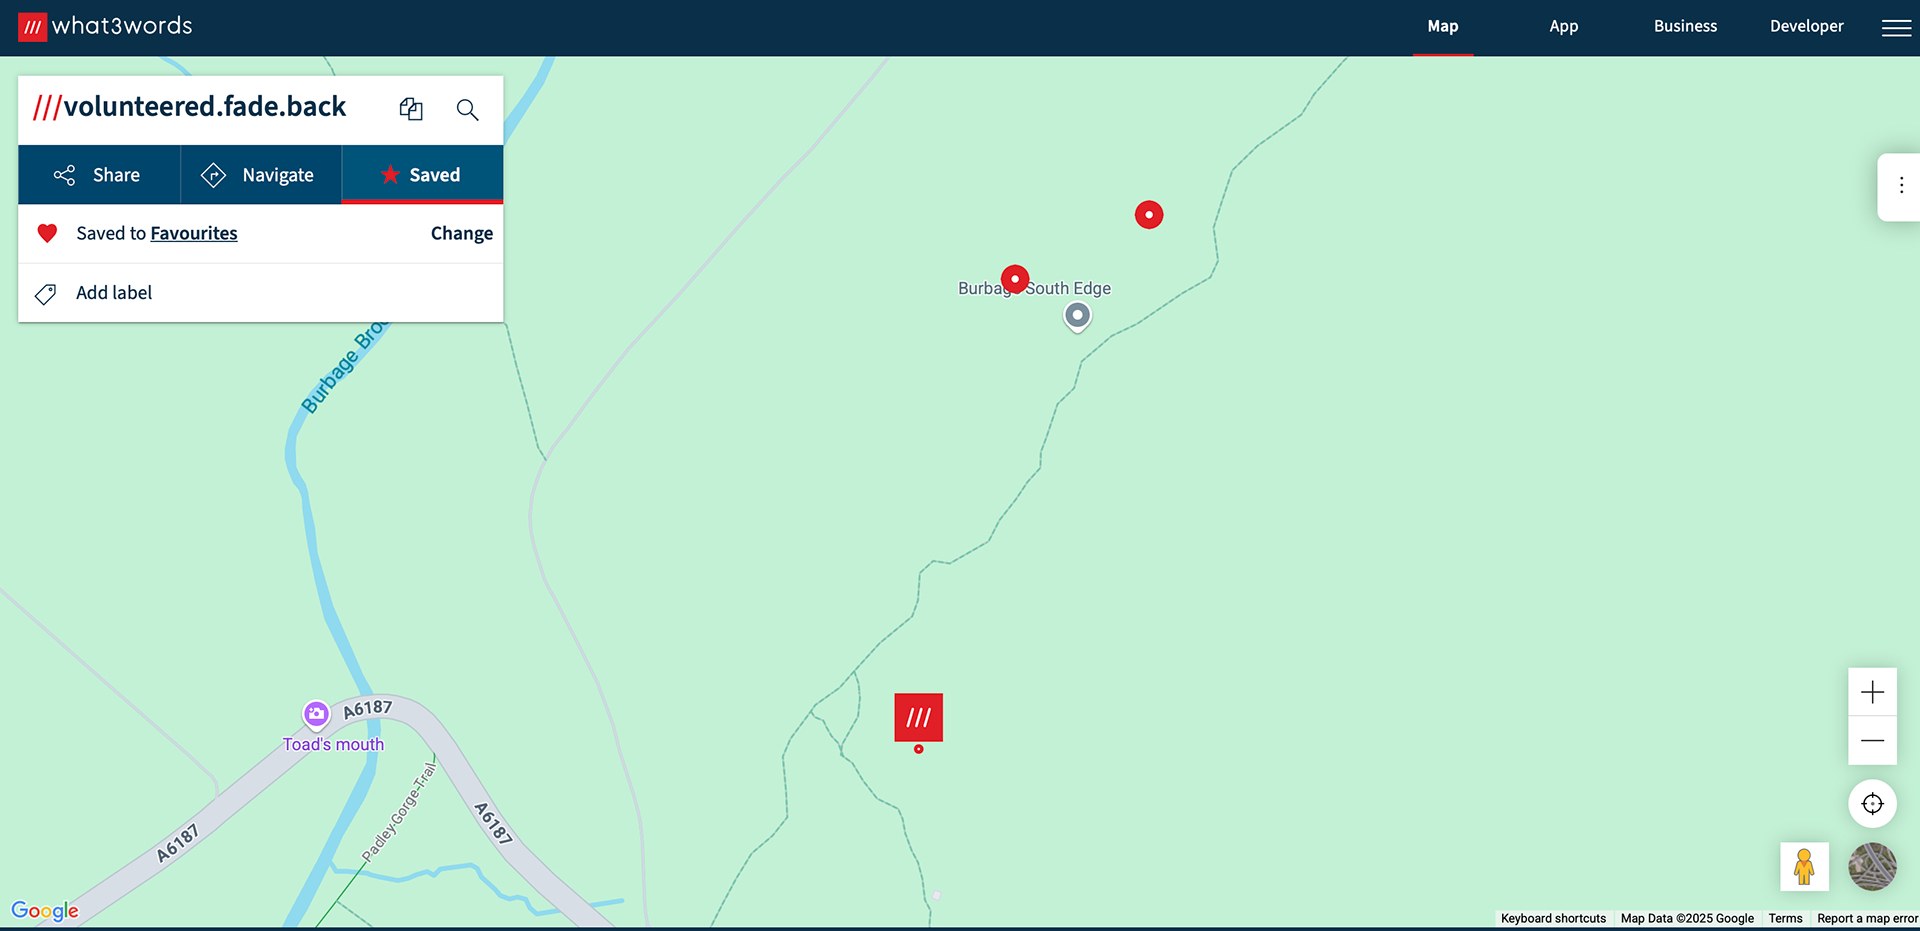
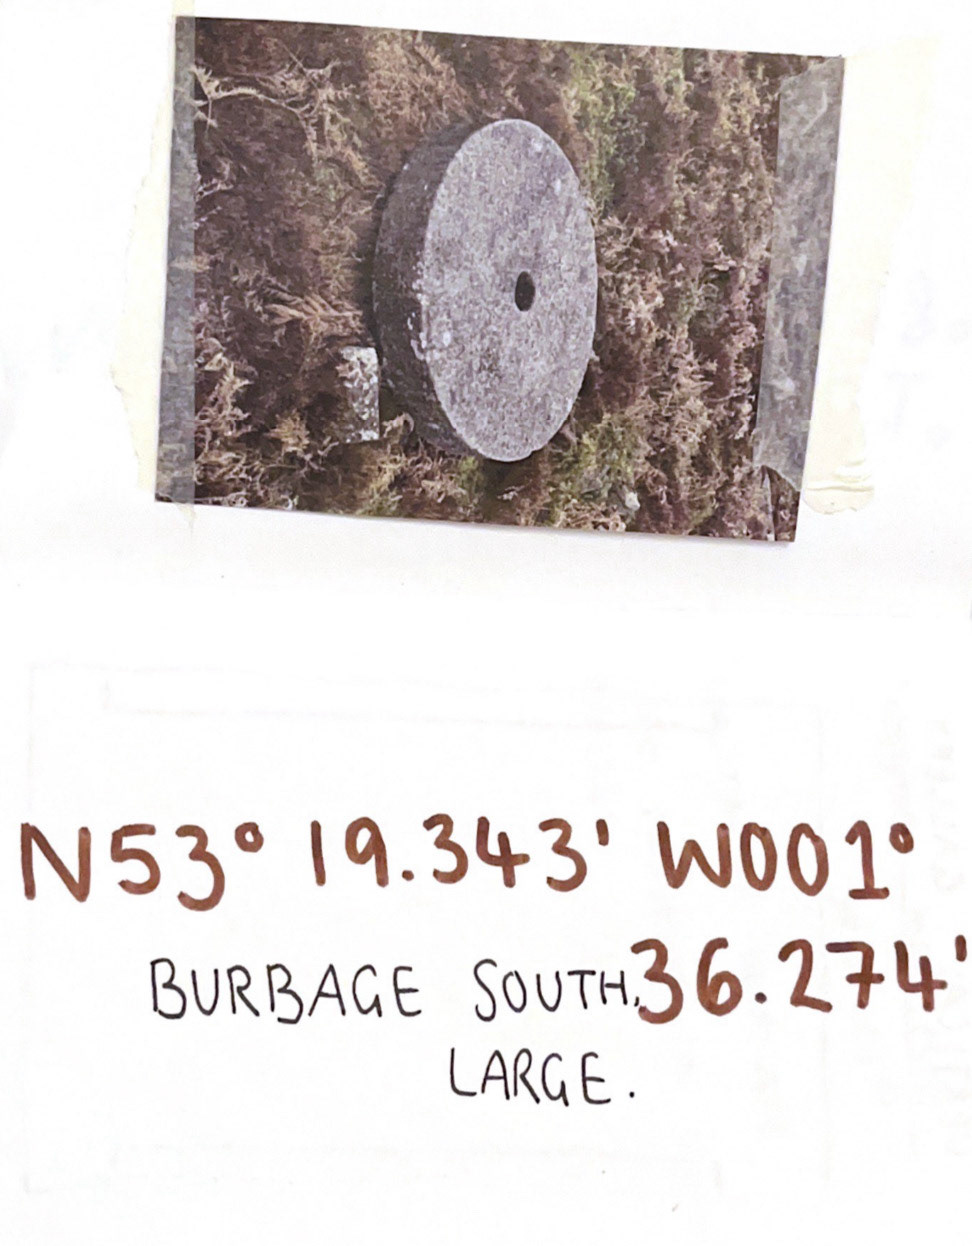
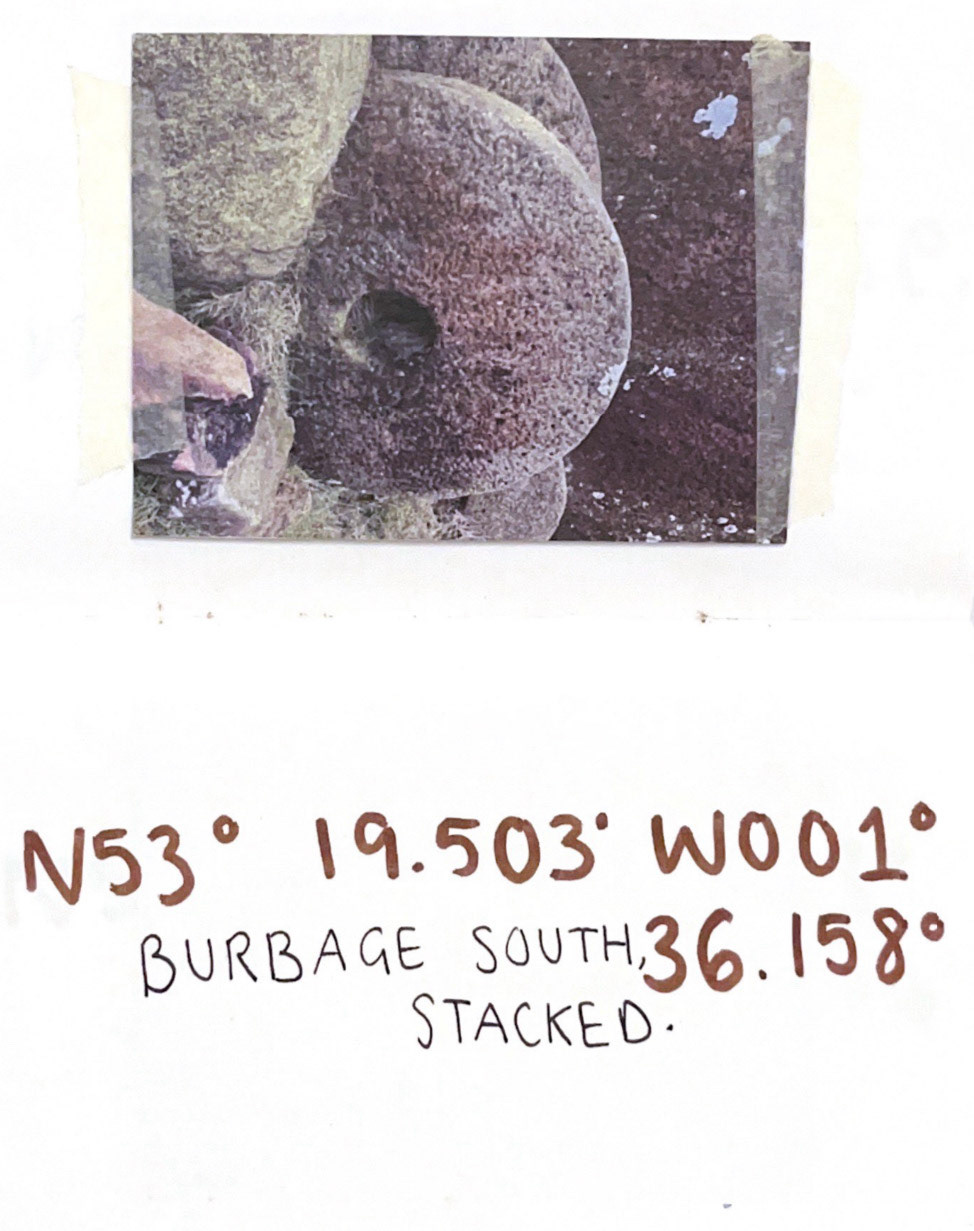
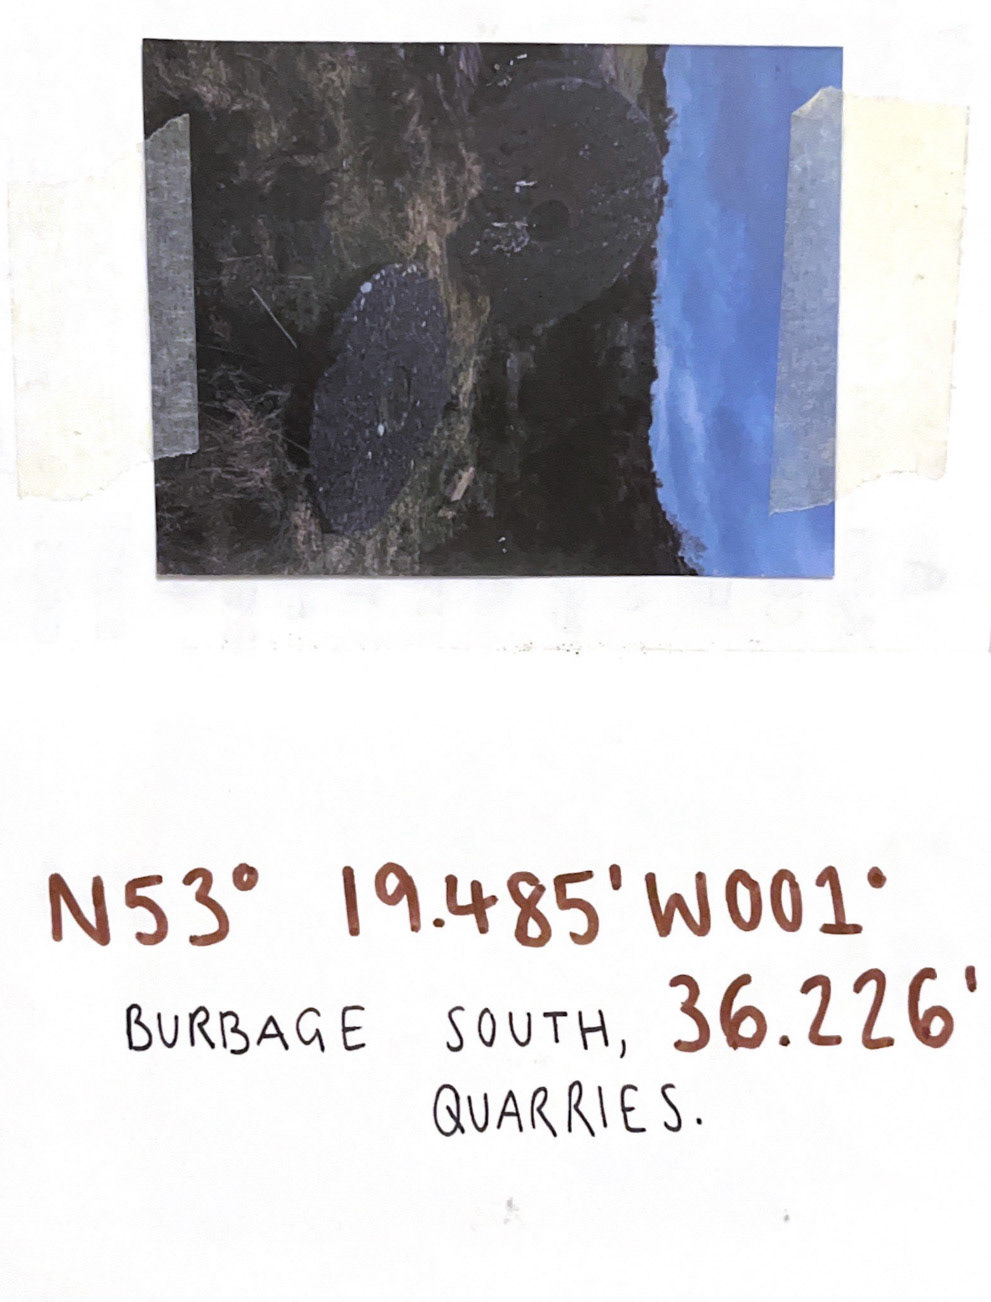
Coordinates of the three millstones, Burbage.
Scaling down
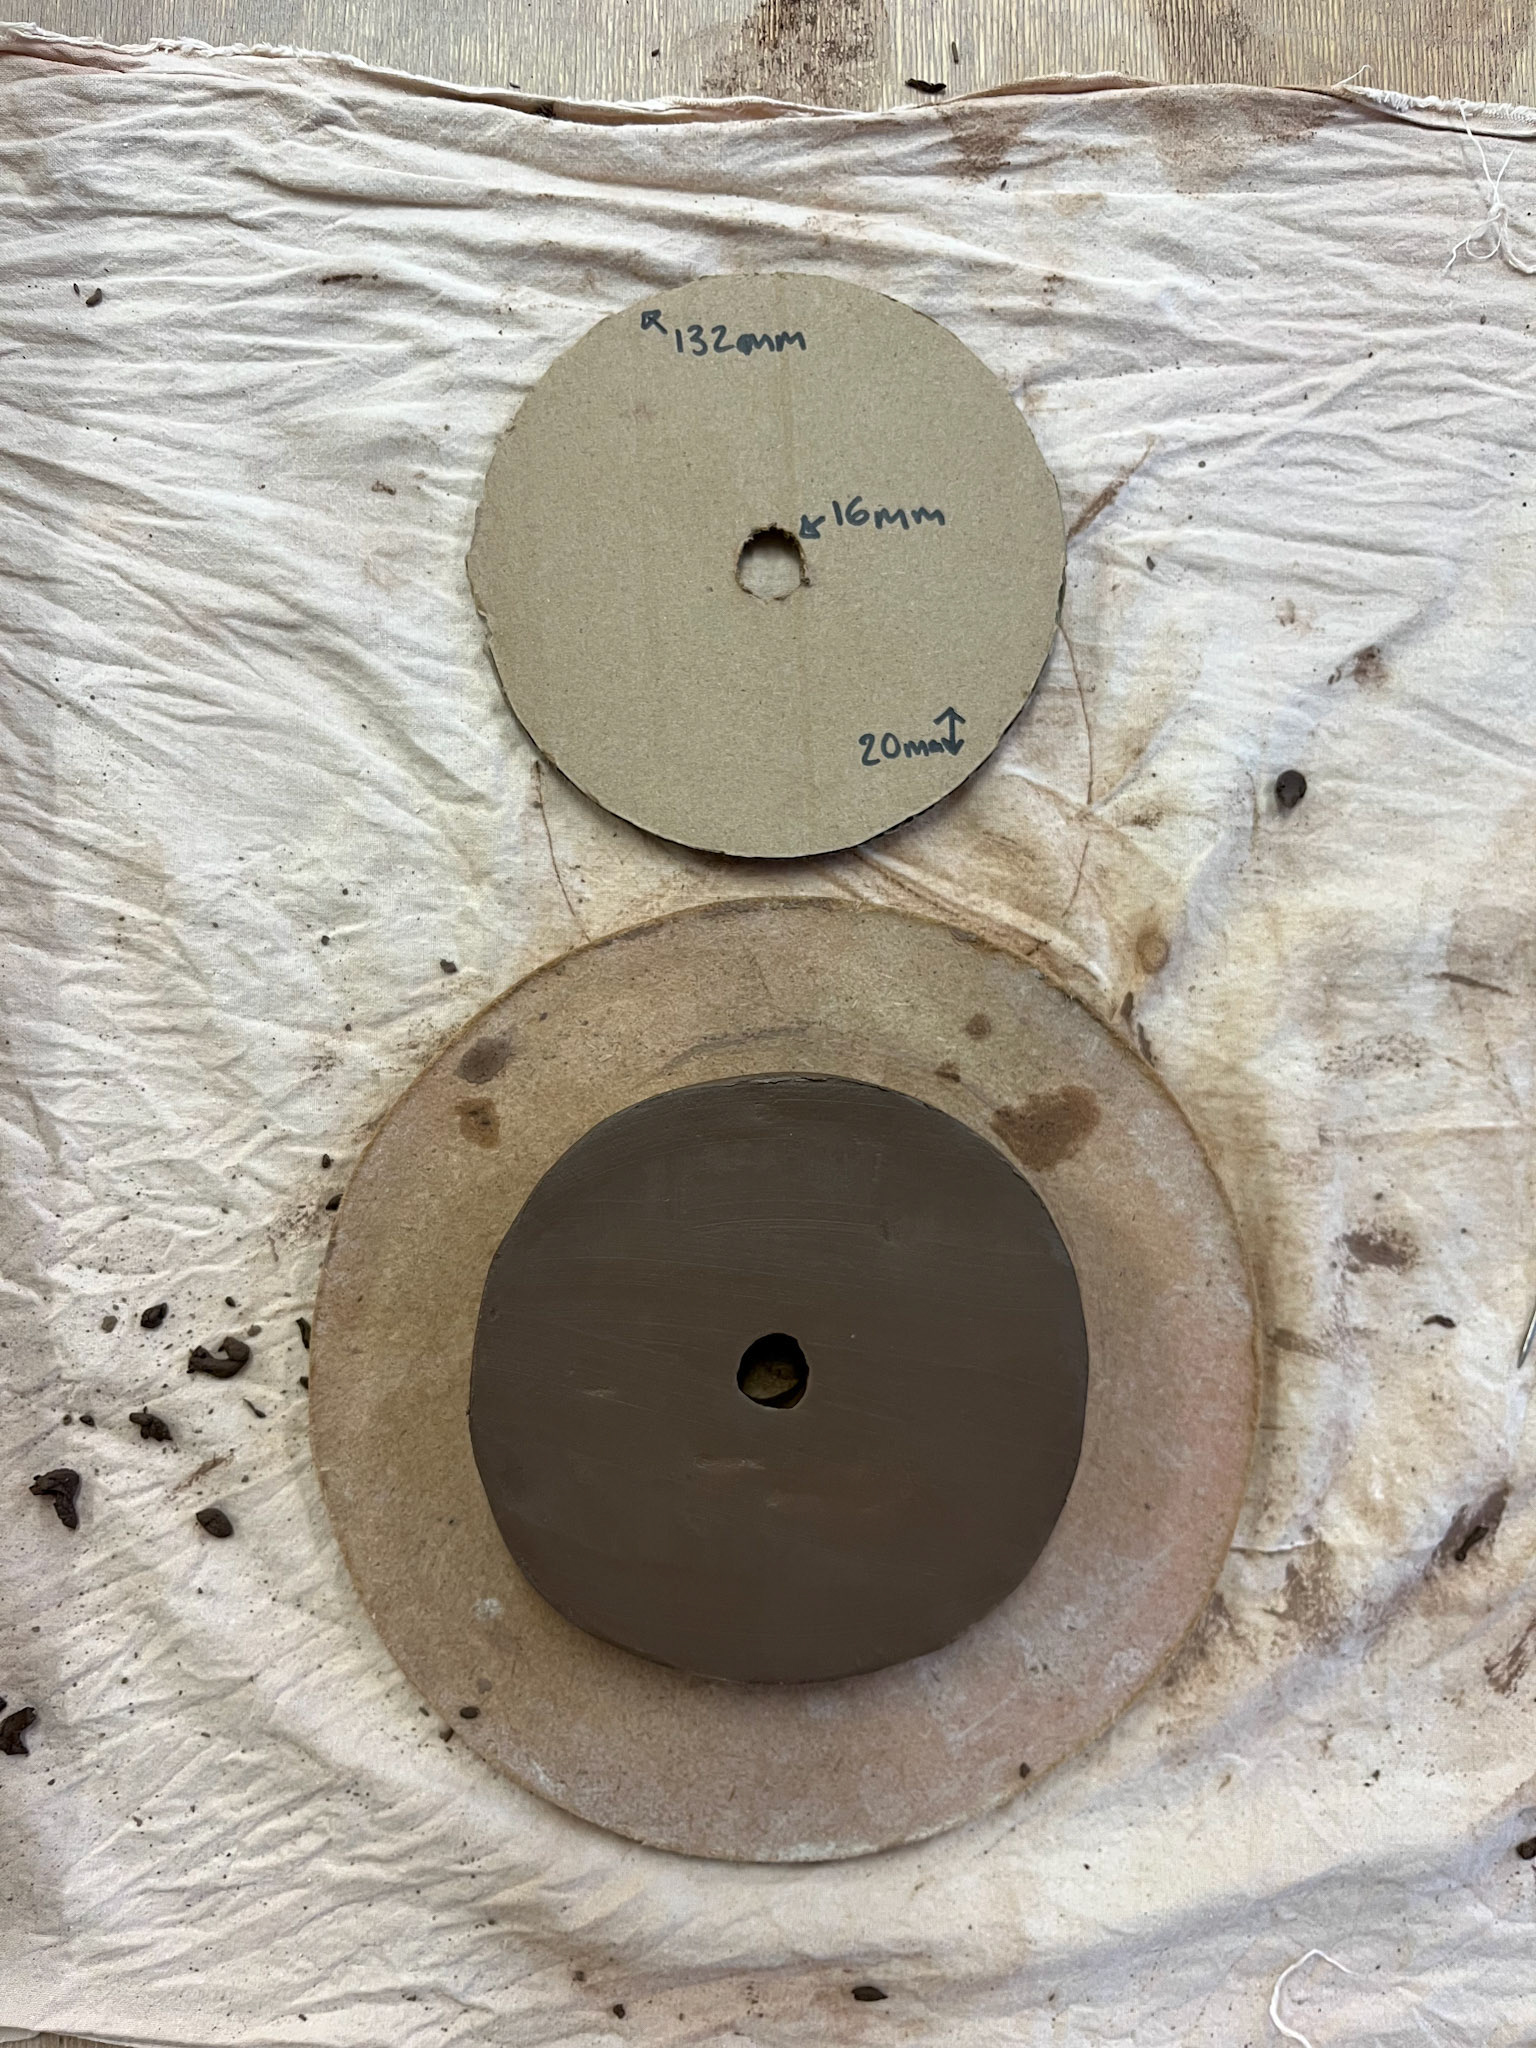
I have scaled the three millstones to 10mm, 15mm and 20mm. I have drawn out these templates, which I will make with cardboard, which are ready to use as a former for making them with clay. I have done this to cut the circular stones as precisely as possible. They will not be perfect, and I am expecting slight changes and variations to happen when making with the clay, however, this will provide a template for me in terms of sizing.
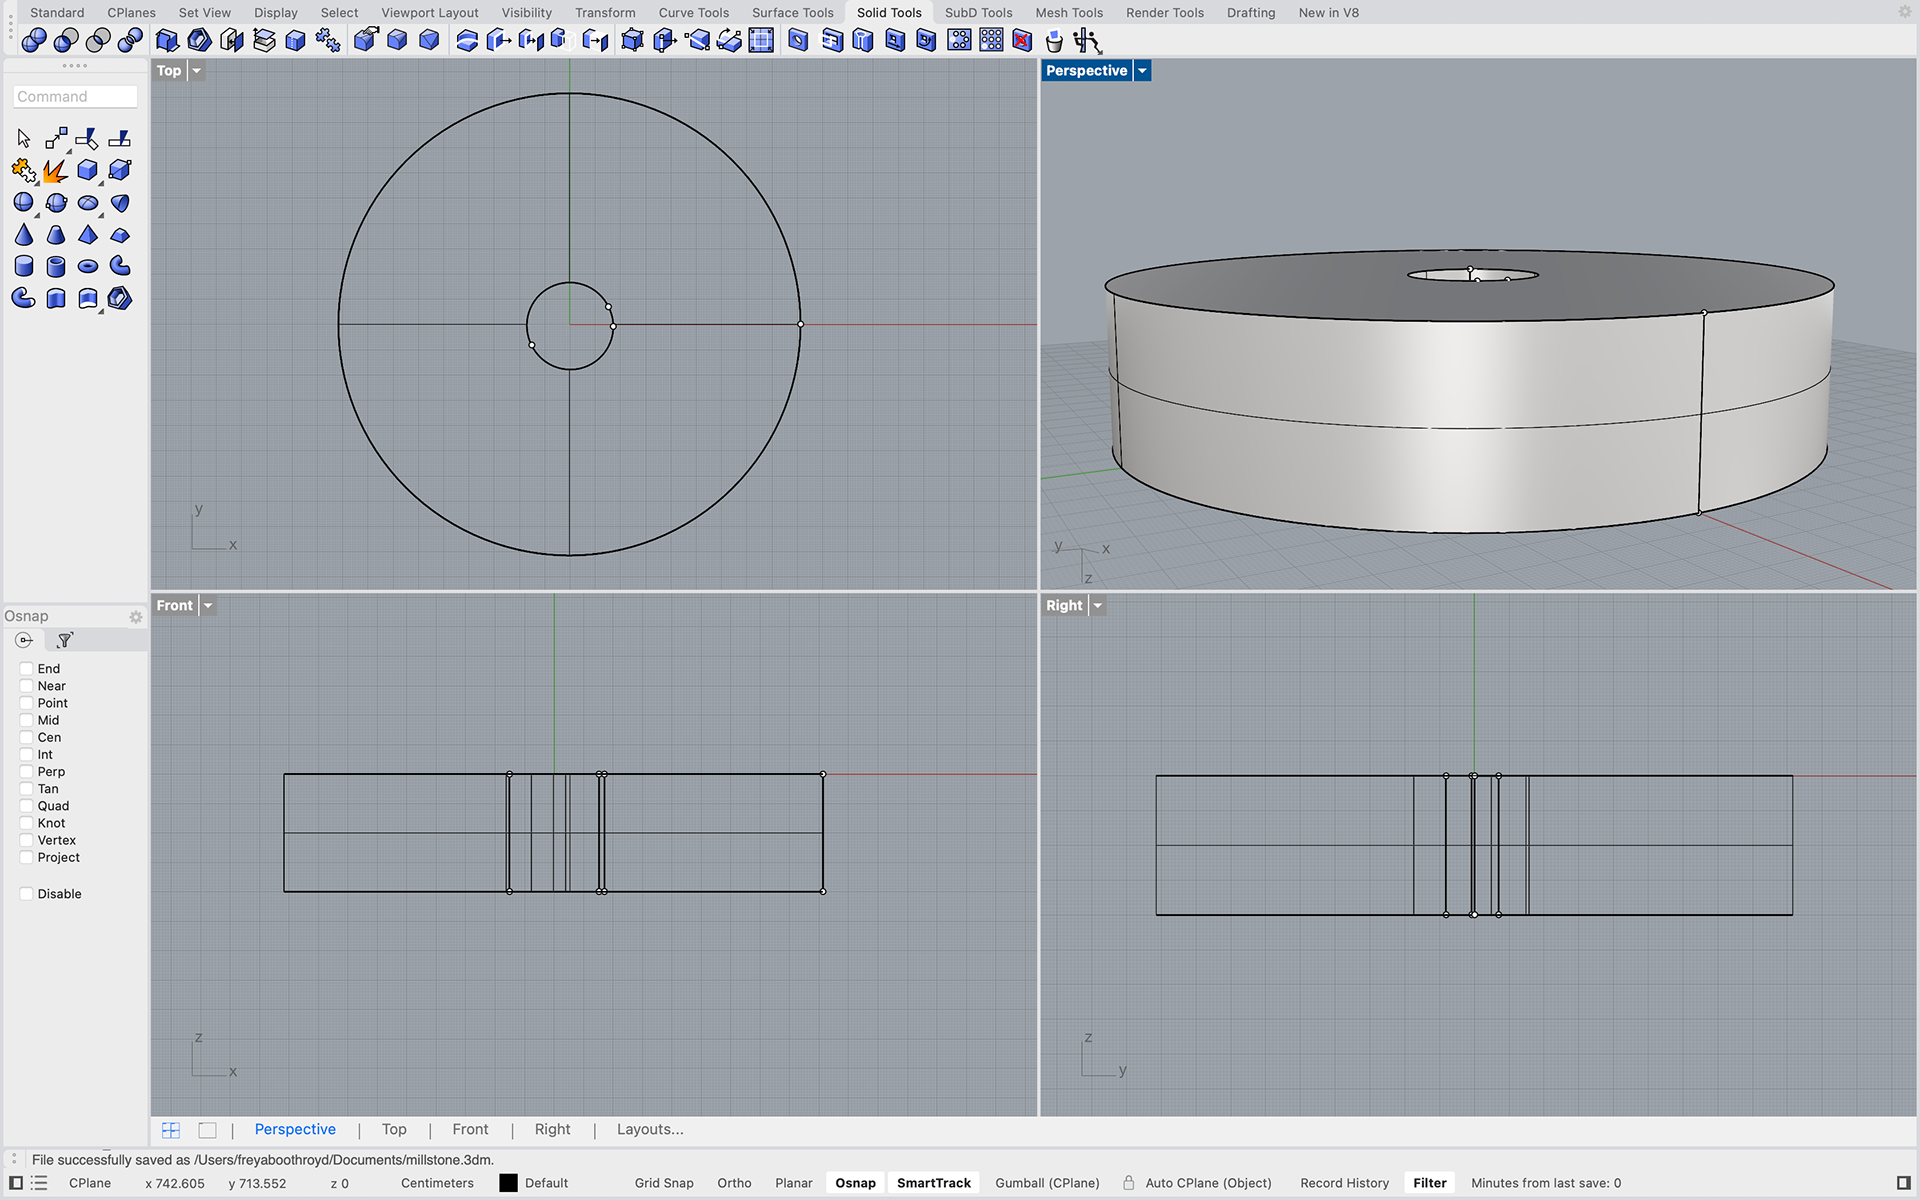
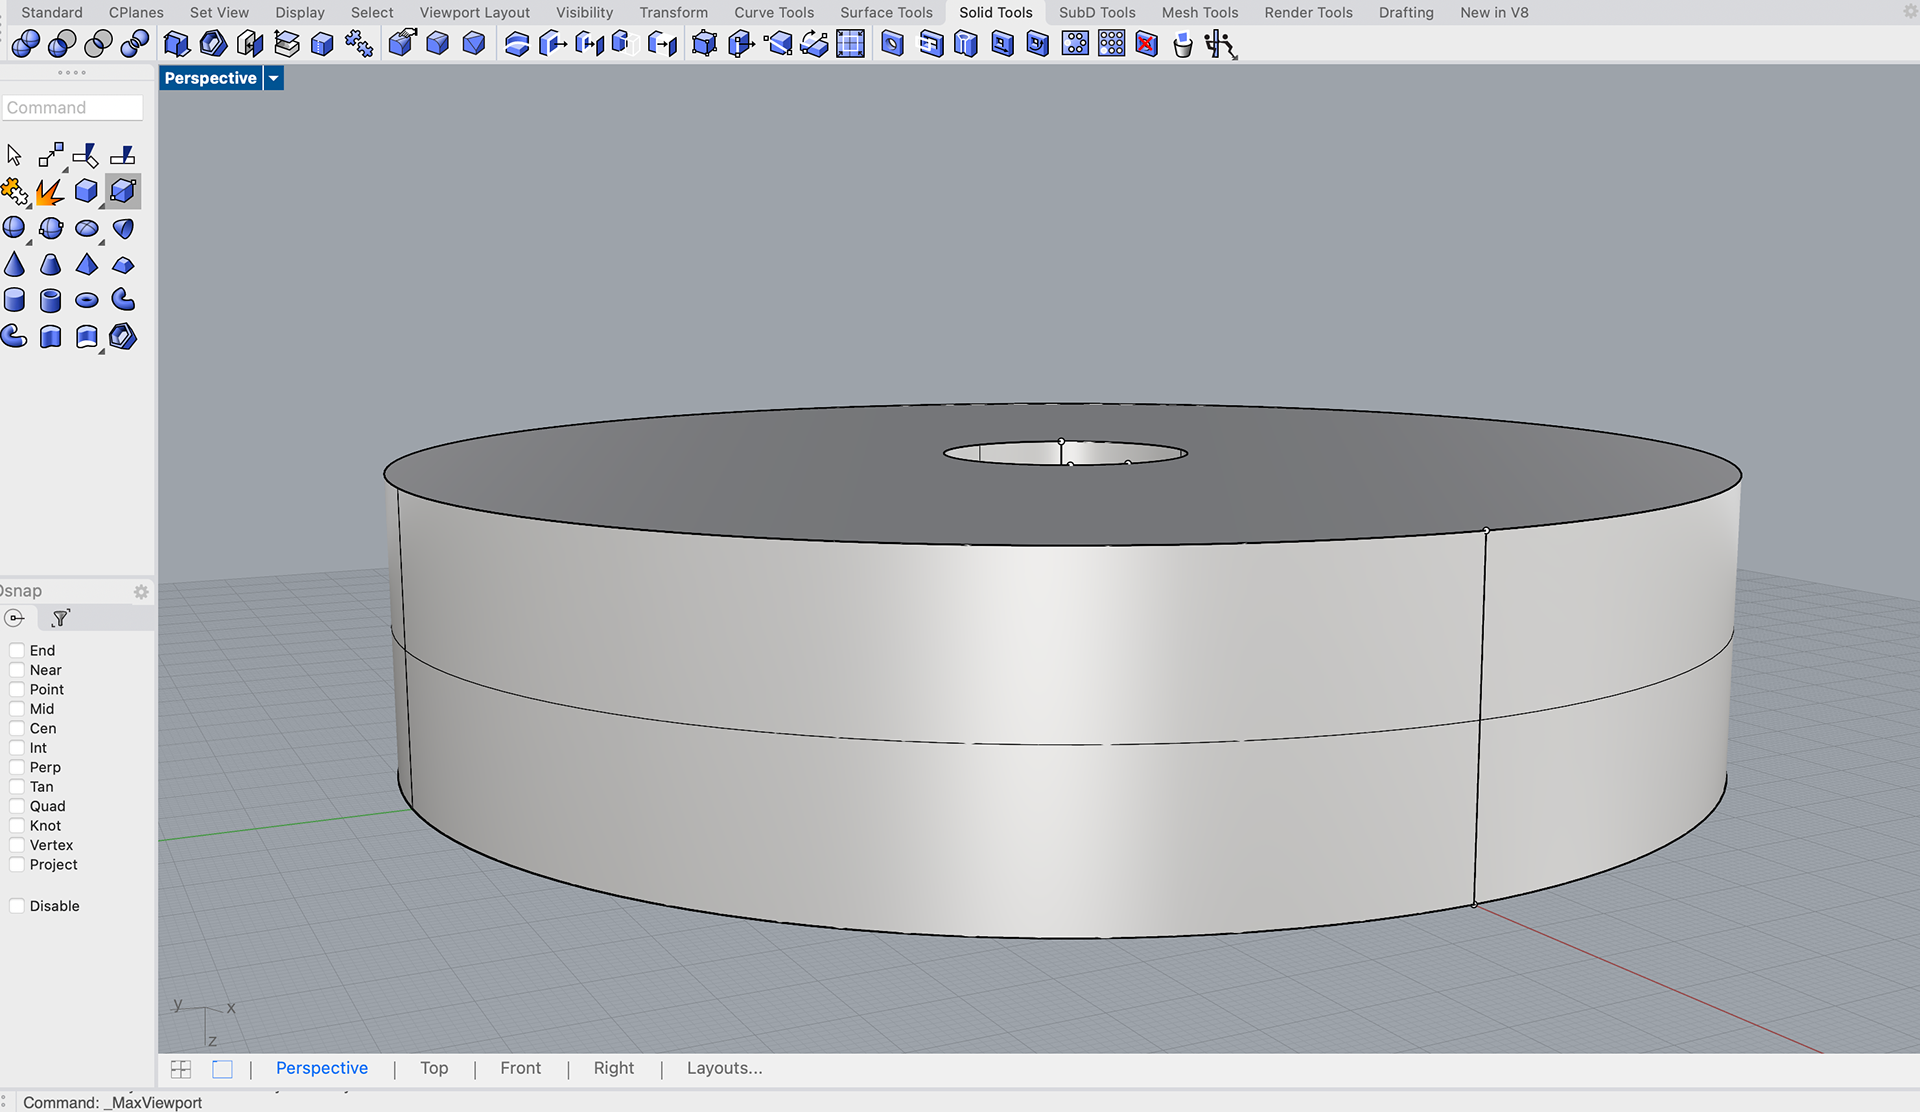
Millstone Mock-up
Using CAD Rhino software, I have made a mock-up millstone of the dimensions of an actual millstone to gauge how I envision the millstone looking in ceramic form. This gave me a clearer view of the 3d aspect of the pieces and allowed me to see a clear view of the curves and dimensions I needed to create, based on the diameters of the millstone.
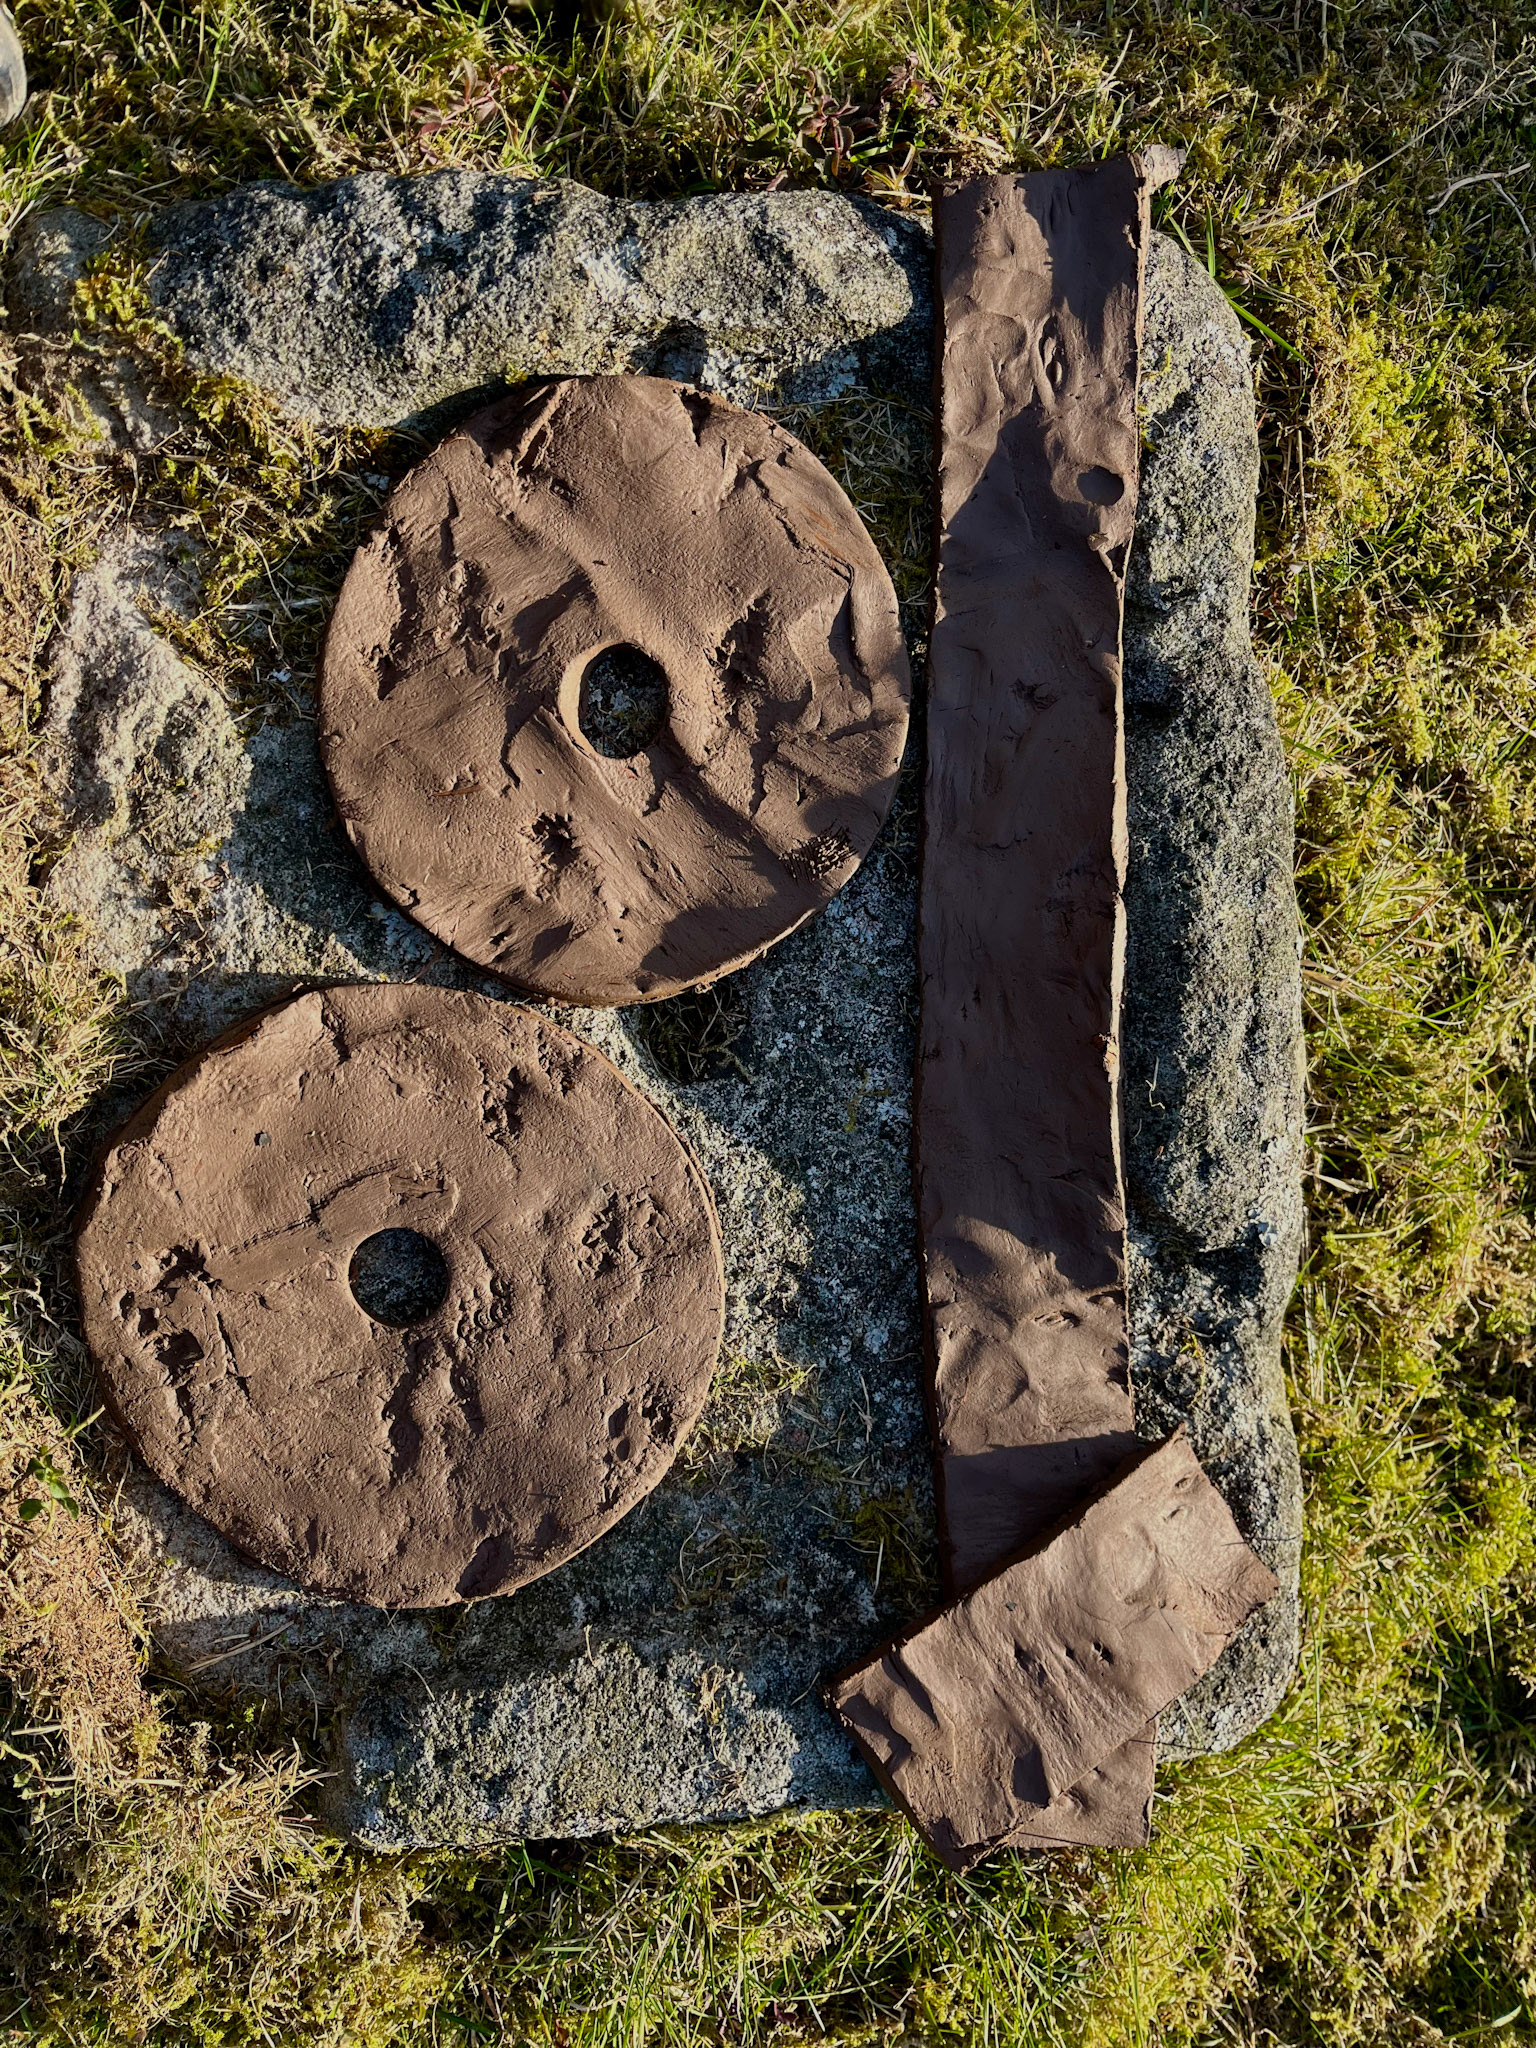
Clay Millstones
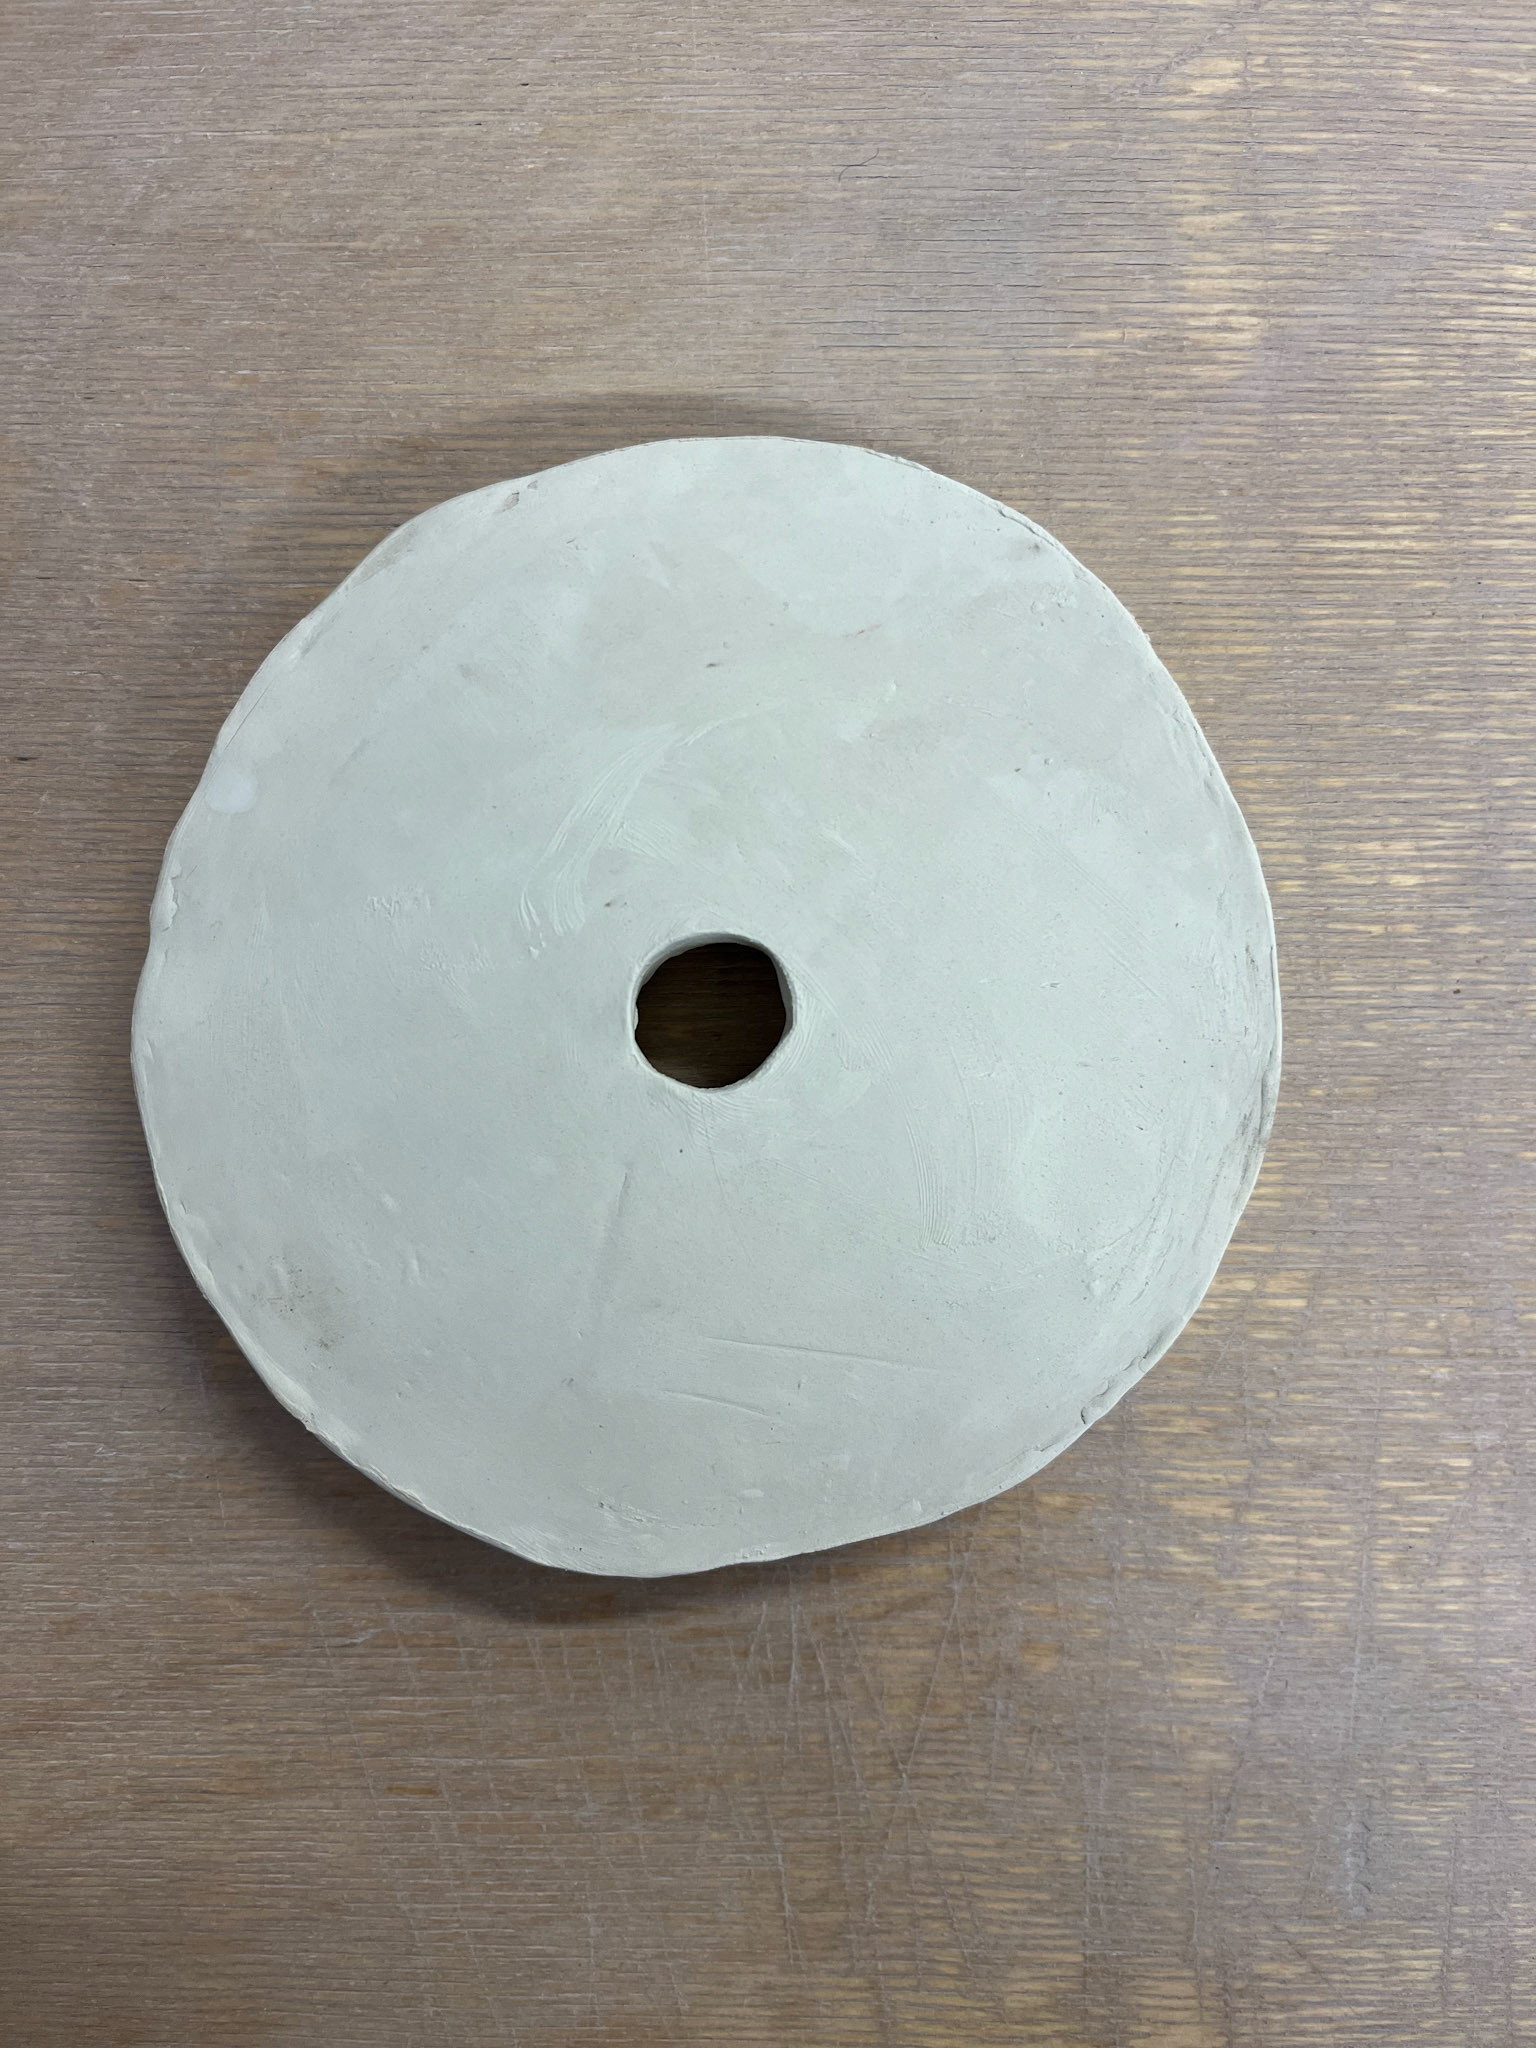
Using the clay that I processed from the Holderness Coast, I started to make clay versions of the millstones. I cut out the measured formers out of cardboard, and used them as templates to create the right dimensions.
I am getting the right thicknesses of the millstones by using specific slats that I have made for the diameters of the millstones. This ensures that I get equal thicknesses throughout and aids with the making.
The Holderness clay felt different to the cave clay that I have got used to working with. It felt more plasticky and tougher, however, more similar to that of stoneware commercial clay.
Removing dried clay from the plaster bat
Bagged up coastal clay, ready to work with
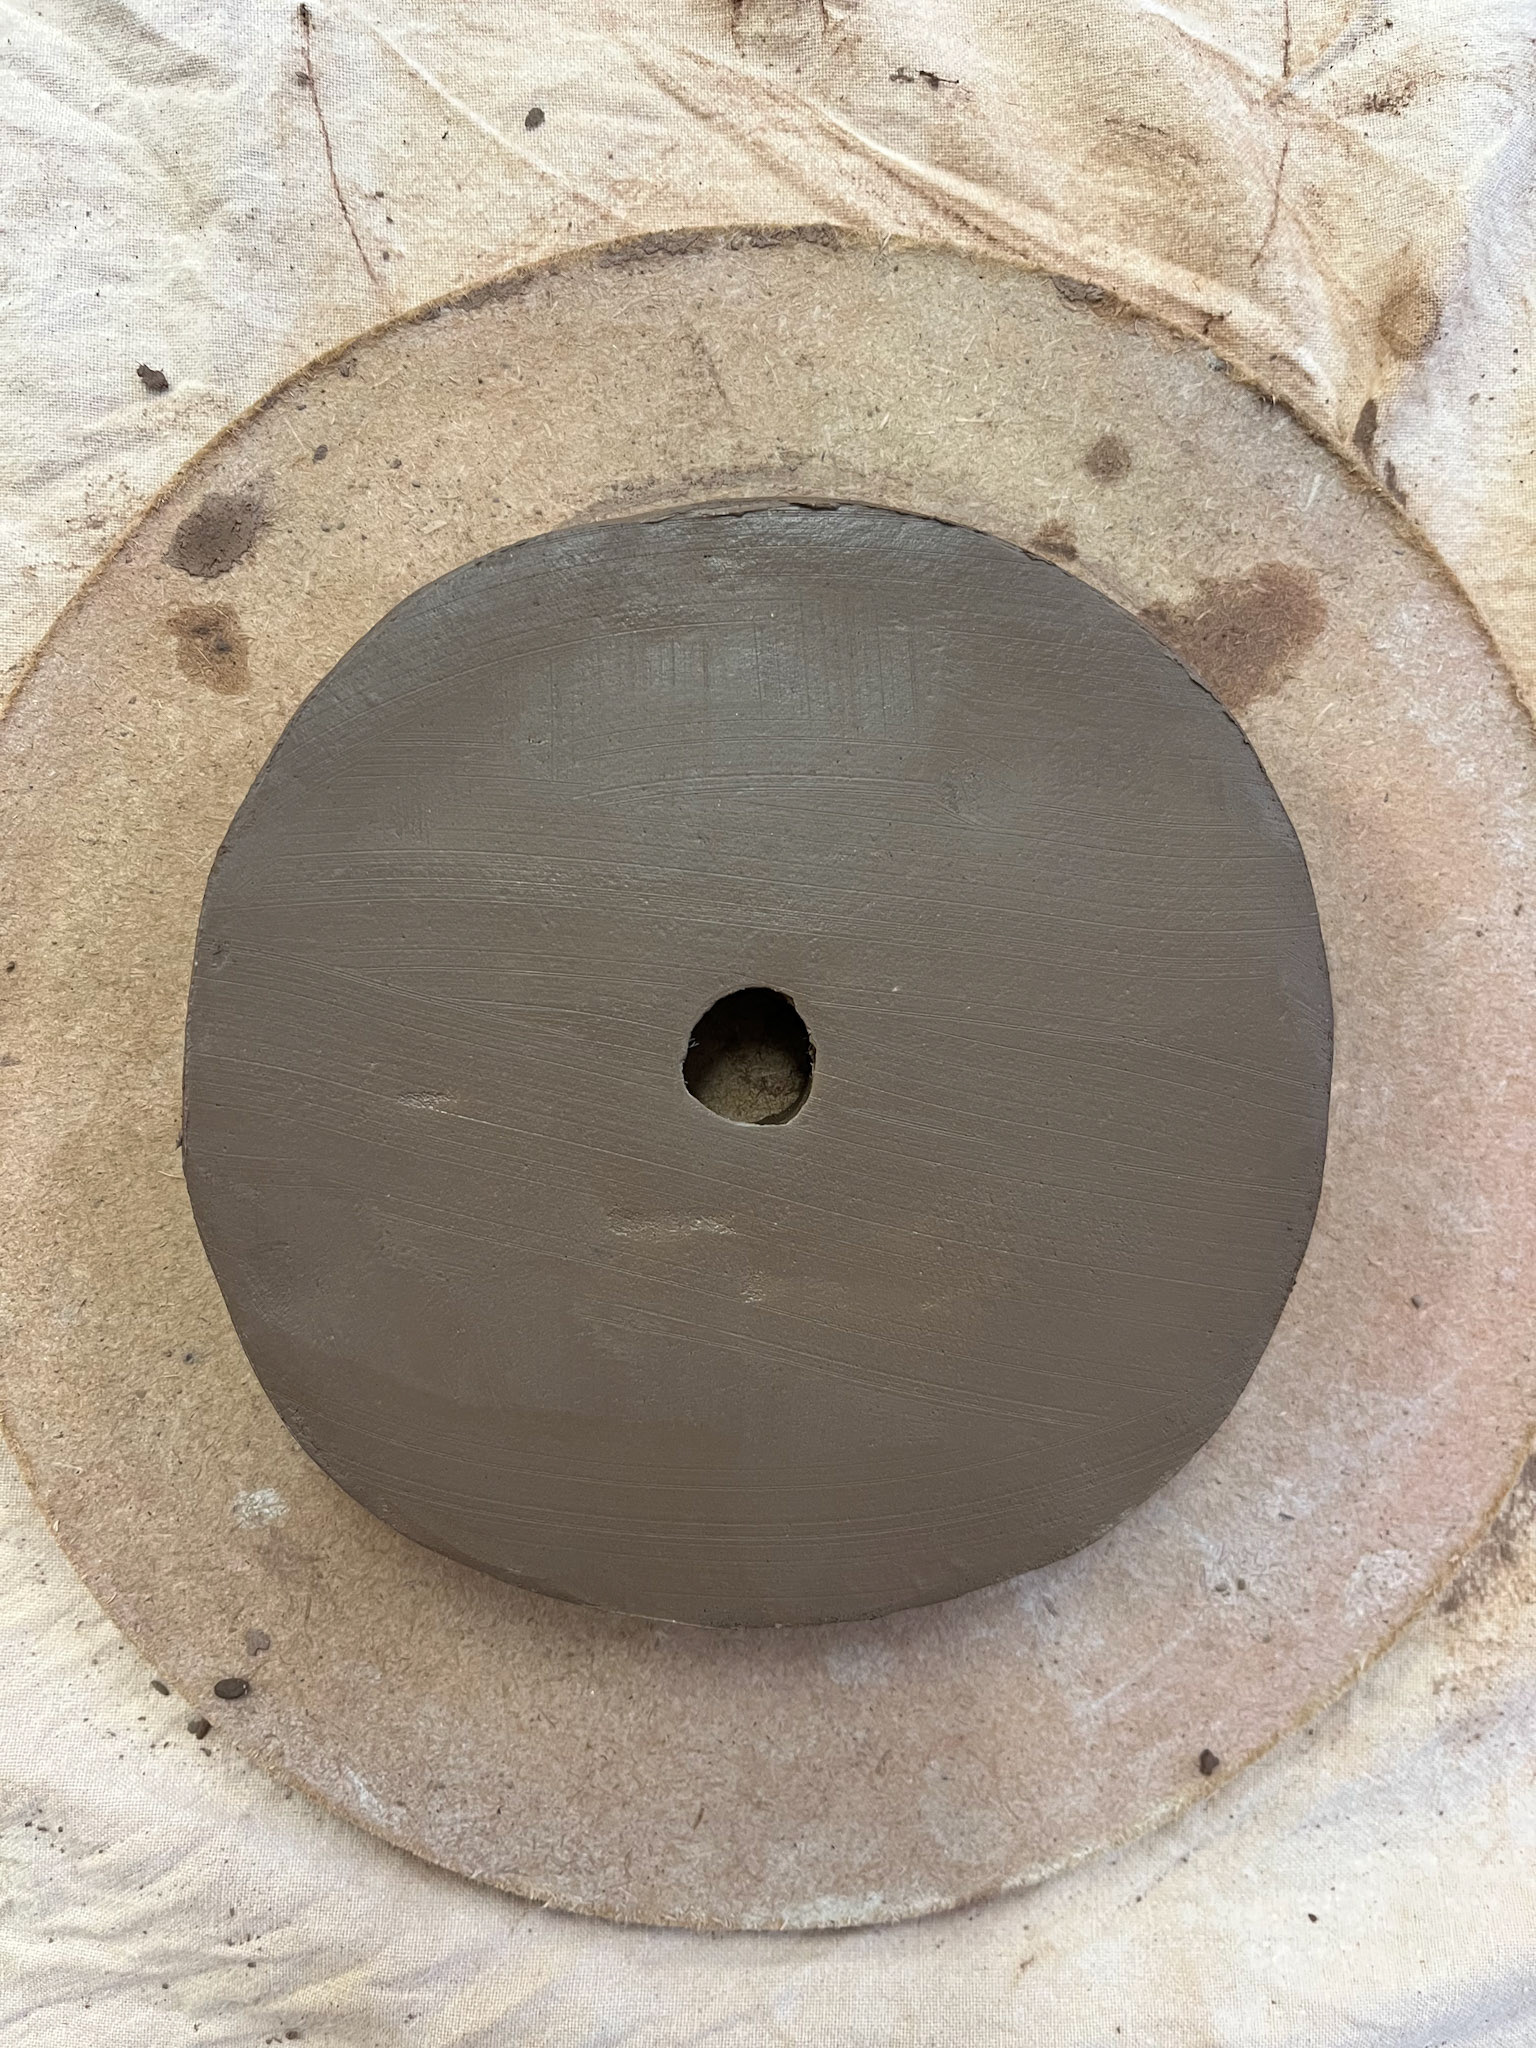
Millstones made with Holderness coastal clay.
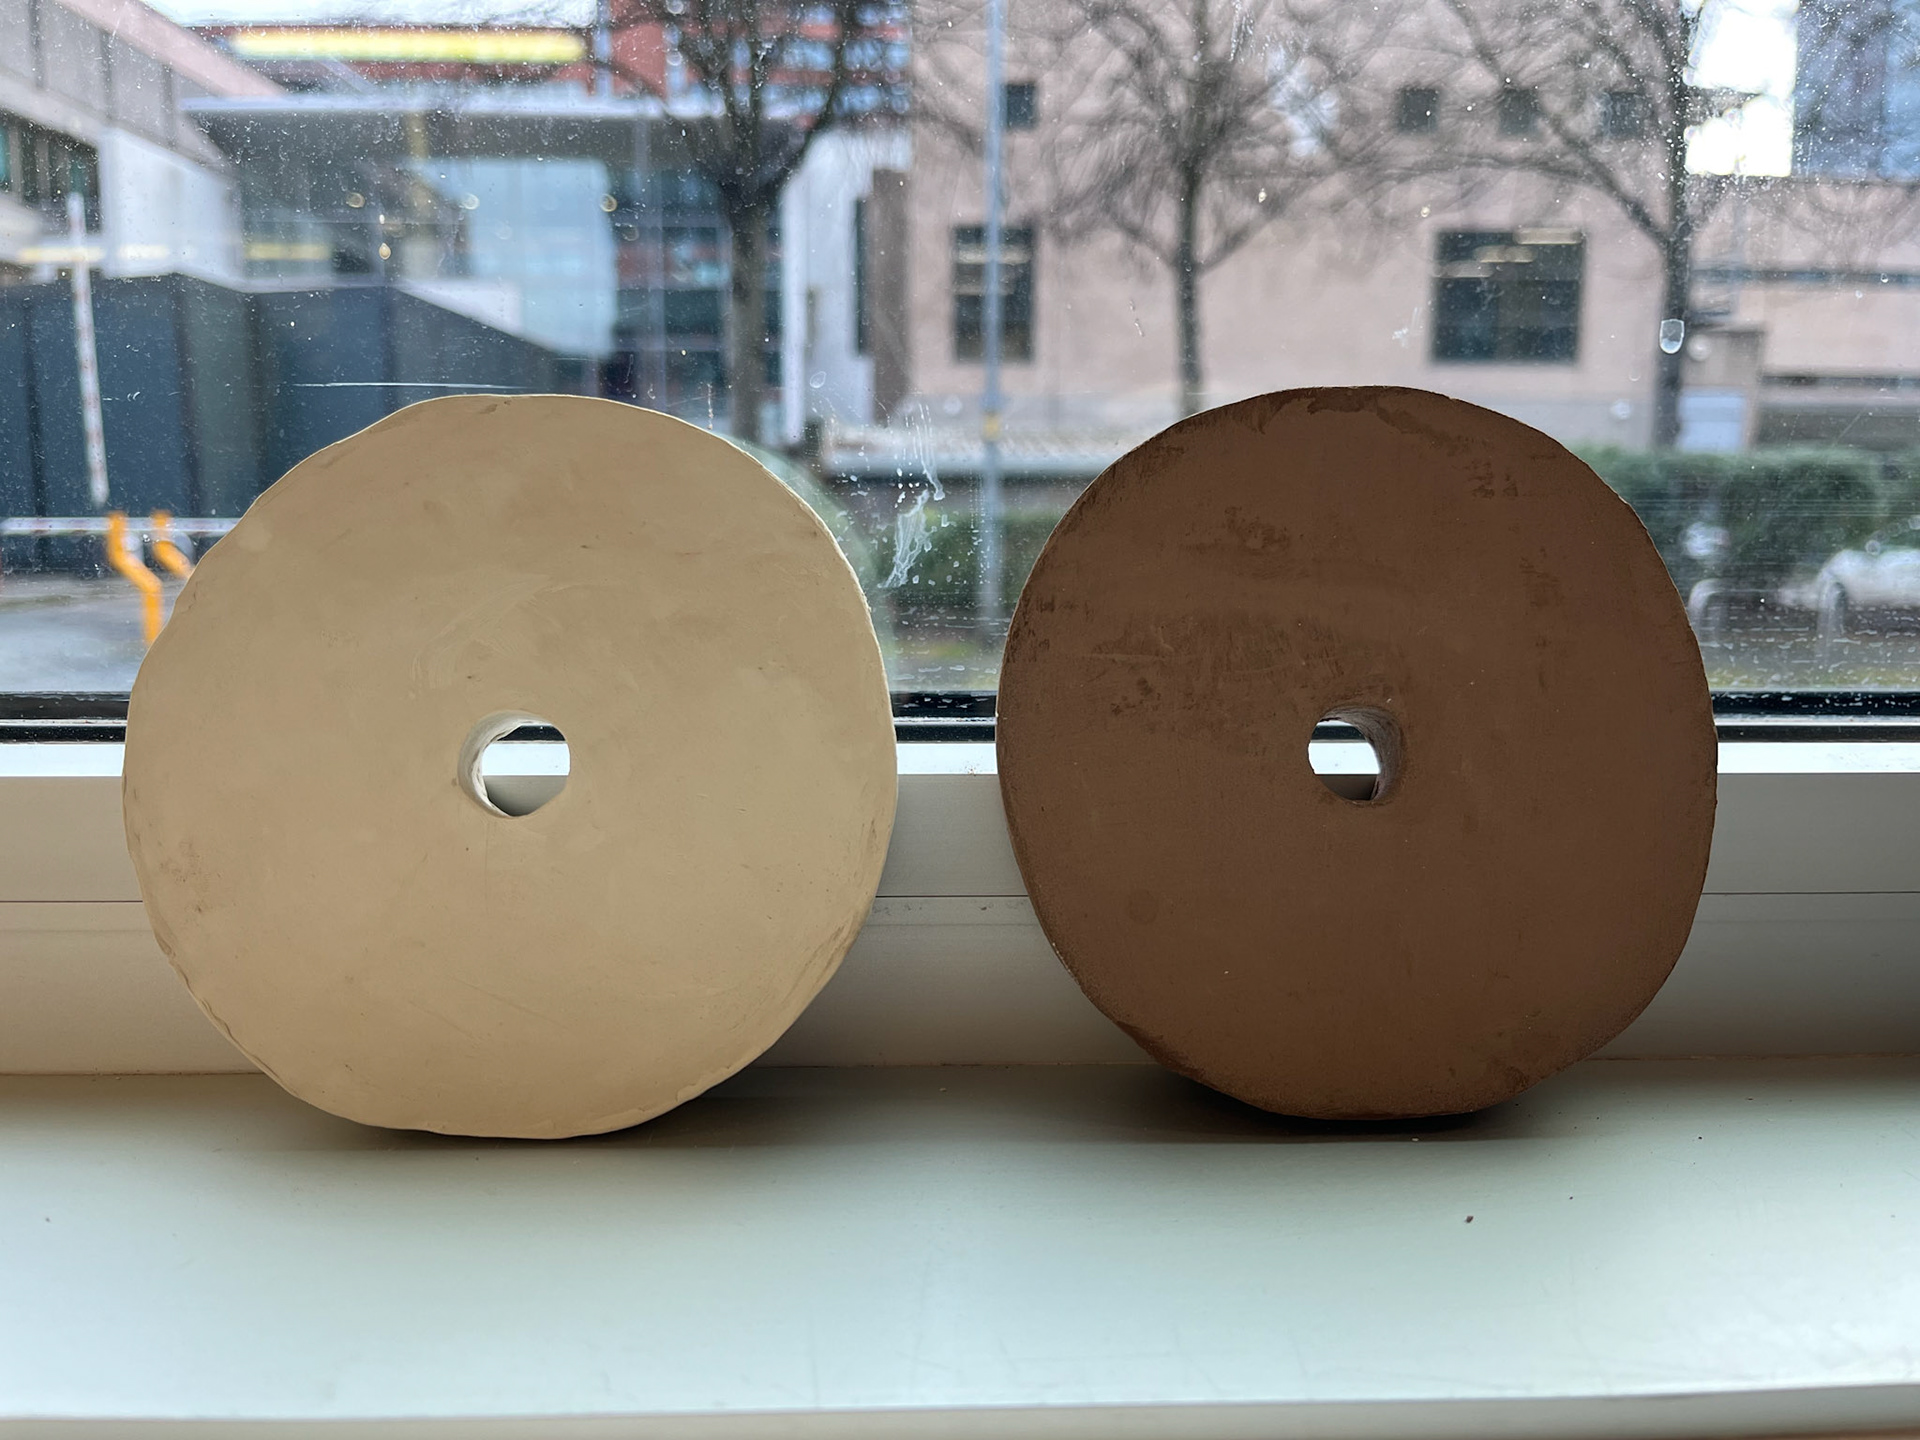
Stoneware clay
I have decided to also introduce the use of some commercial clay to my making. This is because, as part of my investigation into the study of glacial clay, I am interested in comparing the wild clay to clay that has been refined and pre-mixed.
Using ivory stoneware clay alongside the wild clay makes for a good comparison in colours and contrasts well with each other. Due to the stoneware being durable and stronger than wild clay
Stoneware and Wild
Combining two clays
I have combined both the wild Holderness clay with the stoneware to test the clay's capability of firing together. I am interested to see how this survives the kiln, and will be firing to bisque to hopefully limit anything being affected by the strong heat. However, as the Holderness clay fires well, I think the outcome should be quite intriguing.
I am combining both these clays as this mix of material will make the wild clay stronger and provide an effective contrast between the different types of clays.
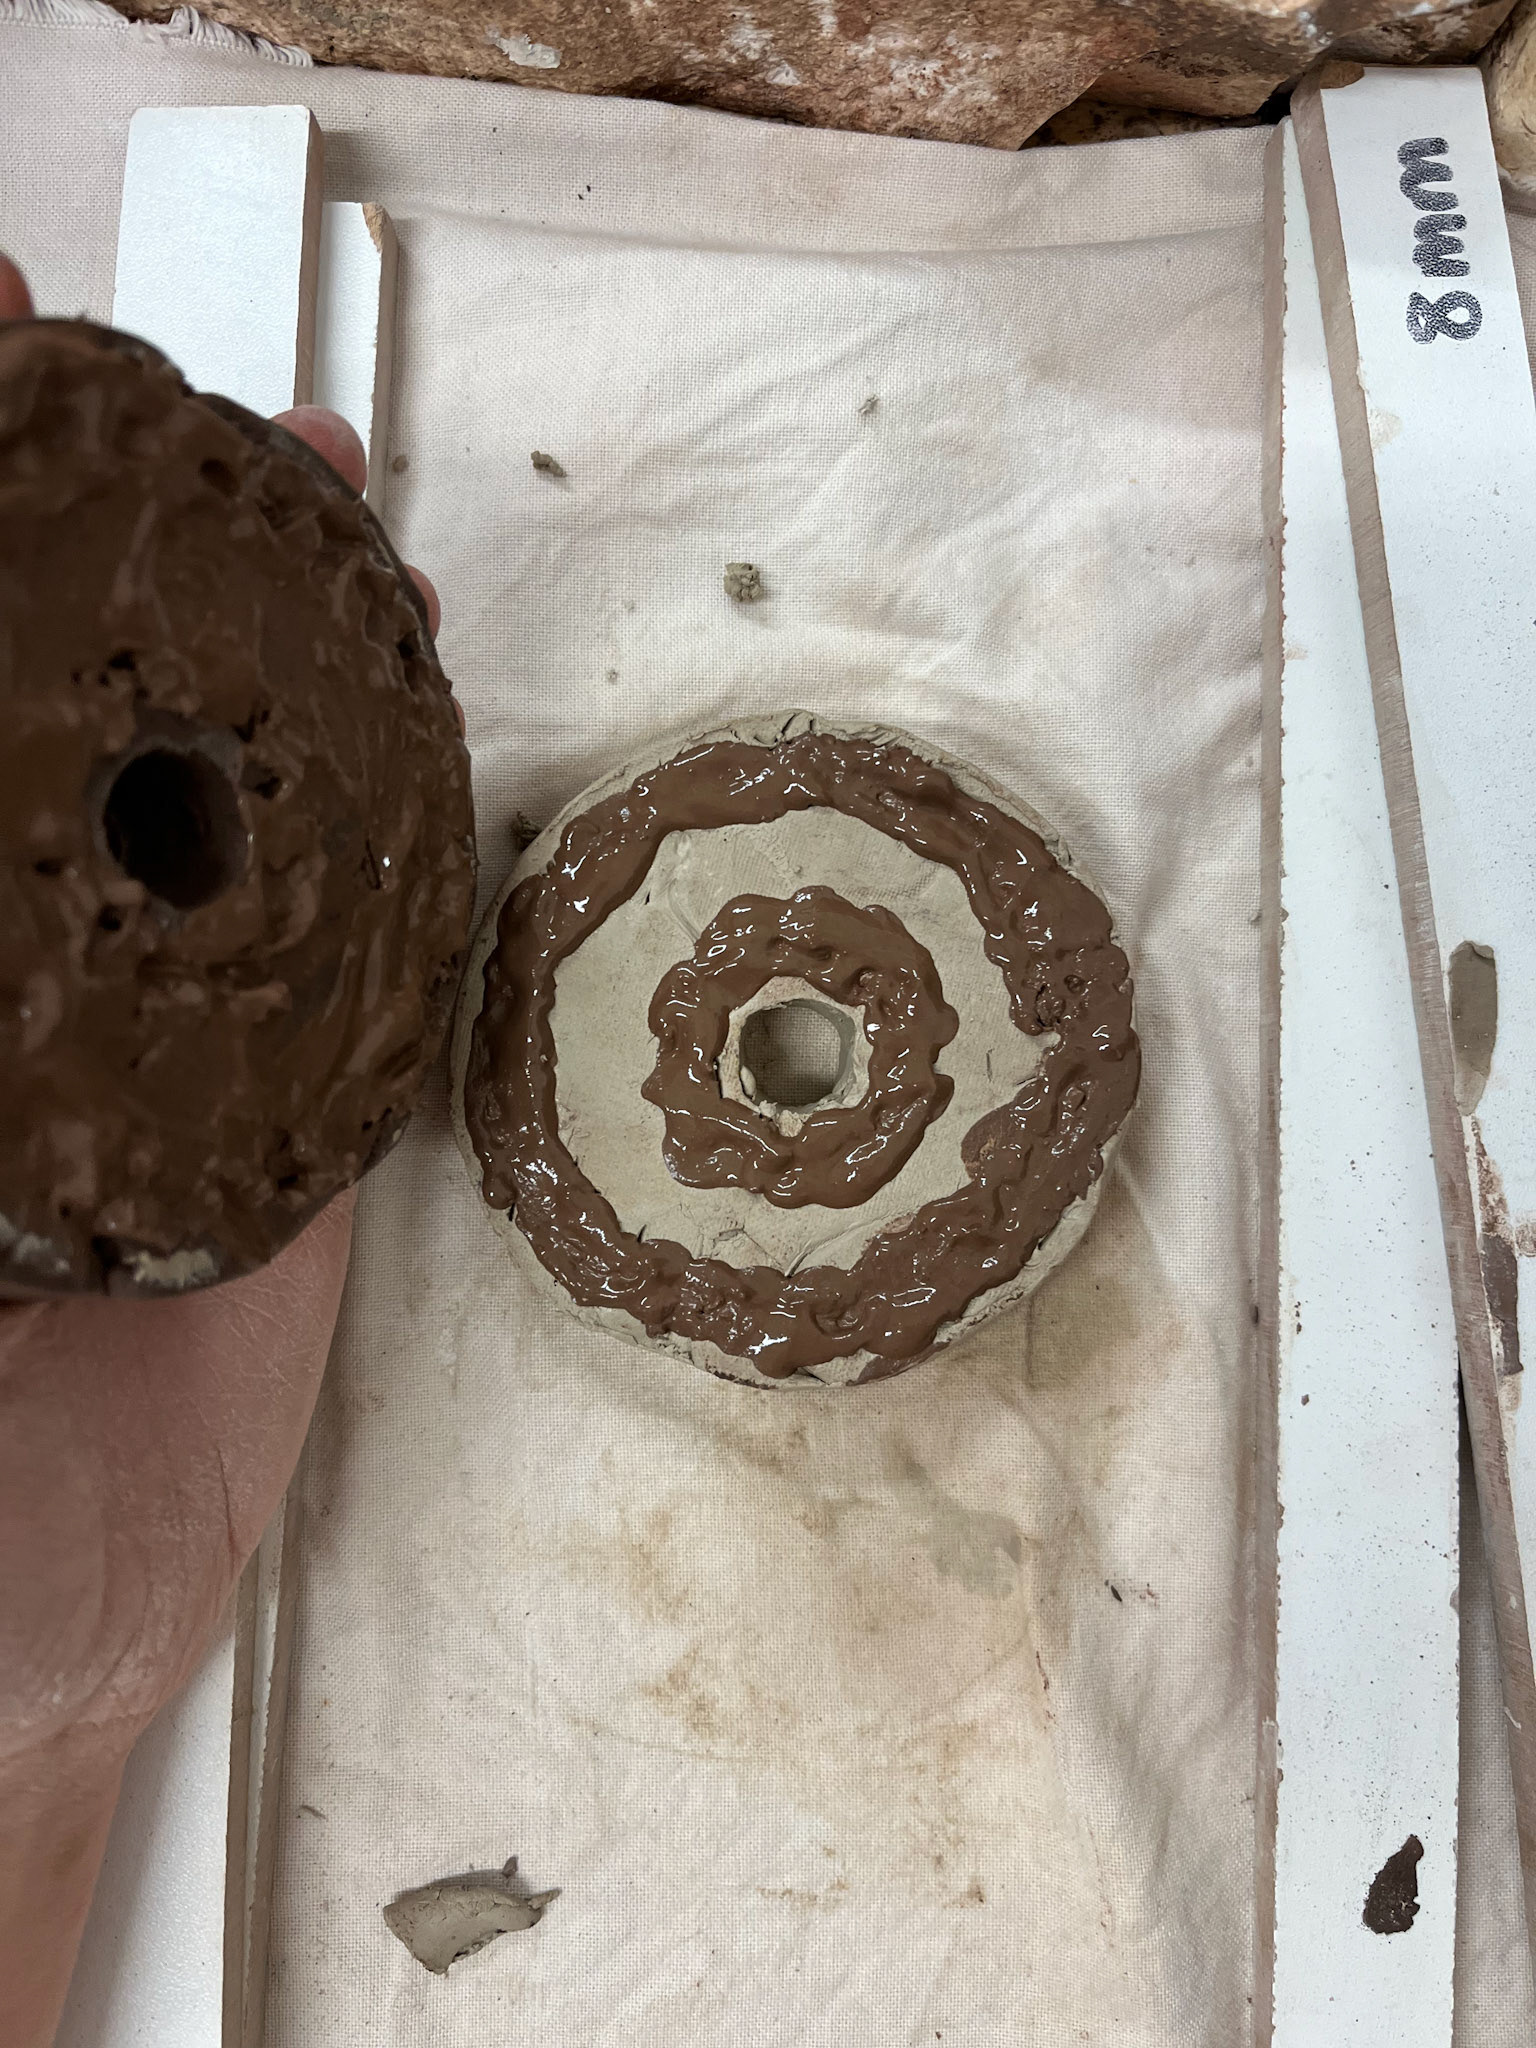
gritstone In the peak district
I have collected a small amount of gritstone which I have collected from the Peak District to bring back to the workshop. Just like with gathering clay, there can be precautions with collecting gritstone from the land, and it is important that I only gather in small amounts and not leave any unnecessary traces behind.
With the gritstone, I tested rolling a clay millstone that I had made prior, which was still fairly wet, into a bowl of grit. I was pleased at how well the grit stuck to the clay, and because it is very fine and powdery, the grit was quite easy to work with.
I will fire this test to bisque, and am quite interested to see whether the grit stays on the clay through the firing as I have not used any sealant to aid it sticking.
Gritstone from Peak District

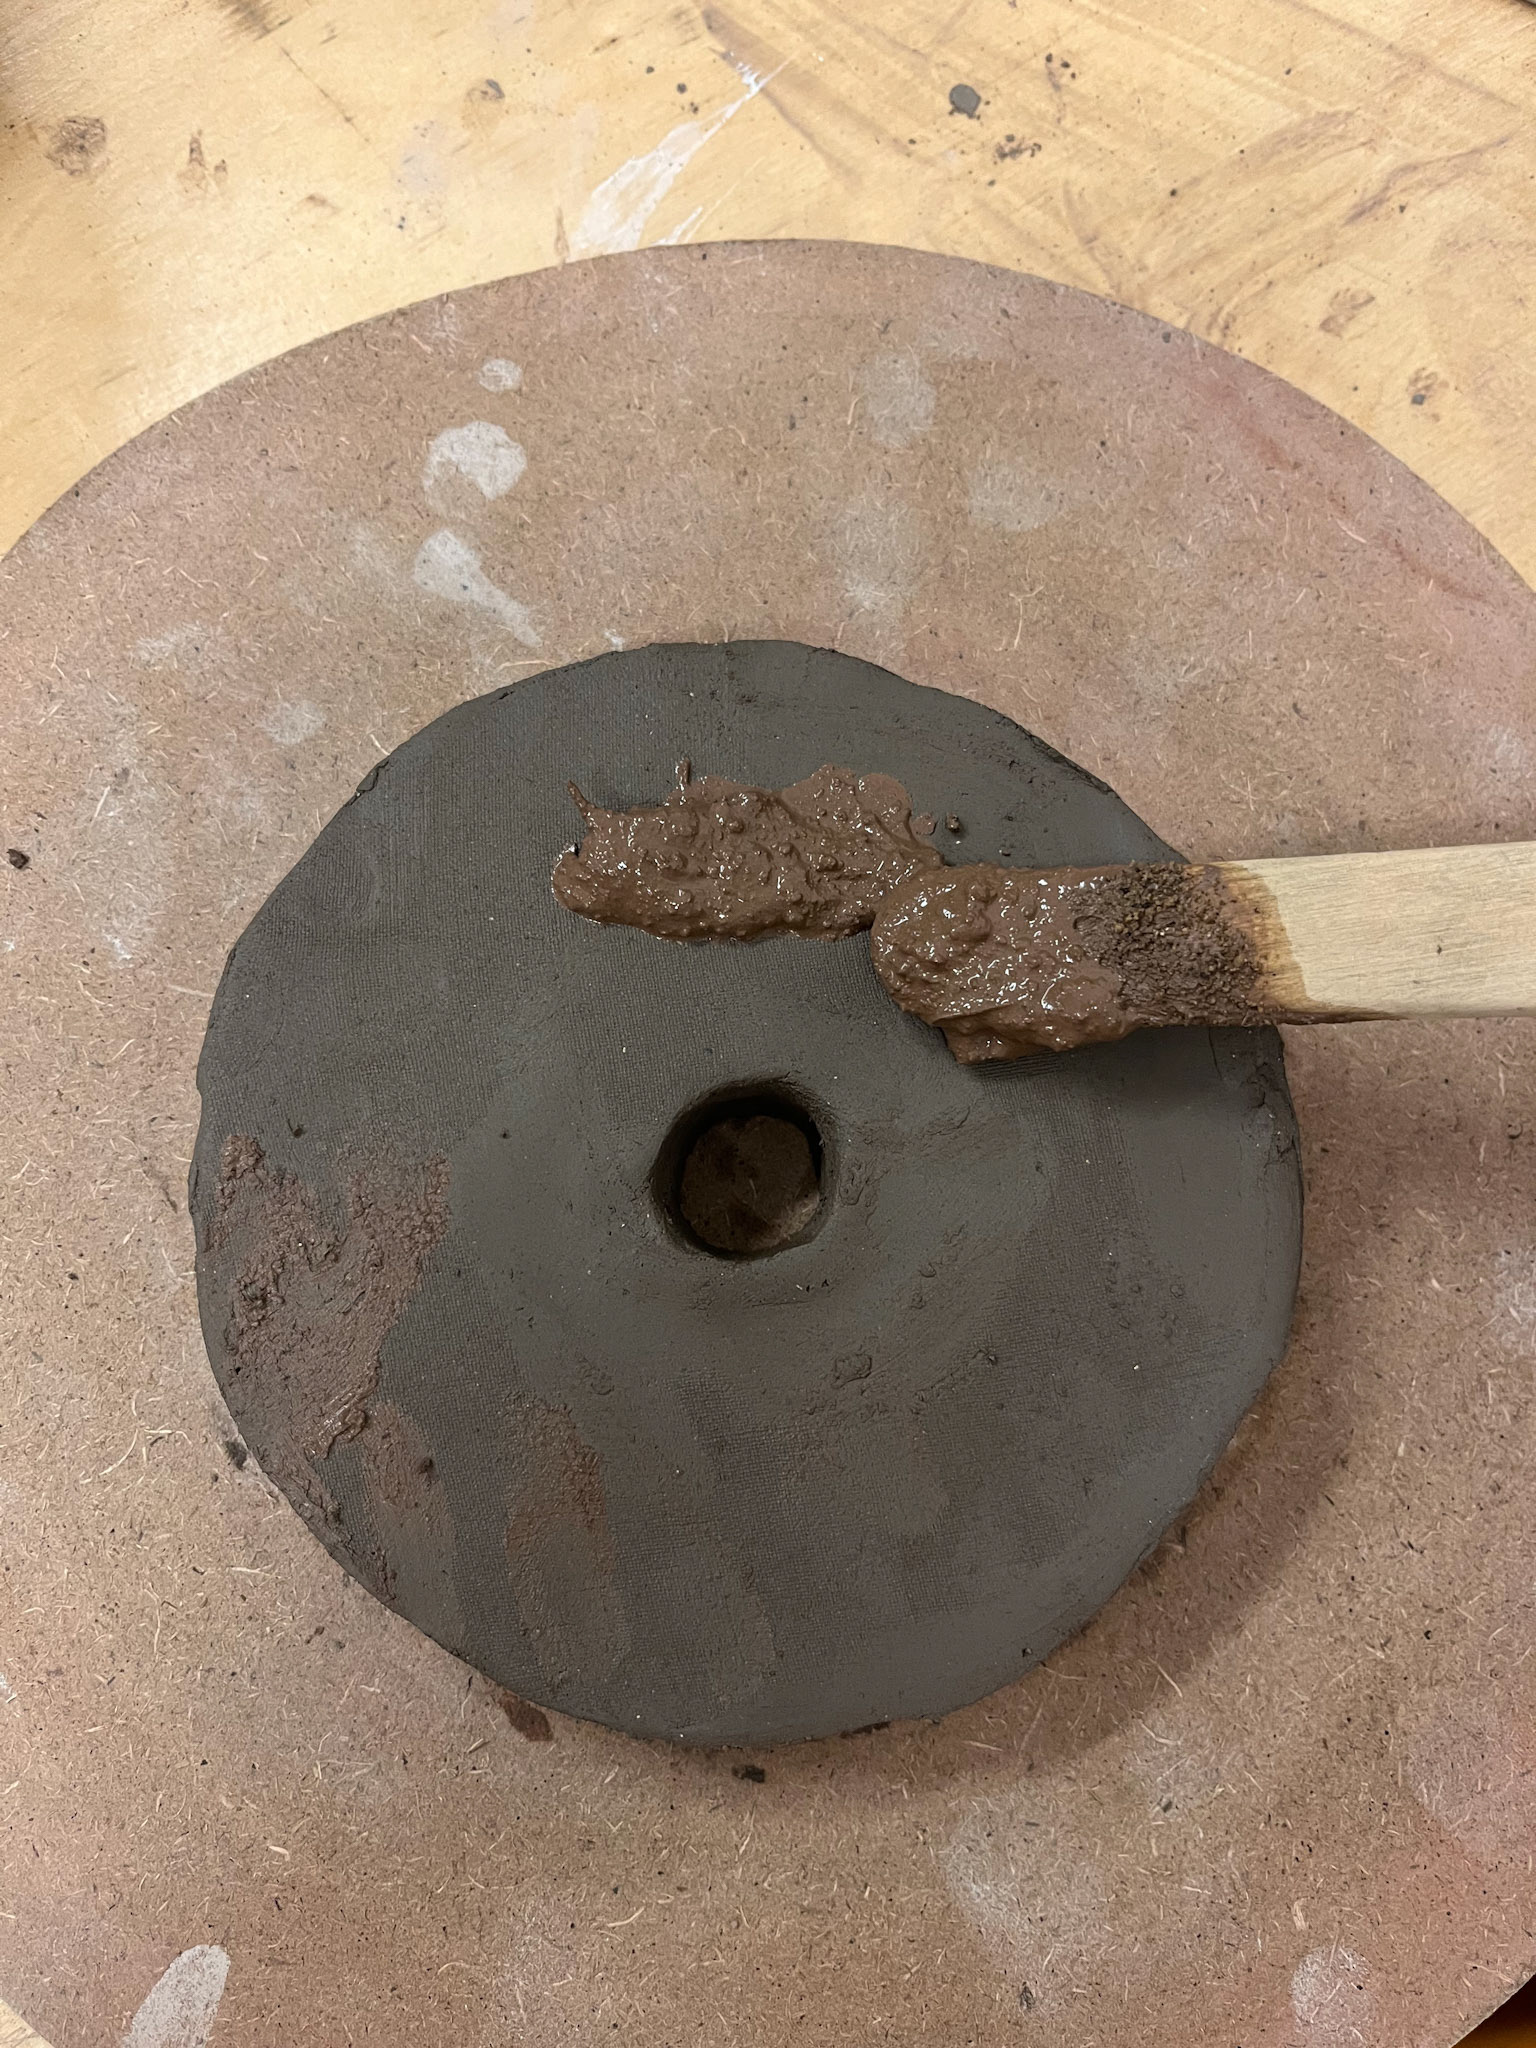
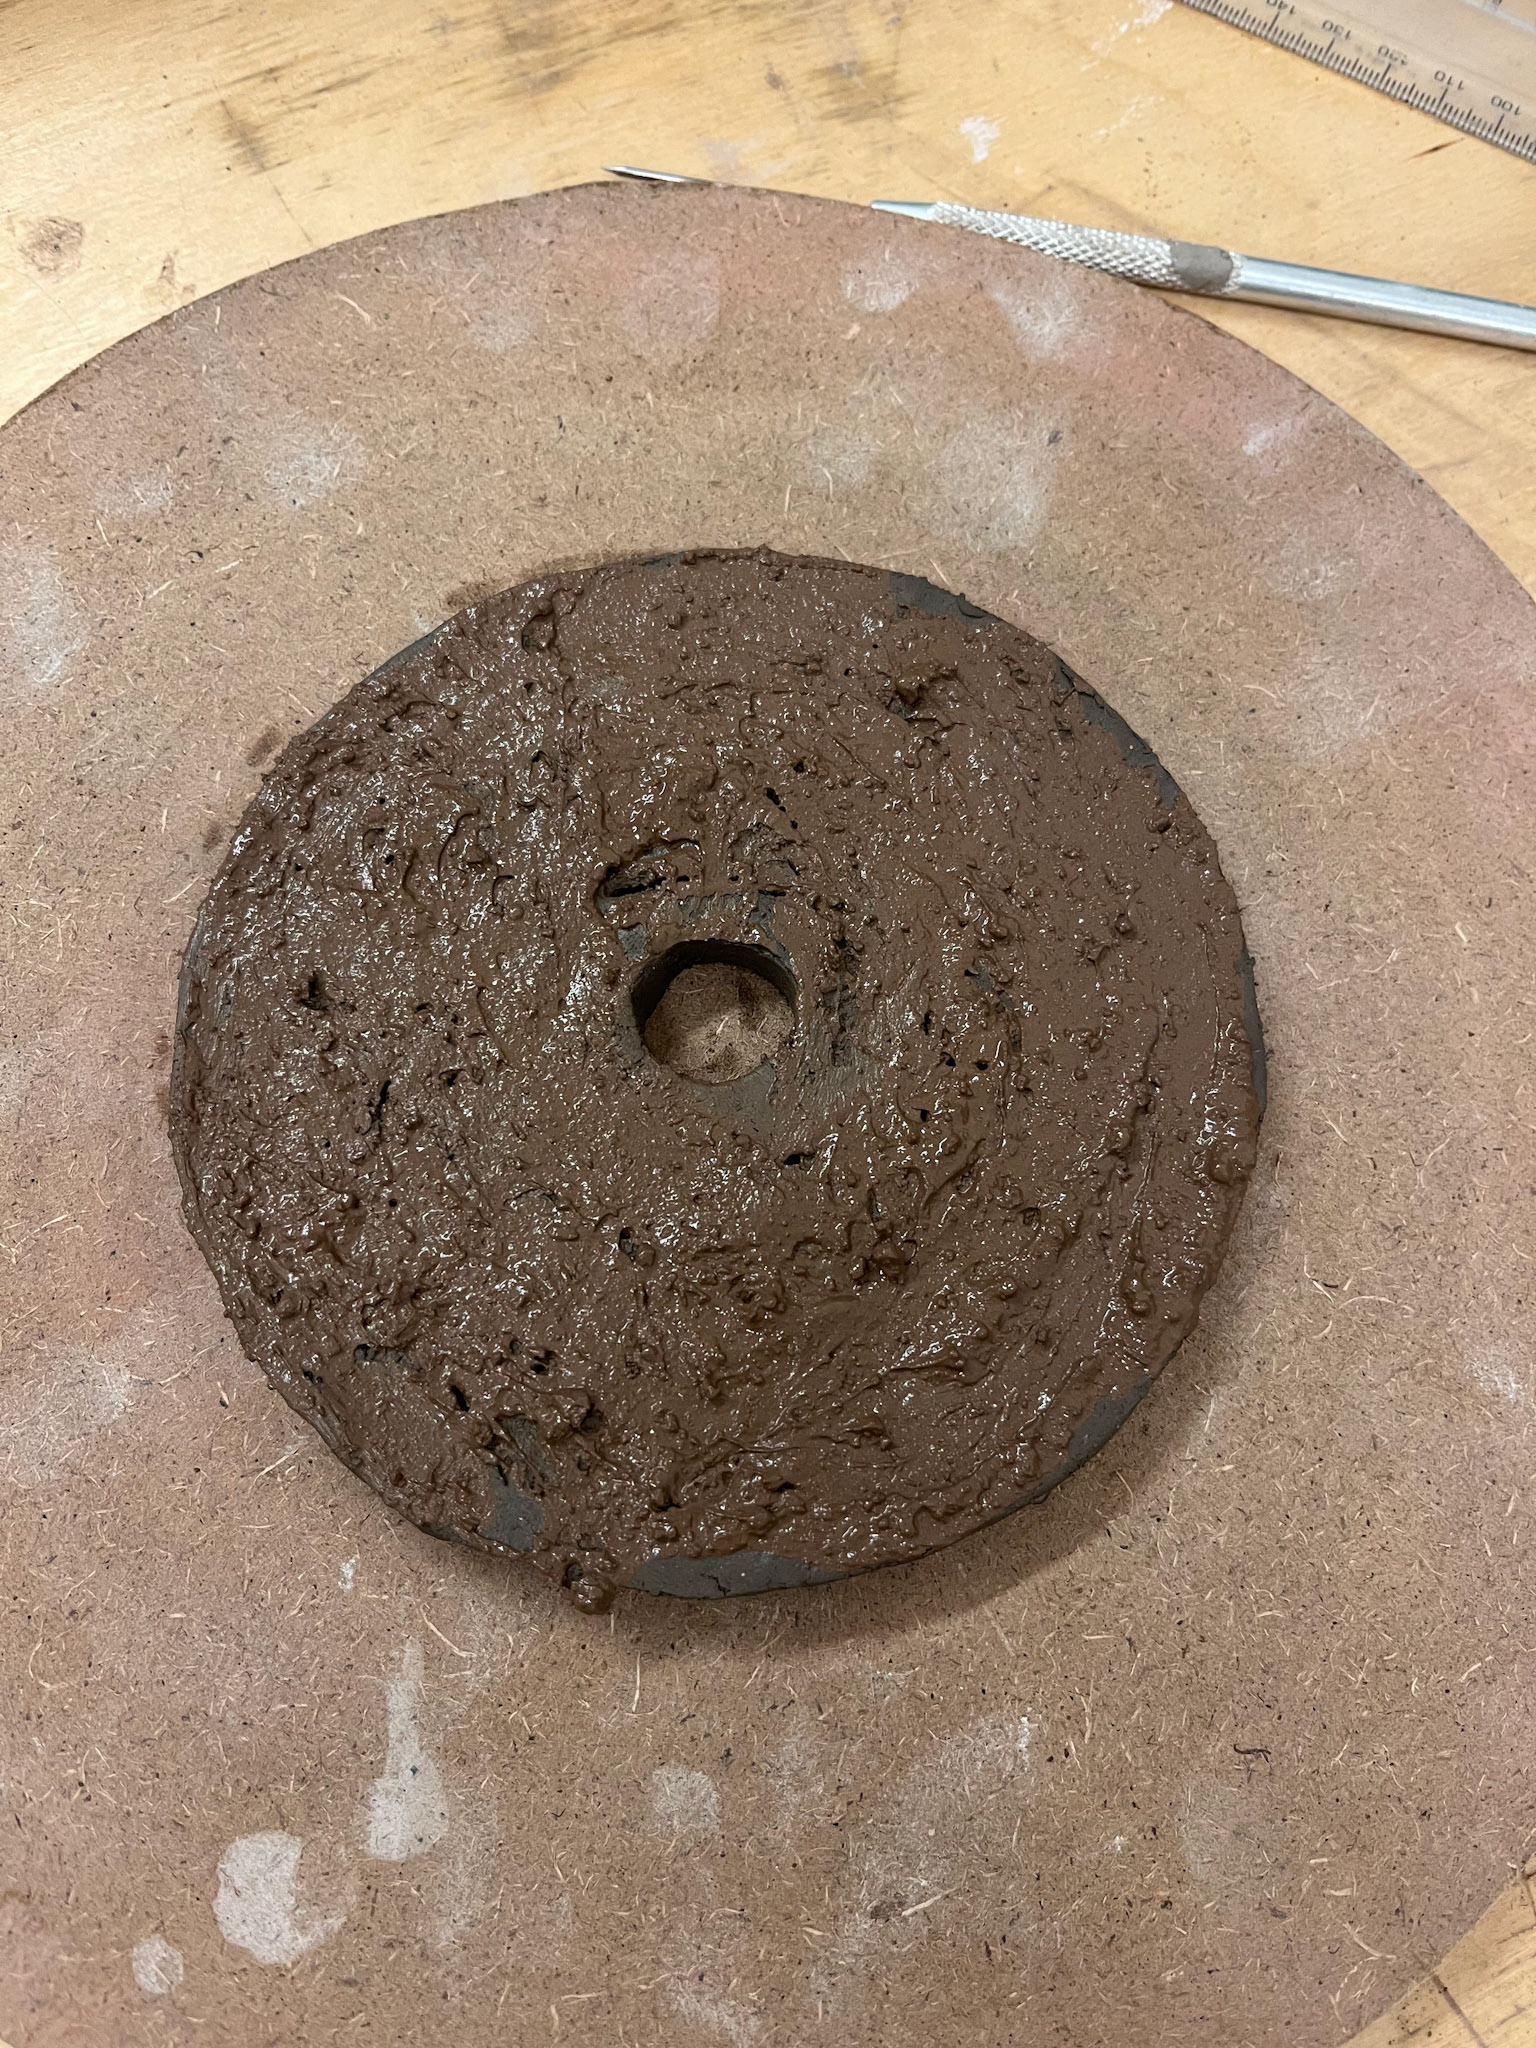
applying grit as a slip
As well as just applying the grit by rolling the clay into it, I have also tried combining it with slip, which I have made with the clay. This application works better than the previous one, as it feels more secure and less fragile. As the slip is the same clay as the clay millstone, it should not affect the look of the ceramic, however it will be interesting to see how much of the gritstone is shown when it is fired.
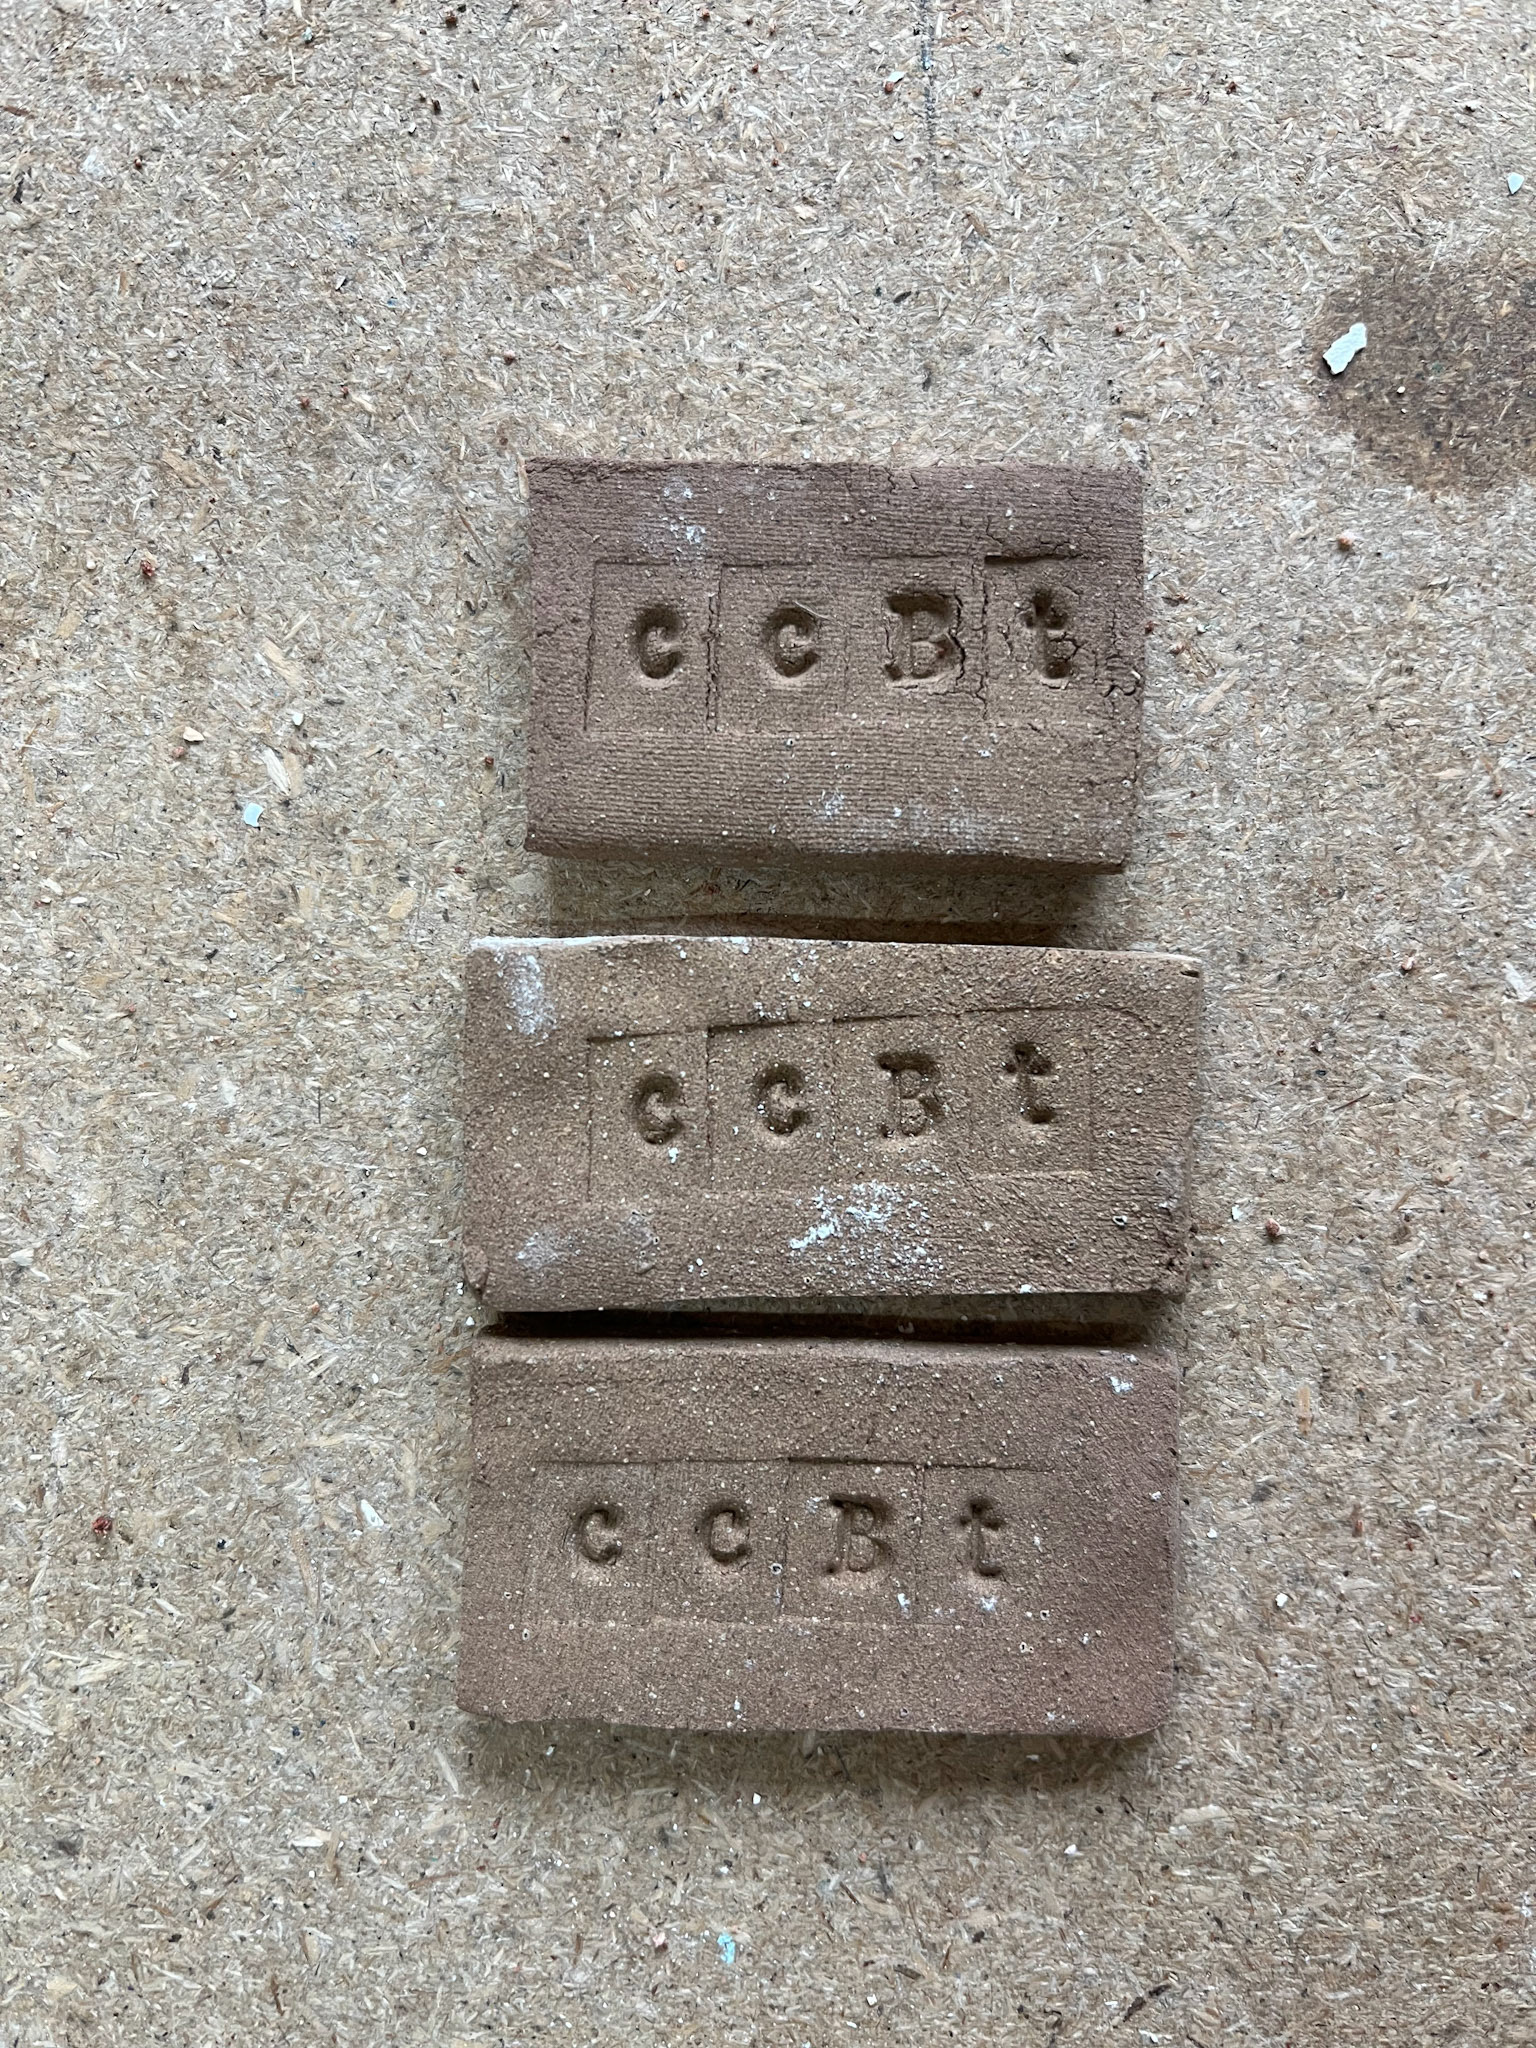
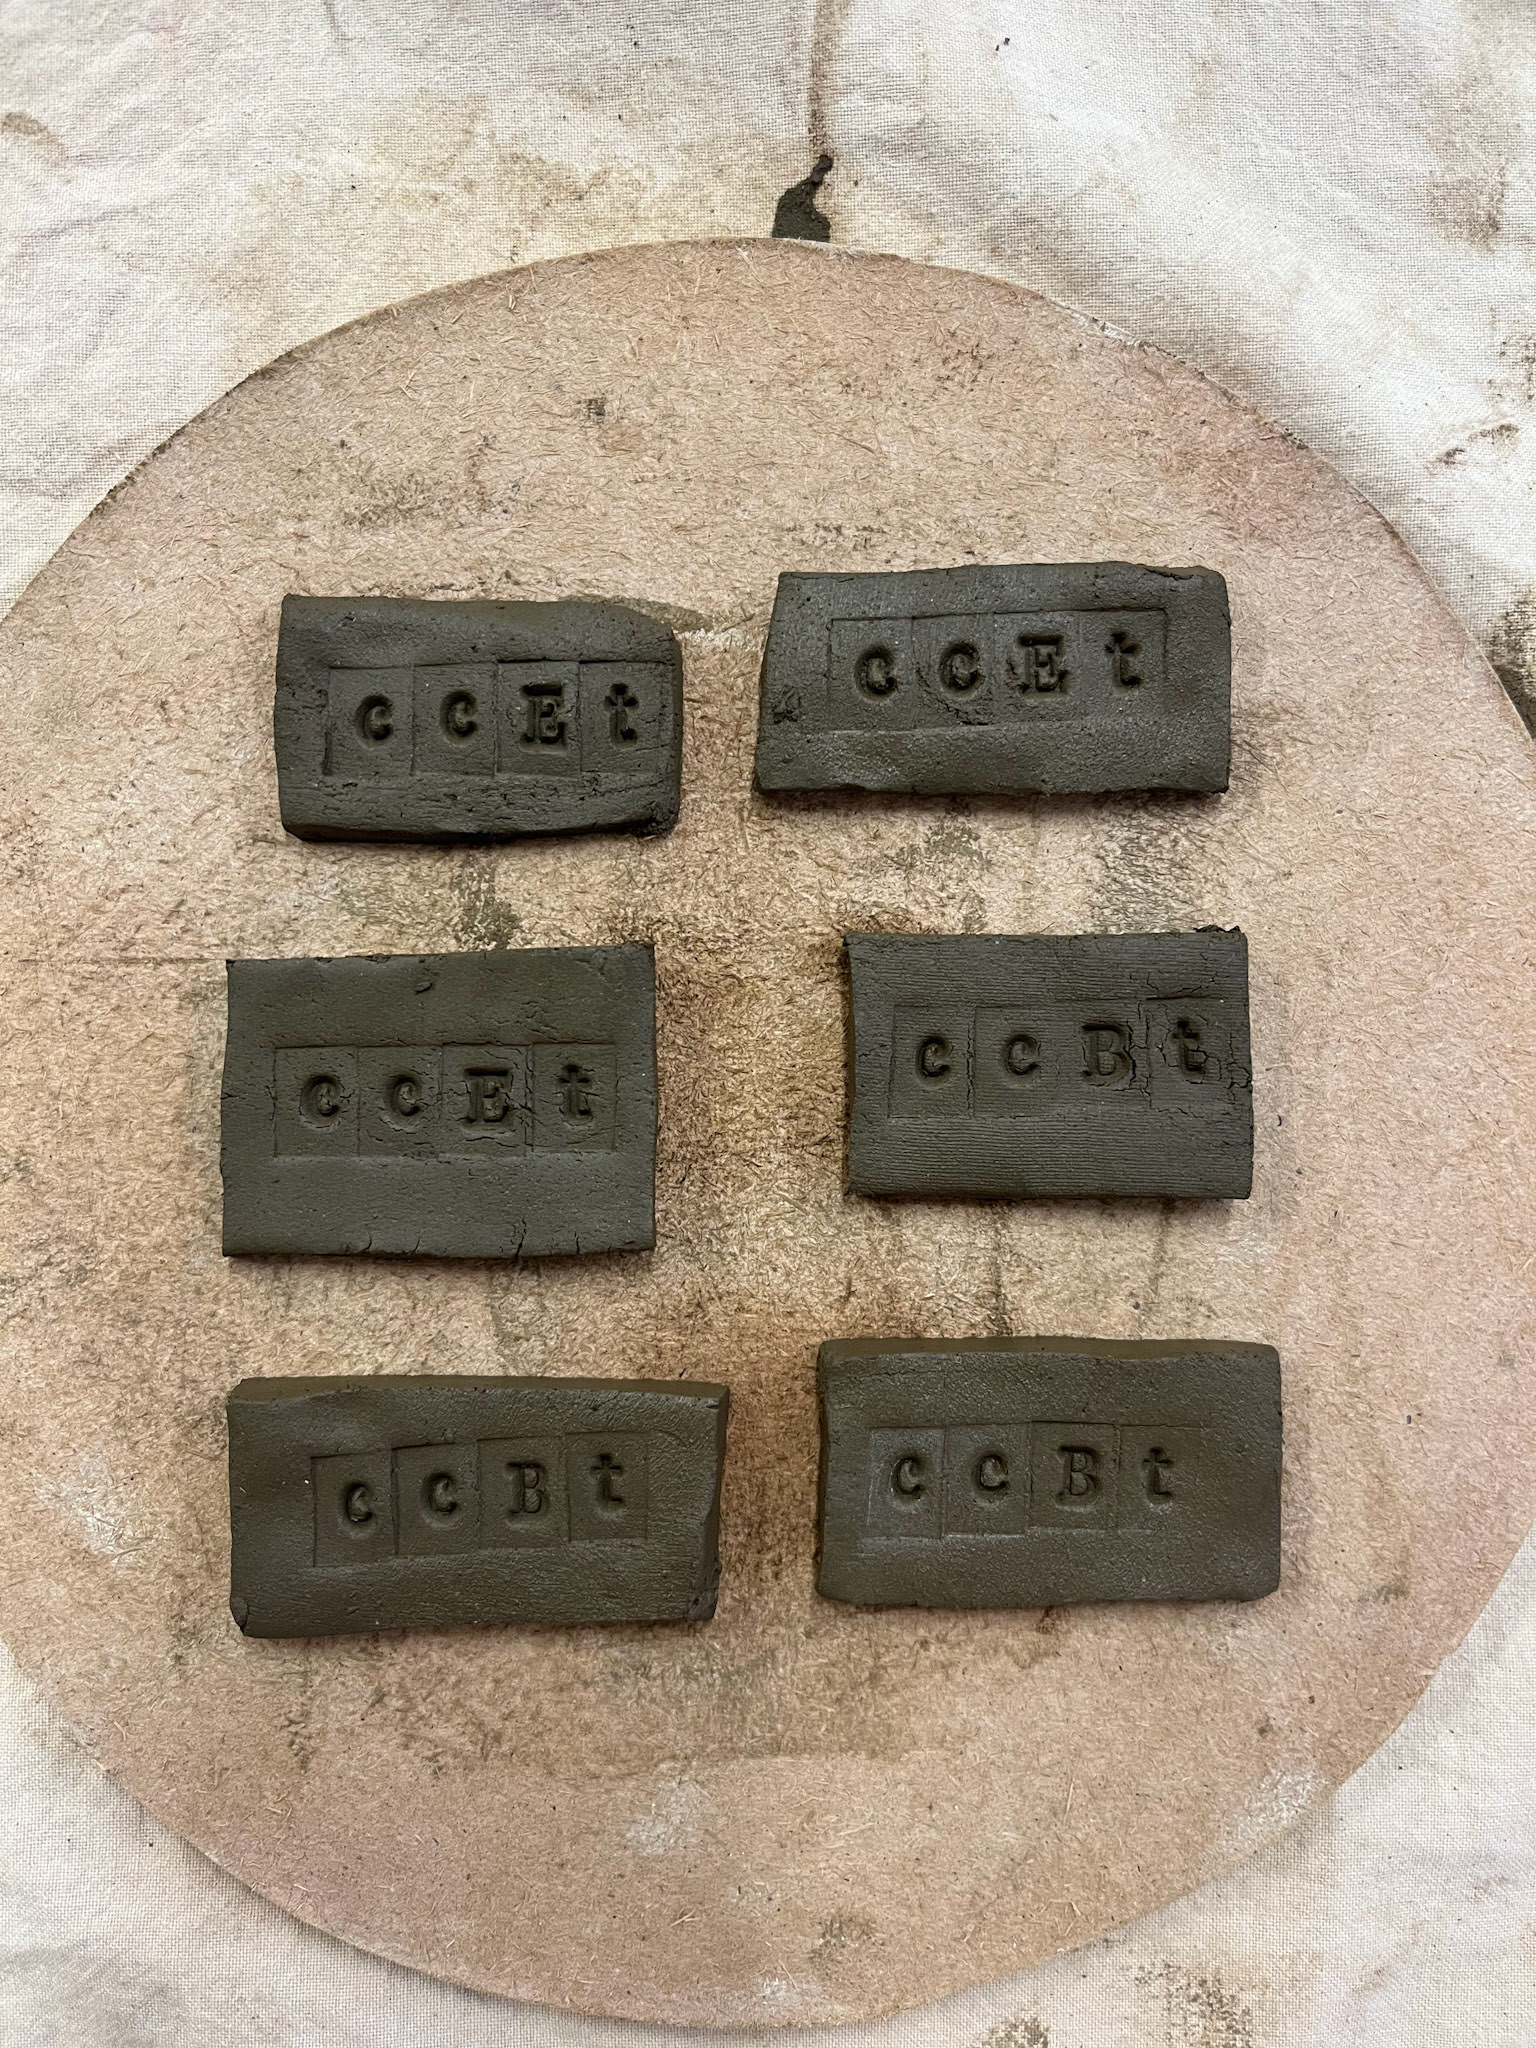
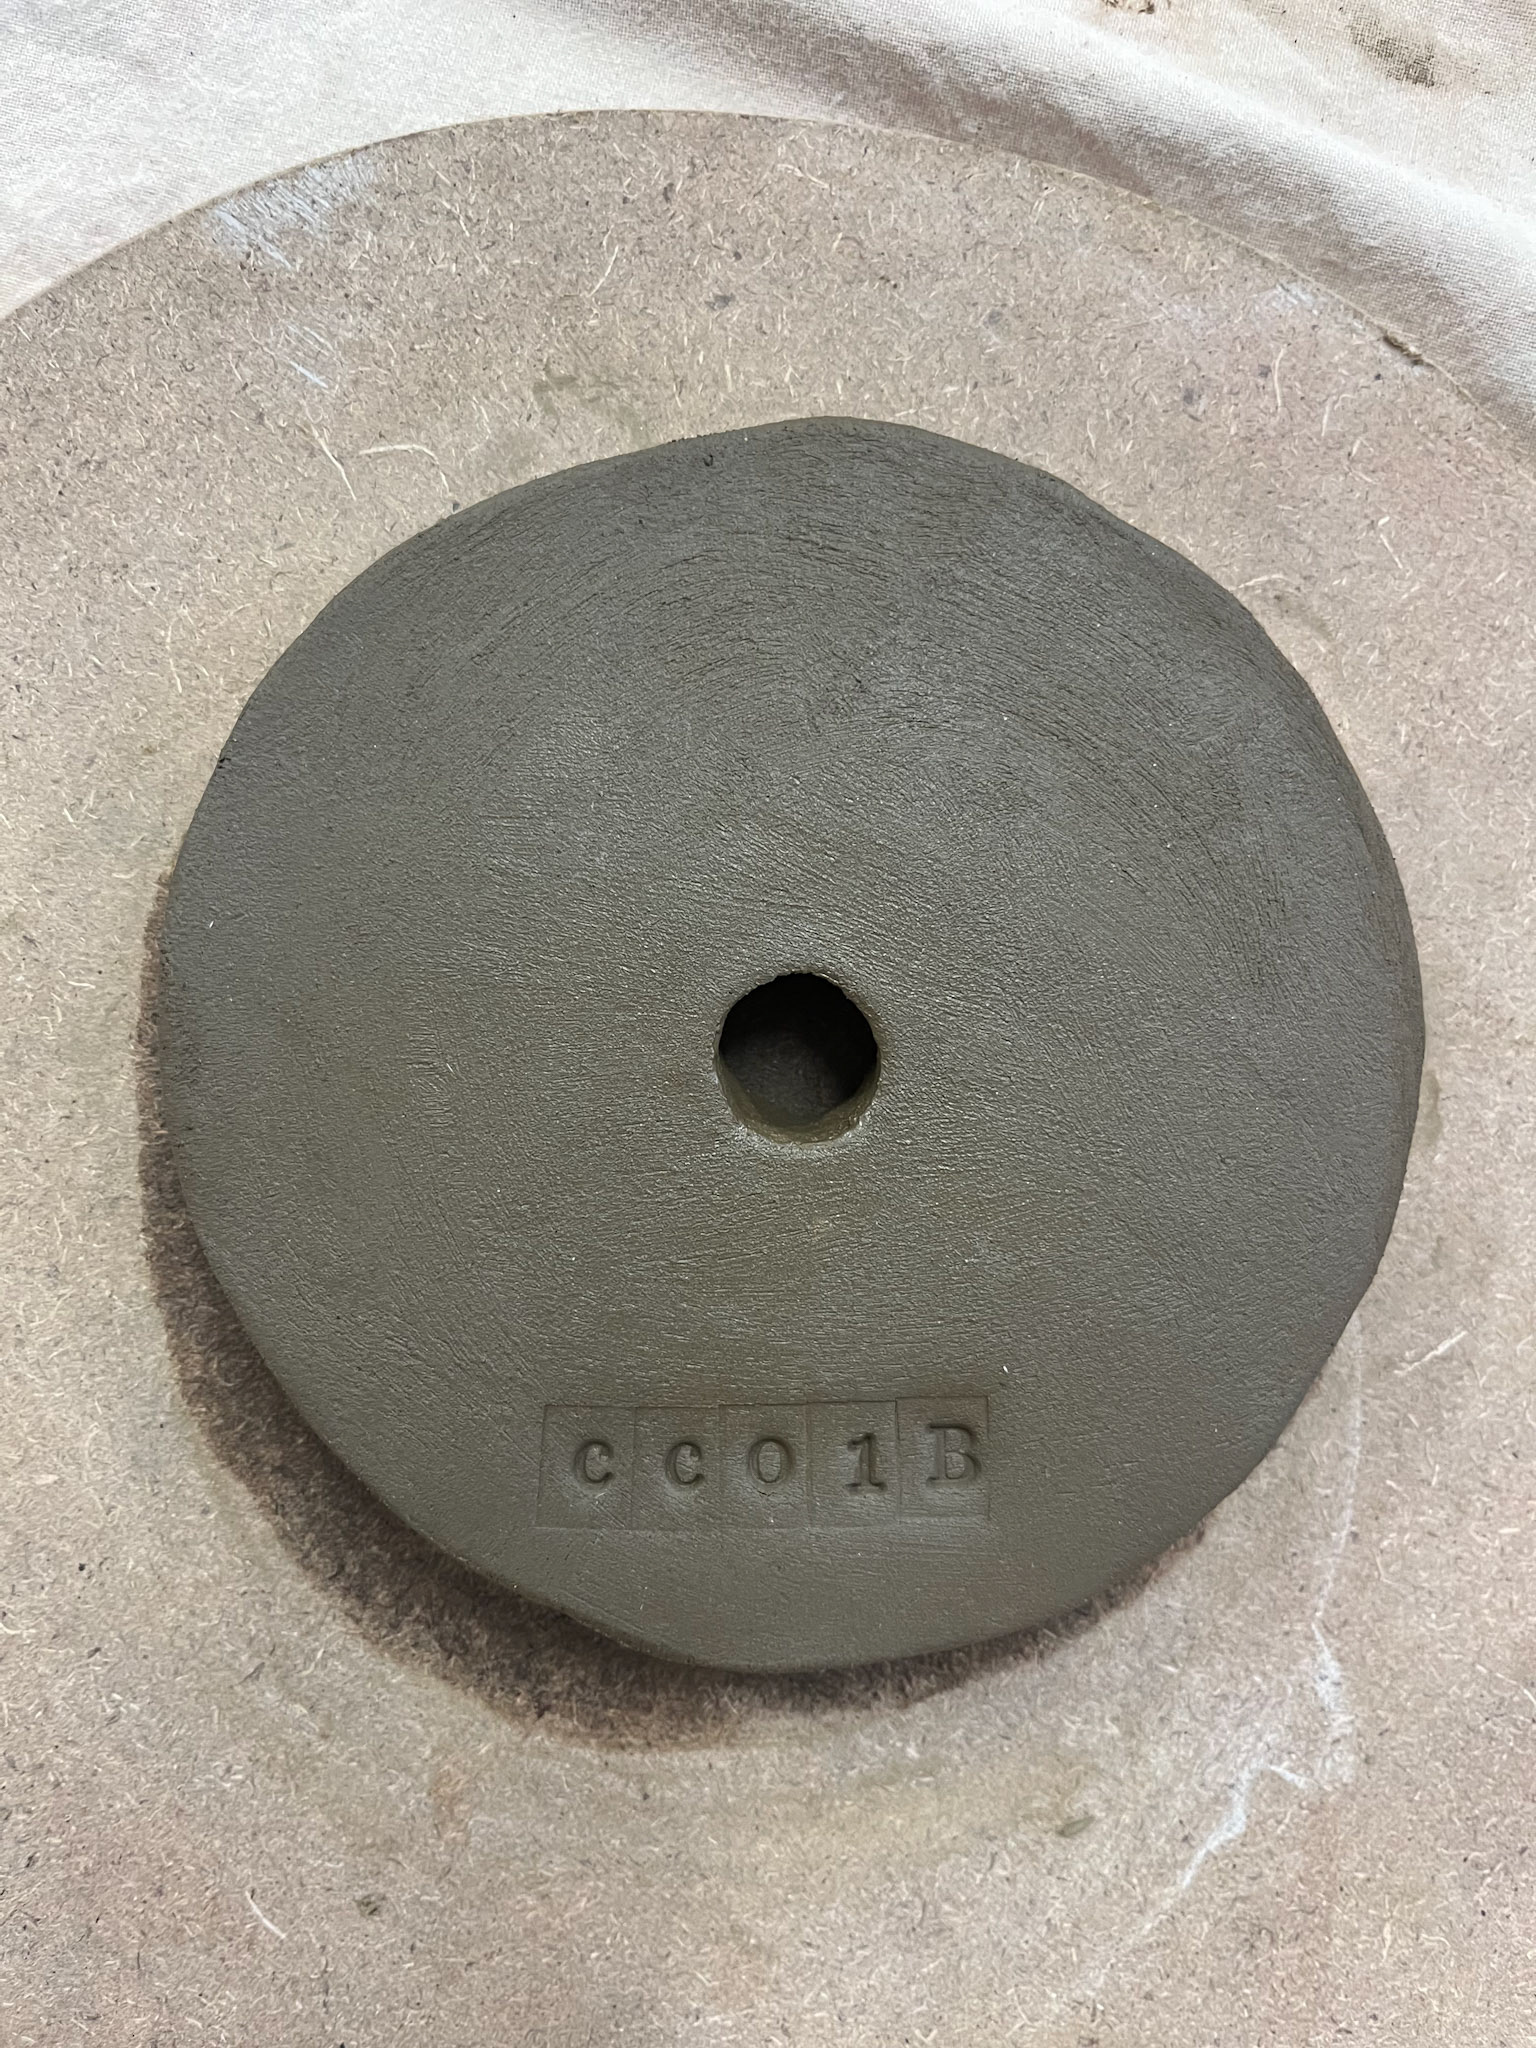
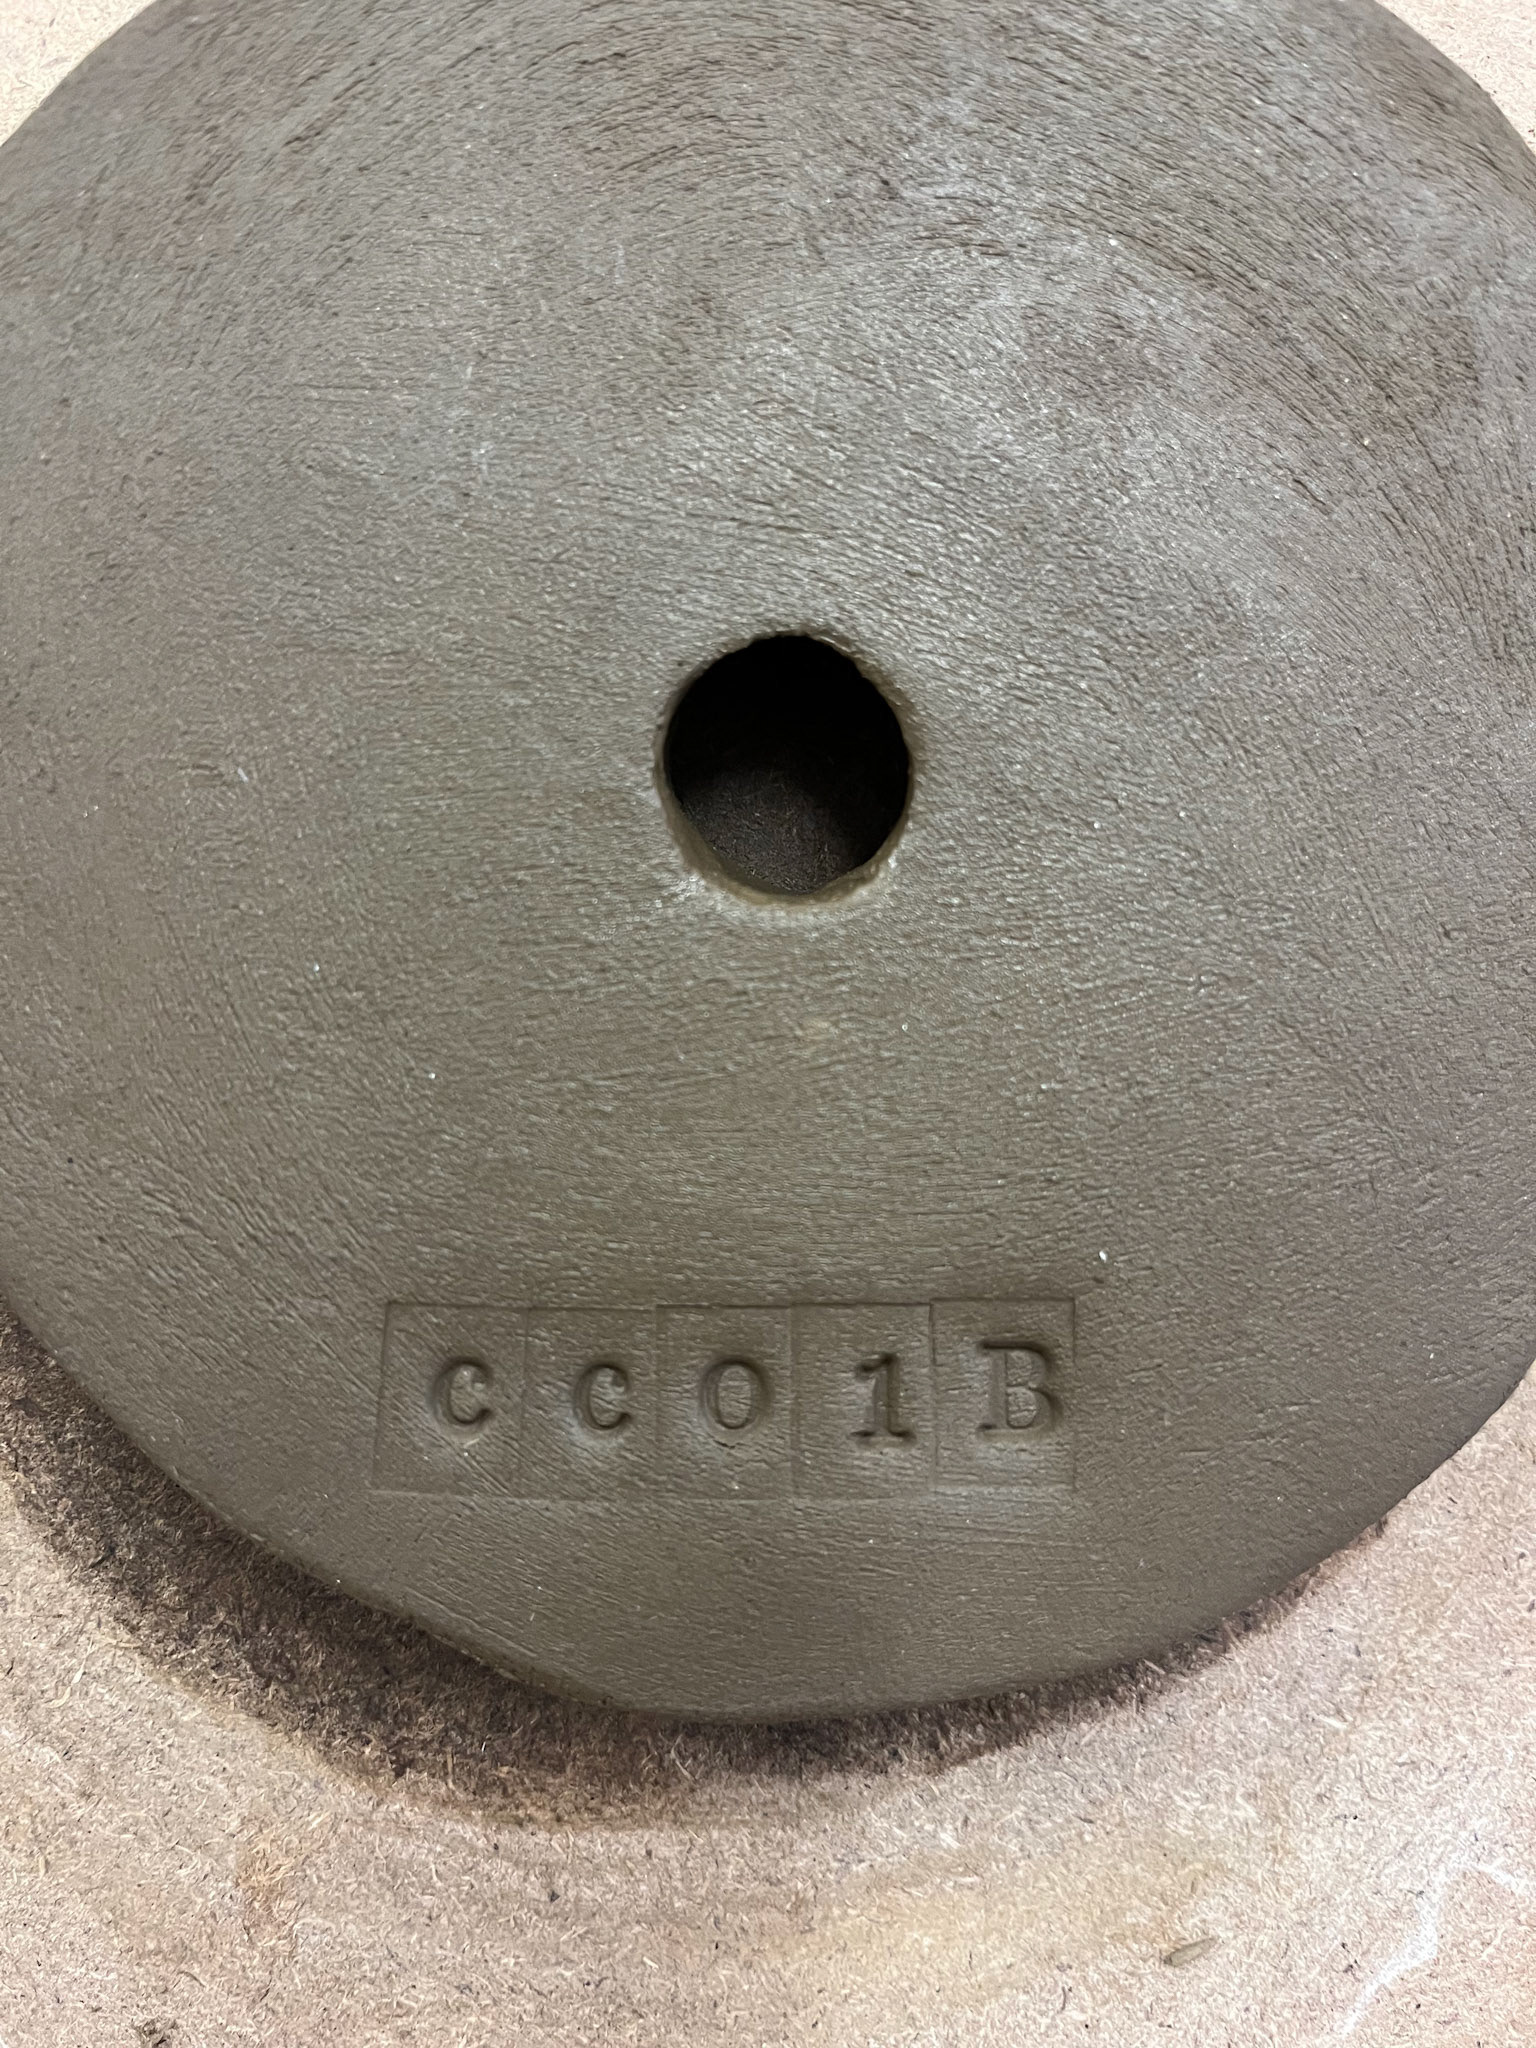
keycodes
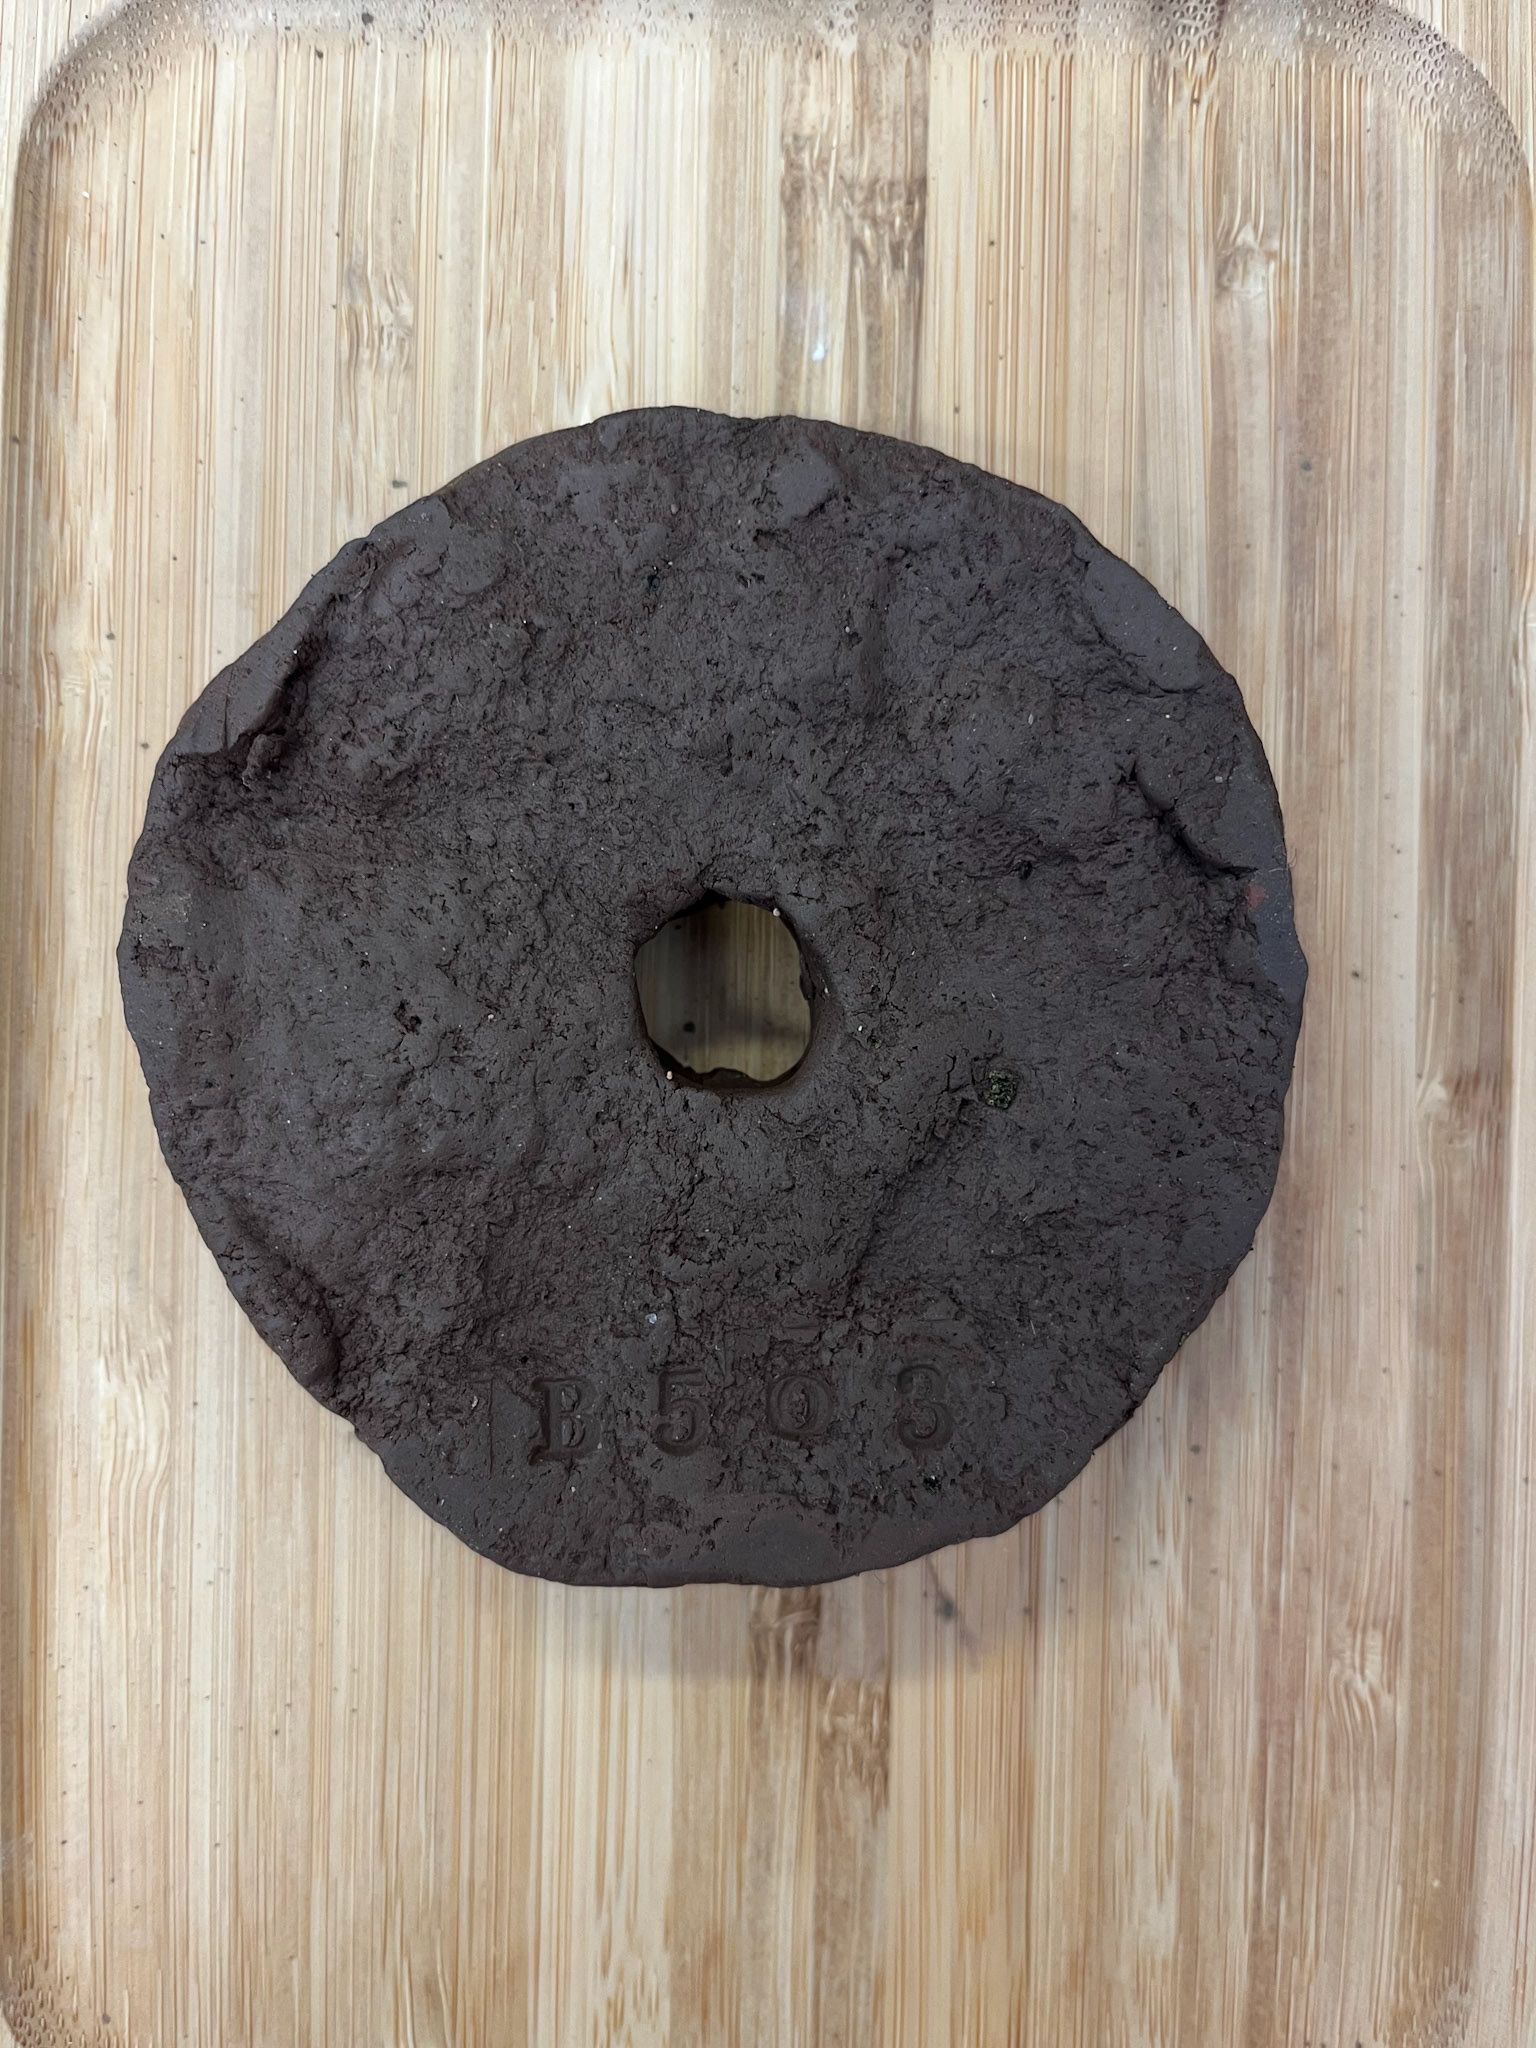
I have used stamps to key-code the clay. This is to decipher between the different variations of clay that I am working with, and makes it clearer for me to assess the differences between the clays.
Code: CC= Cave Clay; B=bisque; E=earthernware; t=test
Making outdoors
I have brought the clay outside to work within the area that I am taking inspiration from, the millstones. By working out in this environment, I am gathering a better connection to the land and the stones my work focuses on. I have decided to make the clay millstone on a larger scale than I have previously, and build it up by slab building.
Due to the conditions of my working environment, it was quite tricky to build a smooth, perfected slab-built millstone. I picked up on the textures of the rock and used a log as a rolling pin, so the slabs are very organic and textured.
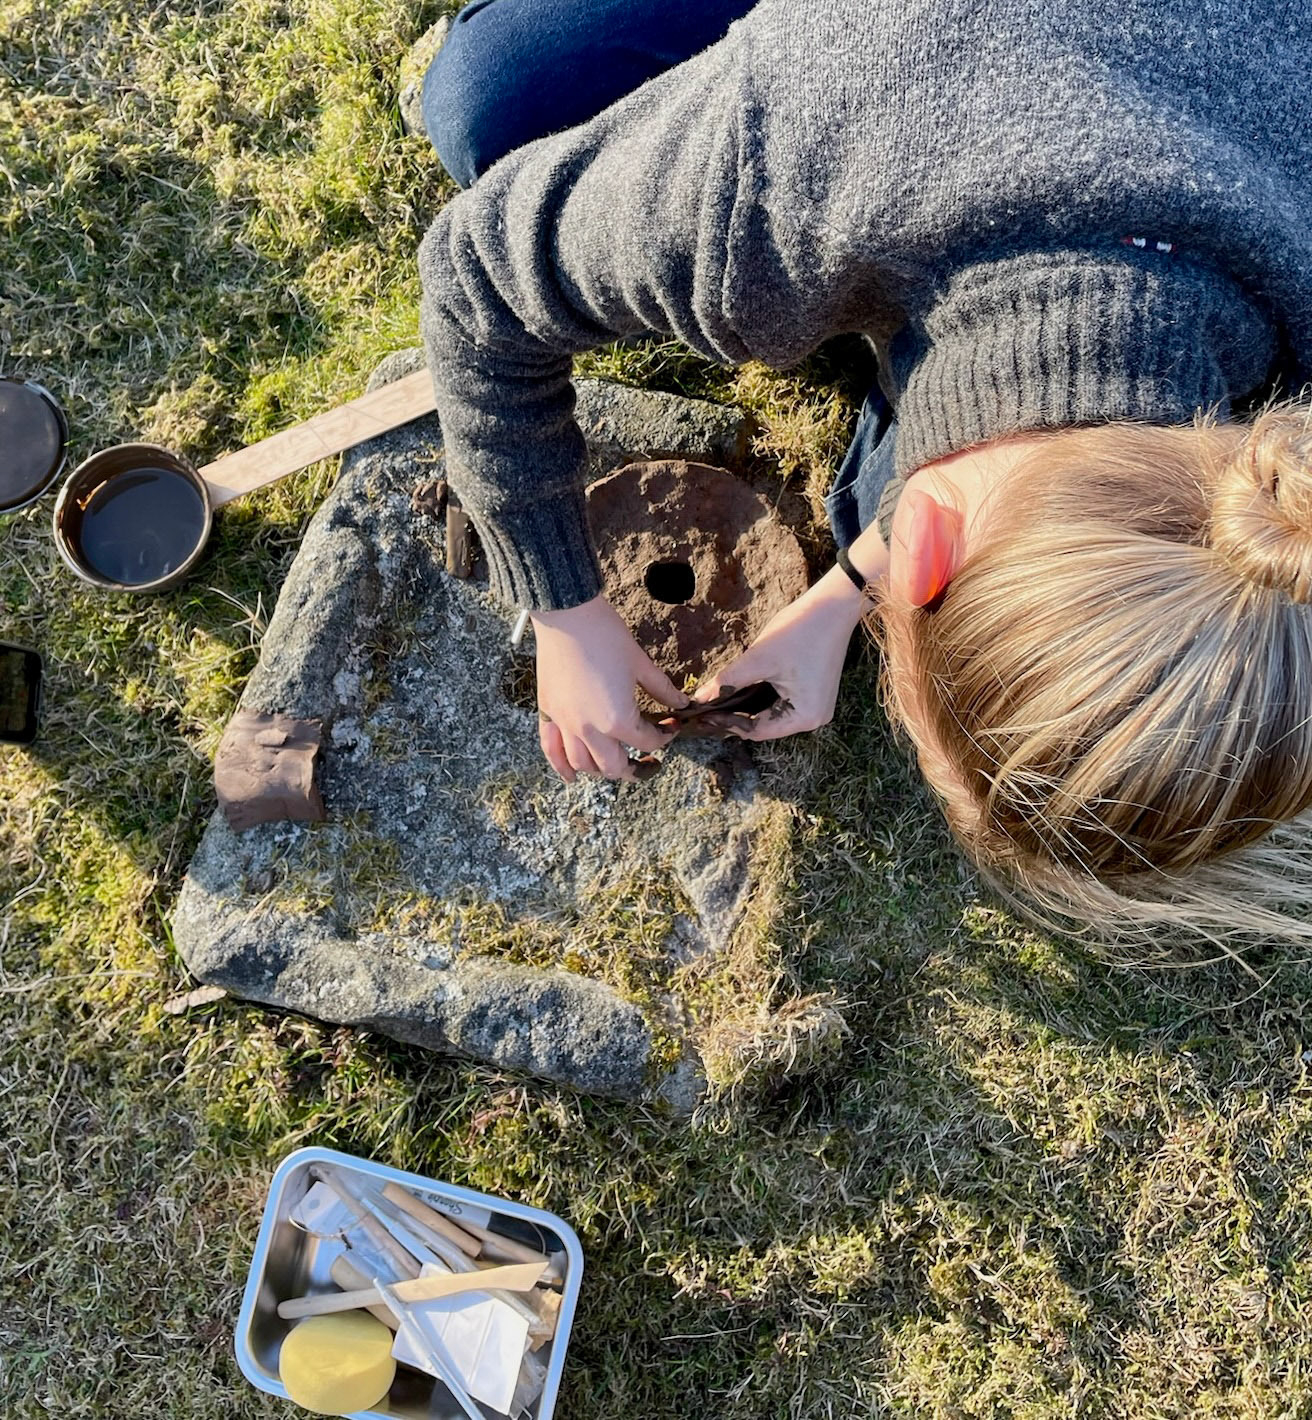
Timelapse of making a clay millstone
I have made this clay millstone using the clay from the coastline. The clay was fairly dry and prone to cracking, and I had little access to water due to the conditions in which I was making the sculpture.
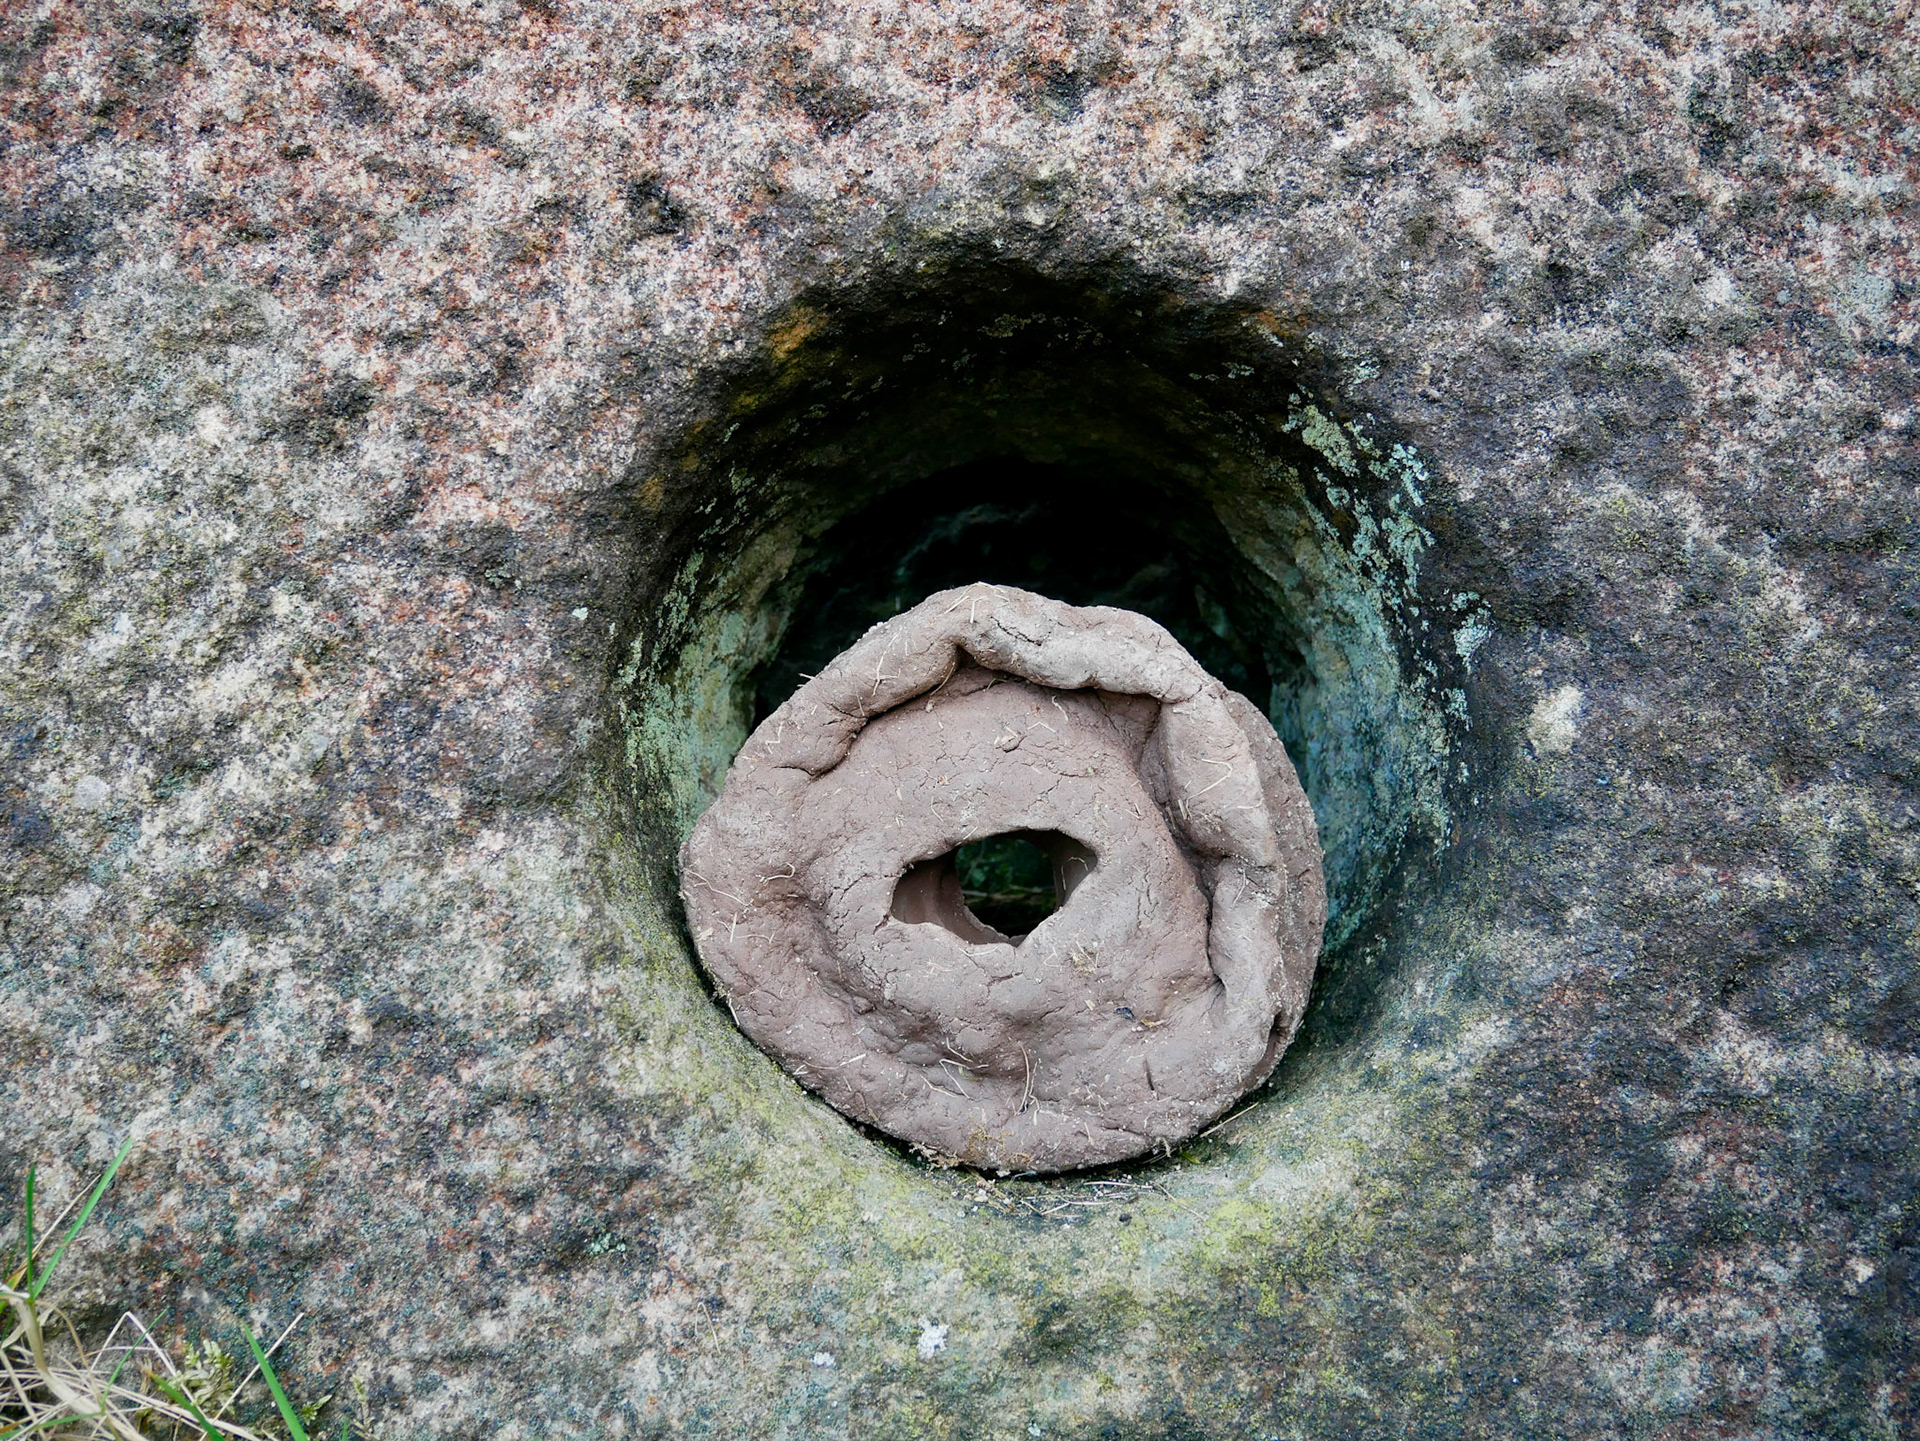
I am not going to fire this sculpture. Instead, I will leave it in the location where I made it, so it is one with the stones, blending in with the landscape.
The reasons I am doing this are so I can keep coming back to check on the clay in this location and see whether it has been affected by the landscape.
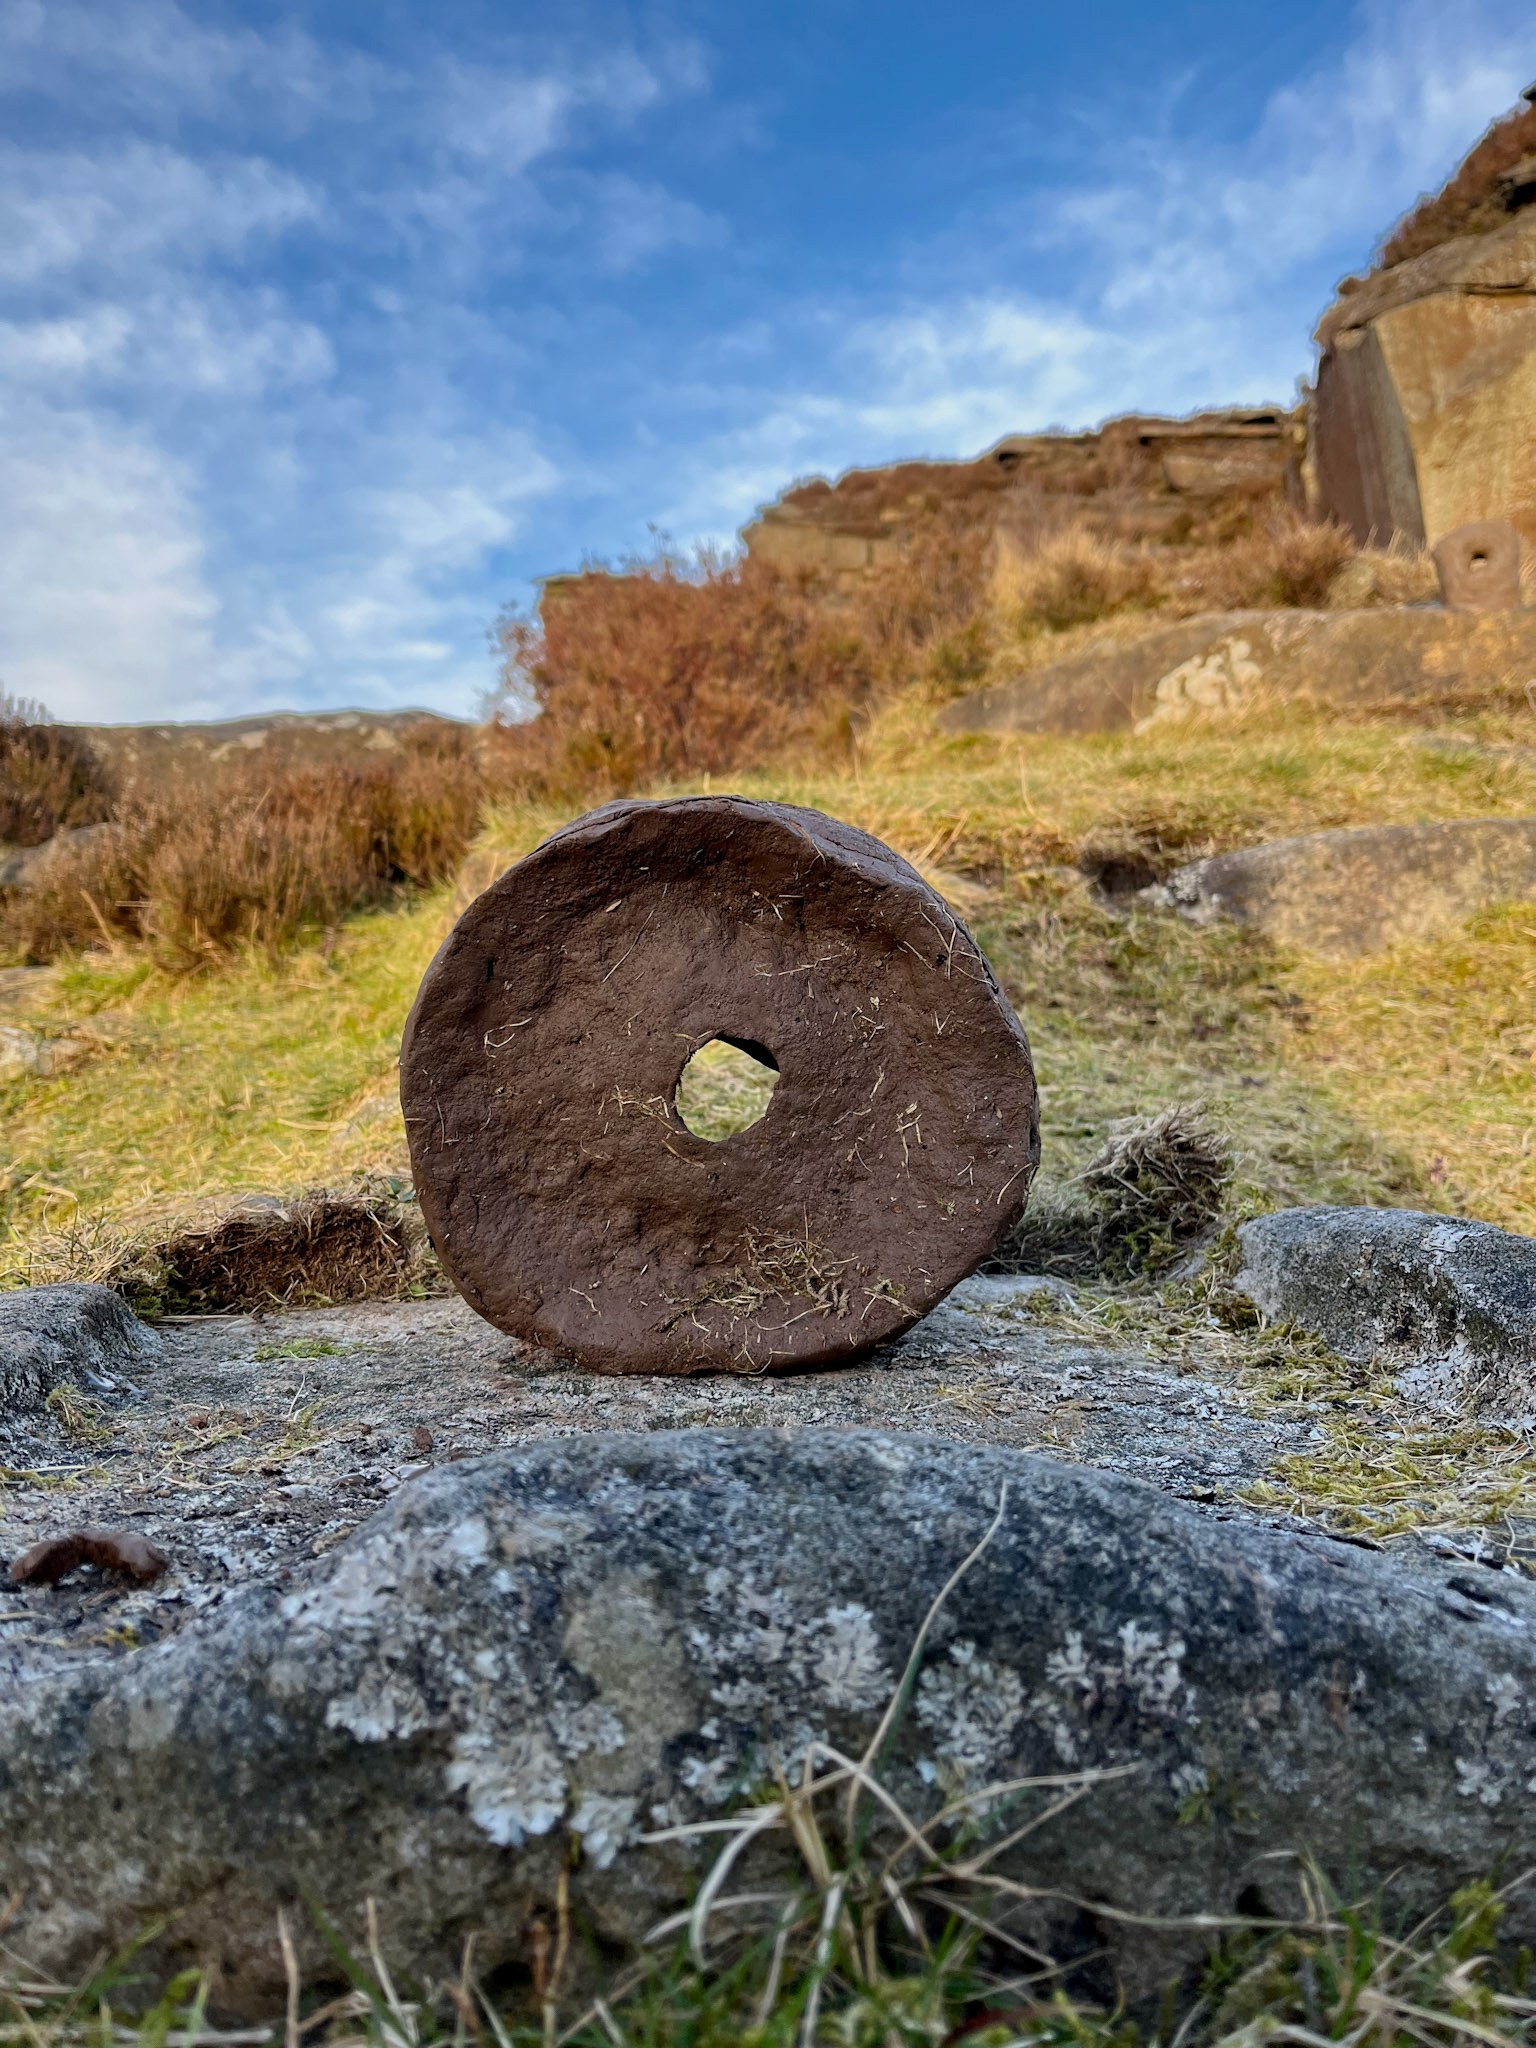
Rolling millstone
I took my finished millstone to the path near the quarry where I was making it. I wanted to mimic the journey that millstones would traditionally go on when transported through the peaks to the factories. I rolled my clay millstone in the grit and path of the land, allowing it to warp and distort with the earth.
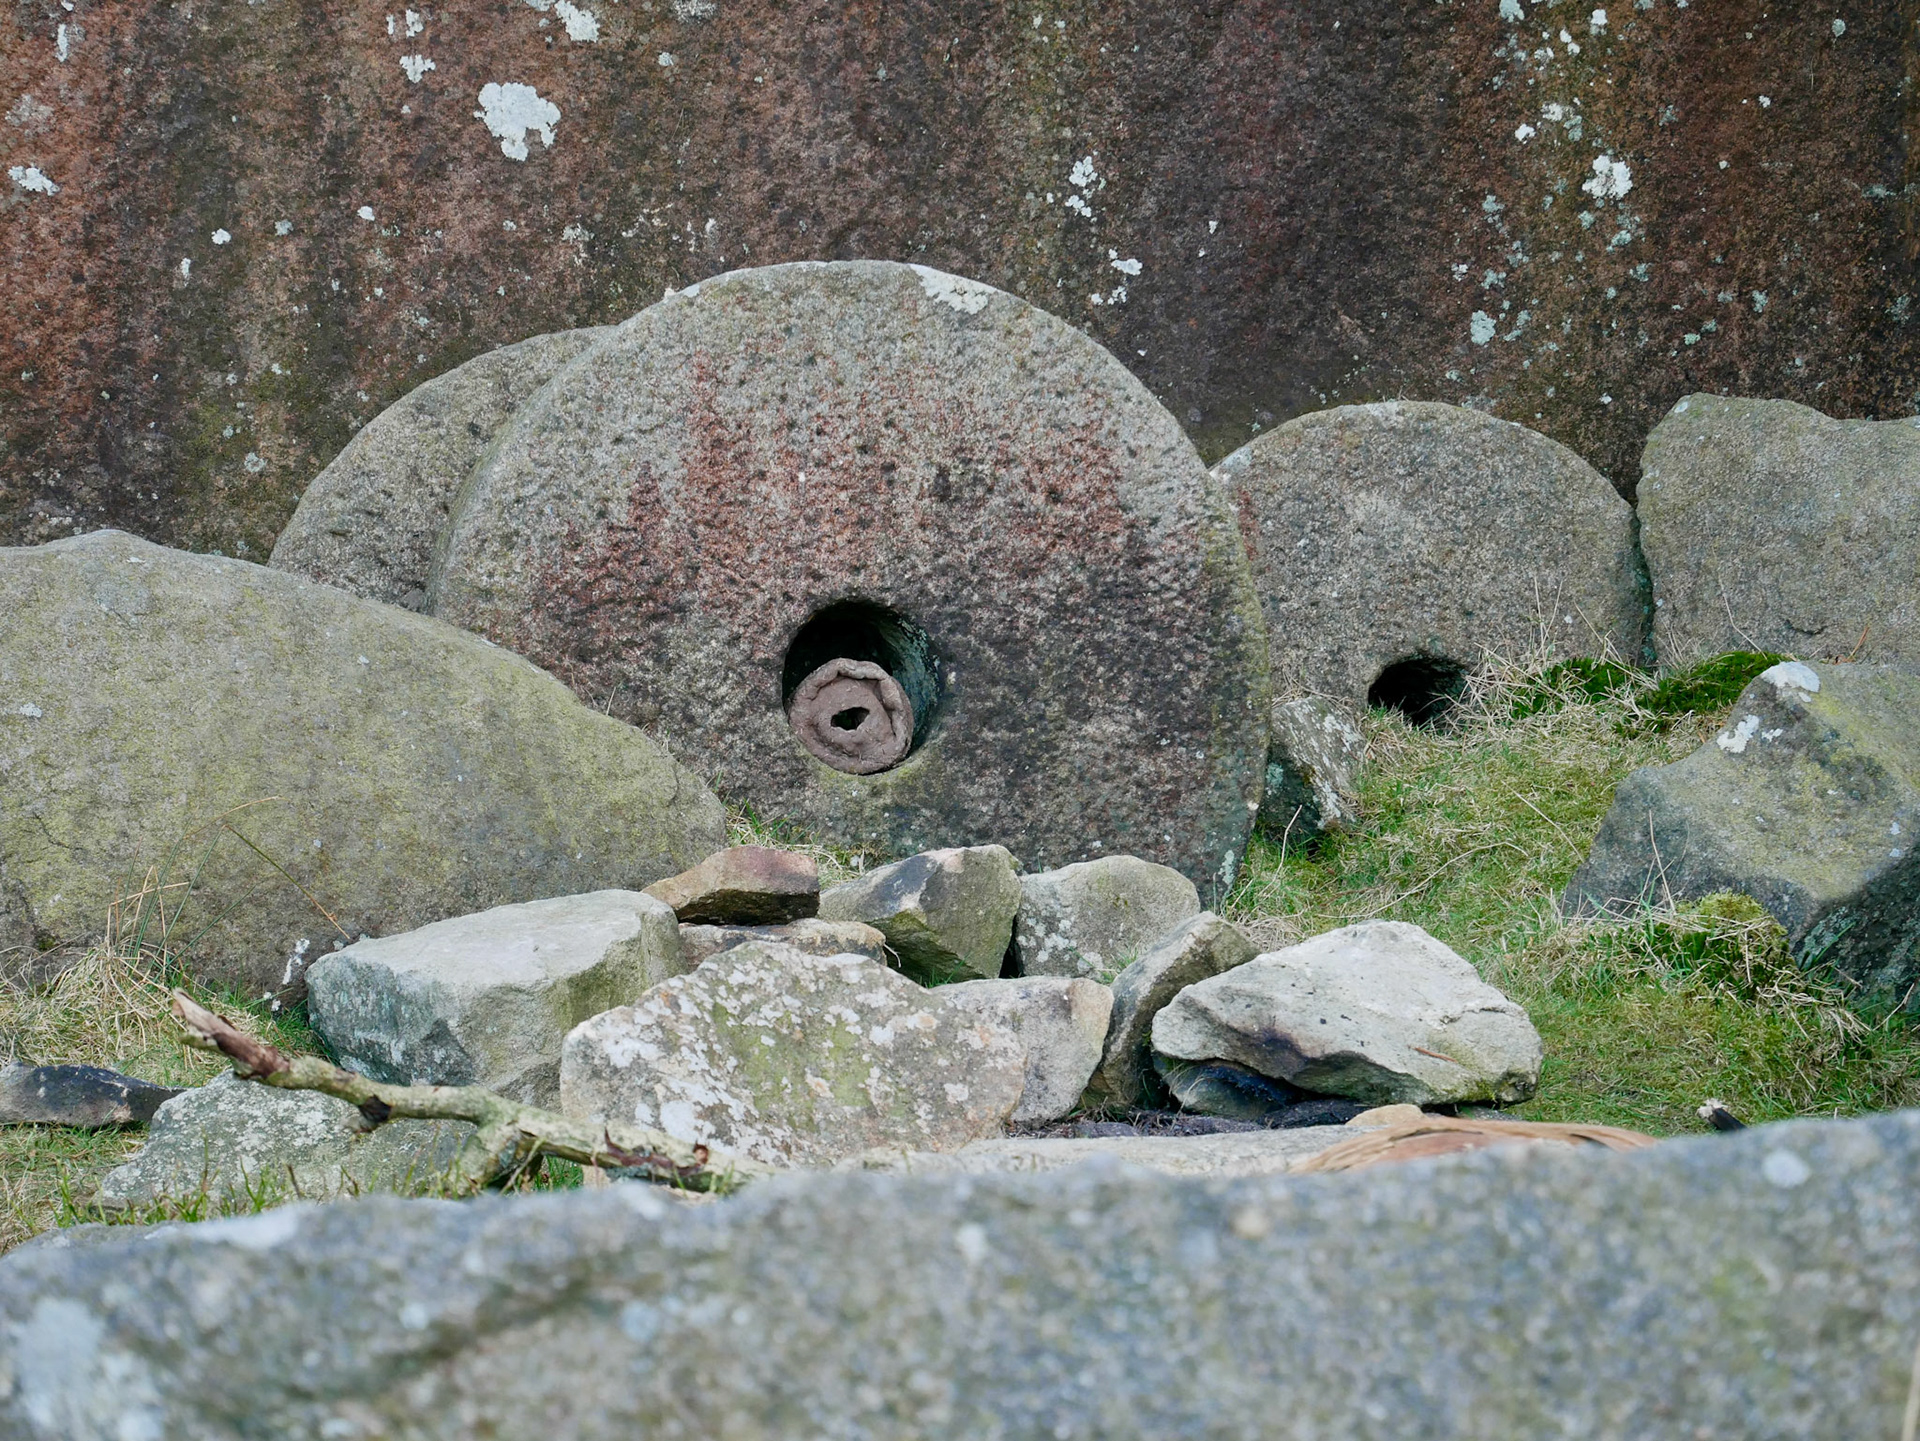
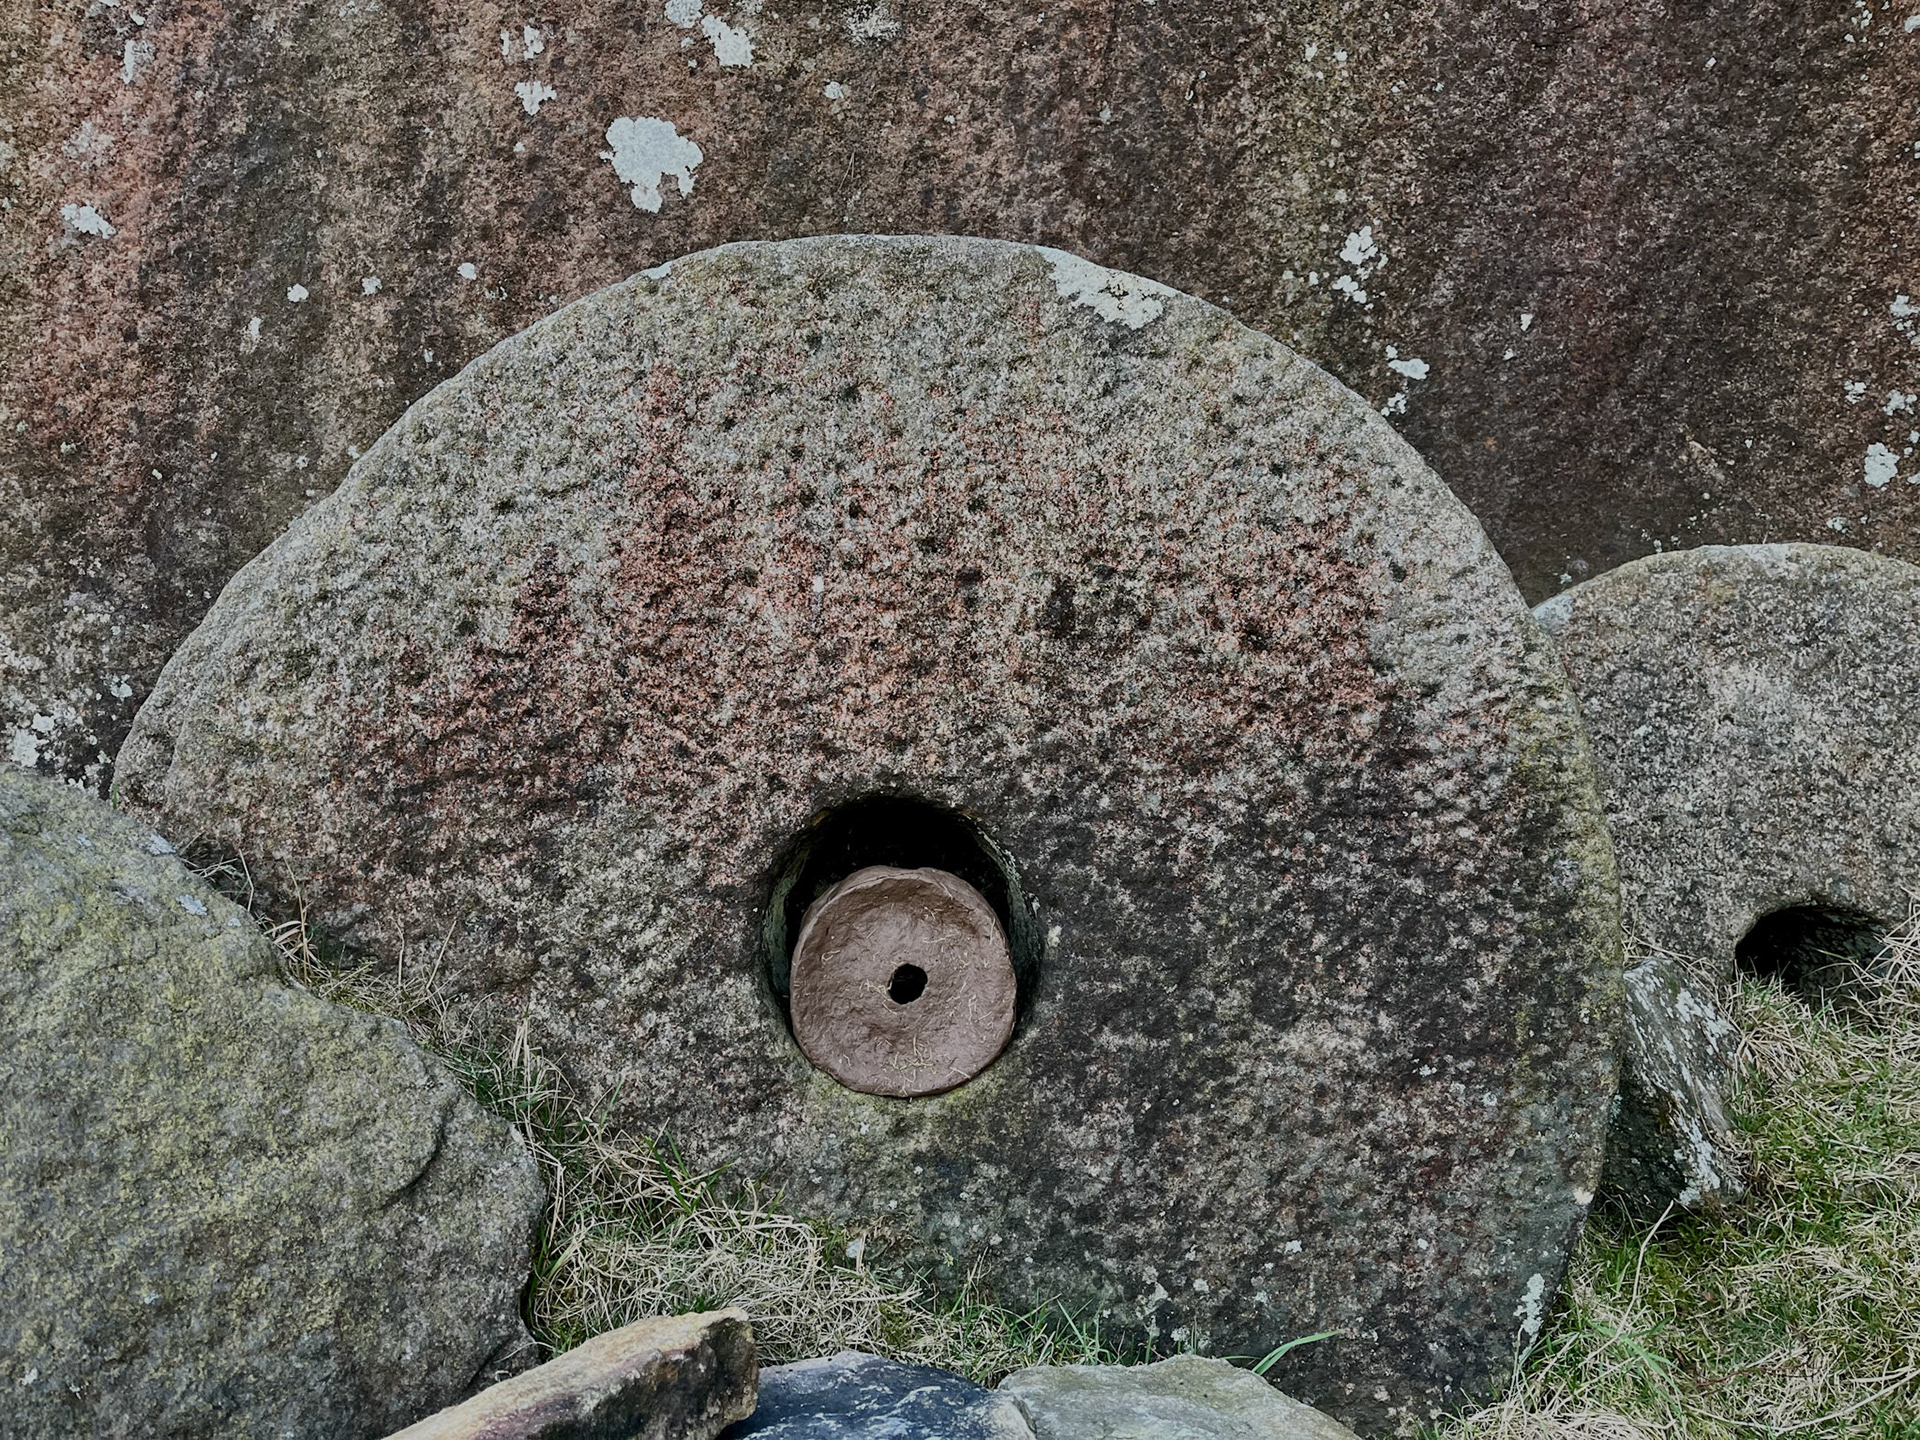
Millstone on location one week later
I returned to the site where I made my clay millstone a week later. It had started to dry out, and because the week before, I had rolled it within the land, and it had started to collapse within itself, it was interesting to see that it stayed in this form, with the earth that it had gathered during the rolling, had stuck to the clay. I left the clay in the centre hole of the millstone on which I had based its dimensions. Therefore, it was fairly unexposed to the natural elements due to having protection from the stone.

From this day making on location in the Peaks, I did make one smaller millstone with the cave clay that I had taken with me. This has the texture of rolling out with the wooden log rolling pin, directly onto the millstone.
Before firing
After firing to bisque
Cave clay gritstone
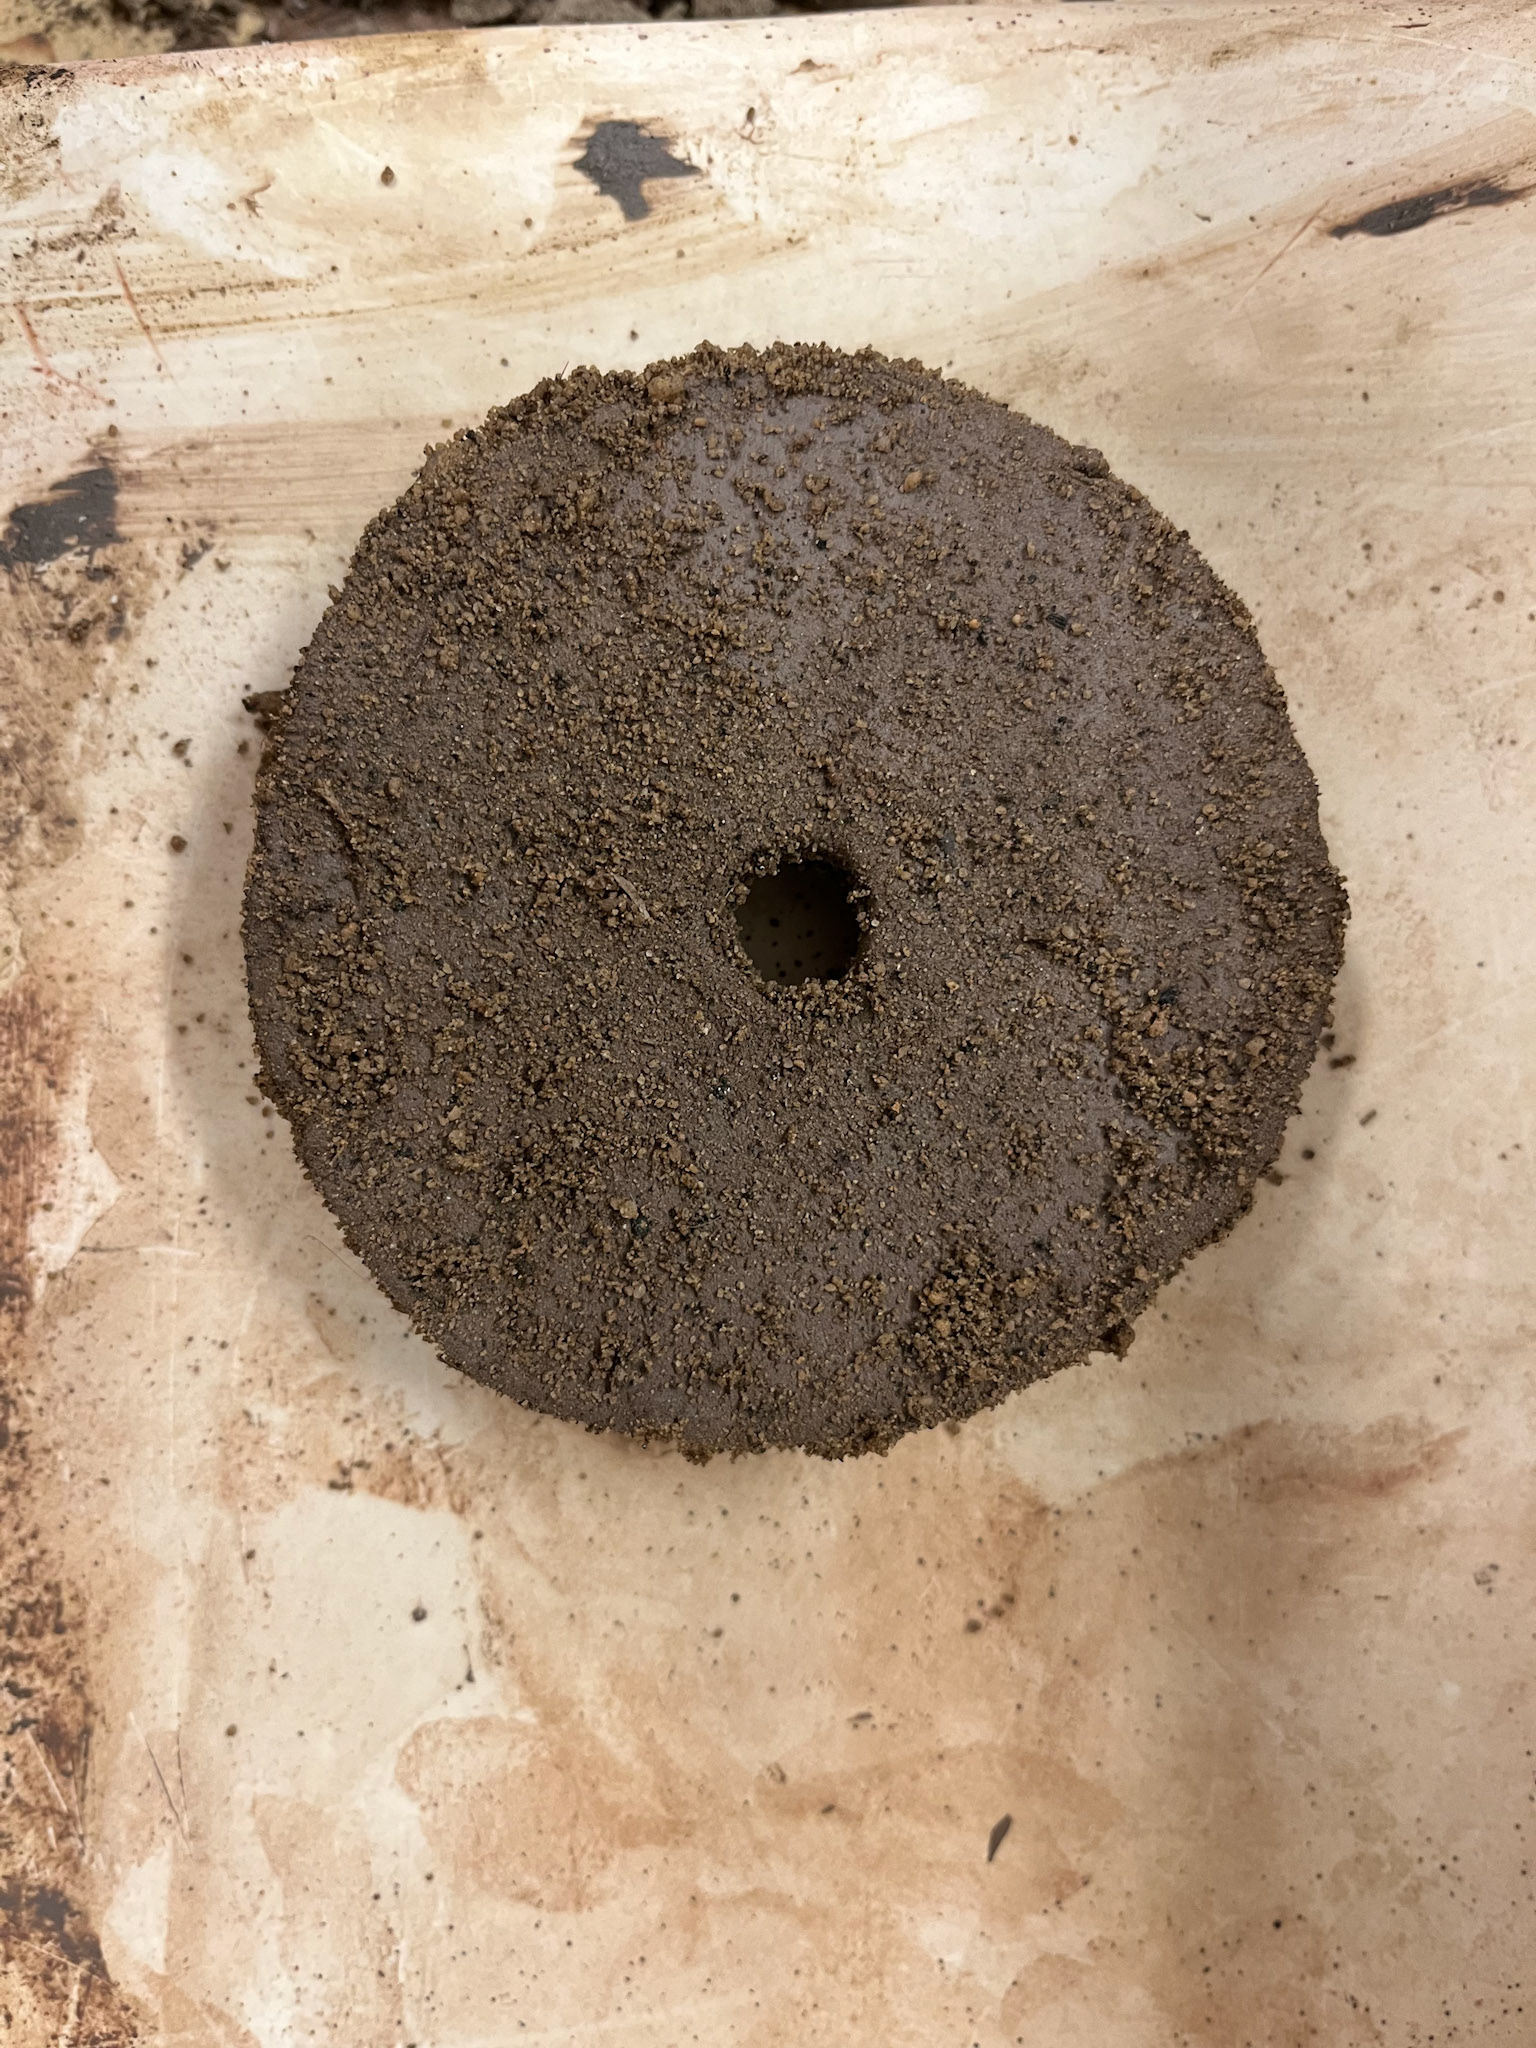
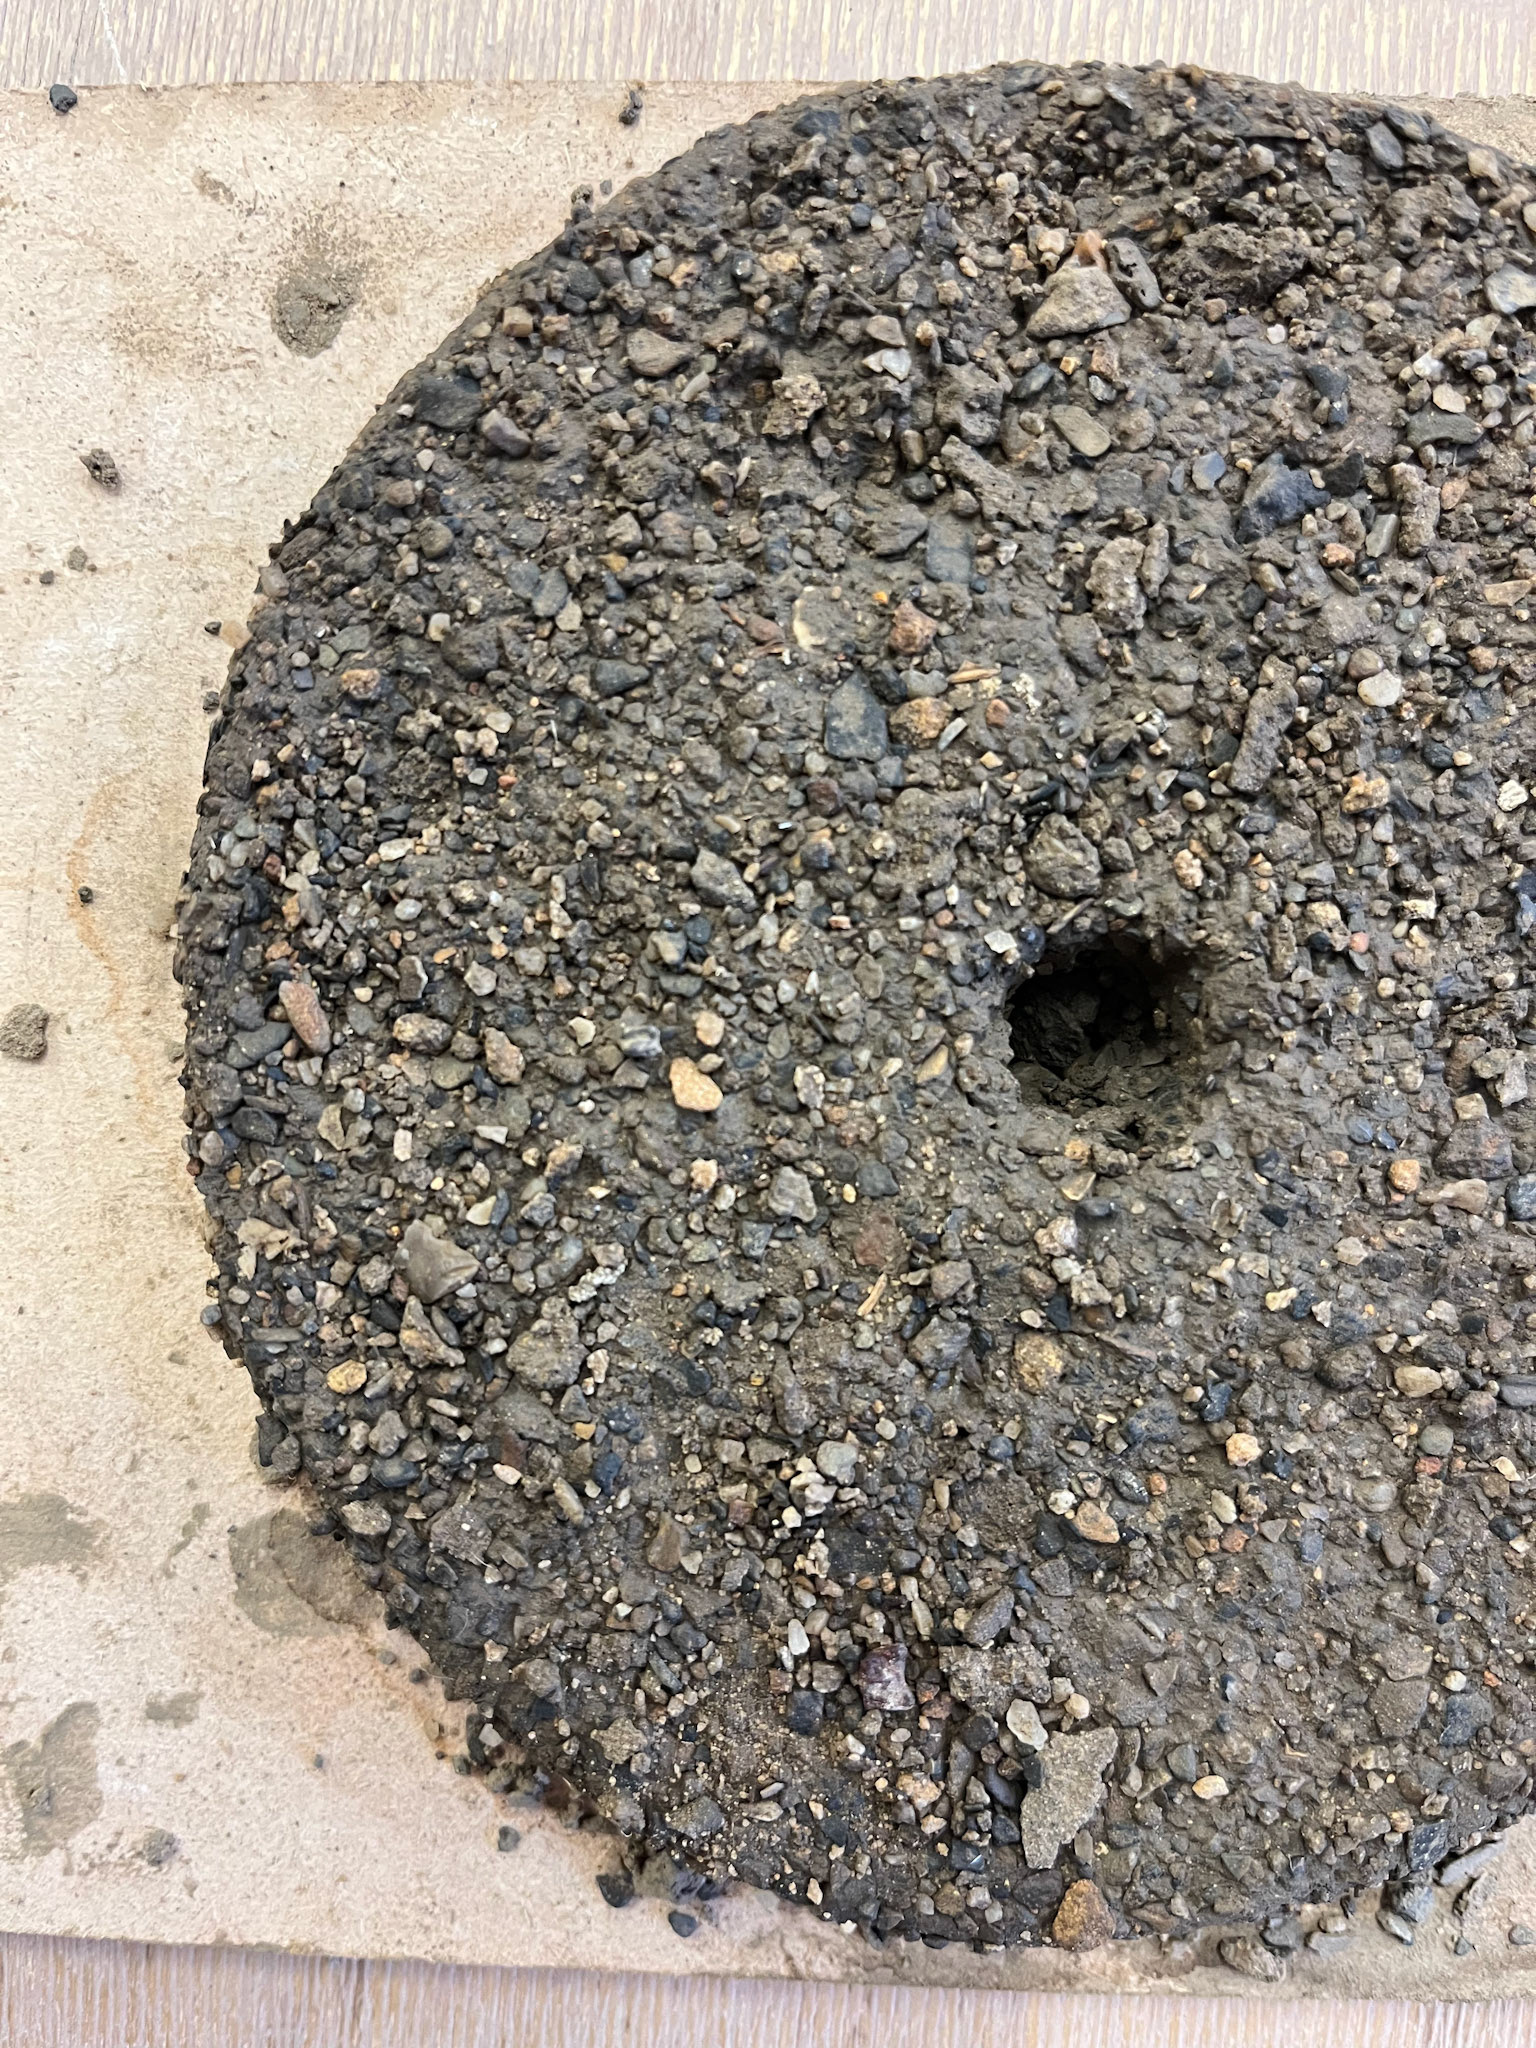
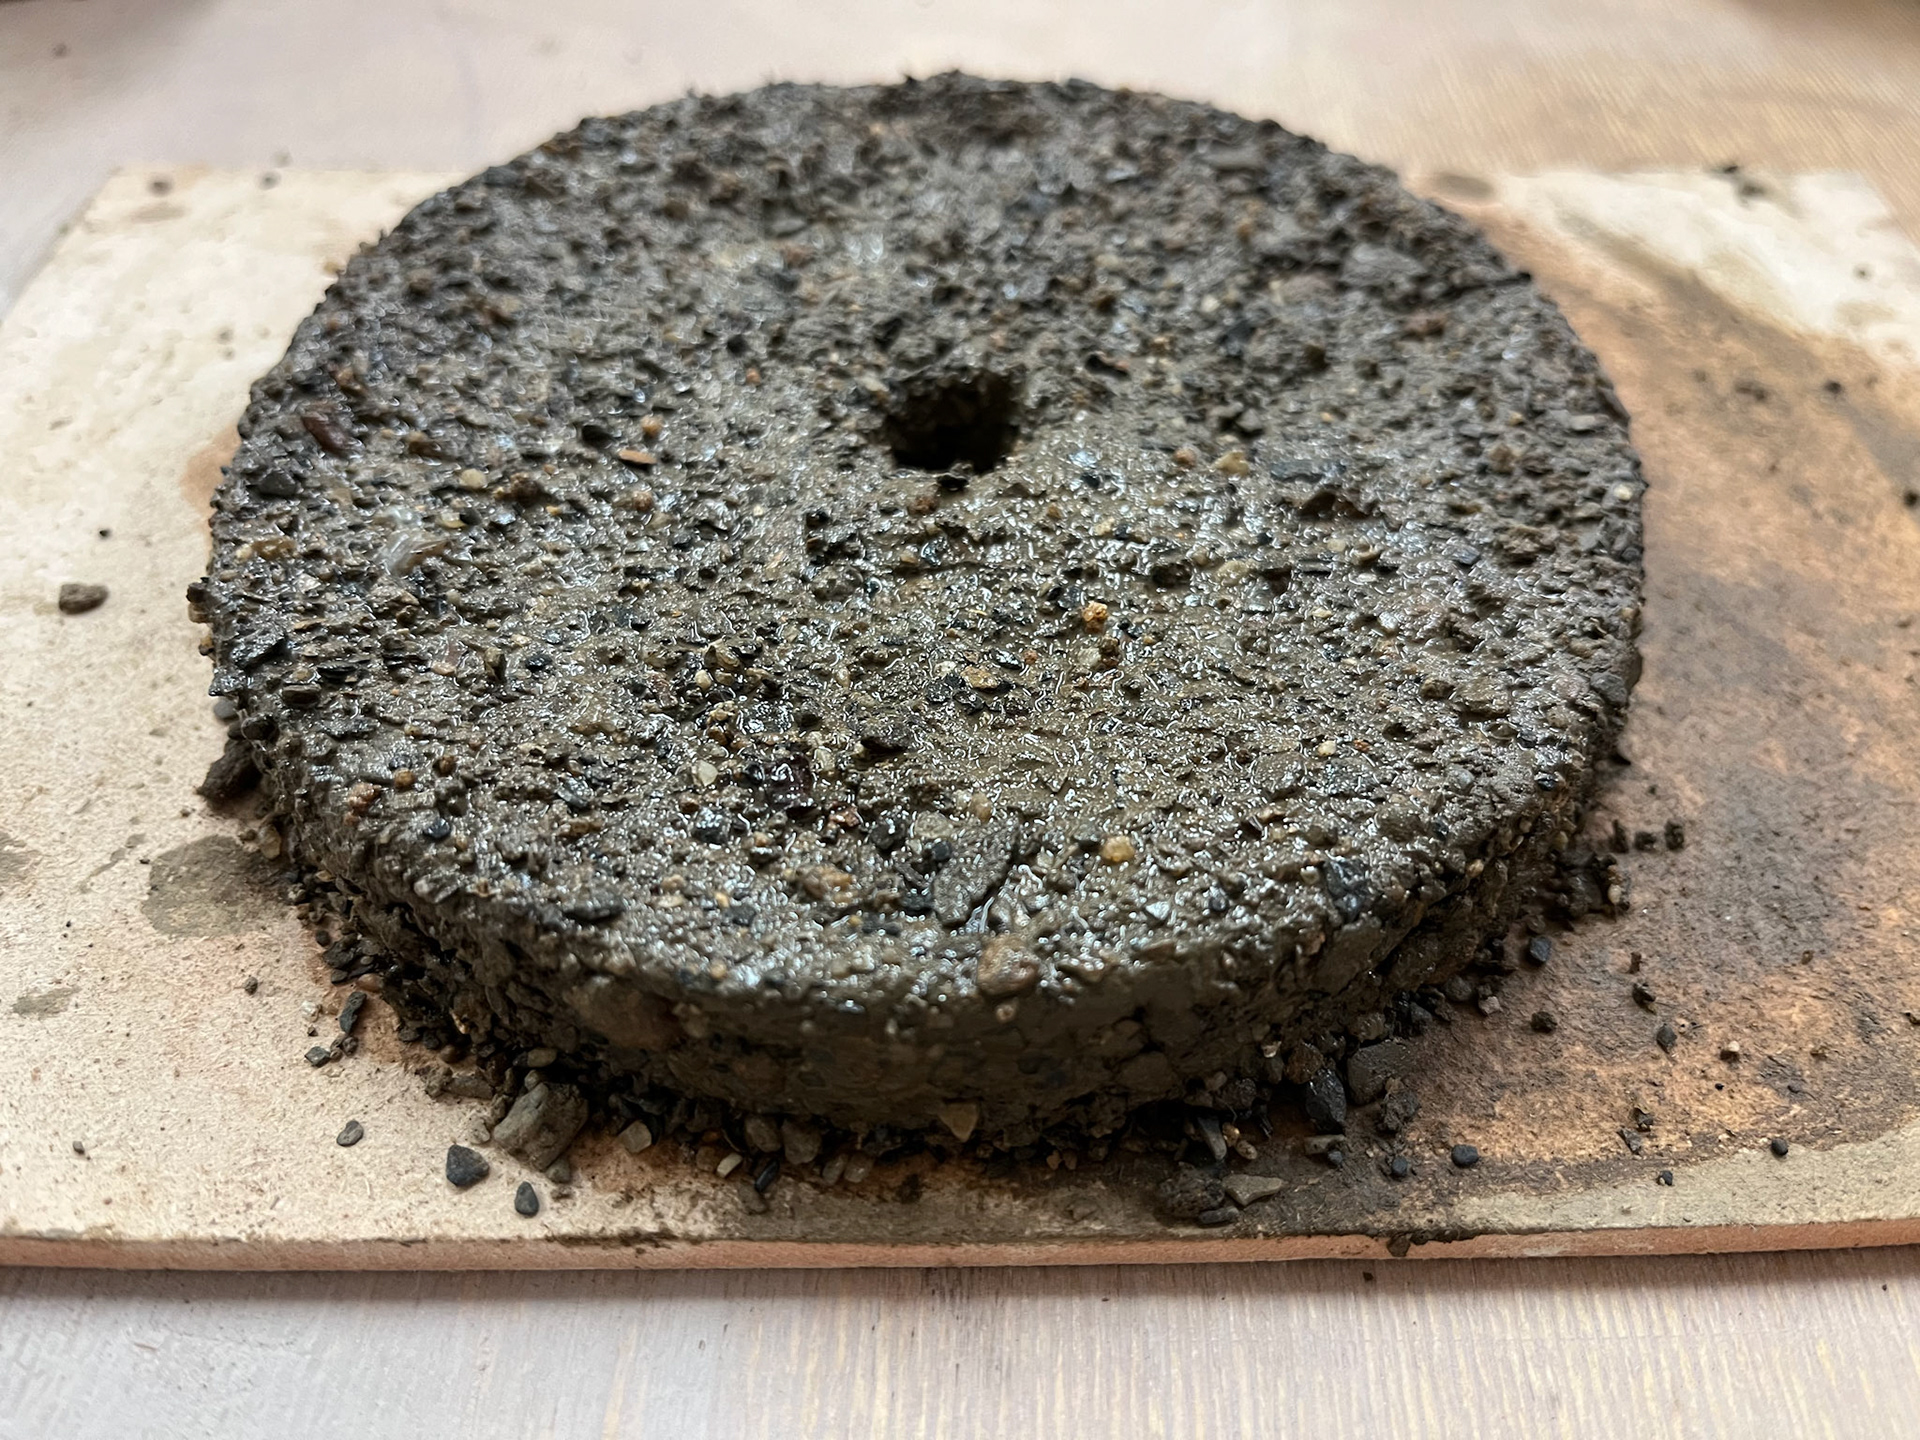
I have used the gritstone from where I have been working in the Peak District, and applied it straight to the cave clay millstone. This is a larger millstone, and I feel like this size is effective and works well with the addition of grit. The grit has been applied directly onto the clay by pushing it into the clay. I have applied a clay slip first, so that the grit sticks to the clay more and becomes embedded into the clay. I am interested to see how this fires as I have overloaded the clay with the gritstone, which is a mix of fineness, with some being larger pieces of stone and some being very fine and dusty.
I have also made the same size millstone using pure cave clay, leaving it smooth. I will fire this to bisque and see how it compares to the gritstone one. Making these millstones has been a fairly tricky process due to the sizing of the sculptures I am having to make, and ensuring that each one is completely smooth and consistent throughout. I am starting to rethink my outcomes for this project, as I don't know whether this is the right way forward with my making. The millstones, with the addition of the grit, I believe, are successful, as the grit overpowers the clay and makes the millstone look like something other than ceramic, a question into the materiality of the object. However, with keeping the clay plain with no additions, I don't think it is as effective. I am not glazing the ceramics with anything but the natural materials that are coming from the locations that I am working with; therefore, without any additives, the plain ceramics show all imperfections.
Cave clay with grit- pre fire

Cave clay with grit- pre fire
Cave clay with grit- pre fire
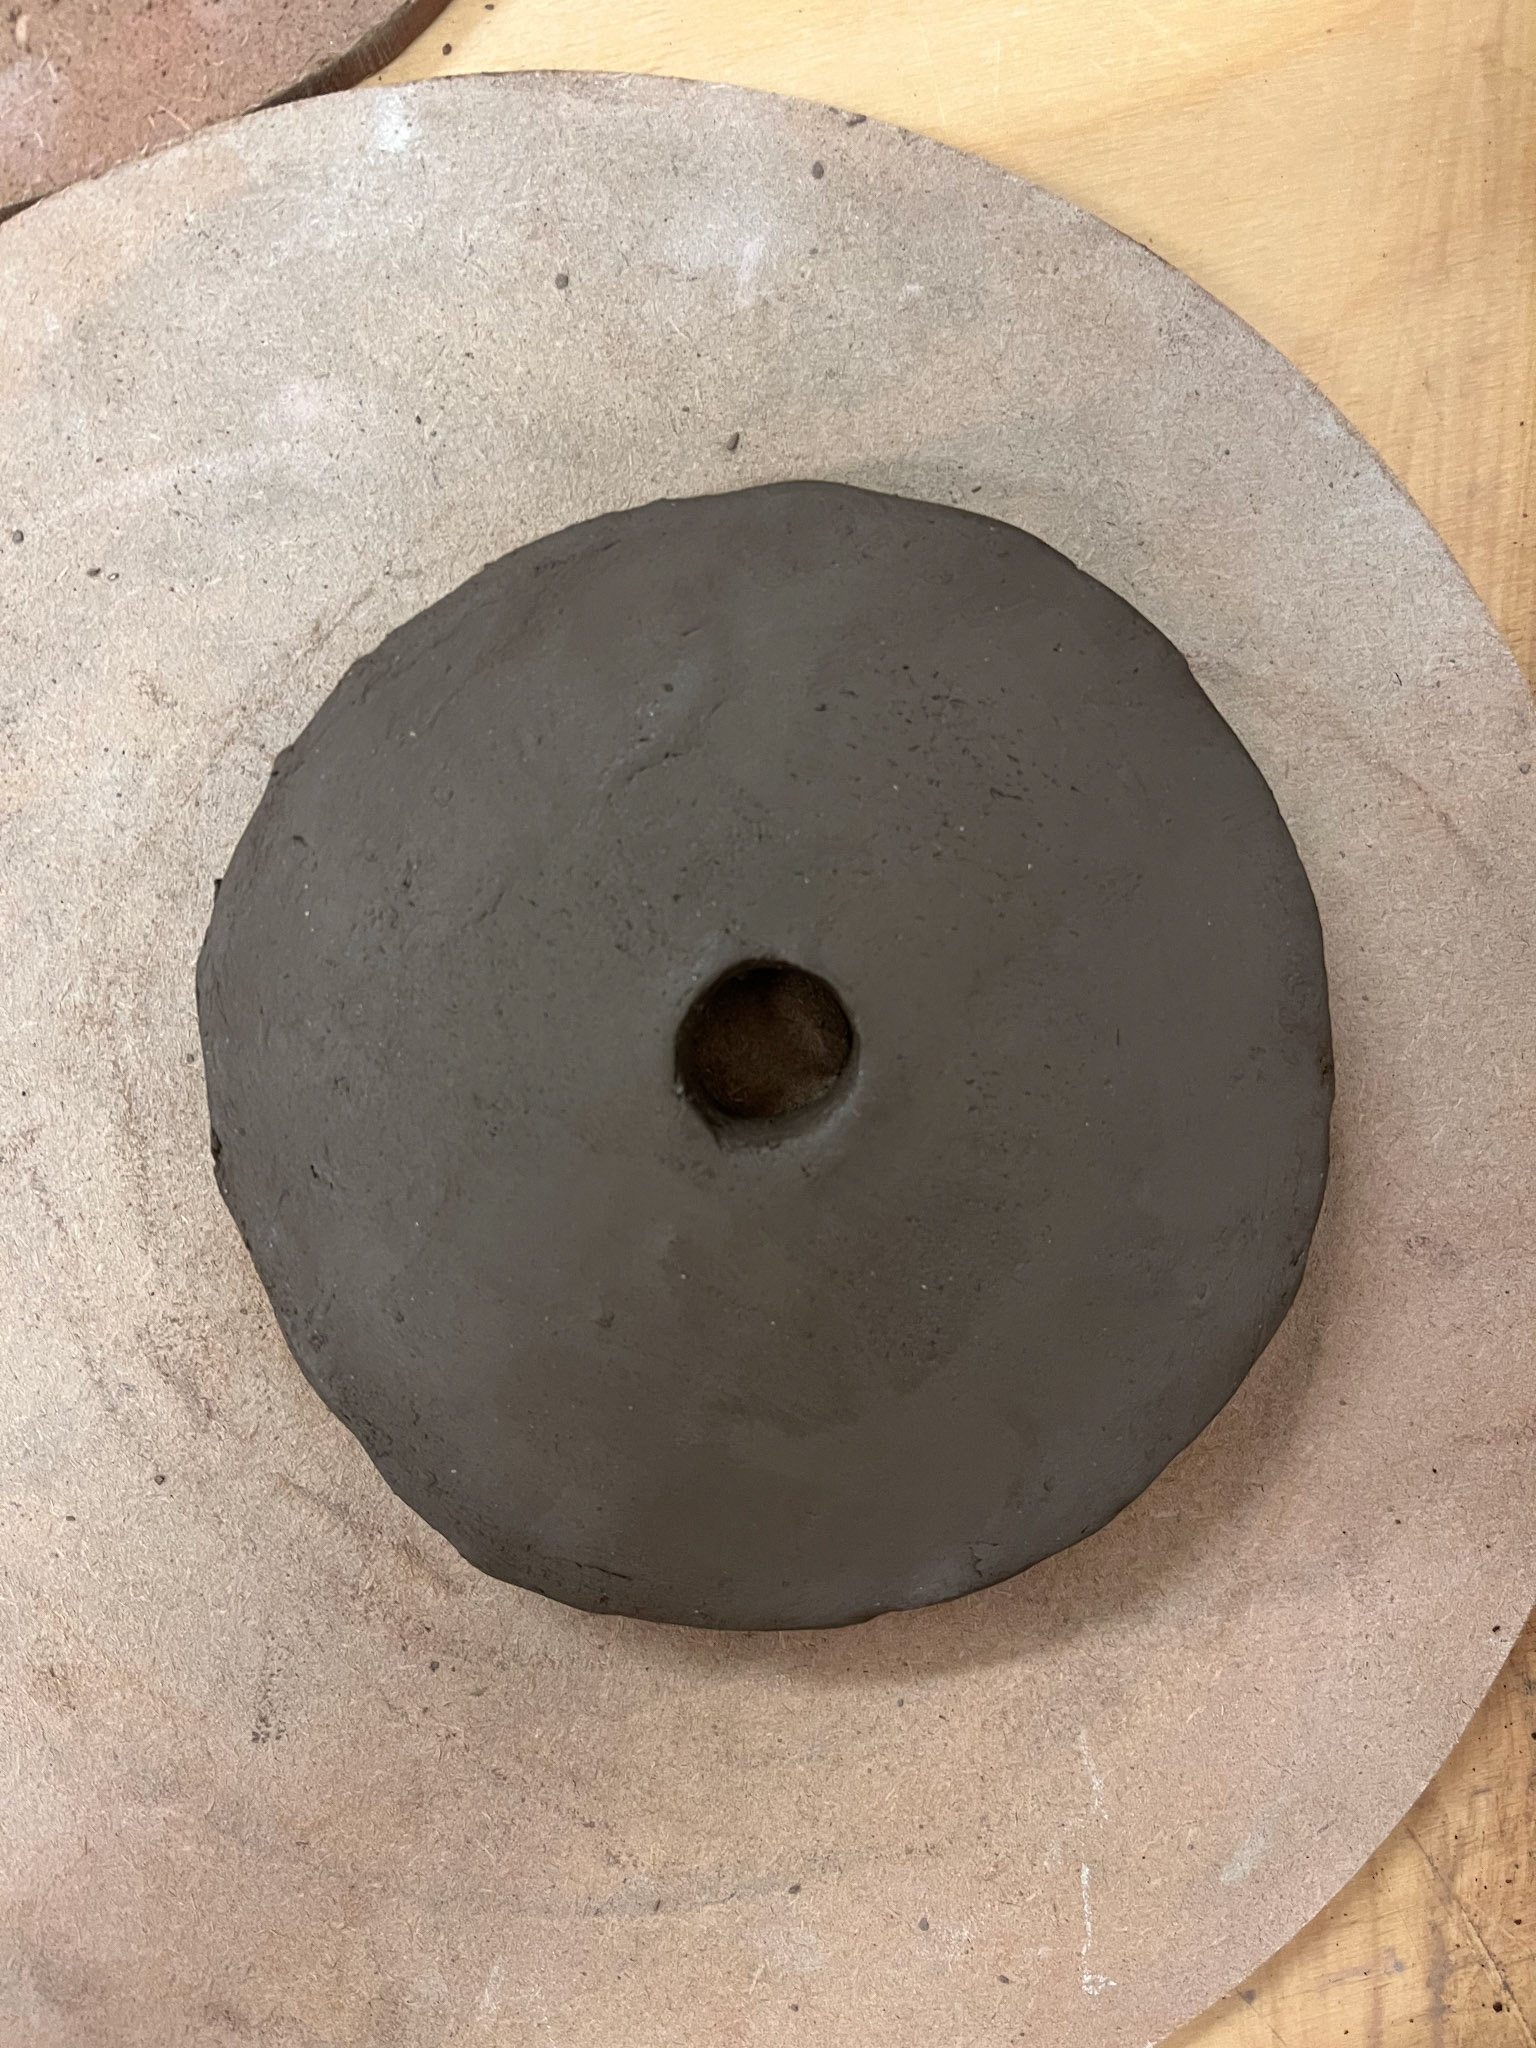
Smooth cave clay pre fire

Smooth cave clay pre fire
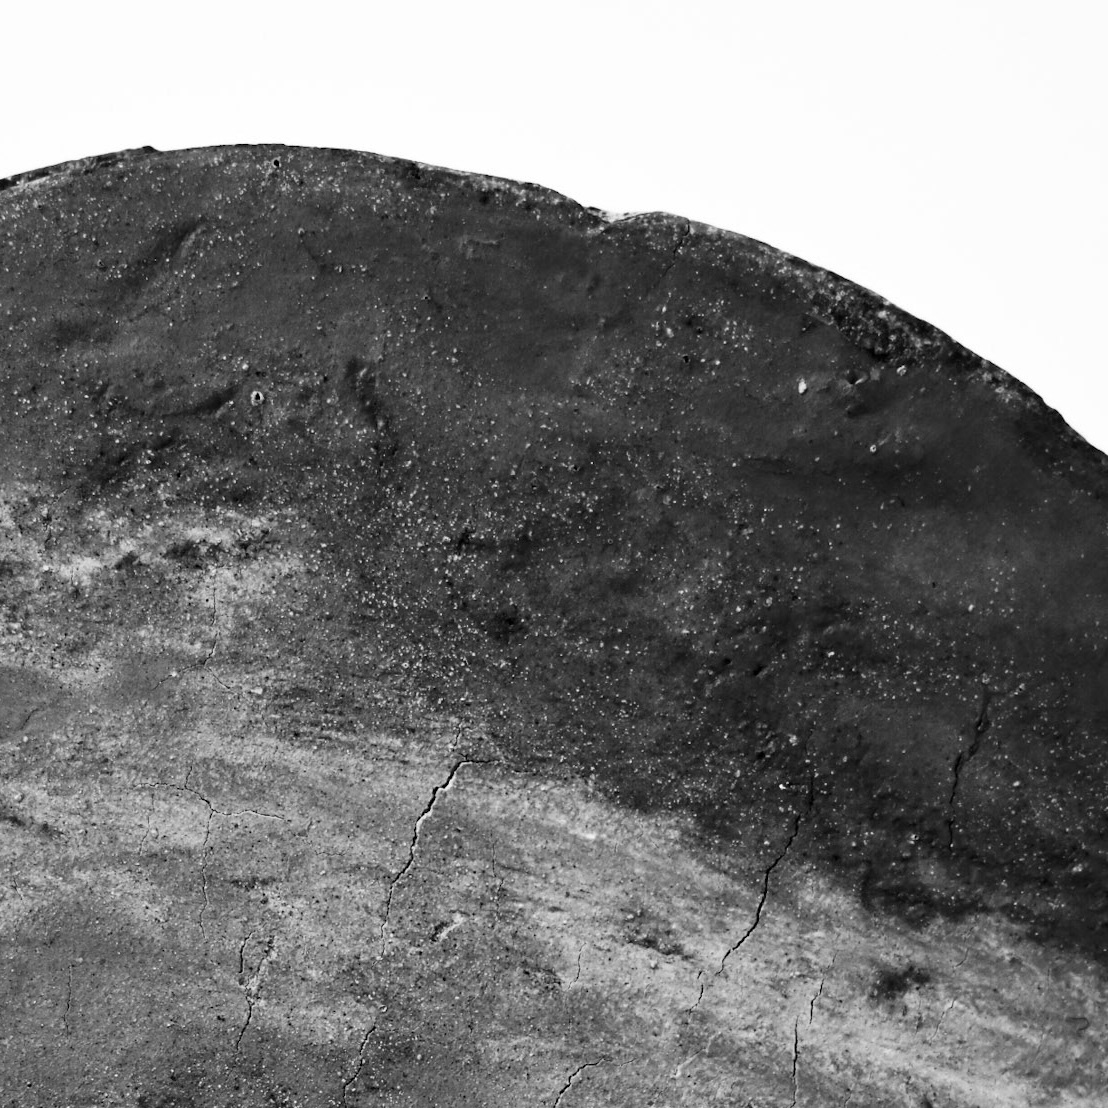
Fired cave clay to bisque
The cave clay, when fired to bisque, gives a really interesting colour and texture, which is unusual compared to any other clay I have worked with. When thinking about various contexts that I can use this clay for, this clay would probably never reach a food-safe level in terms of glazing and firing at a higher temperature; however is a great substitute for commercial clays for decorative purposes and for industry. This clay would be good for making products such as plant pots and vases, due to being robust and durable, but also lightweight. It is also a very sustainable alternative to commercial clays, such as stoneware, due to its very low firing temperatures.
To see how I progress further through this unit, follow the link below.